I’ve been following Katie’s videos to get my feet wet with Unreal Engine, and thought I’d take a note on how to build her sliding door so I don’t forget. Here’s how I’ve built mine in principle:
- create a new Blueprint Actor
- bring in a cube and build an “InnerDoor” piece (that’s the one that will slide up and down)
- build a frame for the door (will remain static)
- add a Box Collision and extend it (it will trigger our animation)
- use a Timeline node to raise the door
- reverse the process so the door closes
I’m doing it slightly different to how Katie suggests it, but there’s really no right or wrong way. I’ve described how to do something similar with a Level Sequence in another article. Let’s see how to do it with a Sequence Node here.
Creating The Door
I’m going to right-click in my Content Browser to create a new Blueprint, and I’ll pick the Actor Class. I’m going to name mine TheDoor, then double click to open it. In that scary (dockable) window we’ll see two areas: Viewport and Event Graph.
The Viewport is where we can build new objects and position them. I’ve build something like this to get my door started (click to enlarge):
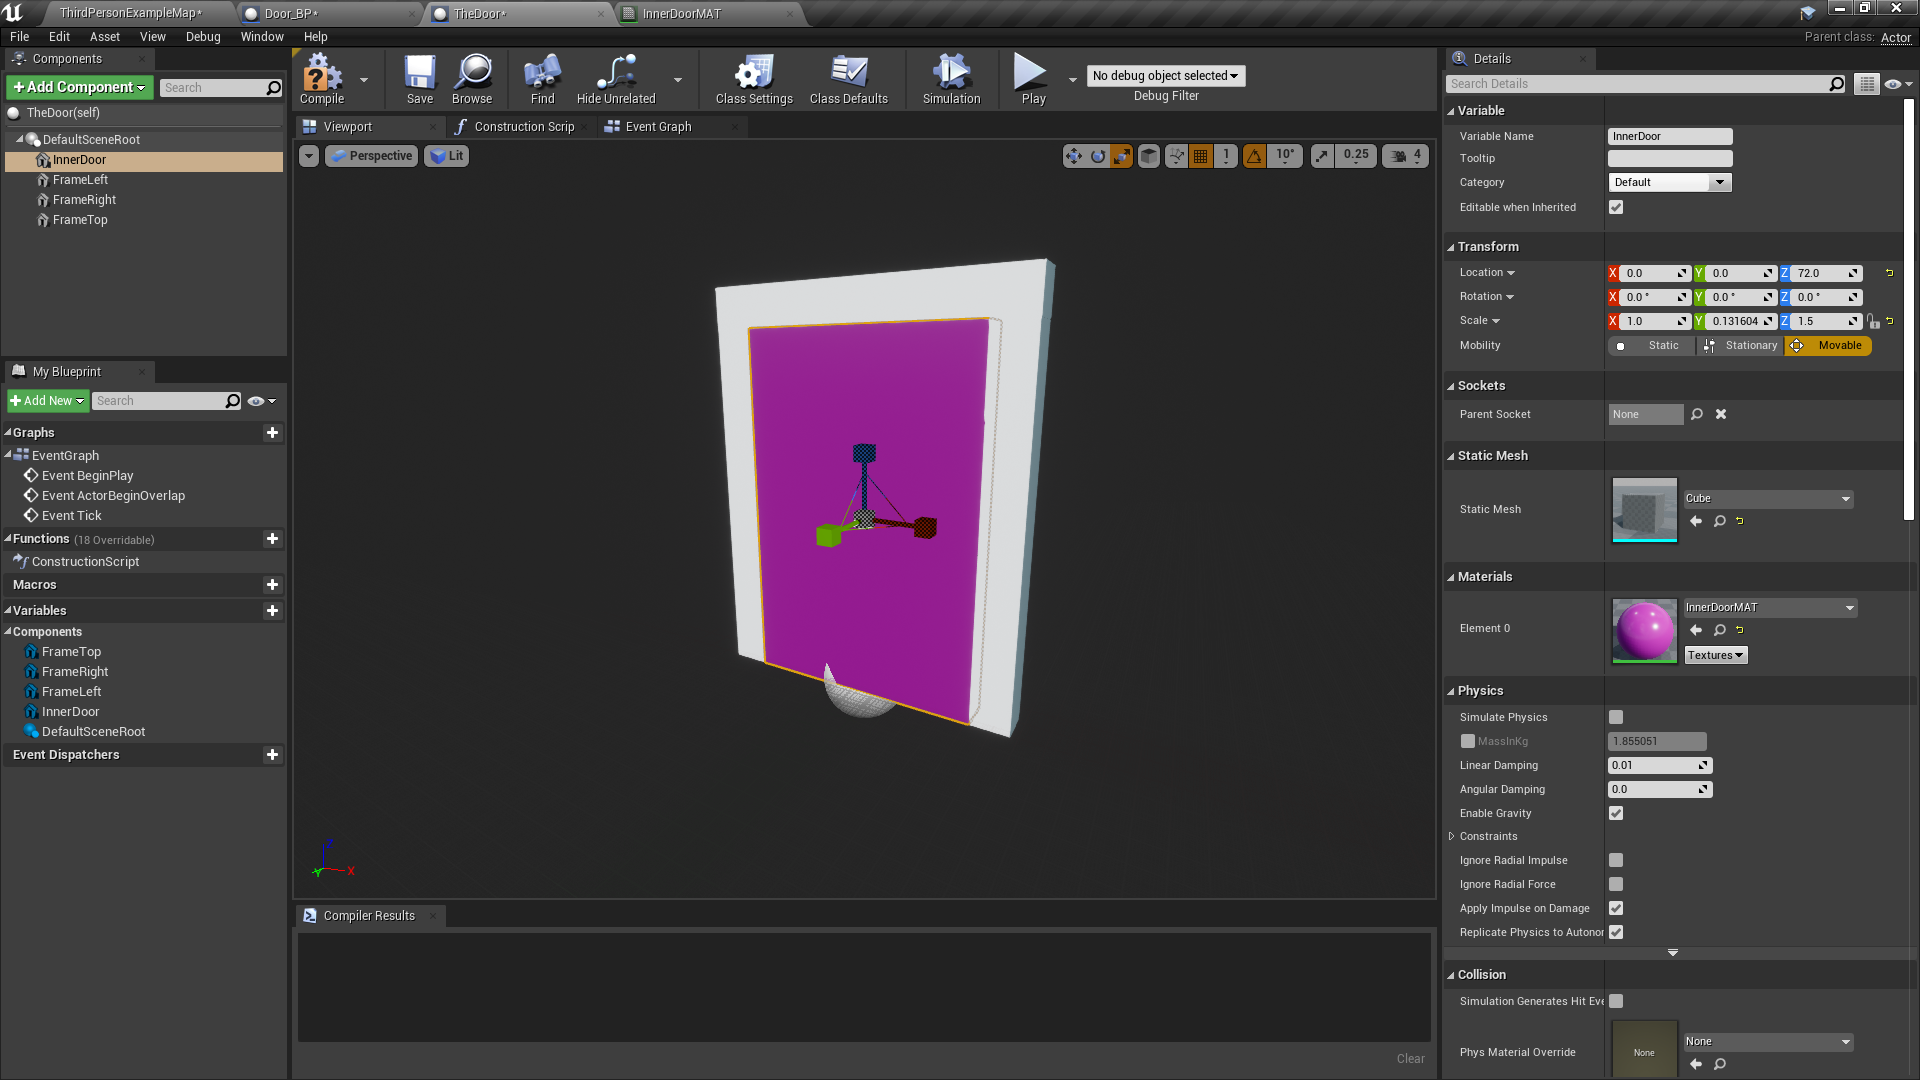
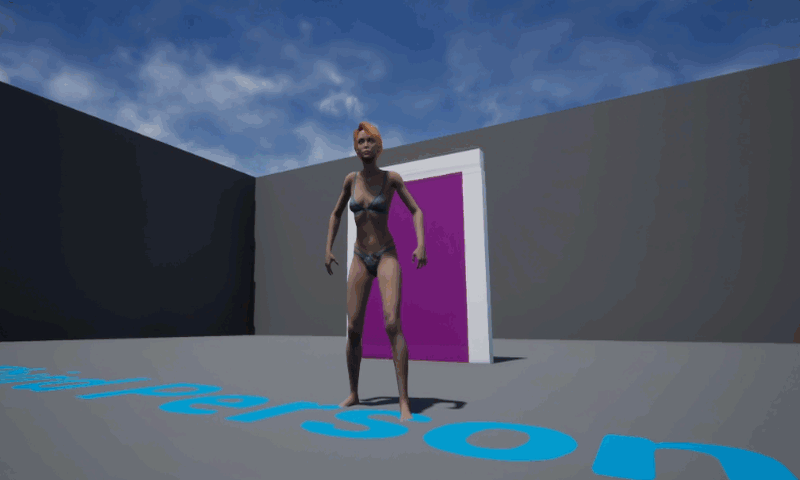
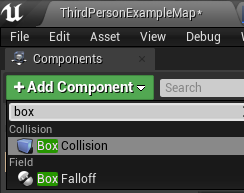
Now we’ll need a trigger volume that detects when my player walks towards the door. Upon collision with him/her, an animation will make the purple inner door part move into the floor. Let’s add a Box Collision component to it and extend it to the front/back of the door.
Note how the trigger volume – or none of the other elements in our Blueprint – are parented to one another. While that’s perfectly possible (and will get rid of that confusing white ball in the middle of the scene), we’ll leave everything underneath the root note for now.

Adding Door Logic
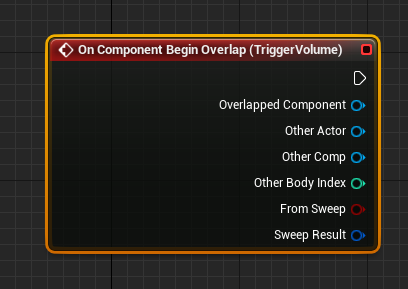
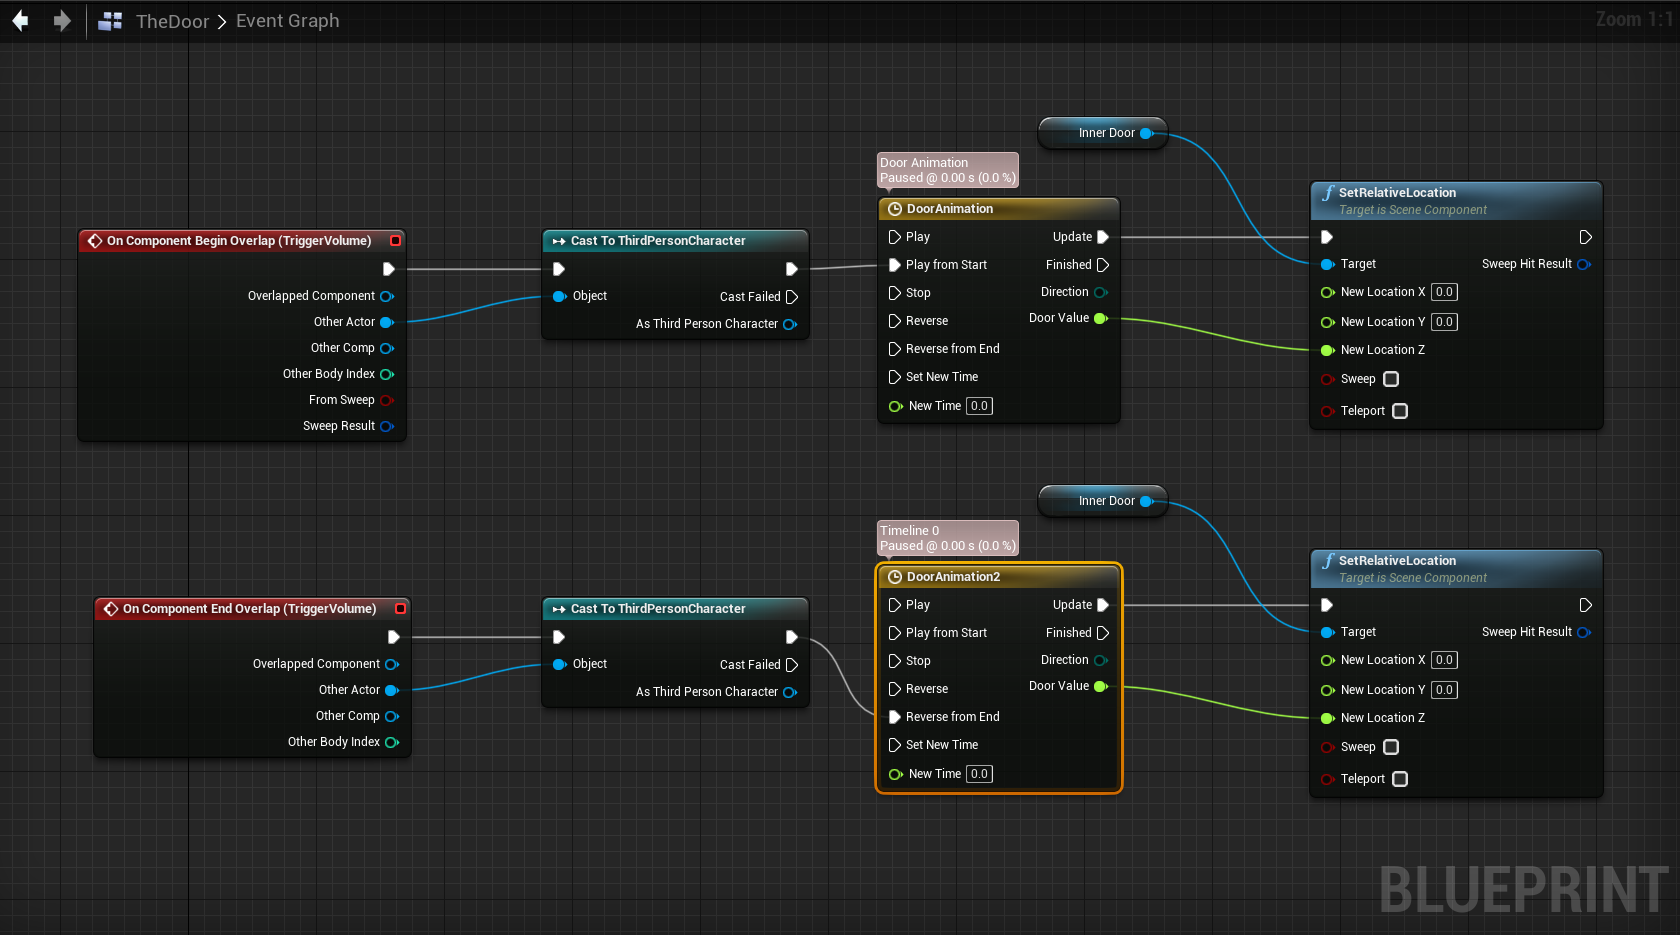
My door is going to behave like an automatic Sci-Fi door in Halo: you approach it, and it’ll disappear into the ground. As you move away from the door, it automatically closes itself again. To attach this logic, we’ll switch over into the Event Graph at the top. With the trigger volume selected, add an On Component Begin Overlap node.
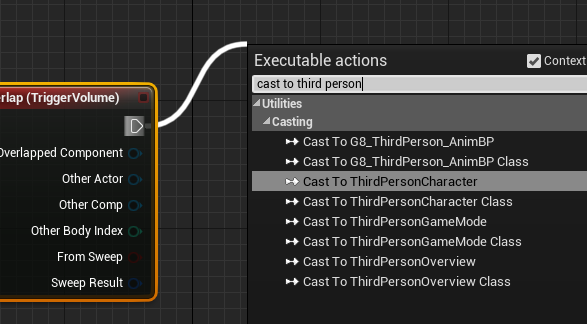
I want to make sure it’s actually our player character that walks into the door, not another random object in my game world, hence I’ll perform a cast to my player here. It depends on what your player character is called; my project is based on the Third Person Template, so I’m asking “is this my ThirdPersonCharacter object”, and only then the rest of my code is processed. You’ll see your player character’s name pop up in the list when you search.
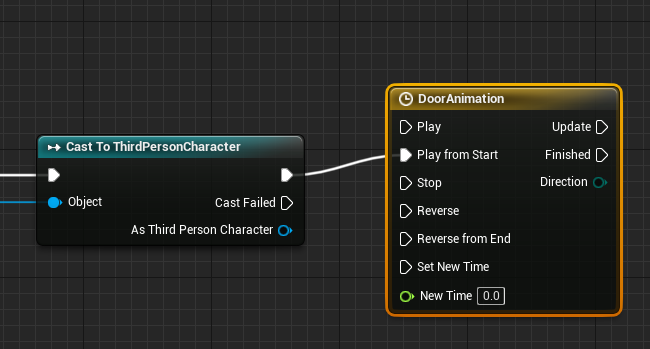
The output of our successful player cast needs to be connected to a Timeline Node. That’s a special thing we’ll look at in more detail below. Essentially it will give out a value that changes over time, which we’ll use to change the position of our inner door object. Note that I’m connecting to the Play From Start input here so that the animation always starts from the beginning of what we’ll setup next.
Animating the Door
Double-click the timeline node and yet another scary window opens. No sweat, that’s what Unreal Engine does. We’re presented with nothing much yet, until we create a float track at the top left. I’ll call mine DoorValue. To make this node interpolate between to values, I’ll set two keyframes by right-clicking on the timeline:
- one at 0 seconds
- and another one at 1 second
I’ll do this slightly different than in Katie’s video: rather than taking a 1 and 0 value out of the node and multiplying it with another value, I find it easier to define it here in the node.
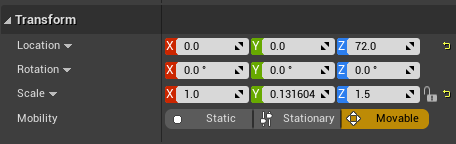
Getting to these values is a little tricky though, as my door height will be different to yours: I know that my door’s Z Location is 72 in its closed position, and a “fully down” value is -72. I can see this in my viewport, with the inner door piece selected. Try experimenting to see what adjusting this value does.
For my timeline node, it means that at 0 seconds (or frame 1 if you will), it needs to be 72 (door open), and at 1 seconds (frame 2) it needs to be at least -72, preferably less so that the door is hidden below the floor as it’s fully open. Its… hard to explain in text. Here’s what my timeline looks like now:
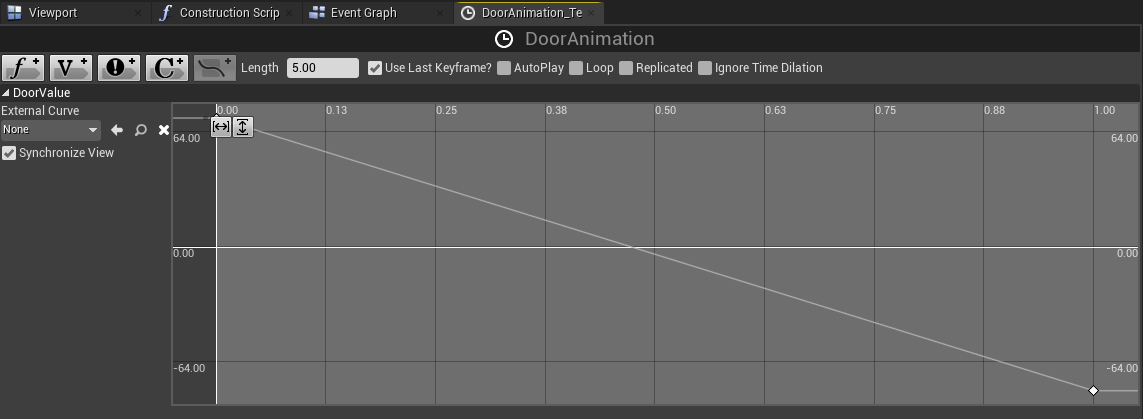
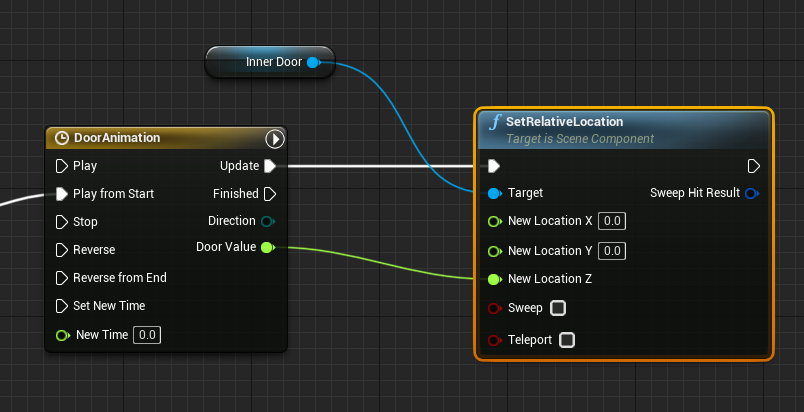
Notice that I’ve selected Use Last Keyframe, which overrides the length value and sets the end of our animation. Back in the Event Graph, I can now hook up the Update pin to a Set Relative Location Node. Select the InnerDoor object first, so you’ll see it auto-referenced in the list:
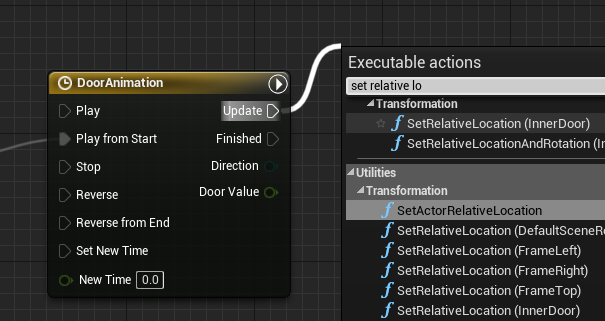
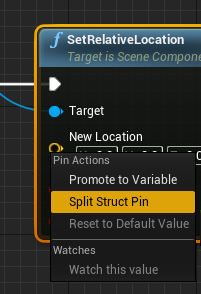
Right-click on the yellow location pin of this node to split its values out into green XYZ values.
Now we can connect the timeline’s DoorValue pin to our new Relative Z Location pin and we’re ready for a test drive!
The door should now open as we approach it with our character. Hurra! However, it’ll stay open forever, and when we approach it again, it’ll pop into place and then open. Ugly with a capital U, and not what we want. We need to define how it should close again as we move away from the door.
Closing the door again
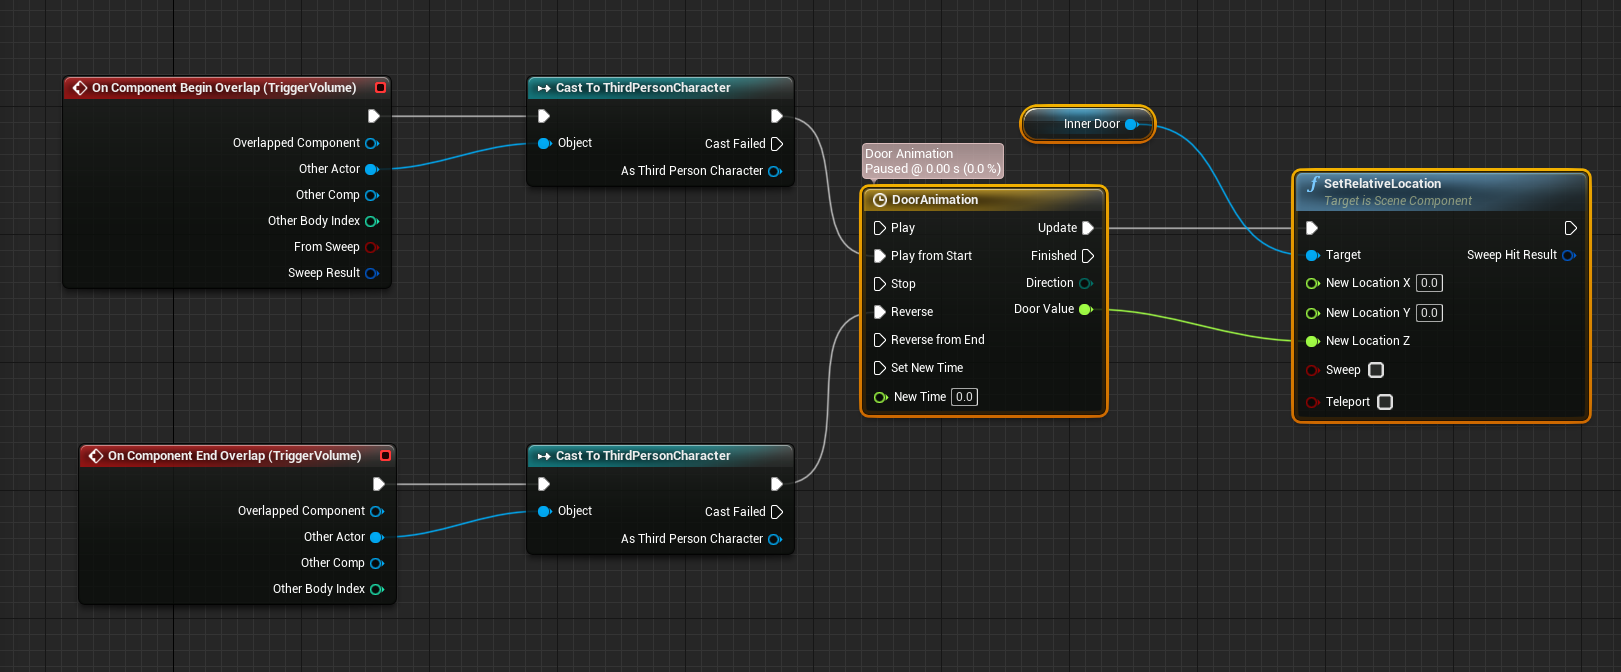
To do that, we need to tap into the On Component End Overlap event, and essentially reverse the process above. This is easier than it seems: all we need to do is grab all nodes (except for the first one), then paste it into place and hook up the End Overlap node. On the timeline, instead of the Play From Start pin, we’ll connect the Reverse From End pin. That’s it!
Here’s what the whole node setup looks like (click to enlarge):
Extra Credit: Removing Duplicate Objects and building a more elegant animation
The astute observer will have noticed some node duplications in the above graph. Coders don’t like that. We don’t need two timelines, location nodes or references to the inner door. Let’s combine them and hook both events up at the same time, like this:
The animation will look prettier with the Reverse pin hooked up instead of the Reverse from End. This will avoid the door from popping open before it closes. Here’s what it looks like in my test project: