I’ve recently found a much easier way to use Unreal Guy’s animations with the Synty (Polygon) characters, thanks to TC Mabe’s video (and his other one too). This is an updated version of what I’ve described back in March, something I was never really happy with, nor did I fully understand all steps involved. The following method is much faster to setup, has less steps and – most importantly – makes more sense.
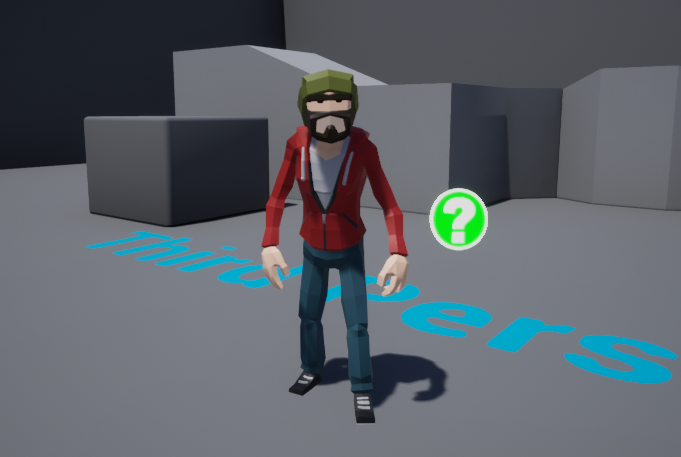
I’ll start with the Third Person Template and the Polygon City pack from Synty Studios (it’s the first one I tried back in March 2020, when I started playing with Unreal Engine).
Setting up the T-Pose
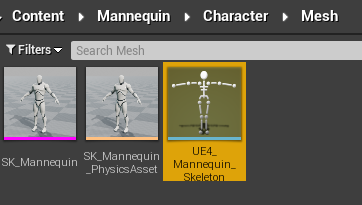
The biggest difference between Unreal Guy and the Synty characters is that he’s setup in an A-Pose. The Synty characters are setup with a T-Pose, so we need to match the two up. Head over to Mannequin – Character – Mesh and double-click UE4_Mannequin_Skeleton (blue icon).
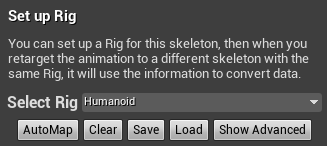
Open the Retarget Manager on the left (rather than the Skeleton Tree) and select Humanoid Rig. This step is important. If we don’t select this, the Synty guys will look like they’re trying to fly later.
Now we’ll move Unreal Guy’s arms into the T-Pose, using the following values:
- Upper Arm: +50 (green)
- Lower Arm: -10 (green)
- Lower Arm: -30 (blue)
- Hand: +10 (blue)
- apply on both sides of his body
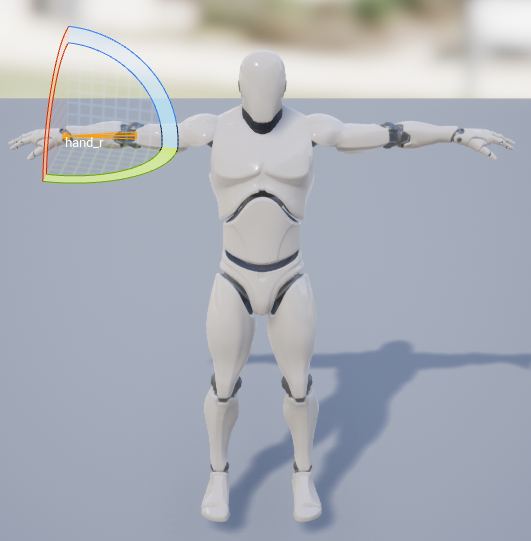
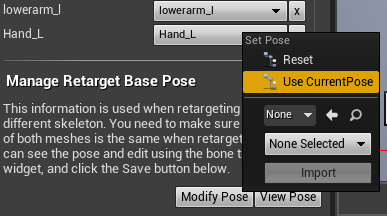
Now choose Modify Pose – Use Current Pose. Save and close this window, we’re done with it.
Setting up the Synty Skeleton
All Polygon packs come with a skeleton that’s setup for use with the characters in that pack. Each pack has their own naming conventions, so mine from the City Pack won’t match the one found in the Vikings Pack. Find yours and open it (it’s the blue skeleton icon, mine is in PolygonCity/Meshes/Characters, called SK_Character_City_Rig, yours will likely be different). Here’s what my view looks like:
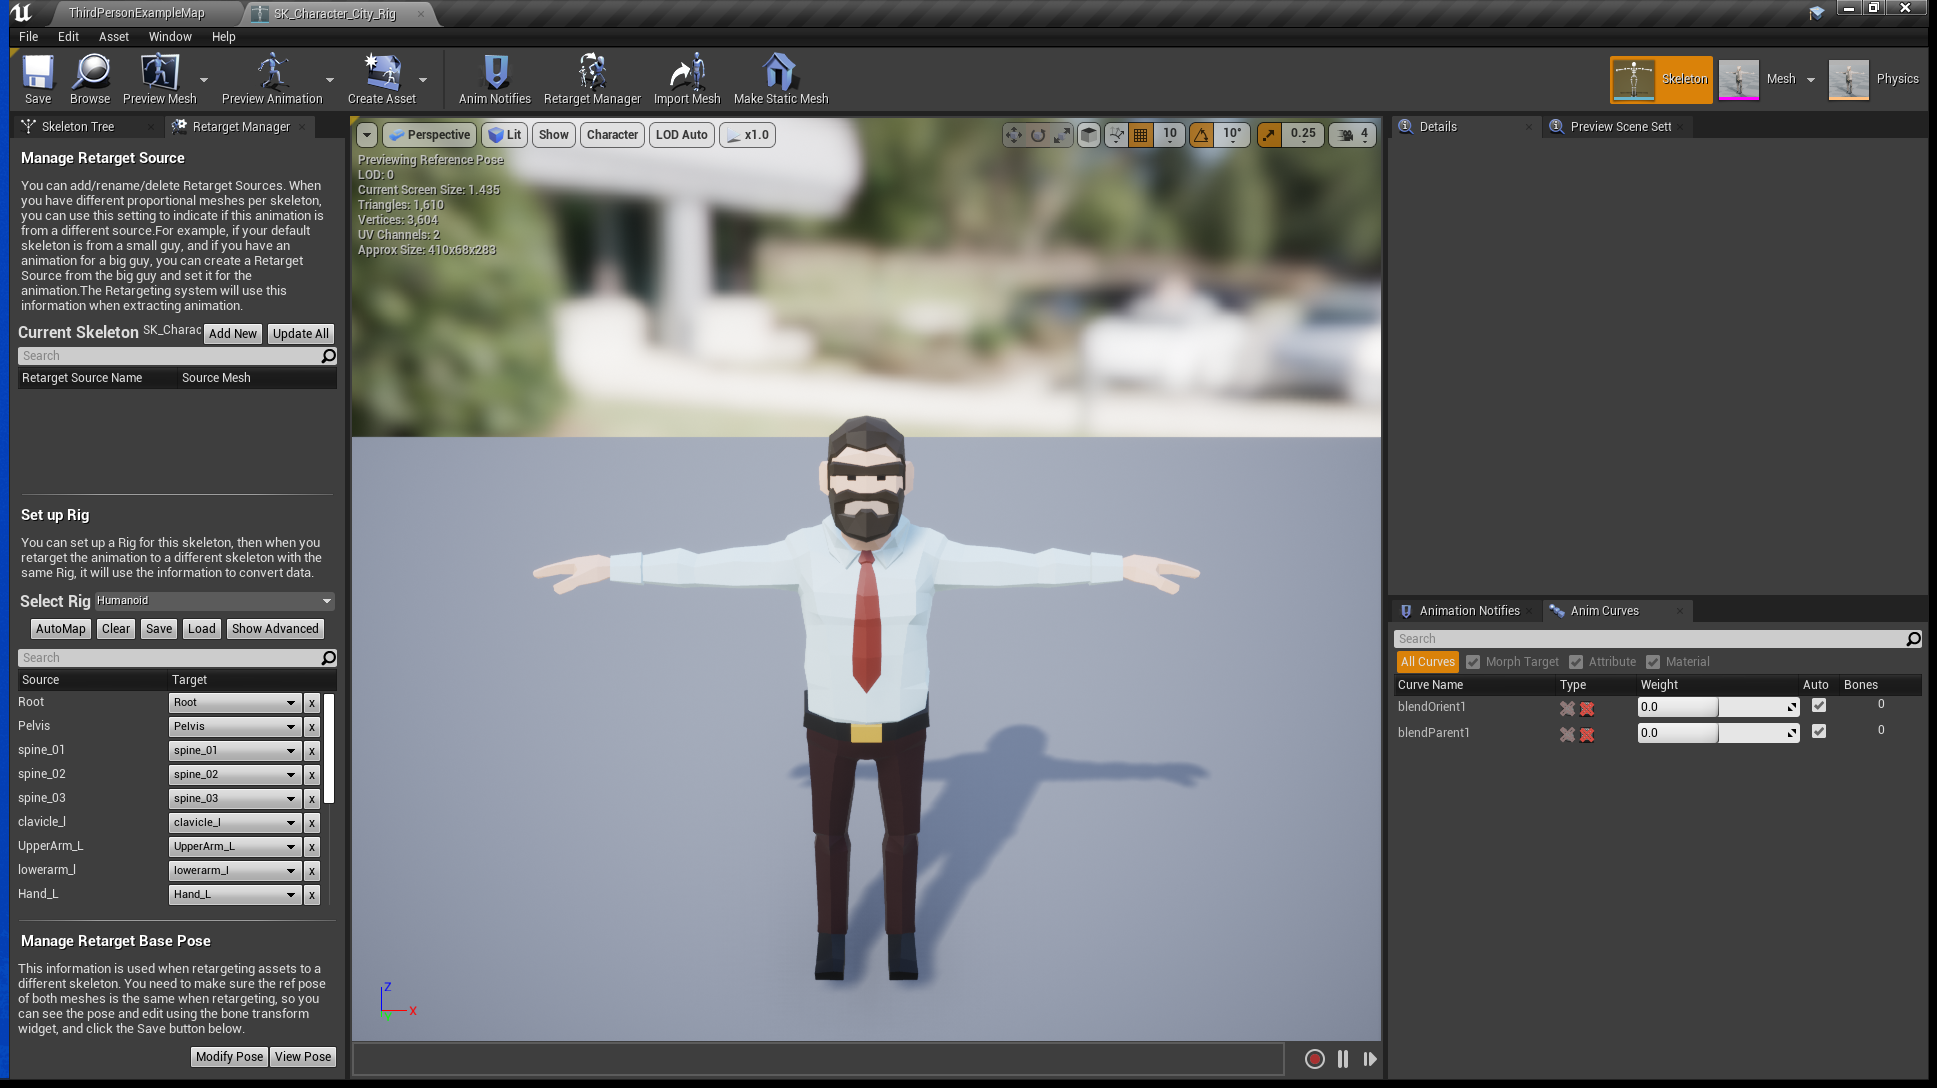
Let’s check if the skeleton is set to use the Humanoid Rig in the Retarget Manager. It probably is, but it doesn’t hurt to verify.
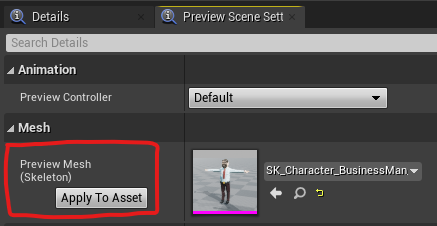
Next we’ll need to set a Preview Mesh. Even though it looks like there’s one already in the viewport, skipping this step leads to issues (and plenty of them – why I don’t know). Pick any of the characters from the pack, even if it’s the same one that was there before.
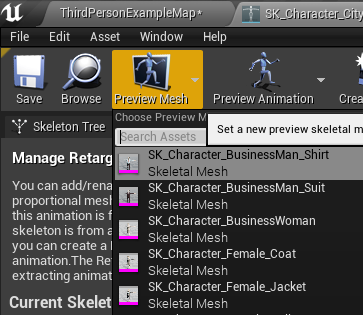
Unreal Engine will give you a temporary pop-up window at the bottom right, asking you to apply this new Preview Mesh. It’s easy to skip and miss though. You’ll be pleased to hear that you can do this on the top right under Preview Scene Settings. Hit Apply to Asset, hit Save, and we’re done here.
Retargeting the Animation Blueprint
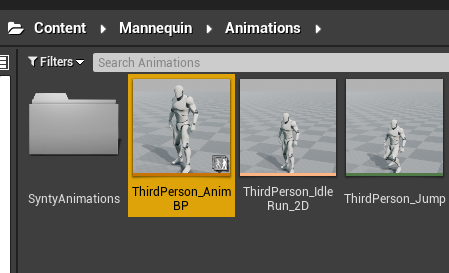
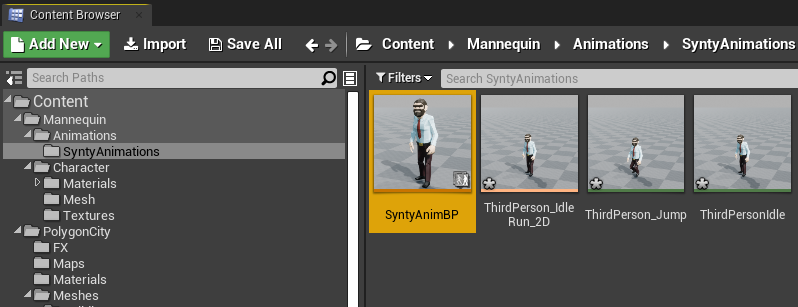
Now comes the fun part: retargeting all animations associated with the Animation Blueprint. In the third person template it’s called ThirdPerson_AnimBP and can be found under Mannequin/Animations. I’m going to create a new folder here called SyntyAnimations, which will be used for the retargeted versions.
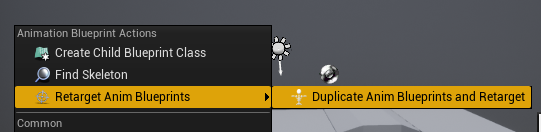
Right-click on the ThirdPerson Animation Blueprint and select Duplicate Anim Blueprints and Retarget.
This will open a relatively scary window, but all we need to do is change the target folder (bottom right, red box), pick our Synty skeleton from the list and hit Retarget at the bottom.
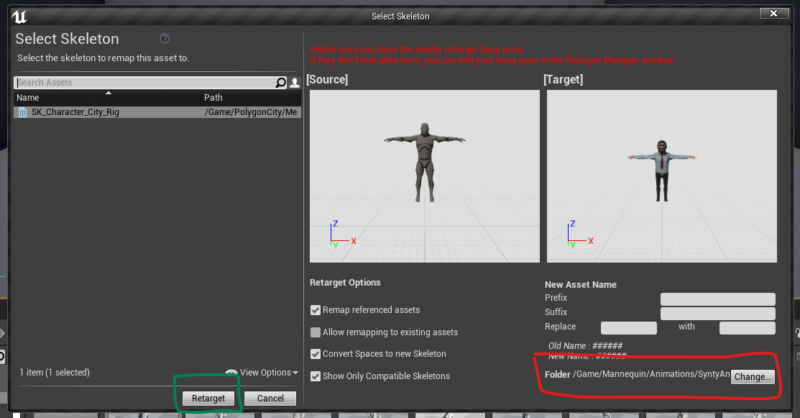
This will make copies of all animations and the Animation Blueprint and save them in our target folder. The thing with duplicates is that when it comes to the next step, we’ll have two identically named, yet slightly different Animation Blueprints to choose from. To know which is the new one, I’ll rename my new Third Person Animation Blueprint into SyntyAnimBP. Entirely optional, but highly recommended.
Swapping our Player Character Mesh
The Third Person template has Unreal Guy standing idle in the viewport. Let’s delete him from the scene and create our very own Synty Character instead. I’ll leave the original Unreal Guy intact in case we want to switch back or examine his properties later (us cowboy coders have a tendency to screw things up frequently… trust me, I’ve been there).
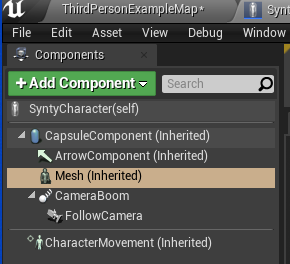
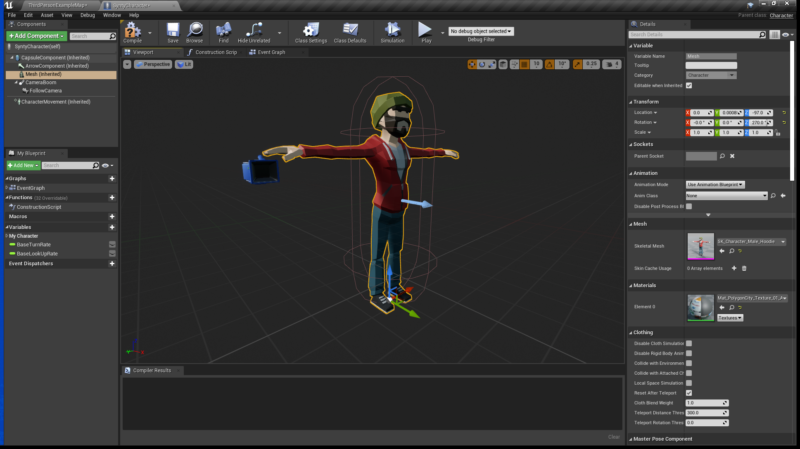
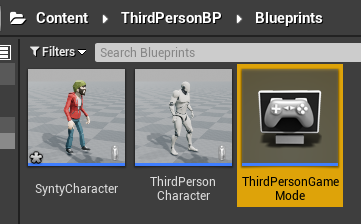
Find your Third Person Character (under ThirdPersonBP) and duplicate him with CTRL + W or the right-click menu. I’ll call mine SyntyCharacter. Let’s open him up for a face lift. Head to the Viewport and find Unreal Guy’s mesh so he has a yellow outline.
Over on the right there’s a section called Mesh. This is where we can pick a new skeletal mesh, replacing Unreal Guy with one of the Synty Characters. When we do, the Synty Guy is no longer breathing, instead giving us the T-Pose treatment. Did we kill him…?
Nah, he’s fine – but we need to give him the retargeted Animation Blueprint from our earlier step. Under Animation, pick the one we’ve renamed into SyntyAnimBP and see him go into a handsome idle breathing pose.
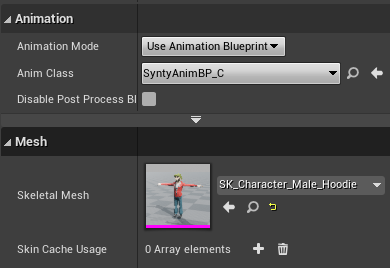
If you haven’t renamed the Animation Blueprint, you may be left with two files called ThirdPerson_AnimBP in the list. One of them will work, the other will not. Renaming means we know which one to pick.
Playing as the Synty Character
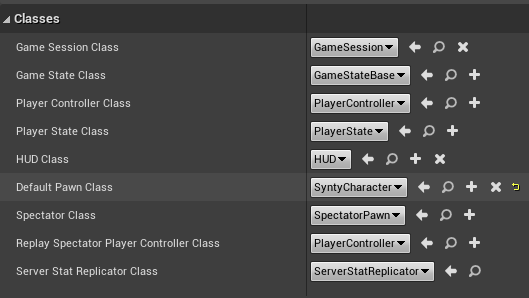
If you play the level now, you’ll still run around with Unreal Guy. This is because although we’ve made a copy of our main player character, we haven’t told Unreal Engine that we’d like to use him/her. We can fix this in our Game Mode, aptly titled Third Person Game Mode in our template.
Open it and find the Default Pawn Class, then change it from ThirdPersonCharacter to SyntyCharacter.
That’s it! Now we know how to use the Synty Characters to walk around in any level we want. Congrats if you’ve made it this far! If you have any questions, leave them below.