I’m getting back into MD (and a little CLO too), but it’s been a while since I’ve looked at the app so I’ll have to re-acquaint myself with some of the basics. Tracing patterns from images is one such thing I’ve never quite mastered, not until watching Lori’s new MD course about version 9.5. Here’s how she does it. This is way more fun than I remember! Here are the steps in principle:
- create a new material, then add our pattern image as a texture
- create another material for tracing
- use the Polygon Tool to place points
- use the Edit Curve Point tool to convert straight lines into curves
- rinse and repeat until all patterns are complete
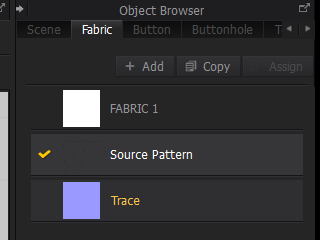
Creating out Source Material
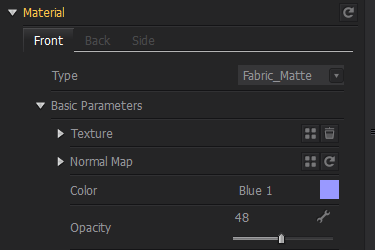
I’ll create myself two new materials for the task. I’ll call the first one Source Pattern (that’s in the right 2D pattern window).
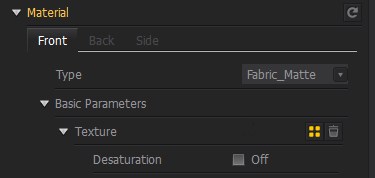
Further at the bottom on the left hand side, there’s an option to load an image in the Texture channel (four squares, next to the trash can).
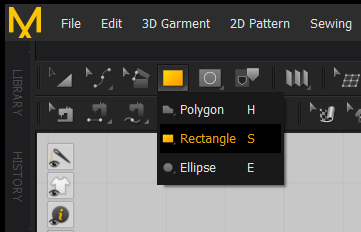
Now we’ll use the Rectangle Tool to drag out a piece using this new material. Adjust to taste, making sure it’s big enough to show the whole pattern.
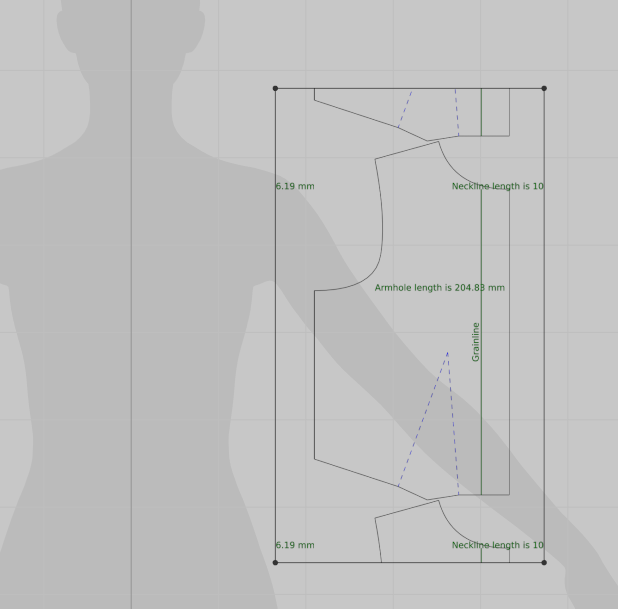
Since we’ve provided a texture, it will show up as tiled image. This may look a little frightening because we may see more than we actually need to trace. Adjust to taste with the Edit Pattern tool, making sure not to skew the image. To position the texture inside the pattern properly, we can use the Edit Texture tool. I have the front piece of a top here, this is what it looks like.
Tracing the Pattern
Let’s create ourselves that second material now and call it Trace. I’ll drop down the opacity to about 40% and pick a nice colour. That way I can see what my finished garment looks like superimposed, while still being able to see the pattern underneath.
With my new material selected, I’ll use the Polygon Tool to start clicking on points that define the patterns. I’ll do a rough trace first to get all corner points. The result should look something like this:
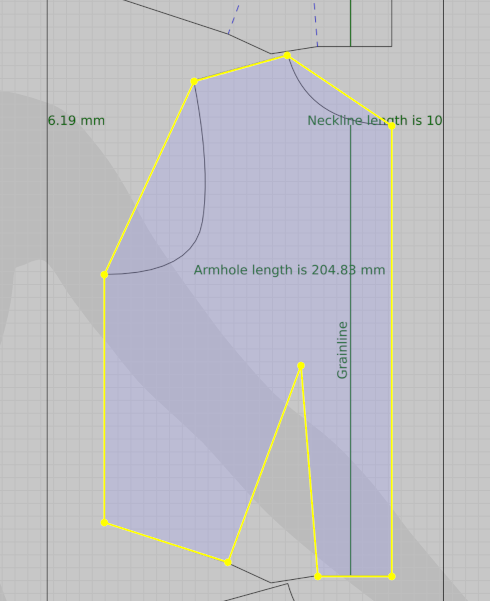
There are a couple of curves in this pattern we need to trace. I’ve always been frightened of curve points and vector tools and perceive them as extremely complicated. Thankfully there’s a helpful little thing called the Edit Curve Point tool that makes it easy to follow curves, or at least approximate them well enough.
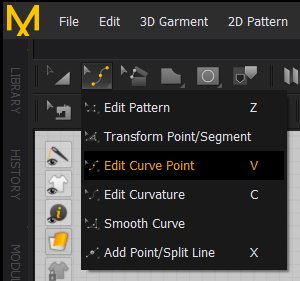
With this tool selected, I’ll click and drag onto the line that’s supposed to be curved and just drag it close to the curve in the pattern. This may or may not work with one point. If it does not, make an approximation to one part of the curve, then set one or more additional points until the curve is complete. It takes a little practice, but works like a fairly intuitive mini game (if you don’t think about it took much… perhaps that’s my problem: my mind tries of mathematically comprehend what’s happening under the hood, which of course drives me crazy. If I don’t think about it, it’s actually quite fun to do).
Rinse and Repeat
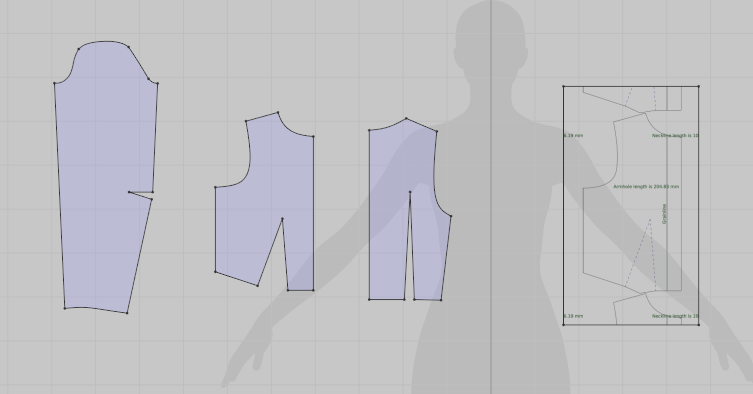
With one pattern finished, use the Transform Pattern tool to move it out of the way and get started with the rest of the patterns. To do that, load another texture on the Source Pattern material, resize as needed, then switch back to the Trace material and start the process again.
Eventually you’ll end up with all necessary pieces for your fashion masterpiece.
When you’re done, feel free to delete the Pattern geometry and material, we no longer need it. You can assign the MD default material to your new pattern pieces and delete that Trace material too, or convert it later to something you’d like to use for your garment.
That’s it! Happy Pattern Tracing 🙂