I’ve been able to import Marvelous Designer animations into Blender for rendering! Here’s a short video I’ve tweeted showing my inflatable boat in action:
This is how we make it happen in principle. In Marvelous Designer:
- animate your garment
- export an OBJ from the first frame
- export the animation as MDD using the same settings as the OBJ
In Blender:
- activate the MDD add-on
- import the OBJ and select it
- import the MDD
And now for a more elaborate explanation with screenshots and further explanations:
Marvelous Designer
Once the garment is animated, head over to Export – MDD Cache (Standard).

Note the scale in the settings: DAZ Scale at 1% so that it’ll look handsome in Blender. You can choose to export the entire animation, or set a range in the Animations Tab and shorten it to the pertinent parts.
That’s our animation. This format save vertex changes over time, but it relies on an initial 3D object for reference. Hence we need to park our playhead on frame 0 and export that OBJ too, using Export – OBJ.
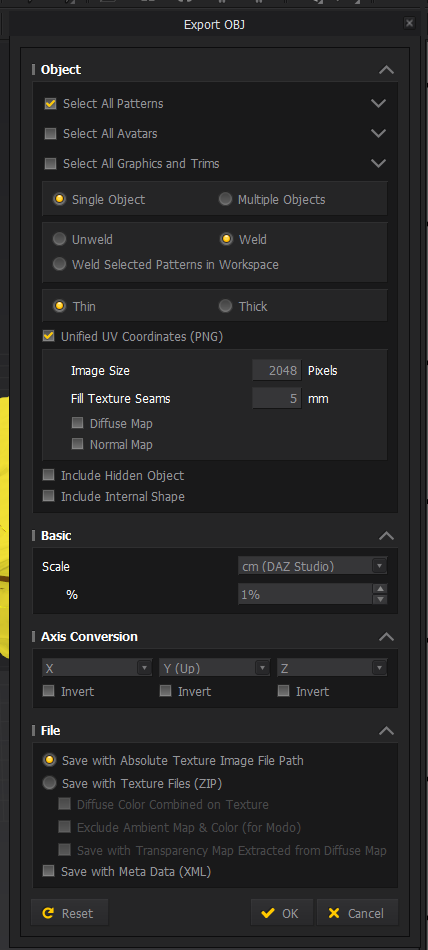
The scale settings should match the animation export, so once again DAZ Scale at 1%. That’s all we need in Marvelous Designer for the moment. Materials are a different process I will cover in another article.
Blender
In Blender, let’s start by importing our OBJ via Import – Wavefront OBJ. Make sure to NOT split by object (groups is fine), otherwise you’ll end up with a lot of lose pieces.

Blender is a little weird, in more than one respect. When the object comes in, it’ll be pre-selected… but somehow in a way that’s not quite “selected enough”. It’ll have a dark orange outline which is apparently evil. We need to de-select then re-select our object so that it has a light orange outline.
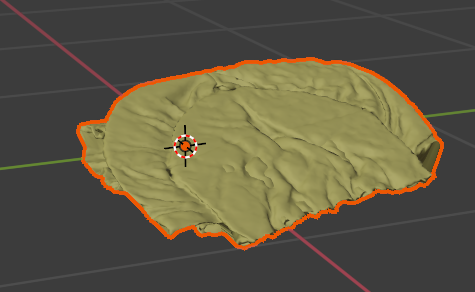

I never understood why that is… something about “all parented objects are also selected, and the last one that was selected was the top object”. All I know here is de-select, then re-select. I’ve decided to find it “charming”.
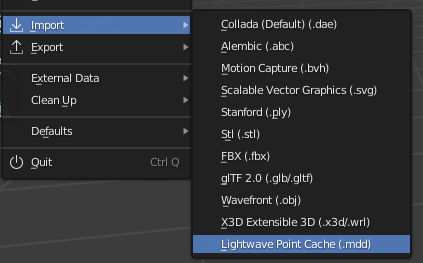
With our object correctly selected, we need to import the animation data. Head over to Import – Lightwave Point Cache and pick the MDD file we’ve exported in a previous step.
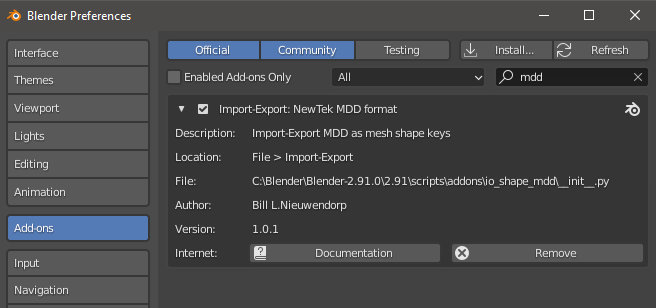
If you don’t see this option in Blender, don’t panic: we need to activate an included add-on for it to show. Head over to Edit – Preferences – Add-ons, then search for “mdd”. Tick the box and the option should show up.
The import process will take some time, depending on the size of your object and the length of the animation. Blender won’t give you any progress reports and may appear to hang. That’s normal (again “charming”), and it helps to understand what is going on under the hood.
What happens during MDD import
Each frame of the animation will create a Shape Key in your original object, describing how the vertices should be moved at every step. You can see this under Object – Data Properties as soon as the import finishes.
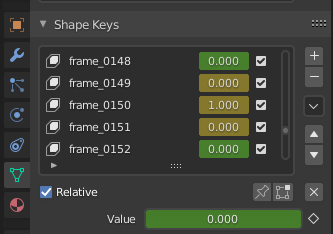
Once all shape keys have been created, each frame of the animation needs to be set to something like this:
- frame 1 = shape key 1 active, all other keys inactive
- frame 2 = shape key 2 active, all other keys inactive
- frame 3 = shape key 3 active, all other keys inactive
- …
When the process has finished, you’ll see a lot of orange keyframes in your timeline. Move the playhead to see your animation.
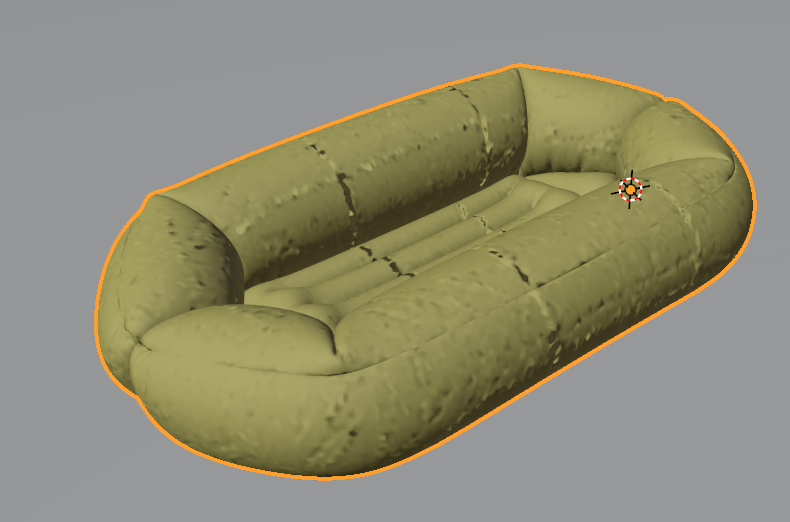
Auto-smoothed Normals
If your object looks a bit rough and not like you remember it in Marvelous Designer, your garment might have fallen prey to the auto-smoothed Normal option. Again I have no real idea what this is, but apparently it’s good for our objects sometimes. Other times it looks rather harsh, like in this example of my inflatable boat.
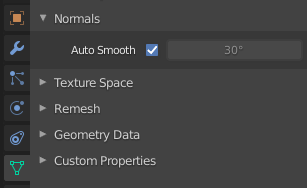
To toggle this option (which is enabled by default), head over to the Object Data Properties (green triangle icon) under Normals. You can play with the angle or simply disable it. My boat looked a lot better without it, but various clothing items I’ve made worked fine with it enabled.
That’s it! Good luck transferring your animations from Marvelous Designer and CLO to Blender.