Sometimes one frame is just too large a step when you’re editing audio in Premiere Pro. Thankfully we can infinitely expand the steps in the timeline by showing Audio Time Units. To do that, find the super tiny nondescript hamburger icon in the timeline, just above the timecode display.
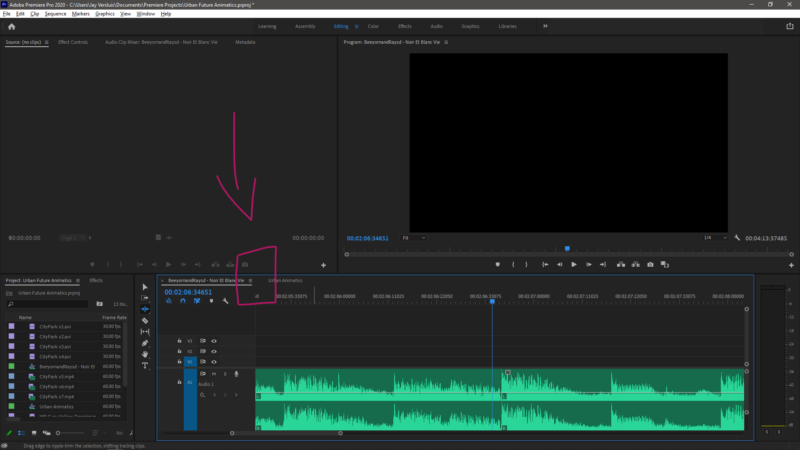
Click it and choose Show Audio Time Units. This will turn your timecode display into infinitely small unites (OK they’re not actually infinite, just way smaller than a frame edit would be).
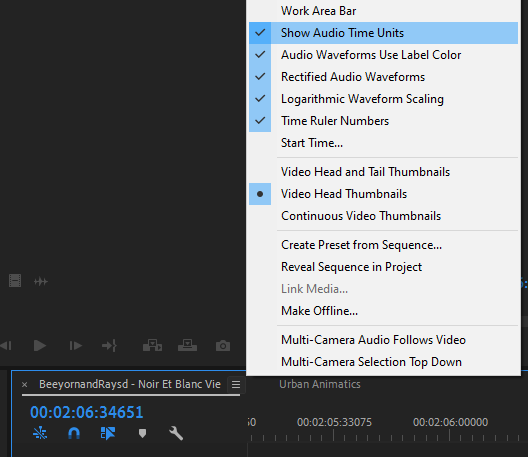
Now you can make an edit at every sample. For a 48 kHz file that’s literally 48.000 times every second. That should be enough to make even the most accurate edits. When you’re done doing audio escapades, use the same menu and switch Audio Time Units off again to go back to regular timecode display.