Let’s talk about pleats! This has to be THE most award winning unintuitive and confusing tool in Marvelous Designer. Let me tell you what I’ve worked out:
There are two pieces to the Pleats Puzzle, and they can be used independantly or in conjunction. We have the pleats fold tool and the pleats sewing tool. There’s also a moderately scary modal dialogue for the former, giving us a choice of three pleat types, and there’s some prep work we need to do. Let’s go through all this one by one, and explore how to create them with CLO 6 and Marvelous Designer 10.
Preparing Your Pleats
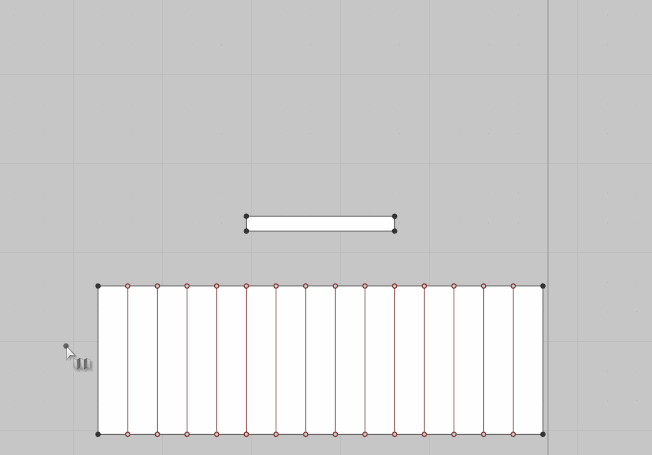
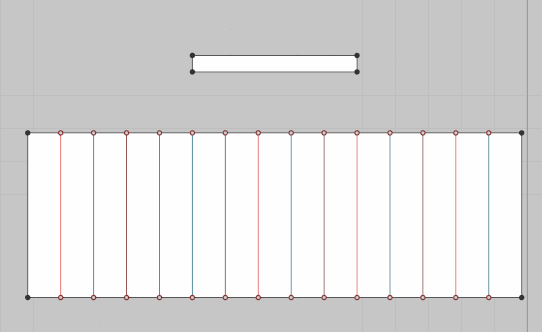
Typically you sew your pleated garment onto an un-pleated piece like a waistband. This implies two pieces of clothing. The pleated piece has several internal lines that are then folded in a particular way depending on the type of pleat. To practice the pleat tools, I find it helpful to create two rectangle pieces in the 2D window: a short frozen one for the top, and a larger one below it. Since we need more fabric for the pleated garment, I’ll make the bottom piece three times wider than the piece we’ll sew it on later. Something like this should do the trick:
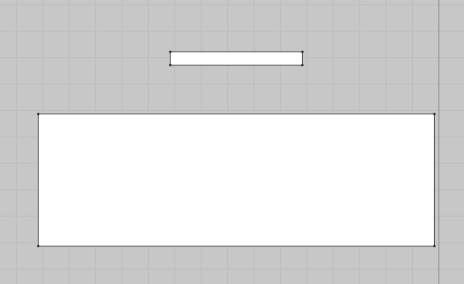
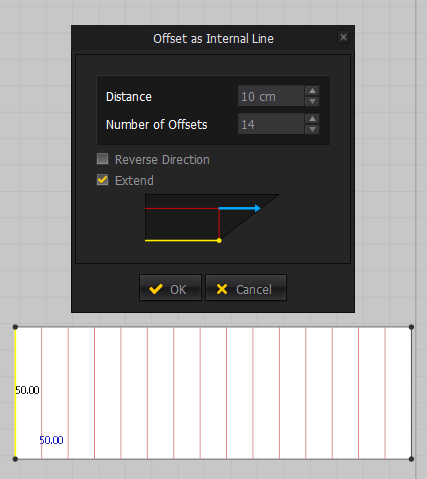
Now we’ll add some internal lines in the bottom piece that will become our fold lines. My pieces are 50x5cm (top) and 150x50cm (bottom) respectively. To space our lines evenly, I’ll choose 14 internal lines at a distance of 10cm. We’ve worked out today that a number divisible by 3 with an added value of 2 works best (so that’s 12 lines plus 2 in our case). To add internal lines, choose the Z tool, select either side and select Offset as Internal Line.
With our lines in place, it is vital to create points at the outer intersections. Even though it looks like Marvelous Designer is doing that automatically, this is not the case. You’d also think that we’ll get a warning dialogue when those are not in place as soon as we try to use the pleat sewing tool, but that is also not the case. No wonder everyone hates these tools!
Anyway, with the internal lines selected, right-click and choose Extend/Trim & Add Point – to Pattern Outline. This will create our necessary intersecting points. Your internal lines will be automatically de-selected afterwards and we’re ready to begin folding.

Folding Your Pleats
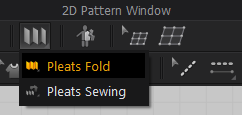
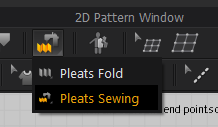
Click and hold the pleats icon in the 2D window and pick the Pleats Fold tool.
With it selected we need to drag over the lines we’d like to fold. What I mean by that is
- left-click next to the pattern on the left hand side
- then move the mouse over to the right hand side
- then double-click to conclude the process
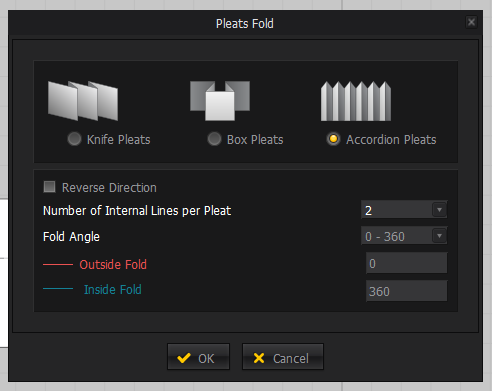
This tells Marvelous Designer about the internal lines we’d like to fold over. A dialogue box appears asking us what type of pleat we’d like to create.
Knife Pleats
Knife Pleats apparently require three internal lines per pleat. Two folds of 180 degrees in reverse angles are used in the process.
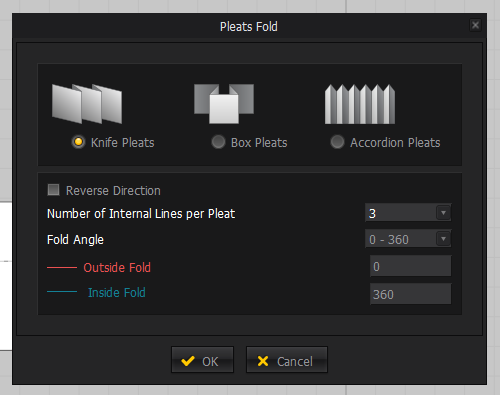
Box Pleats
Box Pleats also need three internal lines per pleat. Each fold is bent 90 degrees in various directions, forming a little rectangle.

Accordion Pleats
They’re the ones that Marilyn Monroe had on her iconic white dress. These use two folds per pleat, each of which is folded 90 degrees in opposite directions.
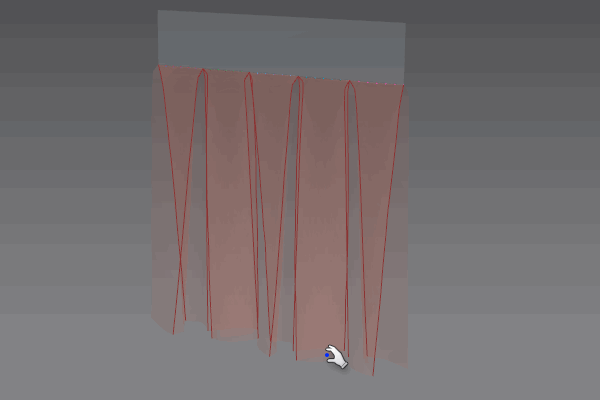
Pick the pleats of your choice and Marvelous Designer will assign folding angles to all internal lines accordingly. With those in place, let’s sew our two pieces (and pleats) together.
Sewing Your Pleats
Select the Pleat Sewing tool by long-left-clicking the pleats icon.
Some bizarre message is displayed as soon as you hover over the 2D window. Something about “Click the start and end points of a line to sew with the Pleats Pattern. Or press Enter to sew Pleats Patterns only”. If you can decipher the hidden message, please let me know. I have a feeling this is some programmer’s cruel joke. Note: pressing Enter will bring eternal misery, so please don’t do that.
Instead, this tool behaves like the M/N free sewing tool. Start with the top piece and click the bottom line from left to right, then left click. This assigns your first sewing line. Now start at the top line of your bottom piece and drag from the furthest left to the furthest right, then left-click to complete the sewing. It’s actually easy if you’ve done if a few times (and if you ignore that super confusing message).
Note how Marvelous Designer automatically chooses a group of three internal lines for each pleat. Don’t use this tool with accordion pleats as they come out wrong (only requiring two rather than three groups). Use the regular M/N Free Sewing Tool for those.
Simulate to see fruit of your handy work.