I just watched the above excellent one hour tutorial by Henning and Morten from FlippedNormals. It’s a great “getting (back) into ZBrush” tutorial that covers everything I keep forgetting when I give ZBrush a rest for longer than 6 months. Which is essentially every time I use it. While watching I took some notes so I can refer back to them. Enjoy!
Brushes
- BST – Standard Brush
- BCB – Clay Build-up Brush (coarse)
- BDS – Dam Standard (carves edges)
- BTD – Trim Dynamic (makes planes)
- BMV – Move Brush (moves big chunks)
- BIN – Inflate Brush
Geometry
- SHIFT F – see wireframe
- CTRL D – subdivide model once
- SHIFT D – switch to lower resolution
- D – switch to higher resolution
- CTRL drag outside the model to Dynamesh
- X – activate Symmetry
Mirror the object with Tool – Deformation – Mirror
To cut off geometry use CTRL SHIFT and select a trim brush like Trim Rect. This will work with symmetry from left to right only when the object is mirrored.
Subtools
- ALT click to select a subtool
- Append to add another object as a subtool
- select part of your object (see below), then hit CTRL W to assign a Polygroup
- split selection into new subtool via Group Splits (make everything visible for it to work)
Selections and Visibility
- CTRL SHIFT and select something like the Rect Tool
- CTRL SHIFT and select a part that will be shown (everything else will be hidden)
- CTRL SHIFT and left click will bring everything back
- CTRL SHIFT and drag off the model will invert the selection
- hold ALT in addition to add to selection
- CTRL SHIFT and click on a Polygroup to select only that group
Masking
- CTRL and drag to mask areas off
- CTRL and ALT will remove from the mask
- CTRL and drag outside the model to clear the mask
- CTRL and click on the mask to soften it
- CTRL W to turn the mask into a Polygroup
- CTRL click outside the model to invert the mask
- there’s also Mask menu under Tool (for growing your selection)
Layers
Funky option to contain a change to a layer that’s in record mode. Change strength of a layer with the slider below it. Add a layer with the square icon, or delete with the X icon. Some funky MDD integration there, might be fun to investigate on a rainy day.
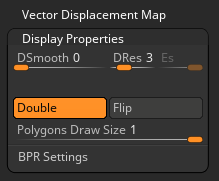
Backfaces
By default there’s no way to see what’s on the other side of your polygons. Under Tool – Display Properties is a button called Double. Click it to show backfaces.