
I just got hold of a Clip Studio TABMATE controller. It’s a little Bluetooth gadget you hold in your left hand while you’re drawing on a tablet with the other (or vice versa). I always wanted one of those so I don’t have to stretch my arm to reach a bazillion shortcut keys, and to casually rotate the canvas while drawing.
The first hurdle was how to get it connected, which wasn’t super intuitive. Here’s how it worked for me, using a cheap USB Bluetooth dongle:
- press and hold the CSP button on on the controller for 3-4 seconds (bottom centre)
- the light flashes blue/red and goes into pairing mode immediately
- in Windows, open your Bluetooth Settings (bottom right in the Task Bar, see screenshot below)
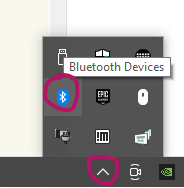
- right-click on the Bluetooth icon and choose Add a Device
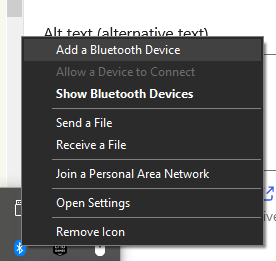
- choose the plus icon to proceed, then choose the top option from the list
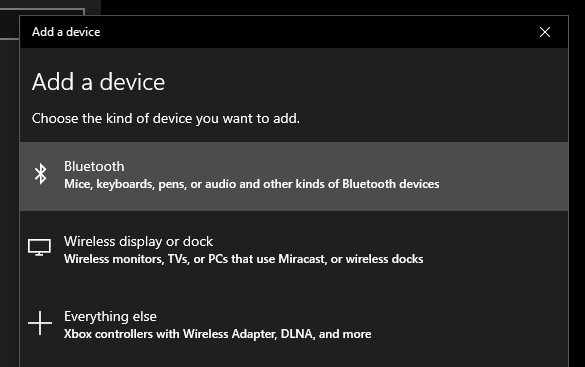
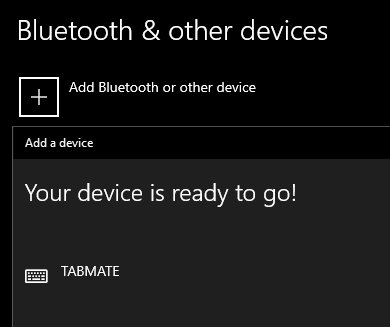
This will let Windows scan nearby devices. You may see devices that don’t belong to you, such as your colleague’s phone or your neighbour’s TV. Ignore those and wait until TABMATE is shown. This can take a few minutes during which time devices come and go. Be patient until you see TABMATE, then pick it when it comes up. Windows will connect and you’ll see a success message (hopefully). Huzza!
Make sure the Bluetooth dongle (or your computer if it’s built-in) is in close proximity to your controller. Mine was setup in the other room, so there was a noticeable latency between what I was pressing and what CSP would display. Moving the dingle closer to where I was working did the trick.
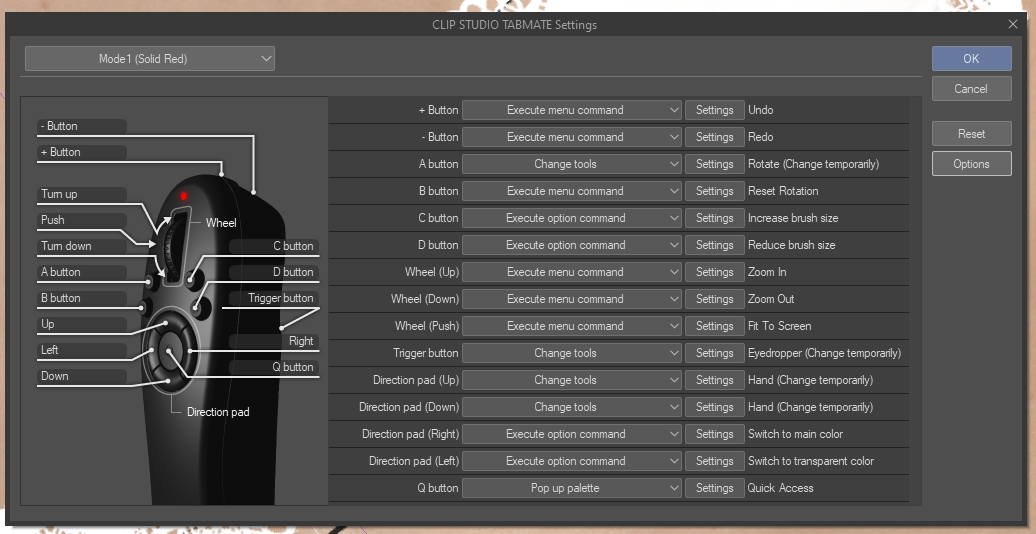
The default configuration works great for me already, here’s what it’s setup as out of the box:
- CSP Button = switch device on/off (old for 4 seconds)
- A = rotate canvas (hold then move the pen)
- B = reset rotation
- C = make brush bigger
- D = make brush smaller
- Move Wheel = zoom in/out
- Click Wheel = reset zoom level (fit to screen)
- Front Top = Undo (hold for multiple steps)
- Front Bottom = Redo
- Trigger Button = Colour Picker
This is dynamite stuff already! Then there’s the D-Pad:
- Q (middle) = Quick Select (brings up sets 1 and 2, which are configurable)
- Up = move layer
- Down = move canvas (hand)
- Left = pick transparent colour (erases things with current brush)
- Right = pick main colour
I don’t use the Move Layer option much and find it dangerous to have it so close by, so I’ve reprogrammed it to something else. That’s super easy to do directly in CSP too: under File – CLIP STUDIO TABMATE there’s a whole host of configuration options (click to enlarge)
To round it off, you can save up to FOUR configurations on this thing and switch them by quickly pressing the CSP button on the controller. The light will change colour to indicate which configuration you’re currently rocking.
Buy the TABMATE Controller
At the time of writing, the controller seems to be completely sold out. I got lucky and got mine from Amazon (via Graphixly). I’m sure it’ll be back in stock soon. Here are three options (all links are affiliated, giving me a cut at no additional cost to you):
- Clip Studio TABMATE (controller only): https://amzn.to/3q5rvYX
- TABMATE and Clip Studio Paint PRO Bundle: https://amzn.to/3r1SnKK
- TABMATE and Clip Studio EX Bundle: https://amzn.to/3uQIwdh
The stand-lone controller comes with a license for Clip Studio Debut, which can be upgraded to PRO or EX at the Clip Studio Website.