I’ve come across Keyed Properties by accident, and was thrilled with what we can use them for. Essentially they let us create a custom slider, whose position behaves much like a little timeline. This has huge potential for anything from an array of facial morphs to various poses or even full body moprhs. It’s the magic behind products like Zev0’s Growing Up or 3D Universe’s Pose Architect.
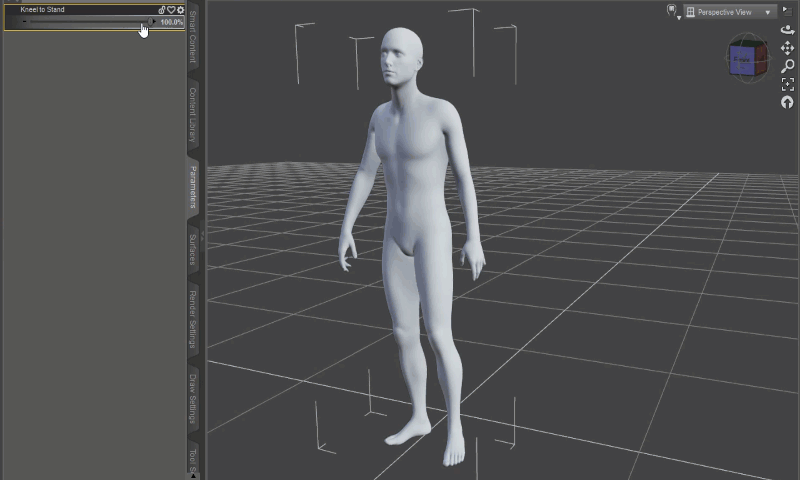
This process also works for poses. Here’s a slider I’ve extracted from an aniblock:
Let me show you how you can create your own Keyed Properties slider.
Step 1: Setting up your morphs
First, setup various keyframes on the regular timeline for values you’d like to interpolate. Give DAZ Studio a bit of room between them, say 5 frames. Start with a neutral/A-Pose/T-Pose value at frame zero.
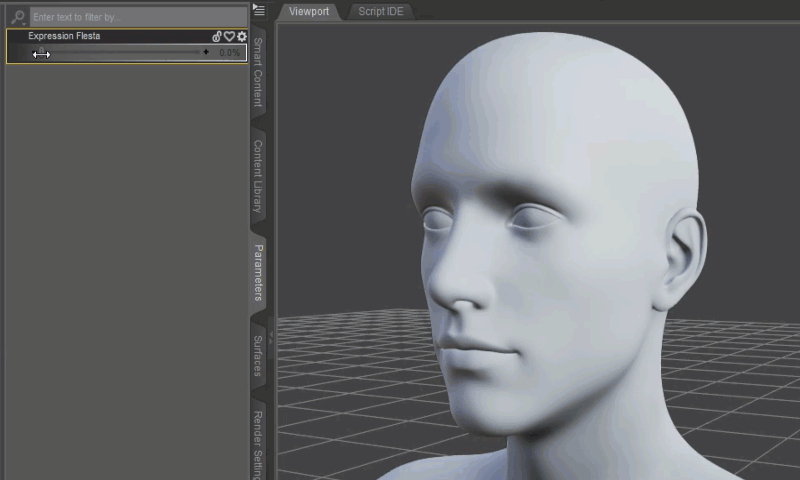
Let’s use expressions as an example: leave frame 0 as it is (unmorphed). Now say “happy” is at 100% on frame 5, and “excited” is at 100% on frame 10. Make sure each frame only has the expression you want, while others are at 0%. You can add as many keyframes as you need.
When you move the timeline now, you’ll get a preview of how your slider will behave. Make corrections as necessary. If you’re happy, proceed to the next section.
Step 2: Creating your own slider
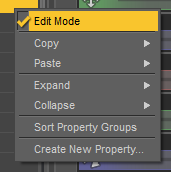
With your figure selected, head to the Parameters tab. Put it into Edit Mode by right-clicking anywhere in the tab and choose Edit Mode.
Now select Create New Property to create a new slider. A rather scary window opens up, but fear not, we can leave most values at their defaults. Give your slider a name and Label, then set the minimum value to 0 (the default is -1, which isn’t going to look good). Pick a path for your slider in the hierarchy, you can define your own “folder” by using a forward slash. In my example I have something rather unimaginative: Pose Controls/Your Folder. Amend as you see fit.
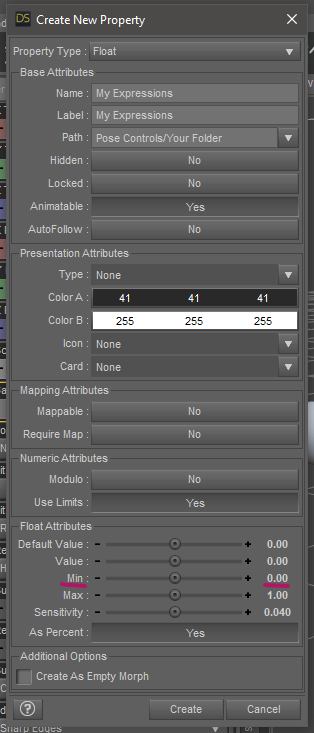
Hit Create and you’re done with this part.
Step 3: Creating the Keyed Properties
Still in Edit Mode, right-click on your slider and select ERC Freeze. This brings up another scary window. Tick the box that reads Keyed (Extract from Playrange) and choose accept. This will lock in all keyframes set on the timeline and turn them into your own custom slider. ERC stands for Enhanced Remote Control I believe, and if I understand it correctly will calculate interpolations for every position of the slider (much like the timeline does).
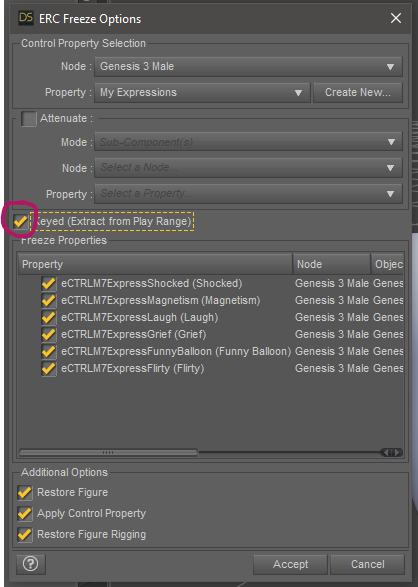
Now take your slider out of edit mode (right-click) and you should see your figure interpolating values as you do. Note that all keyframes have disappeared from the regular timeline.
Step 4: Saving your slider
Saving your slider works the same as saving a custom morph you’ve made. I trust you are aware of the intricacies and where the file will end up. I recommend you create an empty folder and map it as an additional content library before you do this, just so that your work does not get lost in the many gigabytes of content you’ve installed.
Choose Save As – Support Asset – Morph Asset to proceed. A window appears that lets you pick your slider, drill down to find it as you’ve defined it.
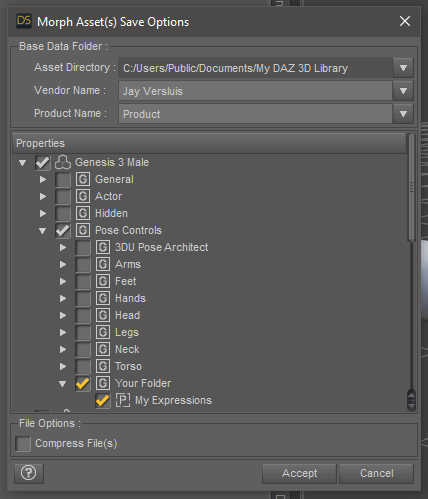
Pick an Asset Library of your choice. My recommendation is not to use the main content library, even though it will work just fine. Fill out the Vendor and Product Name information. The implication of these is where your file will be saved. In my example, the file will end up in data/DAZ 3D/Genesis 3/Male/Morphs/Jay Versluis/Product/My Expression.dsf, inside my main content library. If you ever want to remove it, delete this file from that location.
It will be loaded automatically next time you add the same figure to your scene.