In this video I’m explaining how to apply random animations to otherwise static objects. This is a physics effect that’s applied to a shell around the object and is really neat to animate anything from wind to bounce to complex geometry. I’ve always meant to write the steps down and never found the time when I made the video, so this is going to be a nice refresher for me too.
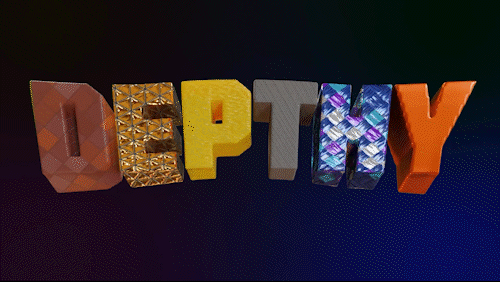
In the video I’m using a complex palm tree, but any object will work. For this description I’m using a text object (DEPTHY is a word that Skywolf came up with describe CakeOne’s artwork, so we’ll make it an official part of the 3D vocabulary now). Let’s call it the Target Object and put it in the centre of the scene. Make sure to apply scale if you’ve changed it.
Next build a mesh cage around it. Any primitive that vaguely follows the shape of the target object will do. For the palm tree I used a sphere and stretched it out a bit, for my text object I’ll use a cube, making it slightly larger so my target object will fit inside. I’ve re-meshed it so that we have a bit more geometry. We’ll call this object the Mesh Cage.
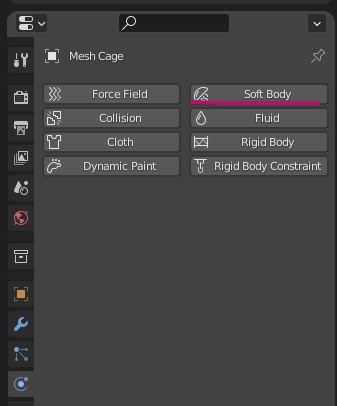
With this cage selected, let’s setup some Soft Body physics. There’s a nondescript round icon on the properties panel (Physics).
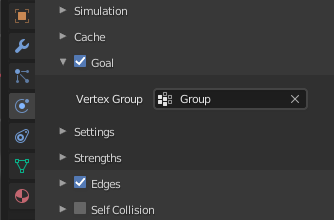
This will come up with a lot of options, some of which we’ll take a closer look at. For our cage to work properly, we need to setup a vertex group on this cage object. Switch over to the little flux capacitor icon and add one. I’ll leave the default name in place (Group), but feel free to rename it.

Back on the Physics tab, let’s select our vertex group under Goal.
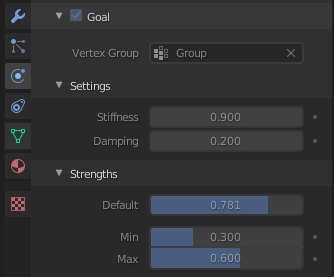
In the same place, investigate the Settings and Strength tabs. Adjust these while playing the animation, and you’ll see the mesh cage start to move up and down (more or less, depending on what you set). I can’t really explain what each value does, and the effect will depend on what you’d like to achieve. Here’s what worked well for my DEPTHY animation:
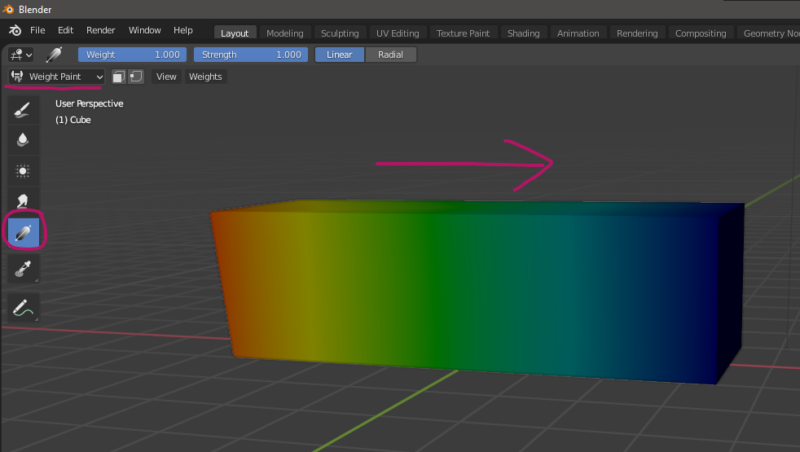
The movement is a little linear right now, so let’s spruce it up with a Weight Map. This will influence some parts of our cage more than others, which is great for wind flutter effects. Switch over to Weight Painting mode at the top left, then pick the gradient tool. Drag it from left to right and see how this changes the colour of your object: red means a lot of influence, while blue means less influence. Keep the animation running to see the effect, or pause it to paint.
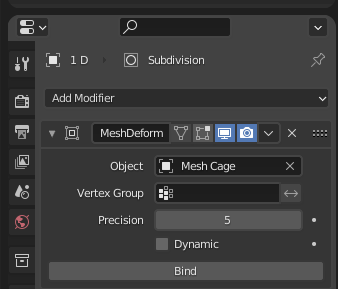
When you”re happy with the effect, we need to bind our mesh cage to the target object so that it too will be influenced this way. No matter how complex the object is, Blender will figure out a way to move it. To do this, add a Mesh Deform modifier to target object. Keep the default values, then pick the Mesh Cage object and select Bind. This will take a bit of time, depending on how complex the motion is. Feel free to hide the mesh cage object to see your target object moving.
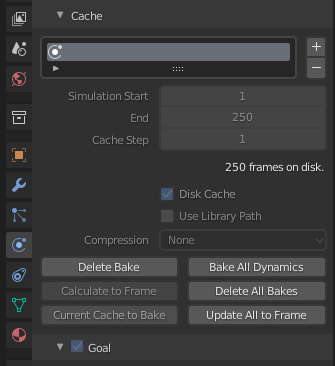
Blender will try its best to show you a live preview of the animation now, but the frame rate is going to be fairly low. To alleviate this, we can let Blender bake its calculations to disk, so it can do all calculations before playing them back. This happens on the Mesh Cage Physics tab, at the bottom just above the Goal settings we’ve played with earlier. Enable Disk Cache, then hit bake and Blender will calculate (the screenshot below is after baking, so when you make adjustments to the settings, delete the bake, then bake again to see the results).
That’s it! You can combine this effect with the noise modifier that I’ve explained in this video, which reminds me… that’s another article I need to write 🙂