EPIC have recently introduced something called the Movie Render Queue to aide us in exporting stills and animations from Unreal Engine. The previous method (Movie Scene Capture) was a tad clunky, and is – as we live in such dramatically fast times – already being deprecated. Although Movie Render Queue is working great, it’s not yet the default in 4.27 and takes a little time to get acquainted with.
Let me tell you what I know in this article.
Where is Movie Render Queue?
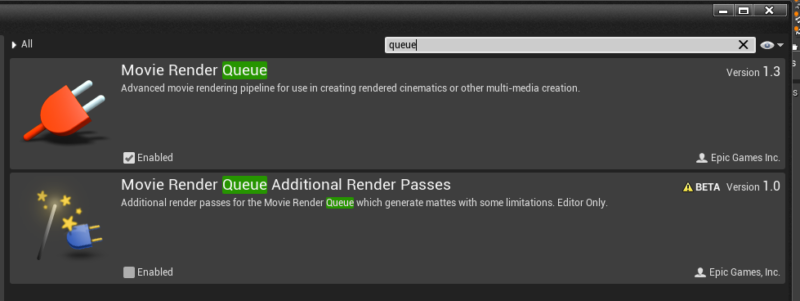
This thing isn’t enabled by default of course – that would be too easy. It’s a plug-in that ships with Unreal Engine and needs to be enabled on a per-project basis, at least at the time of writing. Things change so fast it’s probably already been replaced with something else by the time you read this. Head over to Edit – Plugins and search for “queue”, then enable it and restart the Editor. Also note an additional plug-in for multiple render passes. I won’t talk about this here, and we won’t need to enable this, but make a mental note to revisit it in a future article.
How do we use Movie Render Queue?
Once enabled, there’s an additional option in the Sequencer, in the drop-down menu with the little clapperboard icon (presumably that’s as close as it gets to a “render button” in Unreal Engine).
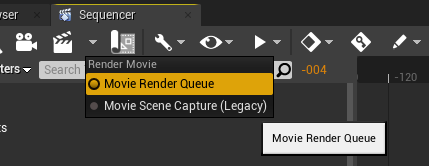
Select Movie Render Queue, then click the clapperboard icon to start rendering your sequence. This will open a new dockable window for the queue and many additional settings.
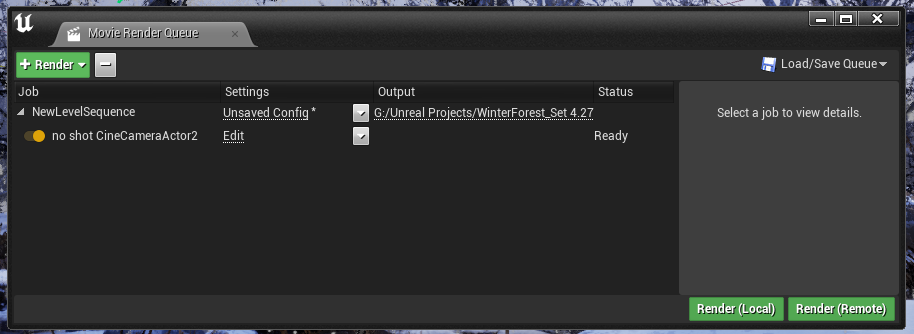
This whole window takes a bit of patience to comprehend. Definitely made by coders and not with creative people in mind. No worries though, we’ll get through this together! See that little line in the Settings column, the one that says “Unsaved Config”? Click on that to open yet another intimidating modal window.
This is where we specify how we want Unreal Engine to render our sequence (or our still image for that matter). While there are a lot of things we could do here, let’s focus on the important ones:
- export file format and output location
- render size/frame rate
- image range
All of these things can be set as options that will add additional tabs on the left hand side. Click on Settings – Output in this window and you’ll see options to adjust your frame size and Output Directory. There’s also an option to override the timeline’s frame rate and the in/out point of your sequence. Override as appropriate.
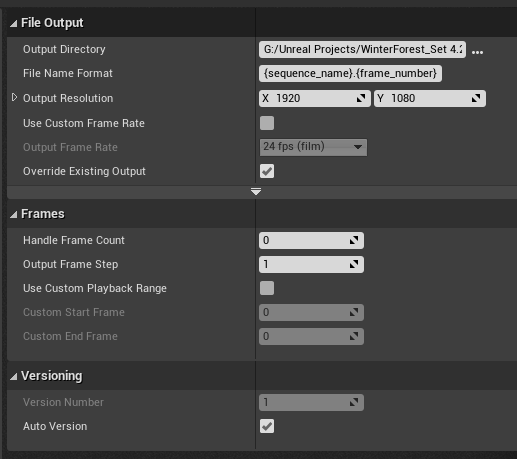
Quick note on the output location: Unreal Engine is weird in that it doesn’t like saving to a place outside the project directory – or at least not always. For example, rendering to a folder on my Desktop gives a file permission error. There’s probably a “perfectly healthy” explanation for this, but I no longer question such things. I tend to nod and move on to a location that works, and the current project directory is one such place. I just thought I’d let you know about this charming quirk.
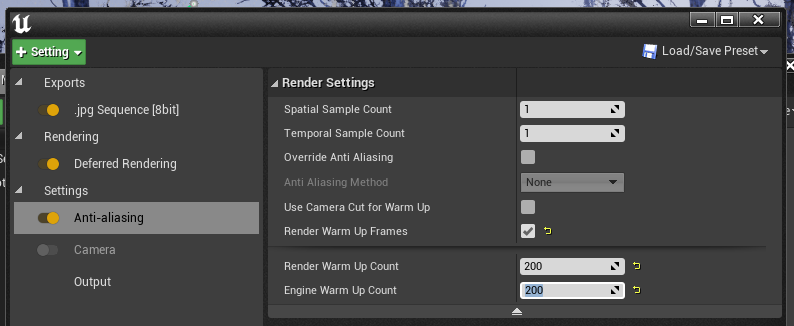
Something else that might be important for your scene is to start particle emitters before your first image. It’s something known as render warm-up frames. This is part of a new tab you need to add manually. Click on Settings – Anti-aliasing (weirdly). Enable the tab and make the appropriate adjustments. I don’t know what the difference is between “Render Warm Up Count” and “Engine Warm Up Count”, but I found that if I set both to the same value it works as expected. Your exact value may vary.
Quick note about these tabs on the left: I haven’t found a way to remove one that has accidentally been added. All we can do is leave it there and disable it – perhaps it’s a bug, or I don’t know how to do it. The Camera tab at the top is a good example. It’s there, but disabled so it doesn’t do anything.
Can we get PNG output instead of JPG?
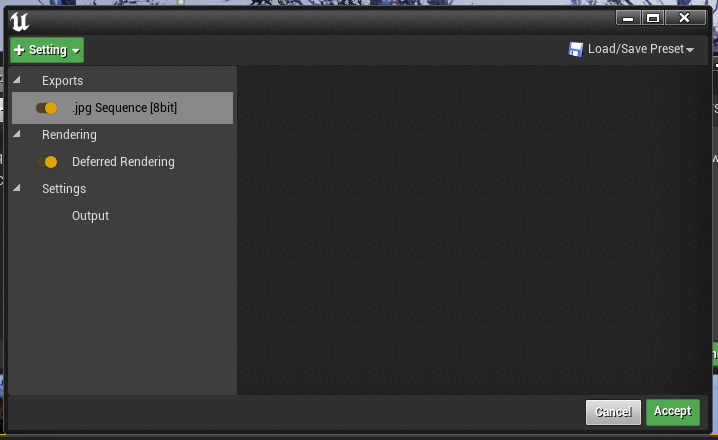
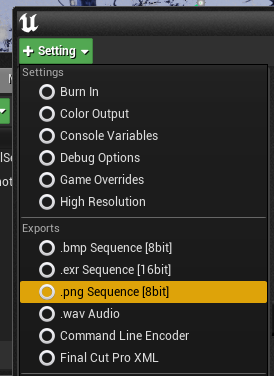
By default Movie Render Queue will save your image sequence as JPG files, but we have no way of knowing how much compression it applies. It’s probably OK for most projects, but if you’d like to save uncompressed files, you can change the image format with yet another tab. Click on Settings and add PNG Sequence.
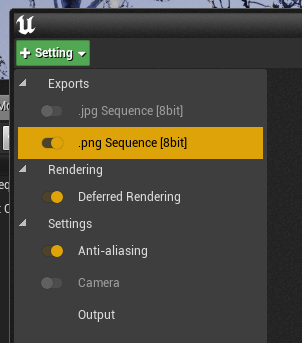
This will now add another tab in addition to JPG. In all likelihood you want one or the other, but not both – and since there’s no way to get rid of a tab, simply disable the JPG slider and you’ll get PNG output (or anything else you may have chosen, like EXR or BMP).
Saving your Render Settings
Bizarrely, Unreal Engine does not saves any of these settings when you quit the project. It’s a little insane (or dare I say “unreal” even), but that’s just how the high-tech cookie crumbles. You can save those settings manually though, so that you can apply them to other projects I guess, but we need to remember this step if we don’t want to lose any of our adjustments.
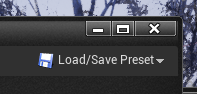
This can be done with the option at the top left of the dialogue (Load/Save Preset).
Let’s Render!
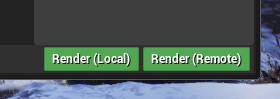
Close the above settings window to return to the main Movie Render Queue. See those two green buttons on the bottom right? Click Render (Local) and Unreal Engine will start processing every sequence that’s in your queue.
You’ll get a preview window with the status of your render, as if this was a real 3D application! Makes a nice difference to the previous option, and it shows how much EPIC want to build out this part of the engine. Very nice I say!
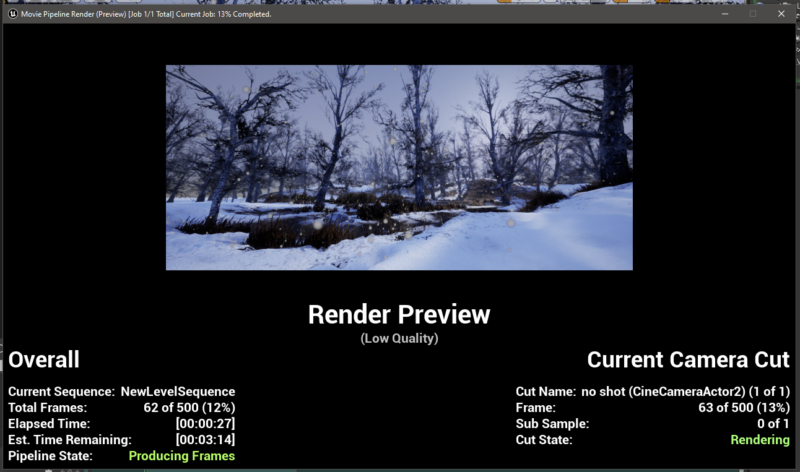
You can wait for the render to finish, or simply close this window to stop it beforehand.
Note that the render will occupy this Unreal Engine session, and you won’t be able to keep working on your project until the queue is finished processing. If that’s something you want to do, click the second option called Render Remote. This will spawn a second UE process from the command line in the background and process the queue, while you can setup your next scene.
And that’s all I have for the Unreal Engine Movie Render Queue. There is some documentation about it here, including the intricacies of the Render Settings: