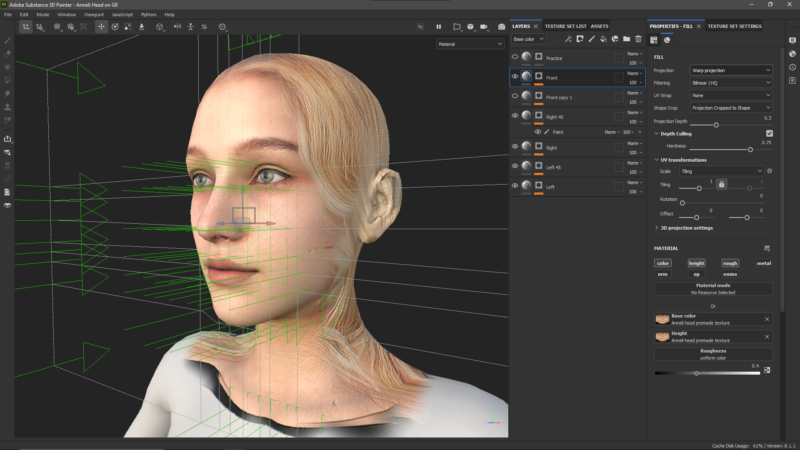
This week I’ve been playing with the fascinating Warp Projection tools in Substance Painter. This way we can project an image onto a 3D object and add vertices onto the projection grid, with which minute details can be lined up for a perfect fit. I’ve tried it with one of those pre-made head textures and had some good results, especially given that the 3D figure didn’t line up correctly with the image.
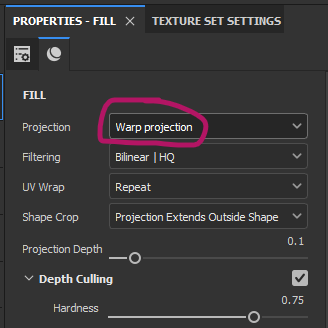
Warp Projection is a little tricky to understand and get into, or at least it was for me. Here’s how it works, while I have it fresh in my mind. The magic happens inside a Fill Layer, whose projection method is set to Warp Projection. You can drag a texture onto your object, or select it in the base colour channel, then switch from the default UV Projection to Warp Projection.

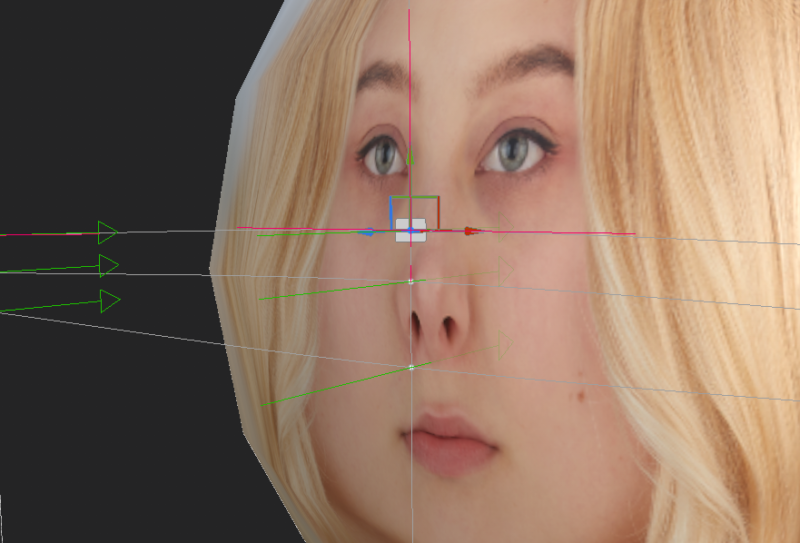
To adjust each of the vertices (little white dots with green arrows), switch from Transform Warp into Edit Vertices mode. This will let us select one or multiple grid points and move them independently. Think of it as moving part of the projection to another place, while leaving the other points alone.
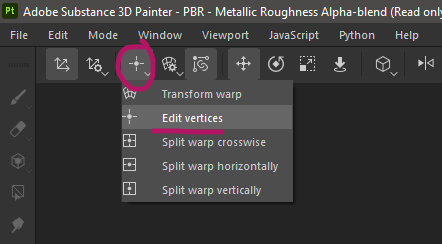
- Split warp crosswise will subdivide our grid at a given position
- Split warp horizontally will add a horizontal line
- Split warp vertically will add a vertical line
Wherever the new lines intersect, new vertex points will be added so that we can adjust them. For my example, if I wanted to bring the nose higher while leaving the eyes and mouth in place, I’ll add two horizontal lines and start moving the vertices using the Transform Tool.
Projection Tips
For wrap-around images, you’ll need projections from more than just the front. In my example I can just duplicate my fill layer, then move it around to project from both left and right at 90 degree angles. I can even make further copies to project at 45 degree increments as well. If I had multiple images, I can blend them together for a full character projection from all angles.
Adding a black mask to our fill layers, then painting on a white paint layer inside it will let us restrict projections to desired parts, all non-destructively.
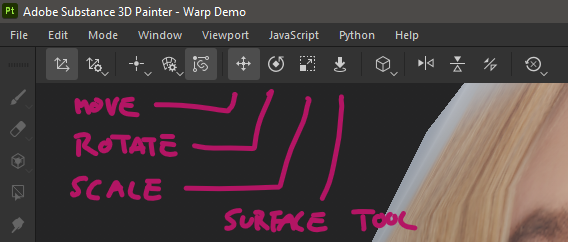
We also have a way to reset all vertex positions in our current layer, and reset all positional changes we’ve made if that’s necessary (little circle with x icon). Switching between translate/rotate/scale can be done with the WER keys like in Unreal Engine and Maya.
SHIFT + V lets us switch between moving the whole grid and single vertices. As the grid gets denser with more vertices, it’s useful to hide We can hide/show the manipulator with Q. And finally, we can in/de-crease the size of our manipulator with the plus and minus keys.
That’s all I have for now.