I’ve just figured out how to do Projection Painting in Substance Painter, and thought I’d best make a note of it. The magic happens inside a regular Paint Layer. It works in both paint mode and projection mode, but to transfer colour information, we’ll need to switch into Projection Mode.

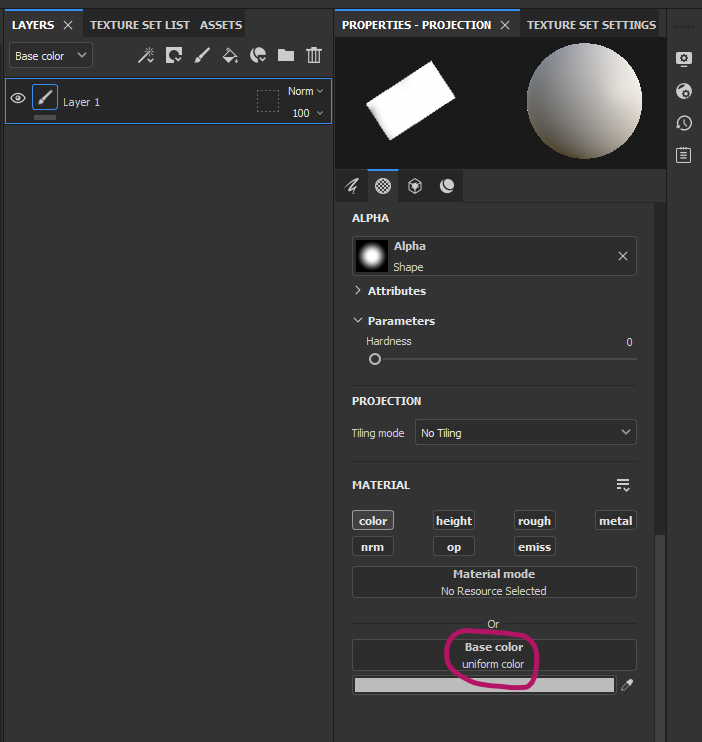
With your paint layer selected, pick all channels you’d like to paint on. I’ll only use base for the colour information. Click on the Base Color option and load a 2D image you’d like to project onto your object. It’ll now be loaded as a stencil overlay. You can pick something from the Substance Library, or import a texture into your project first (under File – Import Resources).
Here are both the later stack and the paint properties side by side (they’re usually on top of one another).
Position your 3D object, then adjust the stencil by pressing S. Here are the crucial shortcuts we need to know about:
- S + Left Click = rotate the stencil
- S + SHIFT + Left Click = snap rotation
- S + Right Click = zoom the stencil
- S + Middle Click = move the stencil
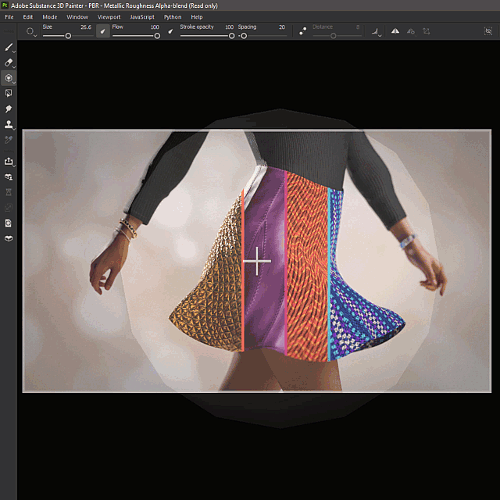
And that’s it! Now you can paint anything you like onto your objects, from overlaid tattoos, to logos and anything else you can think of.
Great tutorial, thanks. However my stencil does not show up, just the grey default panel despite I loaded the texture to Base Color and can transfer the texture like it should be. Just the texture on the stencil is missing, so “aiming” with the stencil is impossible.
Ah, so you can draw on the object, but you don’t see a preview? There’s an option under Display Settings called Stencil Opacity (it’s the weird little monitor icon at the far right, scroll down to Tool Display). Let me know if this helps and I’ll add it to the article.
This helped me find the setting I need when the Projection stencil switches to another channel, like Height instead of Diffuse. Thanks.