Pivot points, origin points, centre points, all of which describe the position at which that 3D manipulator gizmo shows up. Most of the time it shows up in the right place, but every once in a while it does not, and then it’s time for us to change it. Here’s an easy way to do this in Unreal Engine that doesn’t involve sending it back to another application.
Select an object in your viewport, then right-click on, choose Pivot and take a look at this part of the context menu. We have a couple of options here that are of interest.
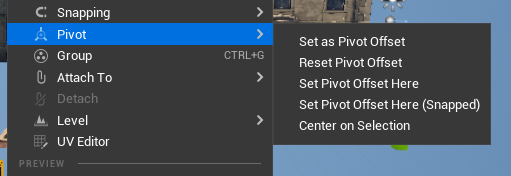
If your pivot point is showing far away from your object and you’d like to summon it to the current selection, choose Set Pivot Offset Here. This will put it at the centre of the object’s bounding box. The other option Set Pivot Point Offset (Snapped) will do the same, but snap the gizmo to the nearest location on the gird, which may not be the centre of your object. Centre on Selection works well if you have multiple objects selected and you’d like to put the pivot at the median centre of all bounding boxes.
To fine tune the position of our pivot point, we can use ALT + Middle Mouse button. Make use of the orthographic viewports to get the perfect position.
To lock in the new position, we can use Set as Pivot Offset from the context menu. This will save the new position on that object. If we ever want to bring back the original pivot point, we can use Reset Pivot Offset.