I’ve seen a couple of good tutorials about how to make things float with the experimental built-in water plugin that came with Unreal Engine 5. Sadly these tips didn’t work in Unreal Engine 5.1 and 5.2 due to a bug that doesn’t install the relevant collision profile on the water body. This causes the floating body to sink to the ground below the water surface. There’s literally no documentation on this subject, so here’s a quick rundown on how to make things float in Unreal Engine 5.1 and 5.2.
Before we look at this step by step, here’s what we need to do in principle:
- create a landscape and water body
- create a Blueprint for our floating object, with physics and buoyancy enabled
- on the water object, set the collision profile to WaterBodyCollision
- said profile needs to be added manually if it’s not there
Basic Setup
Create a new blank project with Starter Content. We’ll need to enable the Water plugin before we start under Edit – Plugins, which requires the Editor to restart. Once it comes back to life, notice that innocent looking message window appear. Do not close it! Instead, scroll all the way to the right and read what it has to say:

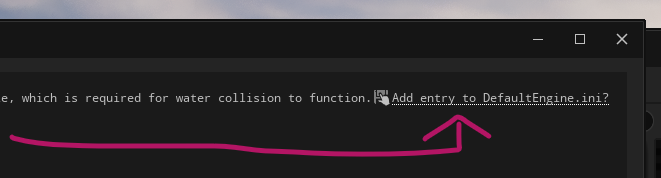
It tells us that without a collision profile, this thing ain’t gonna work. Thankfully it offers to install said profile by clicking on the Add Entry to DefaultEngine.ini. Do so and close the window. This step is extremely important and is easily overlooked, and sadly we only get one chance at doing this. If you’ve skipped it, I’ll describe how to bring this dialogue up again.
Creating our Water Landscape
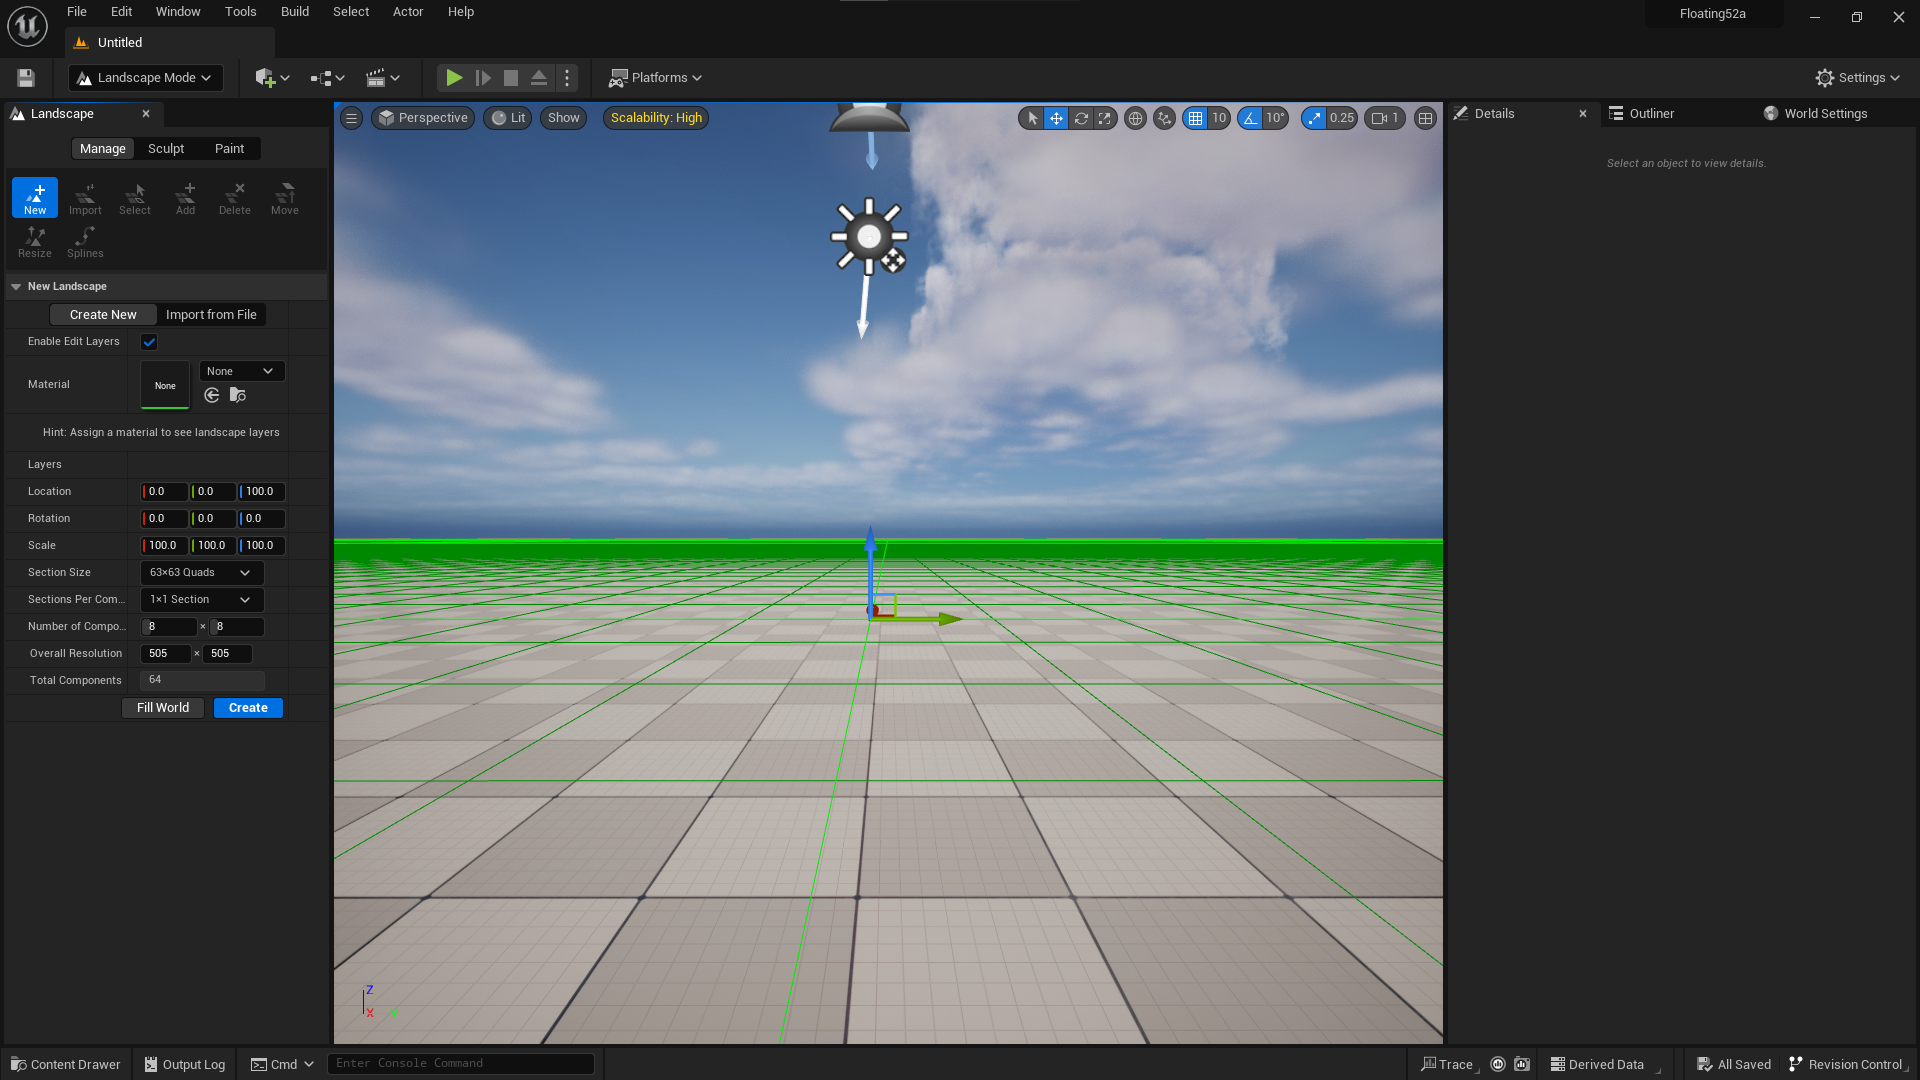
The water plugin works best when used as part of a landscape project. Let’s create a new basic level (without open world shenanigans), then switch to the Landscape tool.
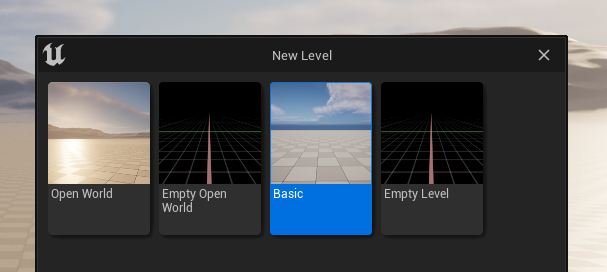
The default values will work fine, click Create and switch back into selection mode. We’re done with our landscape.
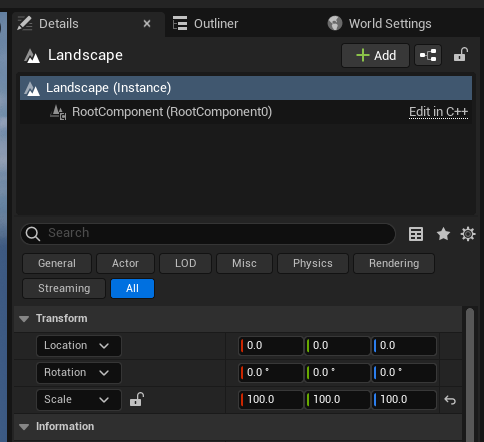
Select the landscape object and put it in the centre of our world by changing the XYZ locations to 0. You’ll notice that we also have a floor object in our scene, remove it.
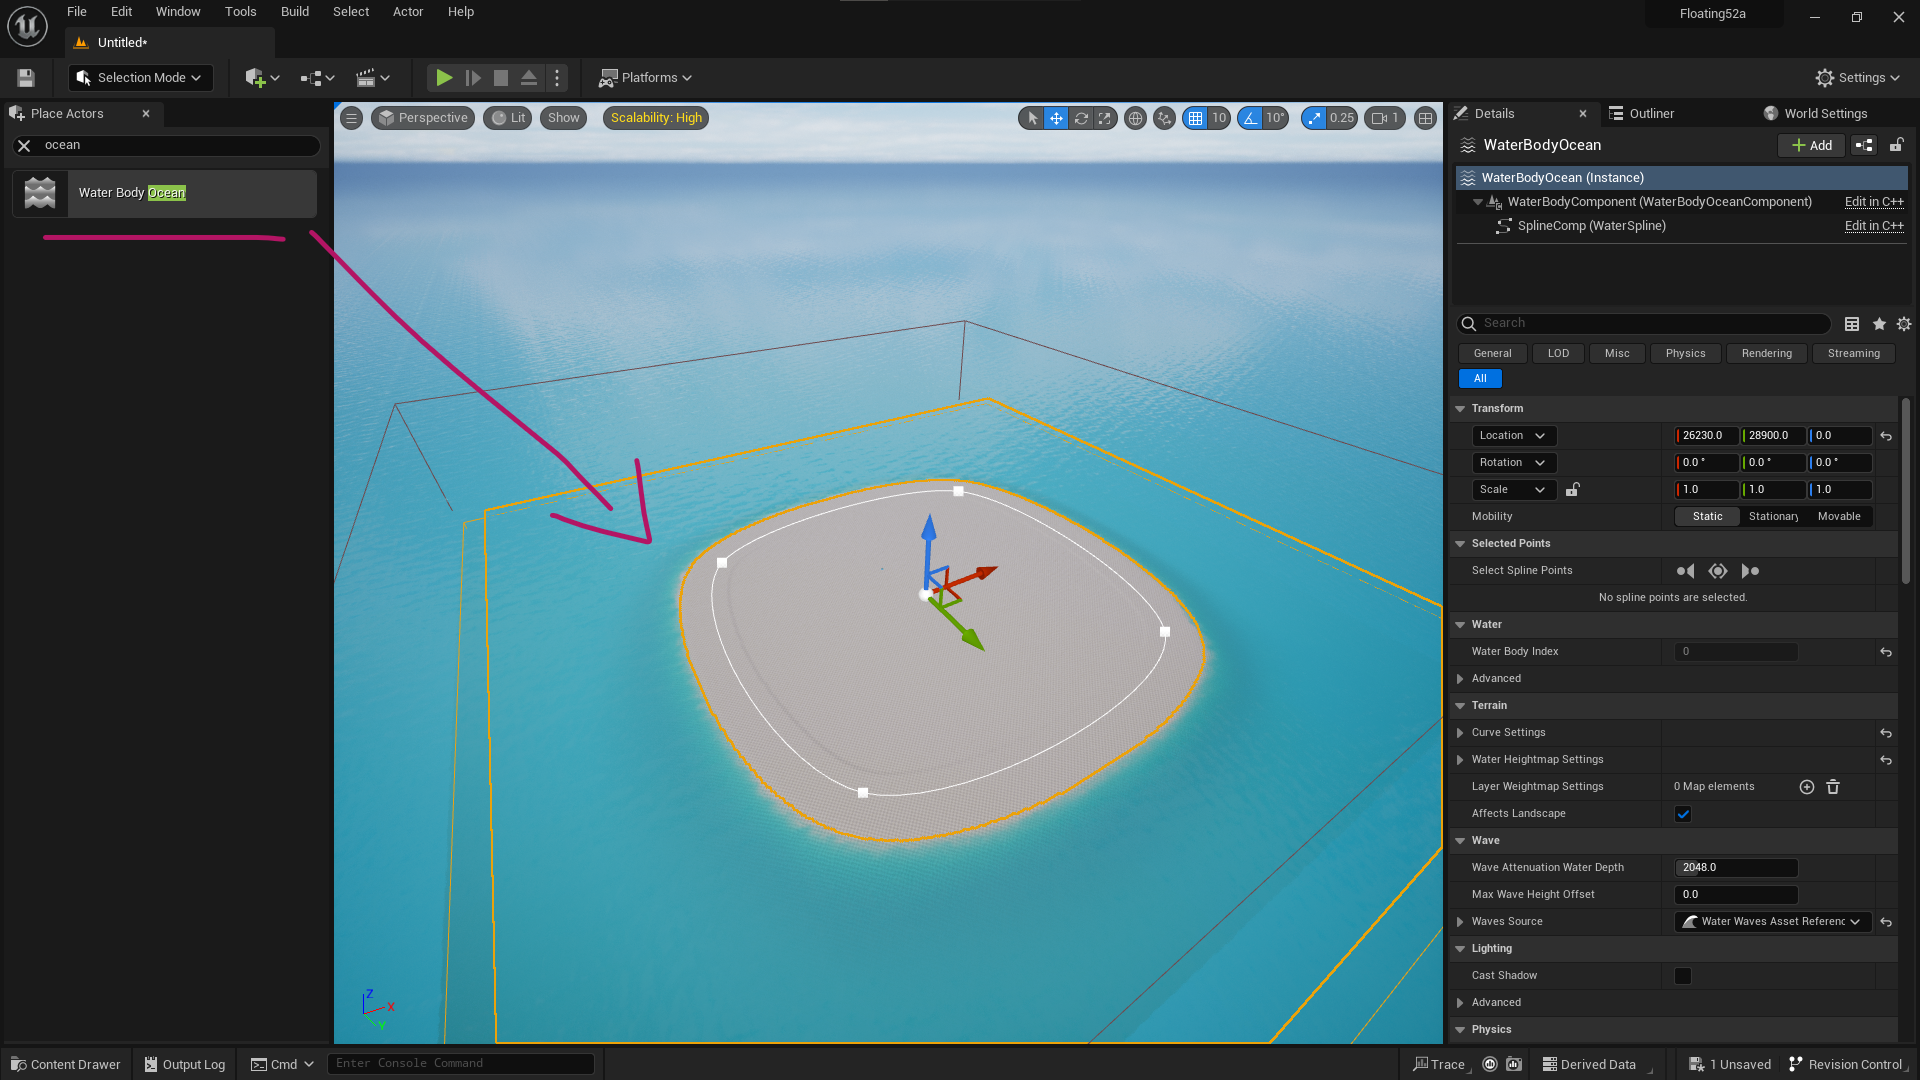
Next we’ll add an ocean around our landscape. You can find it under All Classes – Water Body Ocean. Drag it into the scene and place it so that the landscape is in the middle as a little island.
Setting up the floating object
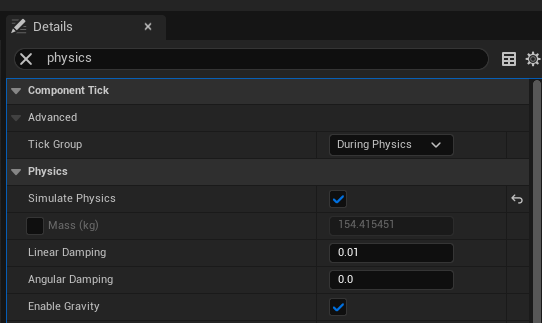
We need an object that can float. It needs some logic so we’ll need to create a new Actor Blueprint for this. Let’s add a static mesh and pick a shape from the Starter Content. I’m using the wide capsule because I think it looks cool, and to make it look better with the default ocean I’ll scale it up by a factor of 5. The object needs Physics enabled and ideally a mass, but we can play with its exact value later.
For reasons beyond my understanding, our floating object needs to be the scene root, otherwise it’ll sink to the ground. To do this, drag it onto the DefaultSceneRoot.
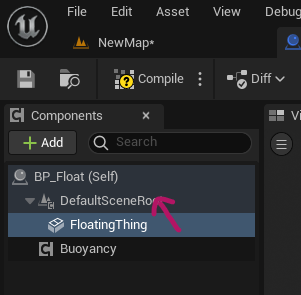
The end result should look like this:
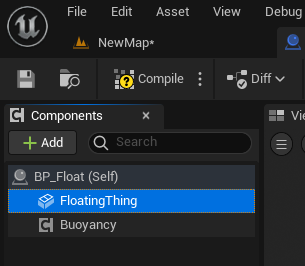
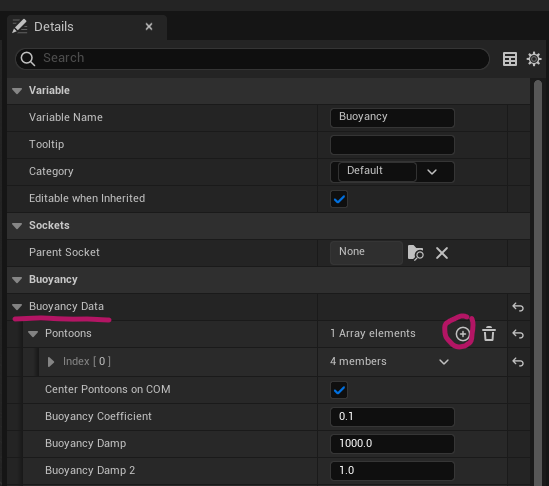
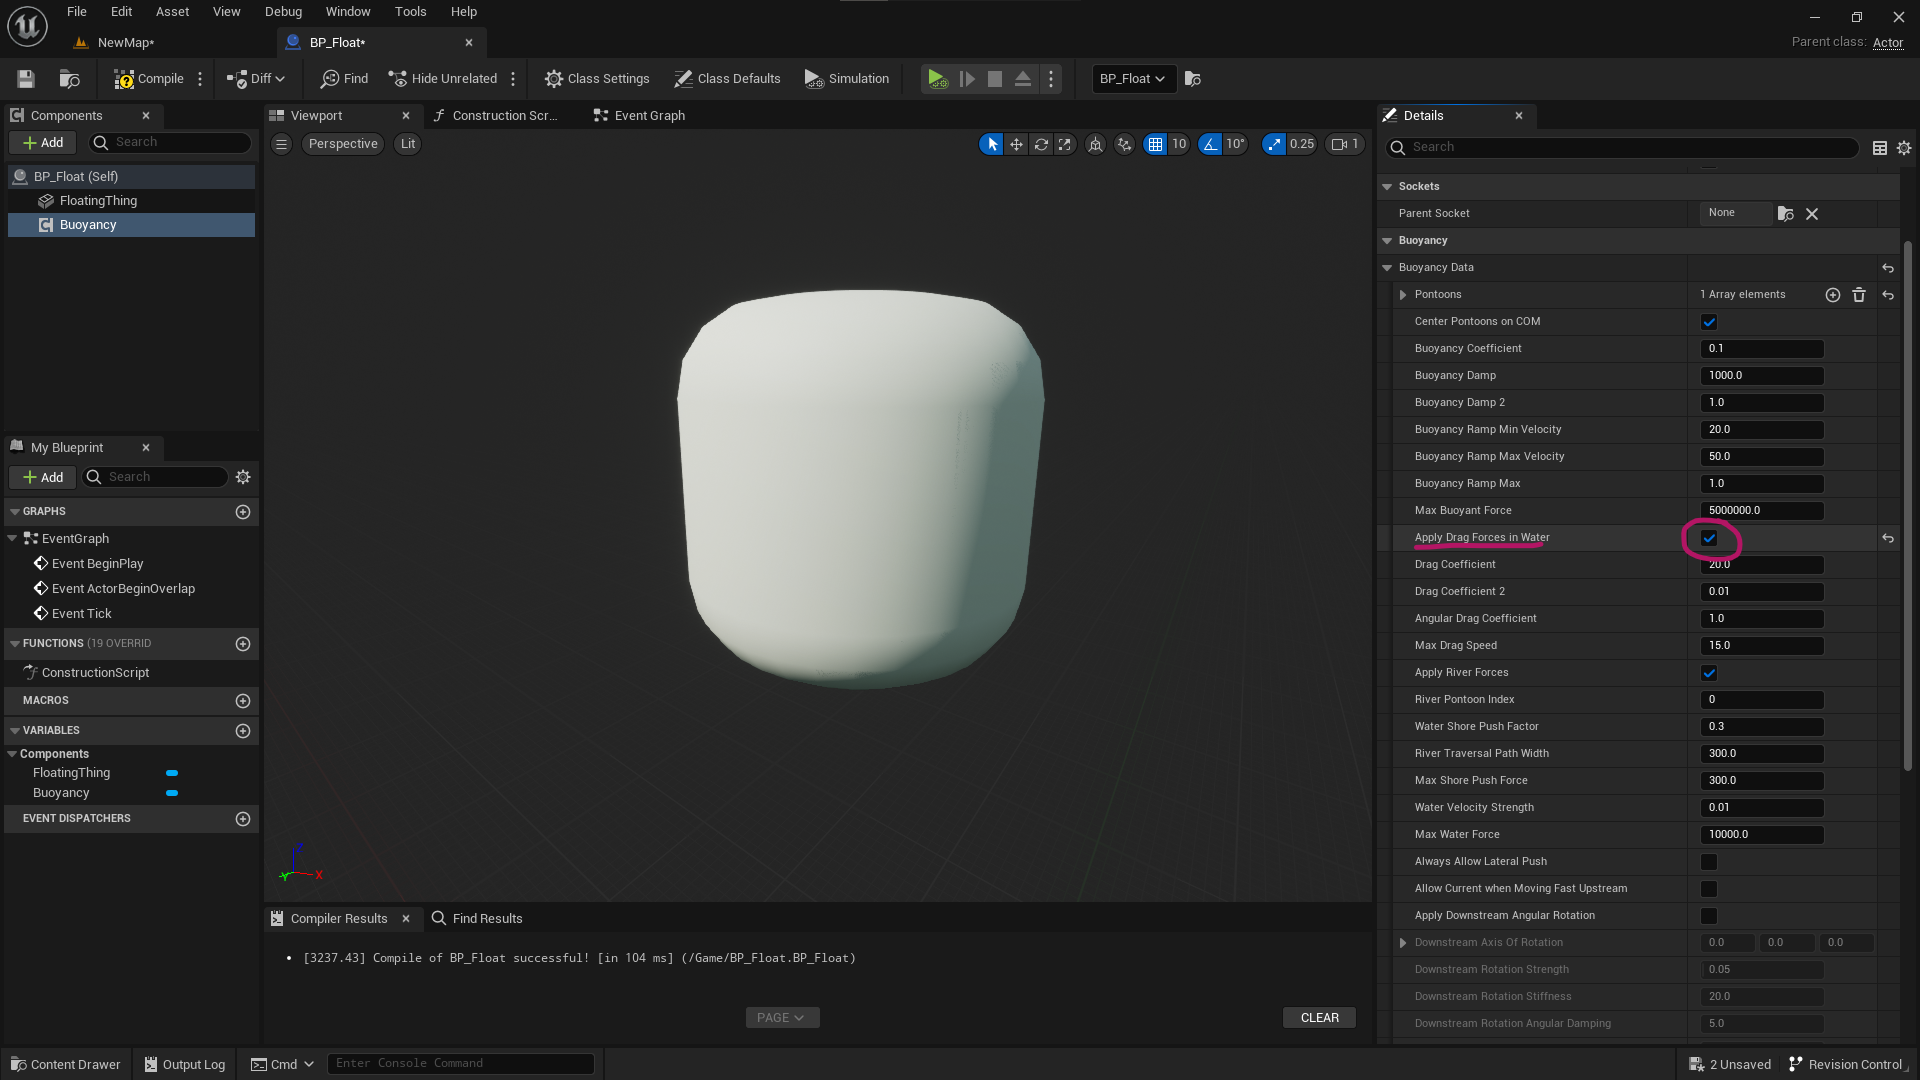
Our blueprint also needs a Buoyancy component to make it move with the waves. To calculate the movement it needs location points called Pontoons, and we need to create at least one of them manually. On larger objects like boats you typically have at least four that can be set with sockets, but for our quick test a single one will work just fine. Select the Buoyancy component add a Pontoon under Buoyancy Data.
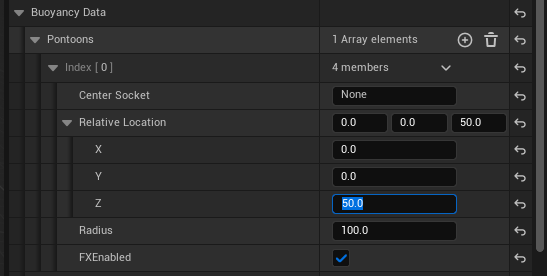
By default this will be set on the origin point of our object, but it’ll look better if the bottom is submerged in water. I’ll set mine to Z 50, moving it up a bit so the movement is calculated inside the object rather than on its bottom face.
Let’s make it float!
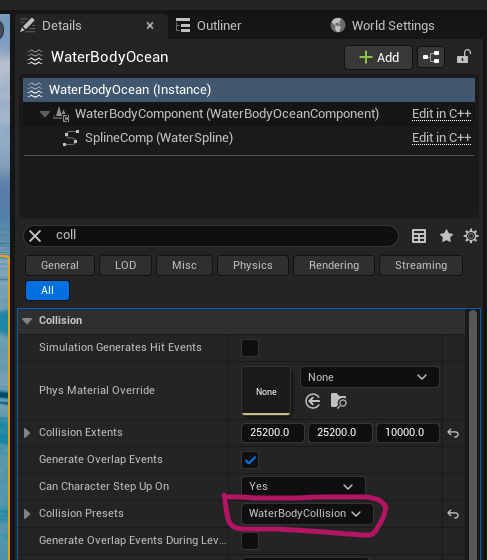
Drag the floaty blueprint into your scene and make it hover over the wavy ocean. We need to tell our ocean object to use that special collision profile for the interaction to work, so select it and search for Collision. Change it from custom to WaterBodyCollision.
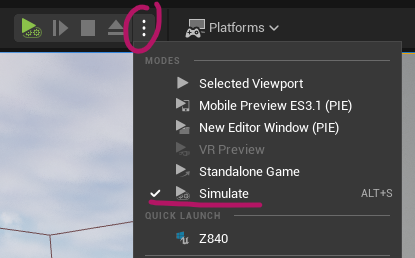
Now switch over to Simulate Mode or press ALT+S and your object should start floating. However, it may also start bouncing on the water or sinking to the ground. It’s a little… unpredictable at this point.
If it doesn’t quite behave as you had expected it, select the static mesh in your floating blueprint and play with the mass parameter. My object sank to the ground, so I’ll set my mass to 100kg and simulate again. Doing so means it behaves like the top GIF in this post.

If the object behaves a little too erratic, you can enable the Drag Forces option on the Buoyancy component. This can smooth out some odd behaviour.
Dangit, I don’t have that collision preset you mentioned
If you don’t see the WaterBodyCollision preset on your ocean object, and you don’t see the clickable link in the status message when your project opens, you can add the preset manually to your project’s DefaultEngine.ini file. Find it in your current project’s folder under Config/DefaultEngine.ini.
Close Unreal Engine, then open that file in a text editor and add the following lines at the bottom:
+Profiles=(Name="WaterBodyCollision",CollisionEnabled=QueryOnly,bCanModify=False,ObjectTypeName="",CustomResponses=((Channel="WorldDynamic",Response=ECR_Overlap),(Channel="Pawn",Response=ECR_Overlap),(Channel="Visibility",Response=ECR_Ignore),(Channel="Camera",Response=ECR_Ignore),(Channel="PhysicsBody",Response=ECR_Overlap),(Channel="Vehicle",Response=ECR_Overlap),(Channel="Destructible",Response=ECR_Overlap)),HelpMessage="Default Water Collision Profile (Created by Water Plugin)")Start UE and open your water project. The status message and the clickable link to create the preset should now pop up.
Further Reading
- https://forums.unrealengine.com/t/unreal-engine-5-1-water-buoyancy/749532/4
- https://forums.unrealengine.com/t/5-1-water-buoyancy-not-working/720788/12
- Floating video by Klaus: https://www.youtube.com/watch?v=5MR04Cg9RJk
- Floating video by UnrealtyBites: https://www.youtube.com/watch?v=NvZSZEKY164&list=PLhlDHJpnPTG-qH5OJhaFM1UQ_m6VILWig&index=8