When you tweak effects through a global Post Process volume in Unreal Engine, and then render out one or multiple cameras, you may notice that the effects can look different in the render than they do when previewing or playing the project. That’s because Unreal Engine can coordinate work with multiple Post Process volumes, but only one of them can be rendered at a time. Every cinematic camera has Post Process settings, and they take precedence over the ones set on the Post Process Volume in the level.
The good news is that we can change this, now that we know it’s actually happening. Take a look at the Camera Options and find the Post Process Blend Weight value.
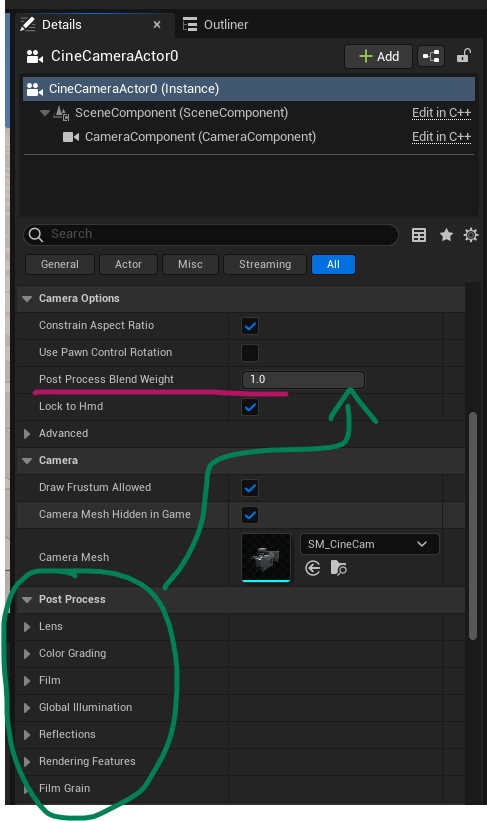
It’s set to 1 by default, which means the camera uses it’s own Post Process settings when rendered. Change this to 0 to use the Post Process settings from the volume in the level, or blend them together as you see fit.
Another Unreal Engine mystery has been solved!