I was working on a scene for which several actors needed to wear long draping robes as they walk slowly across a scene. This proved challenging to Unreal Engine’s native Chaos Cloth solver, which isn’t designed to drape high-res self-colliding cloth. While it can work, the results looked less than stellar as you can see from this comparison test.
In the end it was easier to let Marvelous Designer drape the animation, then import the cloth as Alembic have the same result in Unreal Engine. The workflow for this was a little insane, so I thought I’ll make some notes if you want to try it yourself. The basic pipeline was this:
- prepare animation in iClone, export as FBX
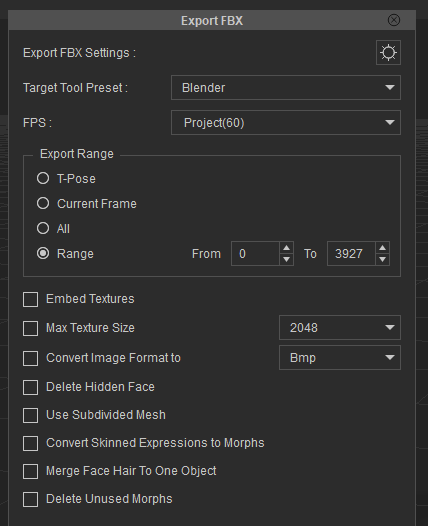
- in Blender, remove interfering objects (like hands), export as FBX
- import into MD, drape cloth, export as Alembic
- create textures in Substance Painter
- import into UE, setup materials, add Alembic and iClone actor to sequencer and animate
Clearly not for the faint hearted! Here’s how I did it step by step.
Prep Work in iClone and MD
MD now has a huge asset library included, with tons of free block patterns and community designed outfits. I’ve found something suitable quickly, but it was not made for my avatar (Camila from Character Creator), so I exported her in the open A-pose and made the garment match. This didn’t work with auto-fitting because my cloak wasn’t a tight-fitting garment, but by carefully freezing and adjusting the pieces I made it work.
I had a slow walking animation for a female and a male character. Neither start with a standing A-Pose of course, so I had to match it up to what worked best for the Marvelous Designer start, blending into the walking animation. This is for the cloth to settle. I exported it as FBX with the Blender preset.
More prep work in Blender
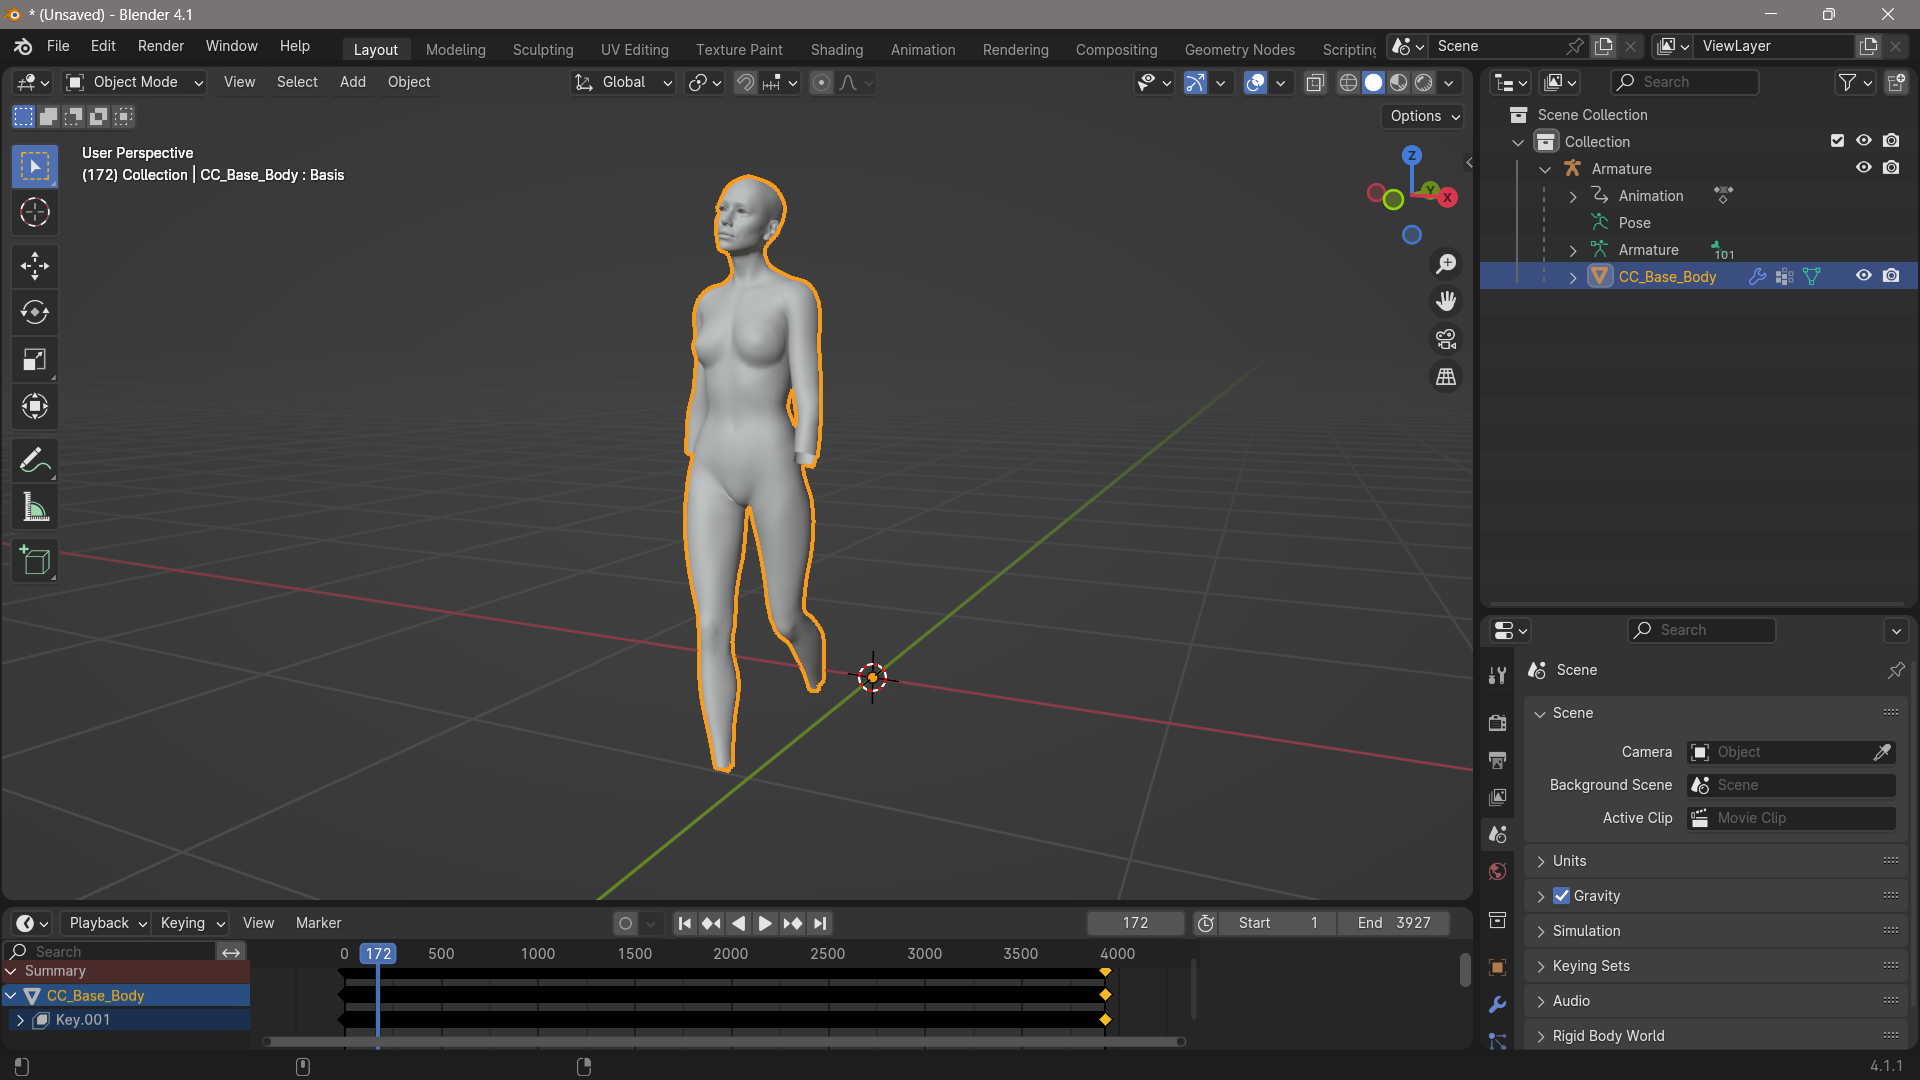
Importing this animation means we can do some adjustments before we give it to Marvelous Designer. Typically things like the hands, feet and hair can interfere with the animation. Also, attachments like the eyes and mouth typically don’t move in MD, so we’ll have to remove these things.

With that done, we can now export the animation again as FBX for MD. If the start pose doesn’t match exactly what you have in MD, export it out separately without animation so you can adjust the garment. It’ll become more clear why this is necessary in the next step.
Make sure the animation is set to the correct duration (end frame), otherwise not everything will be exported.
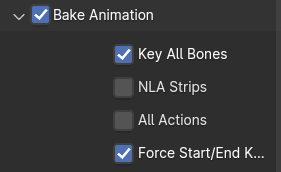
Export settings are all the defaults, except for the animation section (disable NLA strips and All Actions, otherwise MD gets confused).
Draping in Marvelous Designer
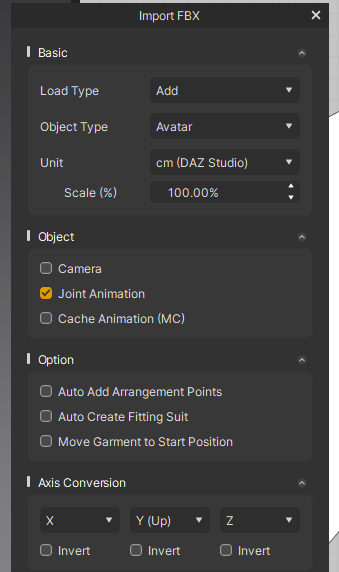
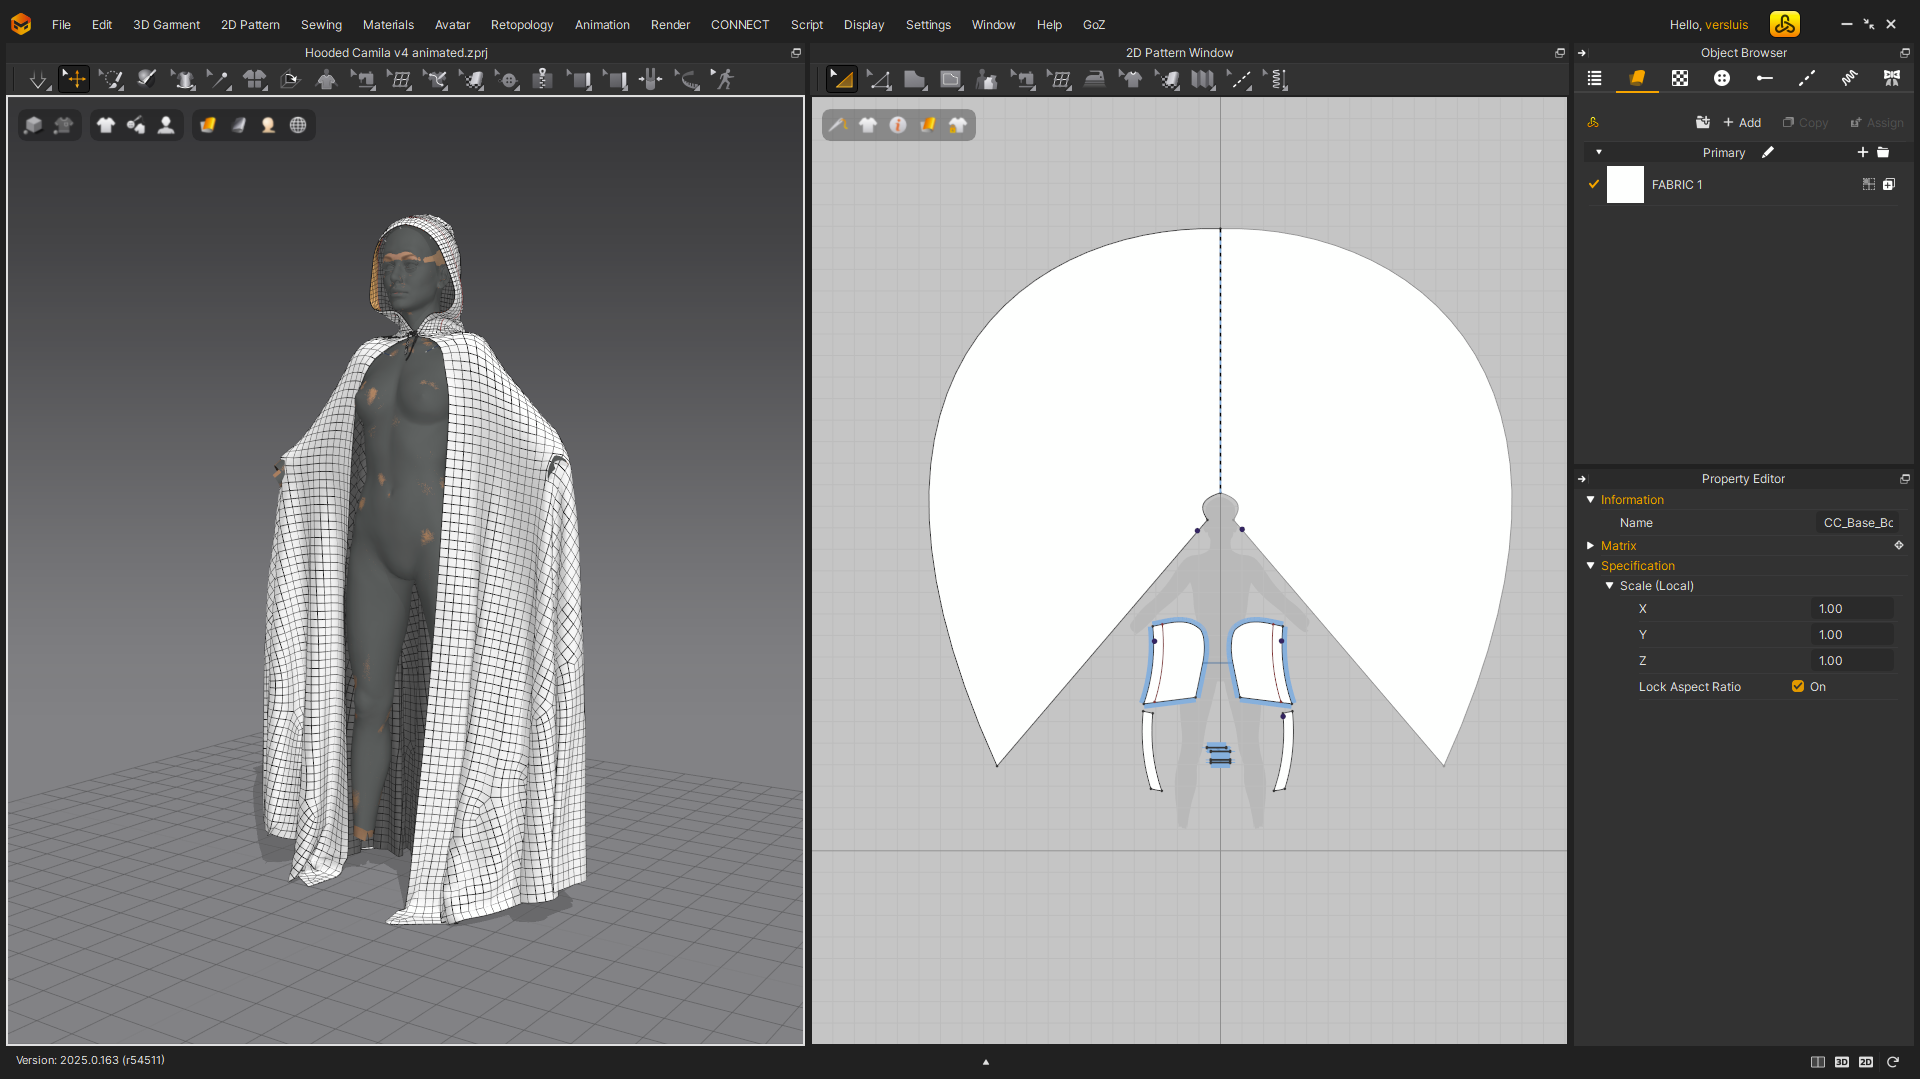
The 2025 version of MD can import joint animation data from FBX files. This is great and means we no longer have to convert things to an MDD cache. Importing can either replace your current avatar (open) or add one to the scene in addition to what you already have (add). I prefer this so I can see if the first frame matches up.
If you see that you avatar is not in the same start pose as the animation, go back to iClone and correct it as close as you can using Edit Motion Layer. It’ll save a ton of hassle with cloth not draping properly during the rest period. My avatars line up, so I’m in good shape (see the Z-fighting between the skin coloured Camila and the grey one? That’s good – so I can remove the static one from my scene).
Now it’s time to drape our animation. Open the timeline at the bottom and adjust the frame rate to match what you’ve exported from iClone. In my case that was 60fps. MD may default to something else. Use Frame Stepping and type in the total duration of your animation (MD does not recognise this). In addition you’ll also have to set the play range at the bottom manually. It’s a little clunky, but does the trick.
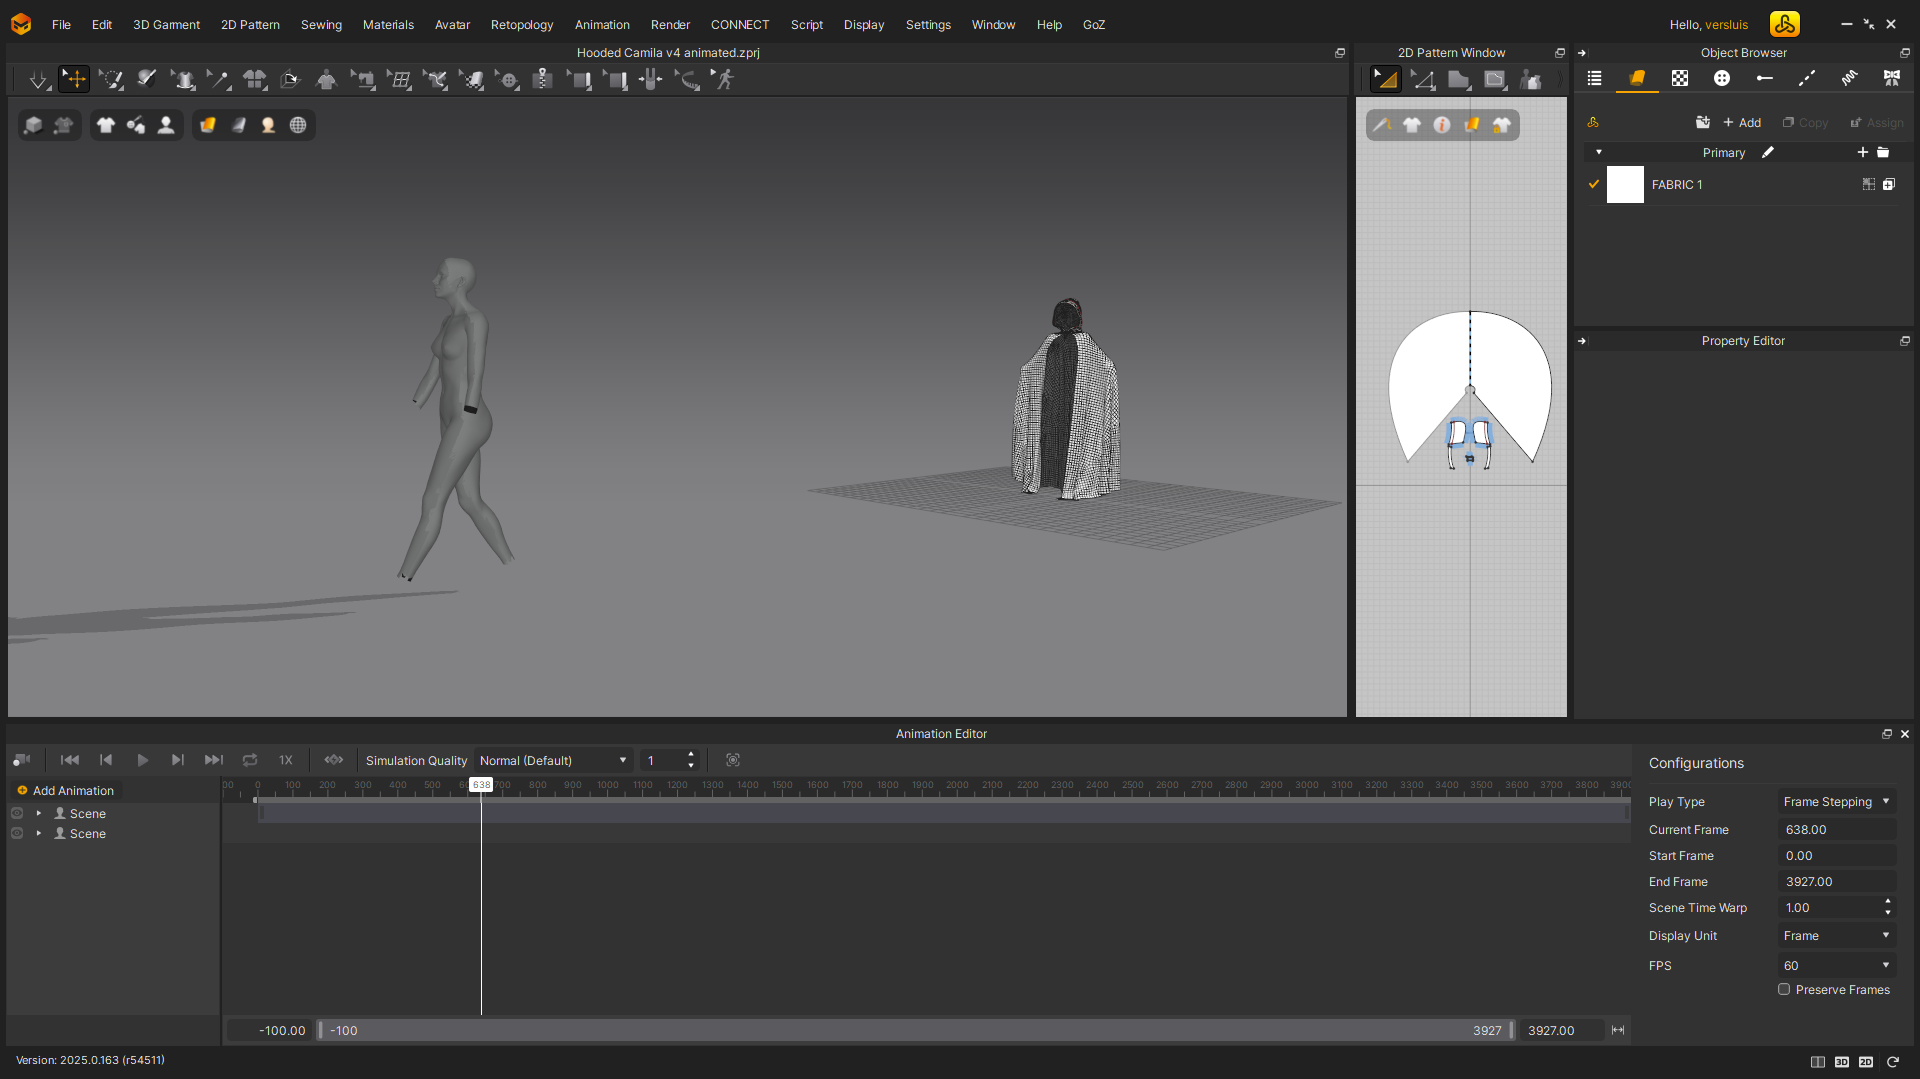
If you move the play head now, you should see your character moving and the cloth staying in place. That’s what we want. Pick a good simulation preset (normal or stable of you have the time), then save your project. It’s good practice to do this: just in case the simulation doesn’t work out, you have a starting point to make adjustments from.
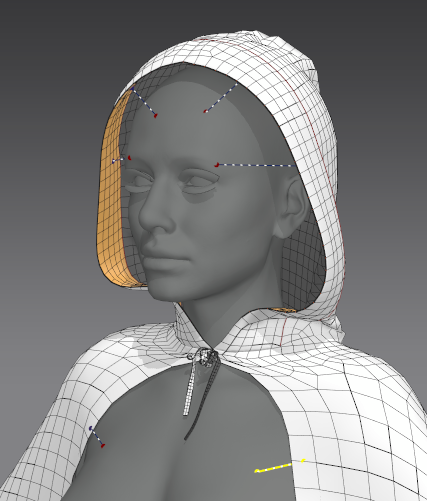
Now press the little camera icon top left in the timeline and MD will start draping your cloth in line with the animation. You may find the garment flying off and not staying in place, in which case use the Tack on Avatar feature to attach the garment to the body. I’ve done this around the hoodie and the shoulders.
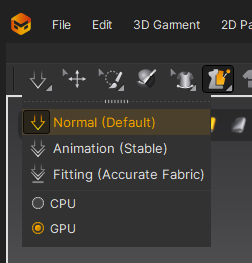
Since MD 2025 GPU can be used, and I find it’s almost draping in real time. I’ve had no issues with it and it saves a ton of time (switch it on the arrow icon at the top left). This will be honoured for animation drapes.
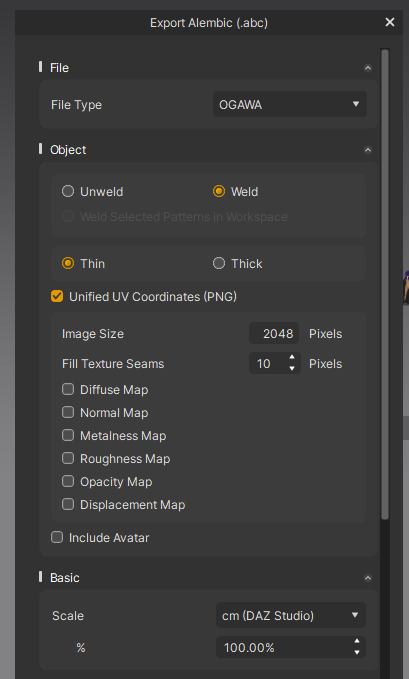
Once animated, save your project as another version, just in case something goes wrong with the export. This will include the simulation data. Now we can export the as Alembic with the following settings.
Import into Unreal Engine
The Alembic importer is enabled by default in UE 5.5. The most important setting is to switch over to Geometry Cache form the default Static Mesh option.
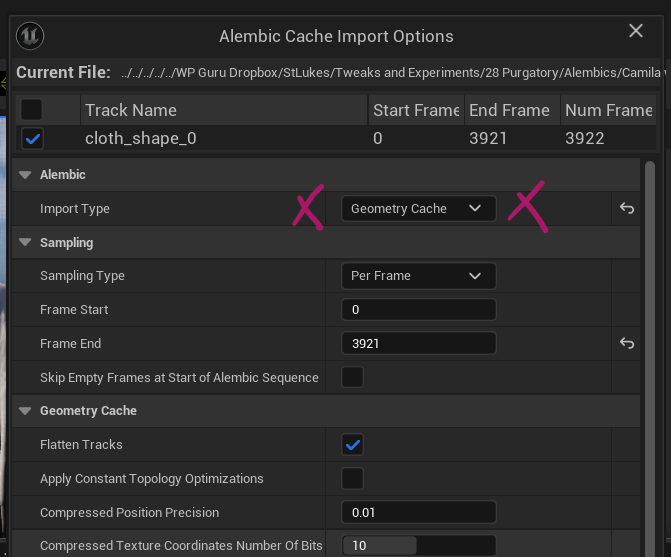
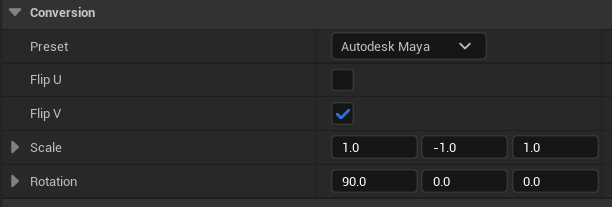
They are working on a better way to make Alembics animatable by importing as Skeletal Mesh with morphs per frame, but that integration isn’t working just yet, so we’ll stick to Geometry Cash. Further down in this dialogue you’ll find Conversion Settings for scale and rotation. If exported as shown above, the Maya preset will work fine. Hit Import and let it rip for a bit (takes longer with larger files).
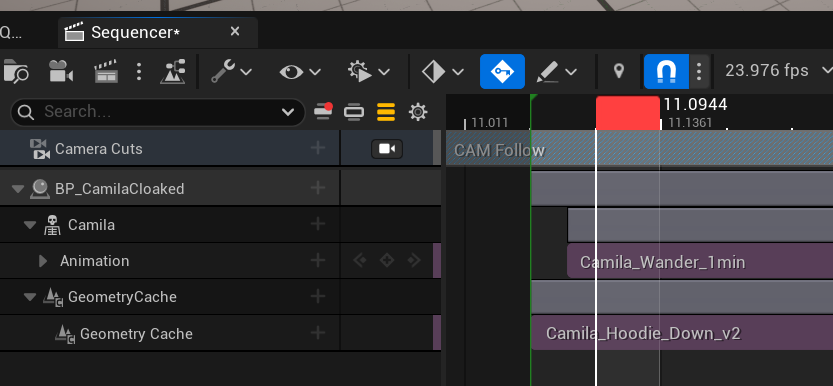
When it’s ready we can add the imported cache directly to our scene and sequencer and select the animation, or add it as a Geometry Cache component to a blueprint.

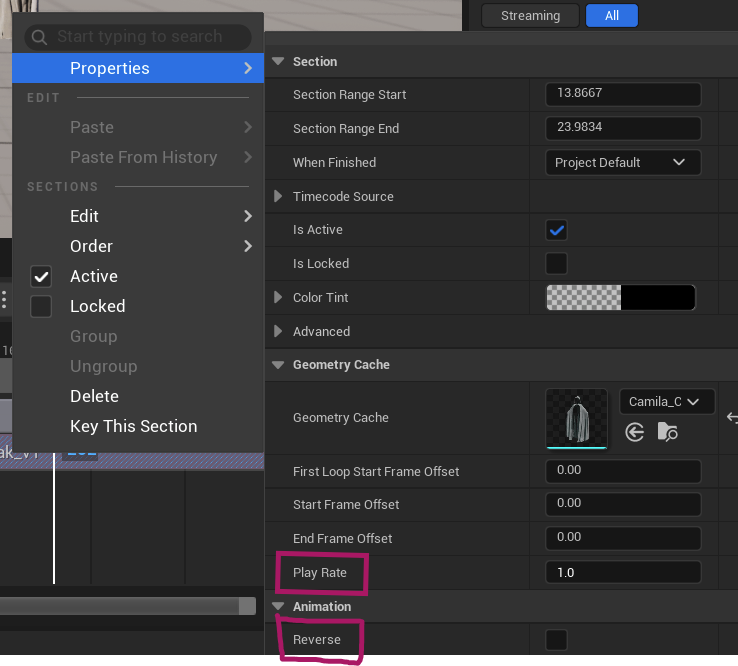
Through a right-click in Sequencer we get access to the animation play rate property, including reverse. Similar options are available in the Details panel for the asset, including an option for a material. I’ve made mine in Substance Painter from a single OBJ export of the garment. It retains its UVs once exported as Alembic.
Fixing Poke-Through Issues
A common problem with two things that need to run in sync (like our character animation and the cache) is that they may not be aligned properly. The result feels like your character pokes through the cloth literally on every frame, possibly only noticeable from one side. This is most likely caused by the two tracks not lining up perfectly.
Try moving one track slightly ahead or behind and see if this cures the problem. In my tests I had to move the animation half a frame ahead of the cache for them to match (green line indicates the start or a new frame, as does the playhead). If this isn’t enough, try increasing the skin offset on your avatar in Marvelous Designer from the default 3mm.
And there we have it! A great many steps and apps involved, but it works and it’s a fantastic way to get MD simulations into UR for rendering.
Have fun!