I’ve recently invested in Narrative Pro, a very comprehensive game framework for Unreal Engine 5. It features maps, quests, dialogues, inventory, combat, Metahuman support and a whole bunch of other stuff – in short, the glue code that would take me a good year to write from scratch. As I get into it, I’ll need to take some notes and this is the perfect place for it.
The first thing I wanted to do was to use a custom (non-Metahuman) character for the player. This is easily done using Live Retargeting, something I’ve discussed at length on my channel, so this could be a Daz or Reallusion character. Since the steps will be the same, I’ll use Camila from Character Creator for this walk-through. The basic steps are:
- import your custom character into UE
- create an IK Rig, IK Retargeter and Animation Blueprint
- create an Appearance (Data Asset) and add your mesh and retargeter
- add this appearance to CD_DefaultPlayer
Let’s take a look at this step by step. Transfer your character as you see fit to Unreal Engine, including any cloth and hair items you want to use.
Be aware you may need to decimate the figure and attachments to improve real time performance. The default version of Camila for example is a cinematic character with hair and cloth dynamics, and as such won’t perform well as a player character out of the box, but a bit of InstaLOD magic in CC will do the trick.
Also note that as of Character Creator 5 (and 4.6 respectively), there is now an option to export figures in native UE skeleton formats, which means retargeting is not strictly necessary as described below.
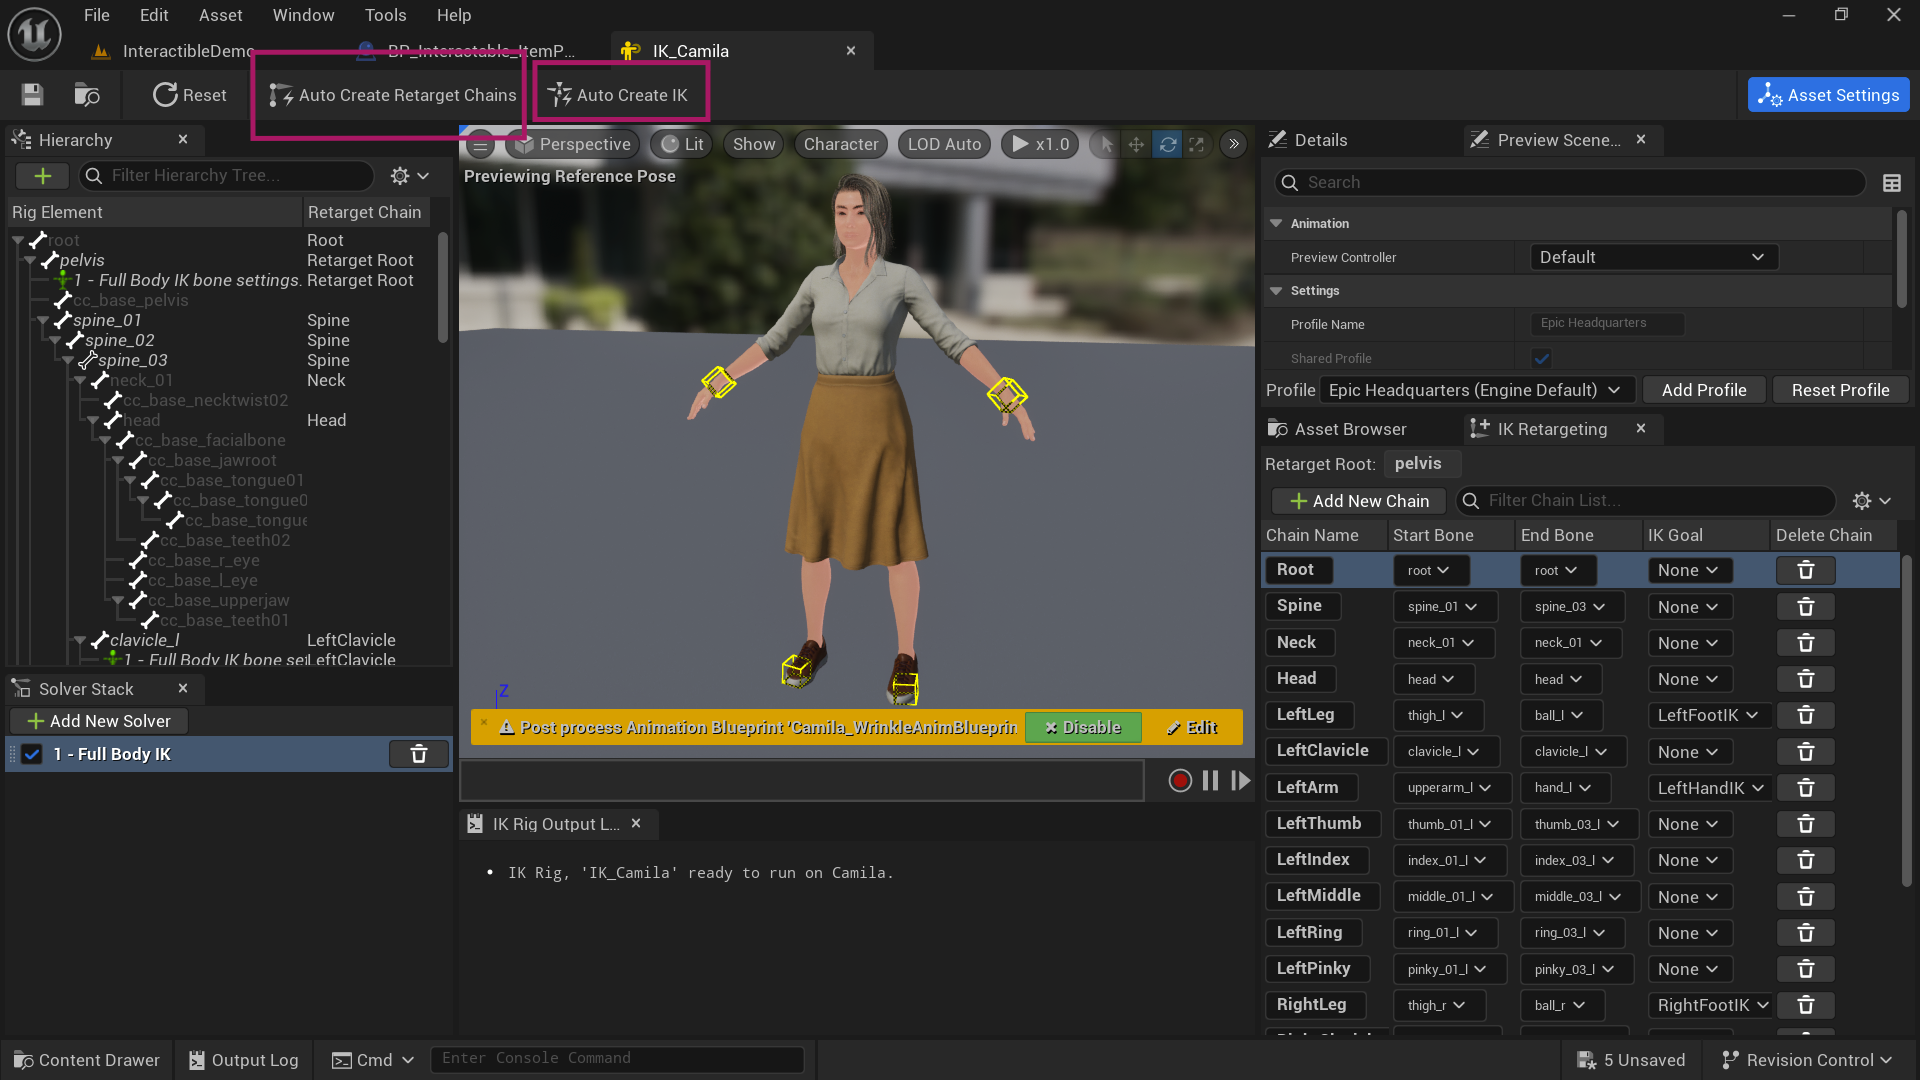
Creating an IK Rig
Once imported, let’s create an IK Rig for our figure (right-click on the skeletal mesh and choose create – IK Rig). Open the asset and infer both the retarget chans and auto IK. Since UE 5.4 this is literally a two click affair and CC figures are recognised 100%.
Creating the IK Retargeter
Right-click in your content browser and create an IK Retargeter. It’ll be blank when you open it. We need a source and target IK Rig, and thankfully we have both. Choose Camila’s IK Rig as the target and the default Narrative Mannequin as the source. It comes with an IK Rig asset called IK_AutogeneratedSource.

We can use the auto-align feature to line up Camila’s resting A-Pose with that of Manny and make manual adjustments if necessary. Feel free to use any of the animations in the Asset Browser at the bottom right to preview the results.
Note that this process has changed slightly in UE 5.6 with the addition of the Op Stack (not shown here). EPIC are still working on it, but to make it work you’ll need at least the “copy base pose” node to make the retargeter do anything.
Creating an Animation Blueprint
The above retargeter is called from a single node in a new animation blueprint we need, so let’s create one. Hook up the “retarget pose from mesh” node and specify your retargeter asset. Save and close it.

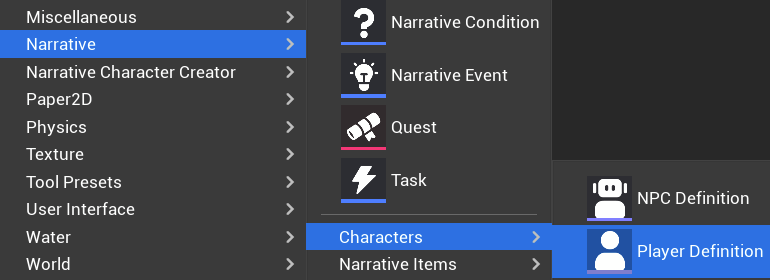
Create a new Player Definition
Narrative keeps track of player appearances via a data asset called Player Definition. Create one by right-clicking in the content browser (under Narrative – Characters – Player Definition).
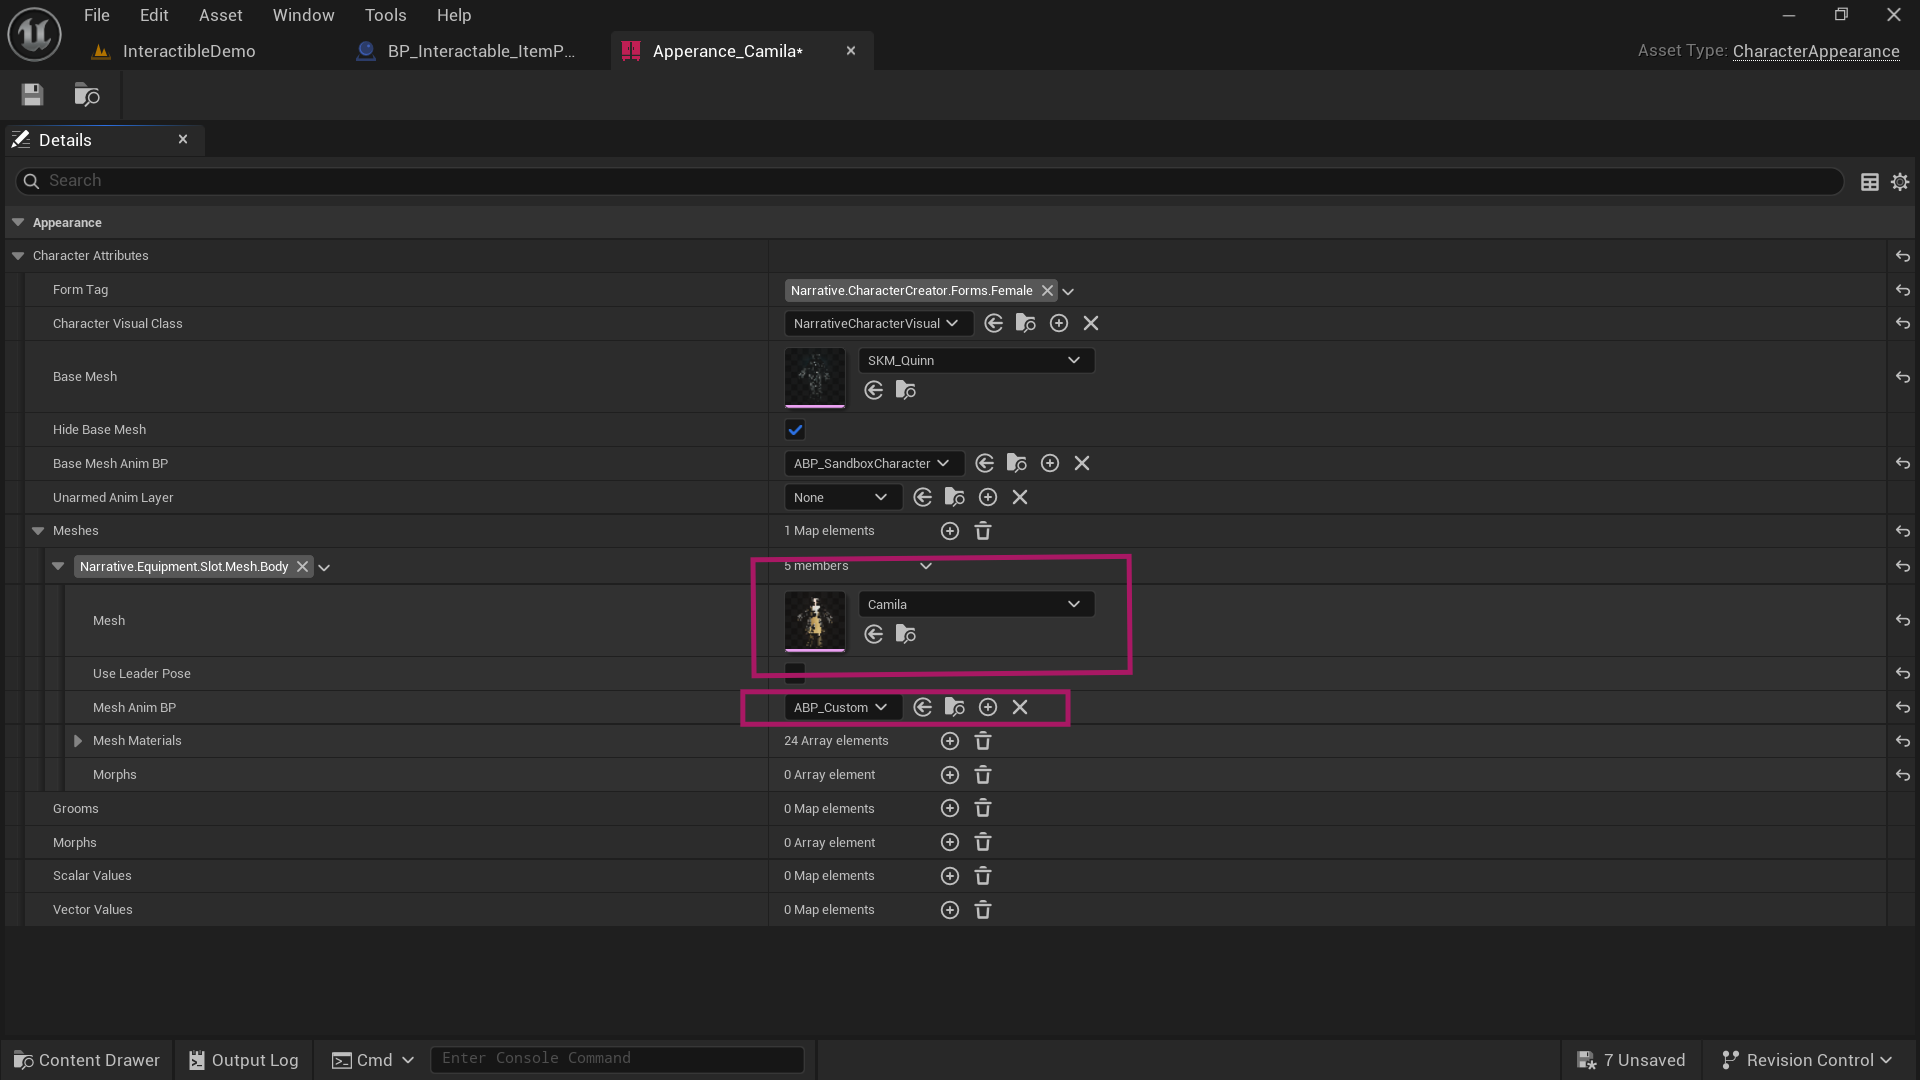
We also need an Appearance asset for the above, which is a collection of what makes up our character visually. Sadly those can’t yet be created from the menu, so we’ll have to duplicate one from the plugin content’s Assets – Appearances.
Open the asset and populate it with your skeletal player mesh (Camila in my case) and the animation blueprint we’ve made earlier. Notice there are two mesh sections: one for the base mesh (that’s an invisible Manny driving the main animation), and our player character. Live Retargeting works by adjusting all animations on the fly from Manny (invisible) to Camila (visible). That way we don’t have to change any of the logic that’s already in place and the character can be swapped out very easily.
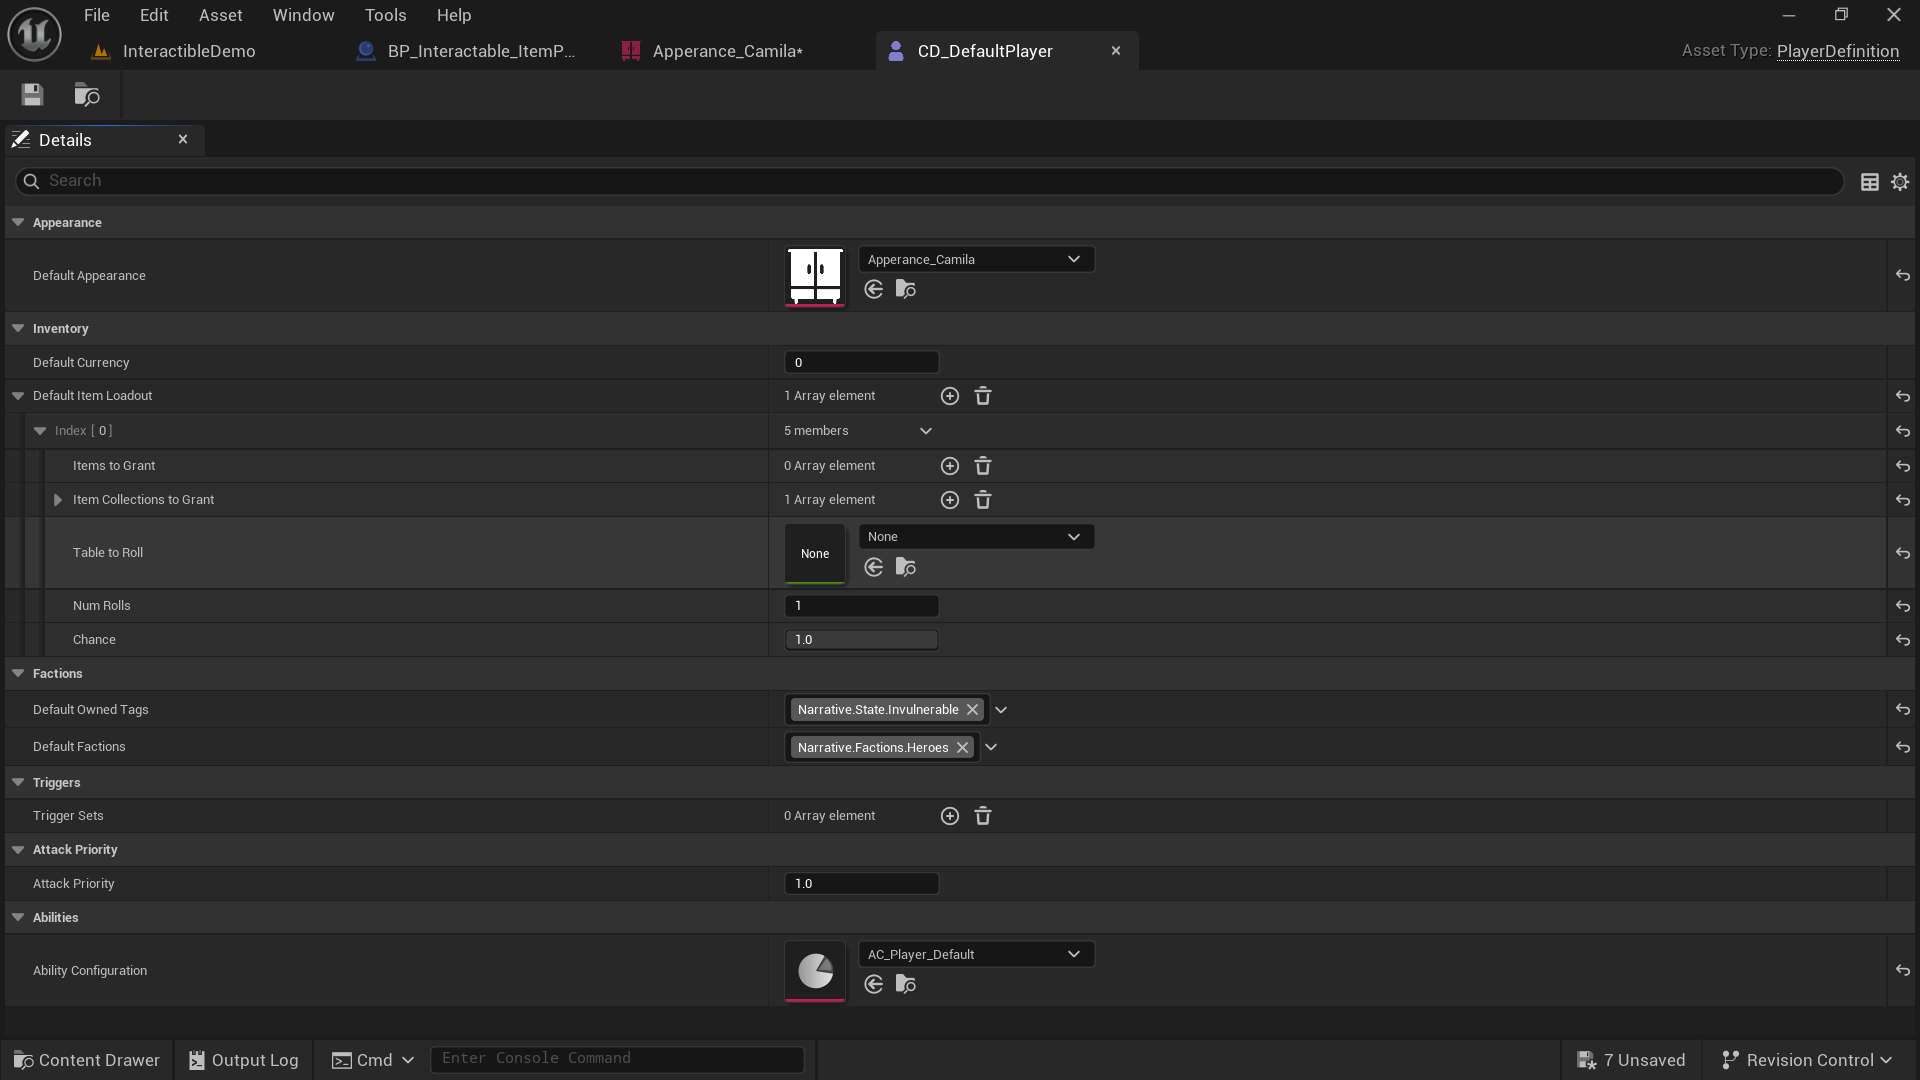
Adding our Player Definition to Narrative
The final piece of the puzzle is for Narrative to use our player instead of Manny. To do this, find and open CD_DefaultPlayer (under Plugins – NarrativeProContent – Maps – DemoLevel – PlayerDefinition). In this section you can also define the inventory for our player (under loadout).
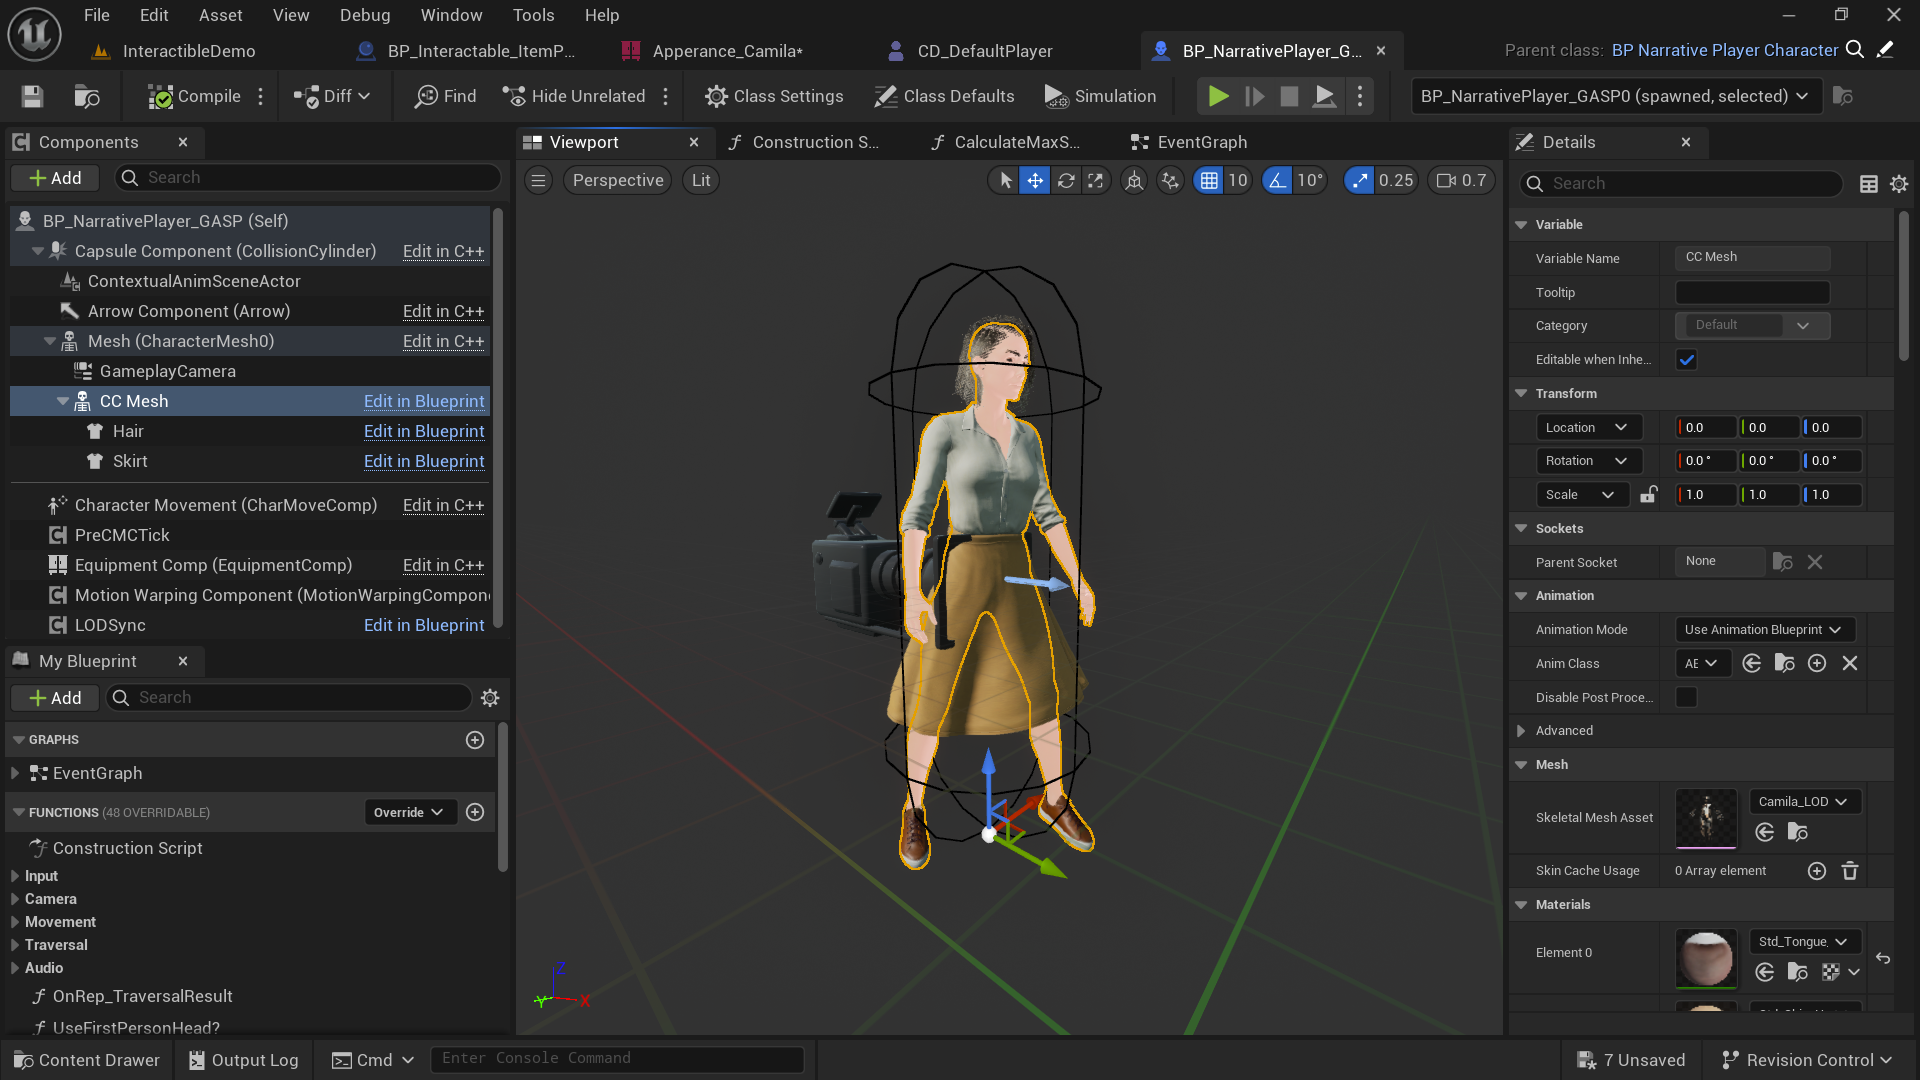
Extra Credit: Adding Chaos Cloth and Custom Groom components
If your character needs special attachments like a separate Chaos Cloth asset, a custom groom hair or any other attachment that isn’t defined in the apperance asset, you can add it directly to BP_NarrativePlayerGASP. I’ve decimated my Camila a bit for performance reasons and split out the skirt from the main mesh like this.
That’s it, I hope this helps! Press play, wait a moment for Narrative to compile a ton of shaders and walk around with your new custom character.
Have fun with Narrative!