The GASP Project is designed with easy extensibility in mind. This means it’s a tad harder to figure out how to amend the project at first, but in this article I’ll show you what to do and where to add your values so your own pawn comes up in the menu.
What we’ll need is:
- a custom skeletal mesh character
- a retargeter for said character (with the UEFN Mannequin as source)
- we need to add said retargeter to the GASP animation blueprint
- a standard blueprint with your character (no logic or tweaks necessary)
- we need to add that blueprint to two variables in the project
Let’s do this!
Creating your new Blueprint
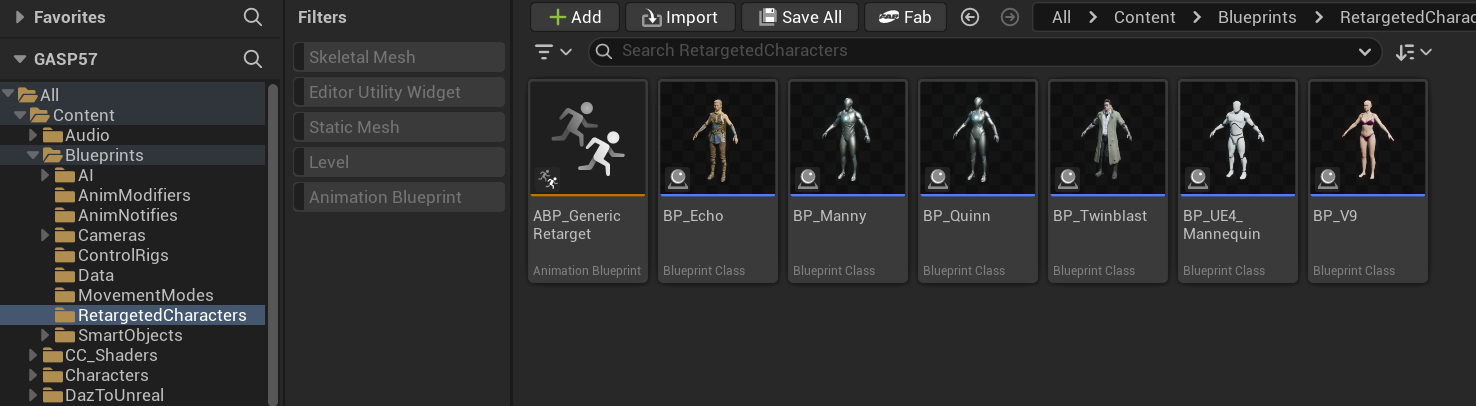
The easiest way to setup your character is by duplicating one of the existing character blueprints under Blueprints – Retargeted Characters. Name it something memorable (V9 in my case), then open it and swap our the mesh with your own.
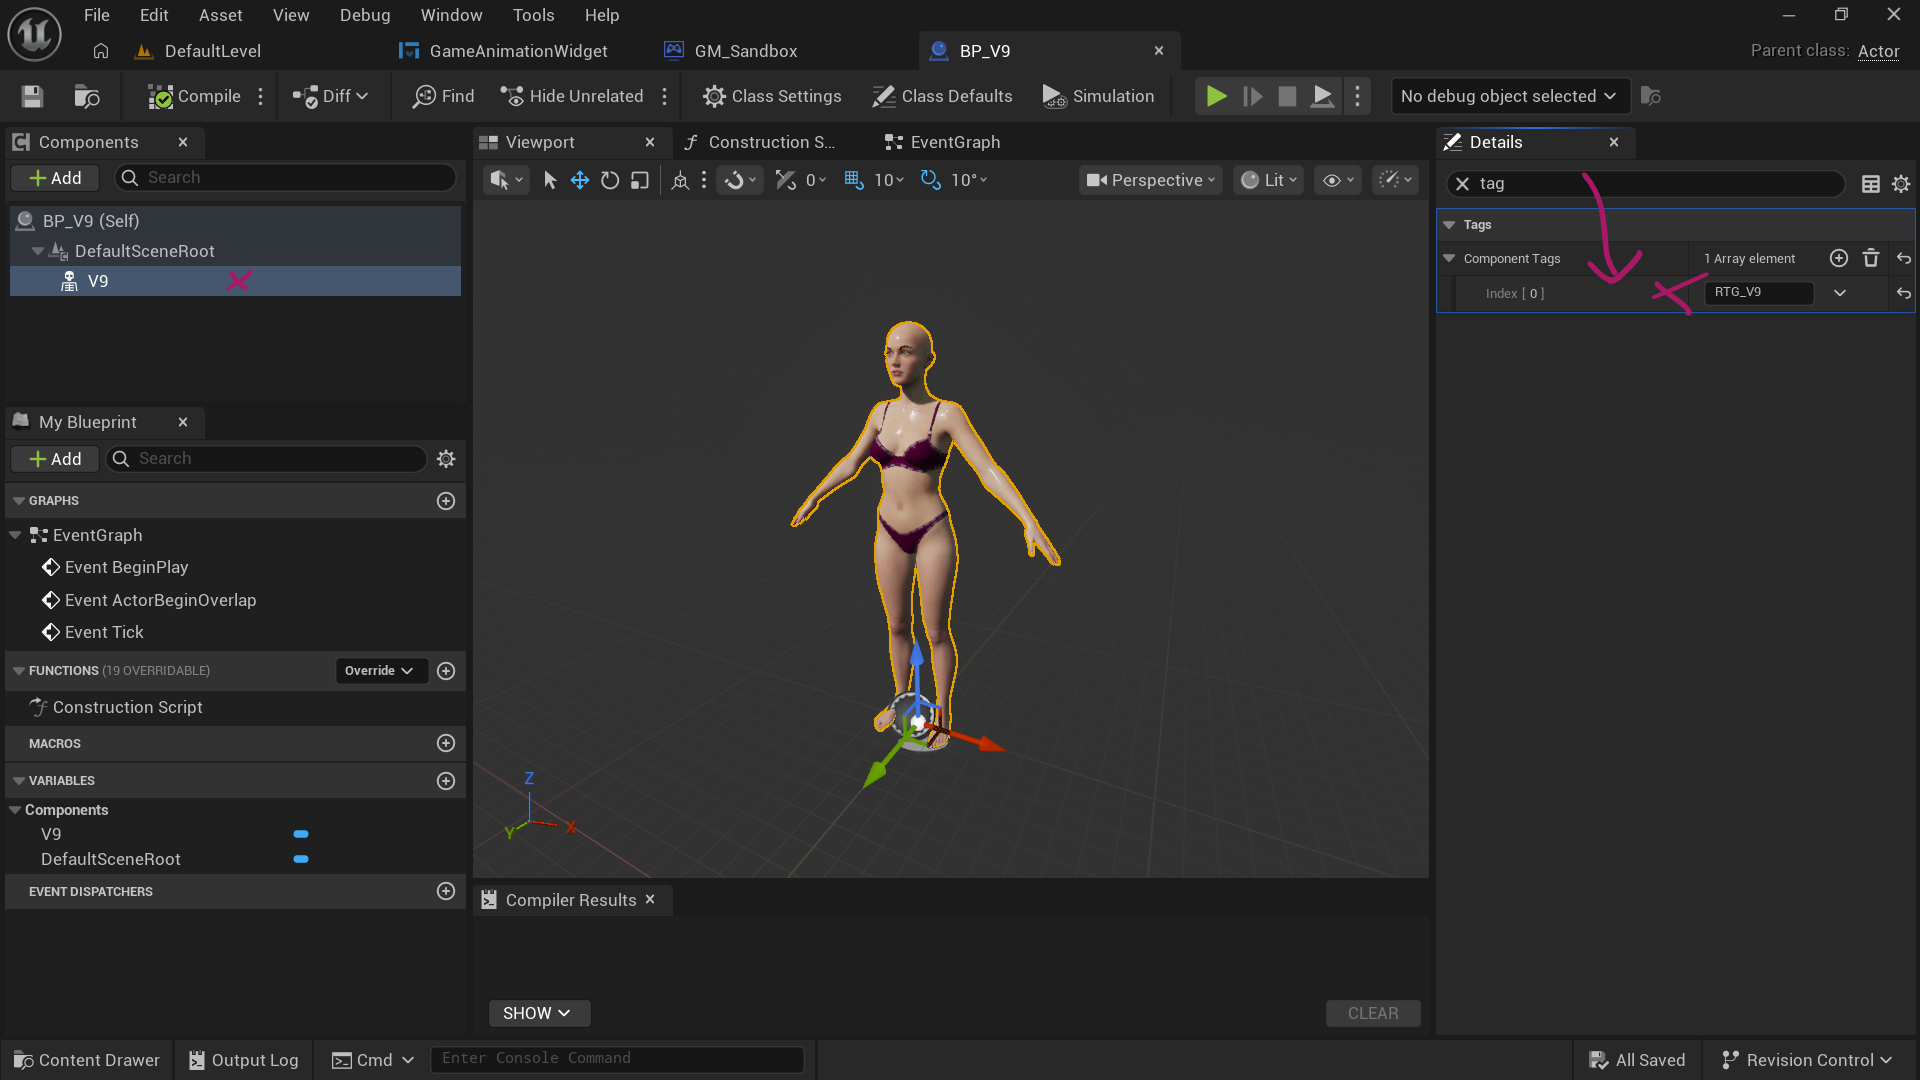
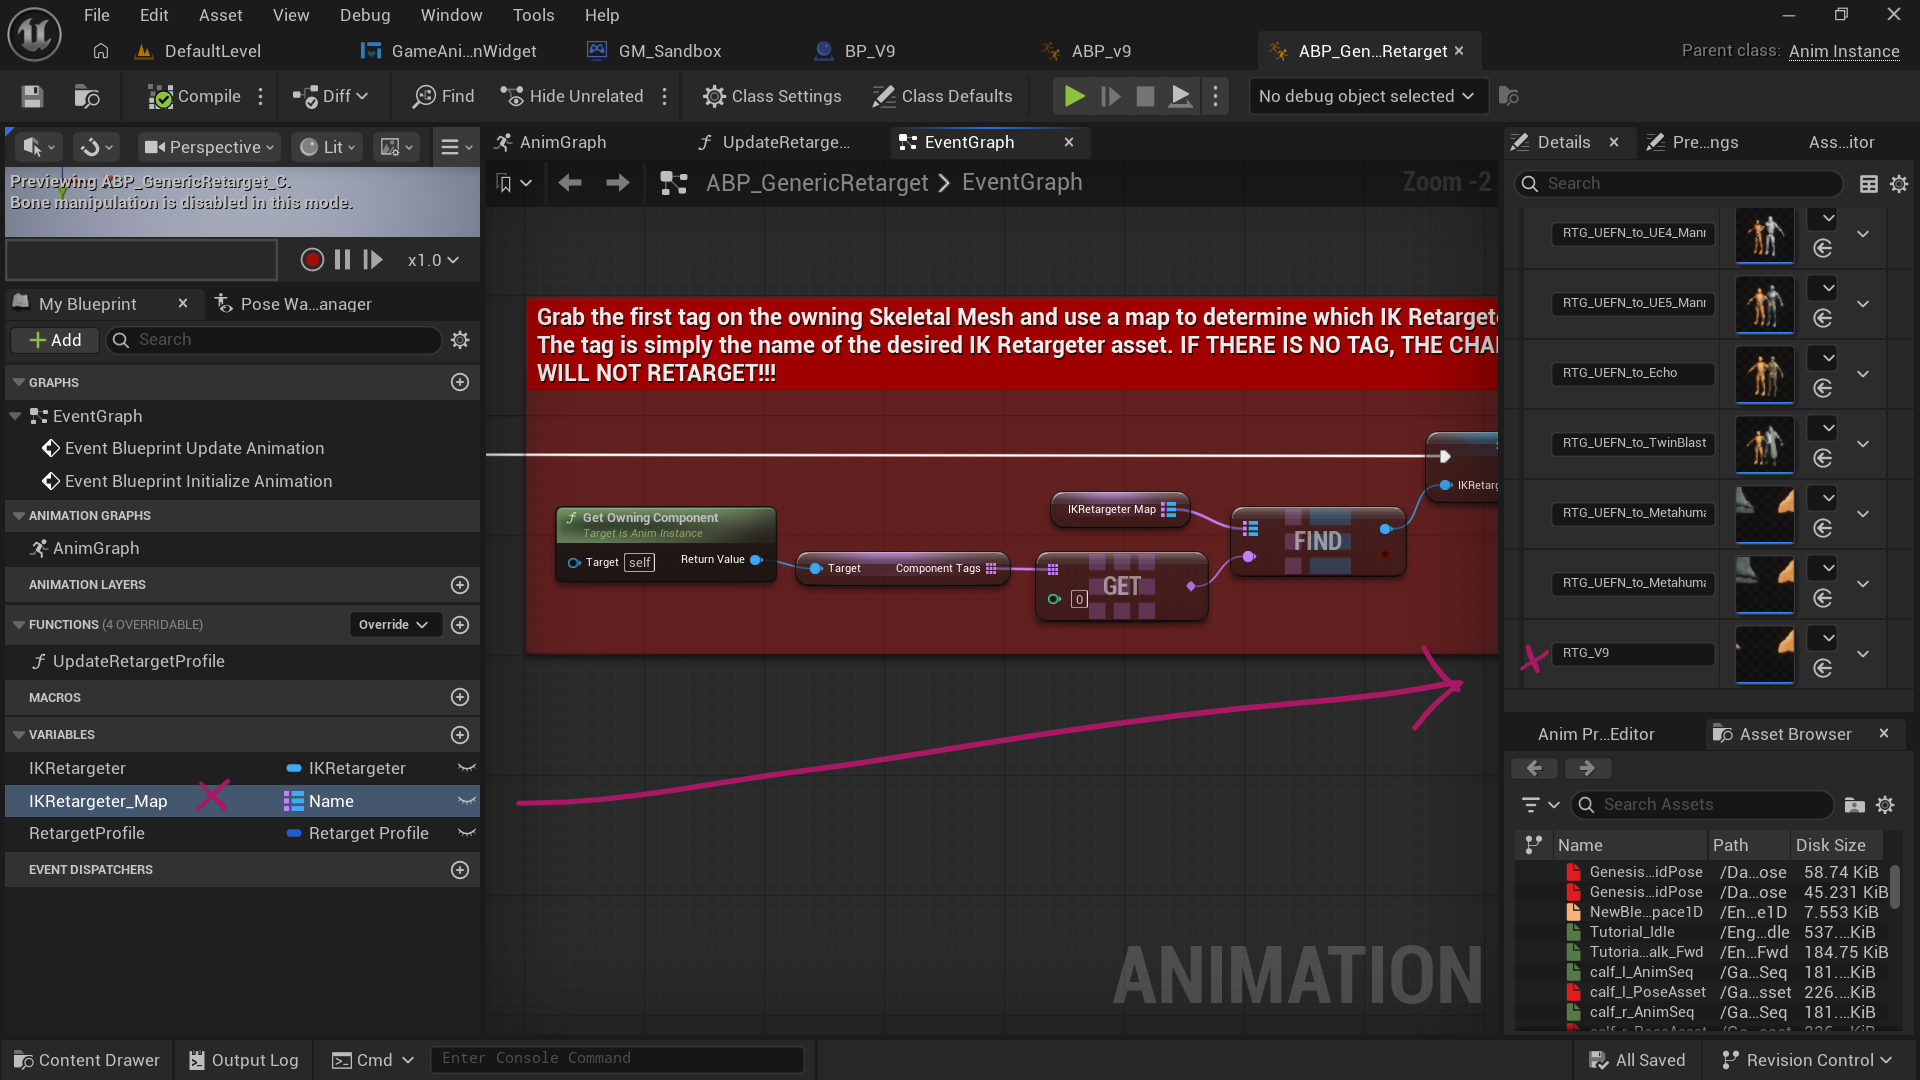
Notice an animation blueprint in this folder called ABP_GenericRetarget. It contains a table that will act as a lookup to see which retargeter needs to be used for your skeletal mesh. We’ll come back to this in a moment when we’ve built one. For now, open your custom blueprint, select your skeletal mesh, and search for “tag” in the details panel and give your mesh a memorable tag. We’ll need that in the generic animation blueprint later. I’ll call mine RTG_V9.
This is where you’d add custom accessories to your figure (clothing, hair, props), as well as logic. You can close this file for now though, we’re done with it.
Creating the Retargeter
Since UE 5.6 we can right-click on our skeletal mesh and make a new IK Rig and IK Retargeter asset with a single click. Let’s do that.
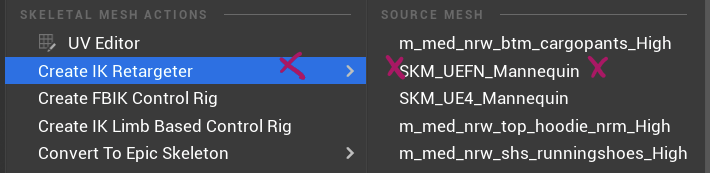
Since UE 5.7, the IK Rig is already fully setup, however in 5.6 you have to open it and setup the retarget chains and IK manually (it’s just two clicks on the toolbar at the top). The retargeter asset will be setup with your source and target IK rigs pre-populated. For this GASP project, we want to choose the SKM_UEFN_Mannequin as a source, since that’s where we’re retargeting from.
Open the retargeter and make the relevant adjustments here, then close the file.
Creating your Animation Blueprint
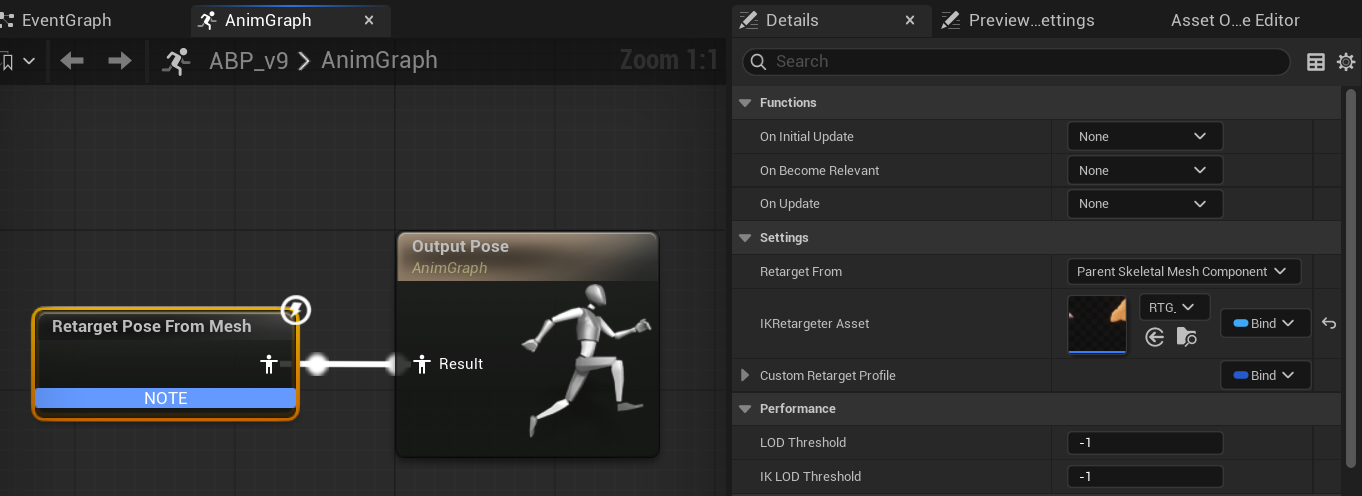
For live retargeting, we’ll need a new animation blueprint. It’ll be super simple: right-click on your skeletal mesh and choose “Create – Animation Blueprint”, give it a name you can remember (like ABP_V9 in my case), then open it up. All we need to connect here is a single node called “retarget pose from mesh”. This node needs the retargeter we’ve just setup, so select the node and populate it on the right.
That’s it! You can close this blueprint. Remember that other animation blueprint that comes with GASP? The one called ABP_GenericRetarget, under Blueprints – RetargetedCharacters? Open it up and add your new retargeter to the map variable called IKRetargeter_Map. You’ll have to add a new entry to the map, then add the tag you gave the skeletal mesh in the character blueprint.
With this we’ve given UE all the parts to make things work in principle, all we need to do now is to add a new option to the menu so we can select our new character.
Adding our Pawn to the Widget
This is a two part process: we need to add our custom blueprint to both the widget itself, as well as the game mode so the added option can be acted upon. Here’s how to do it.
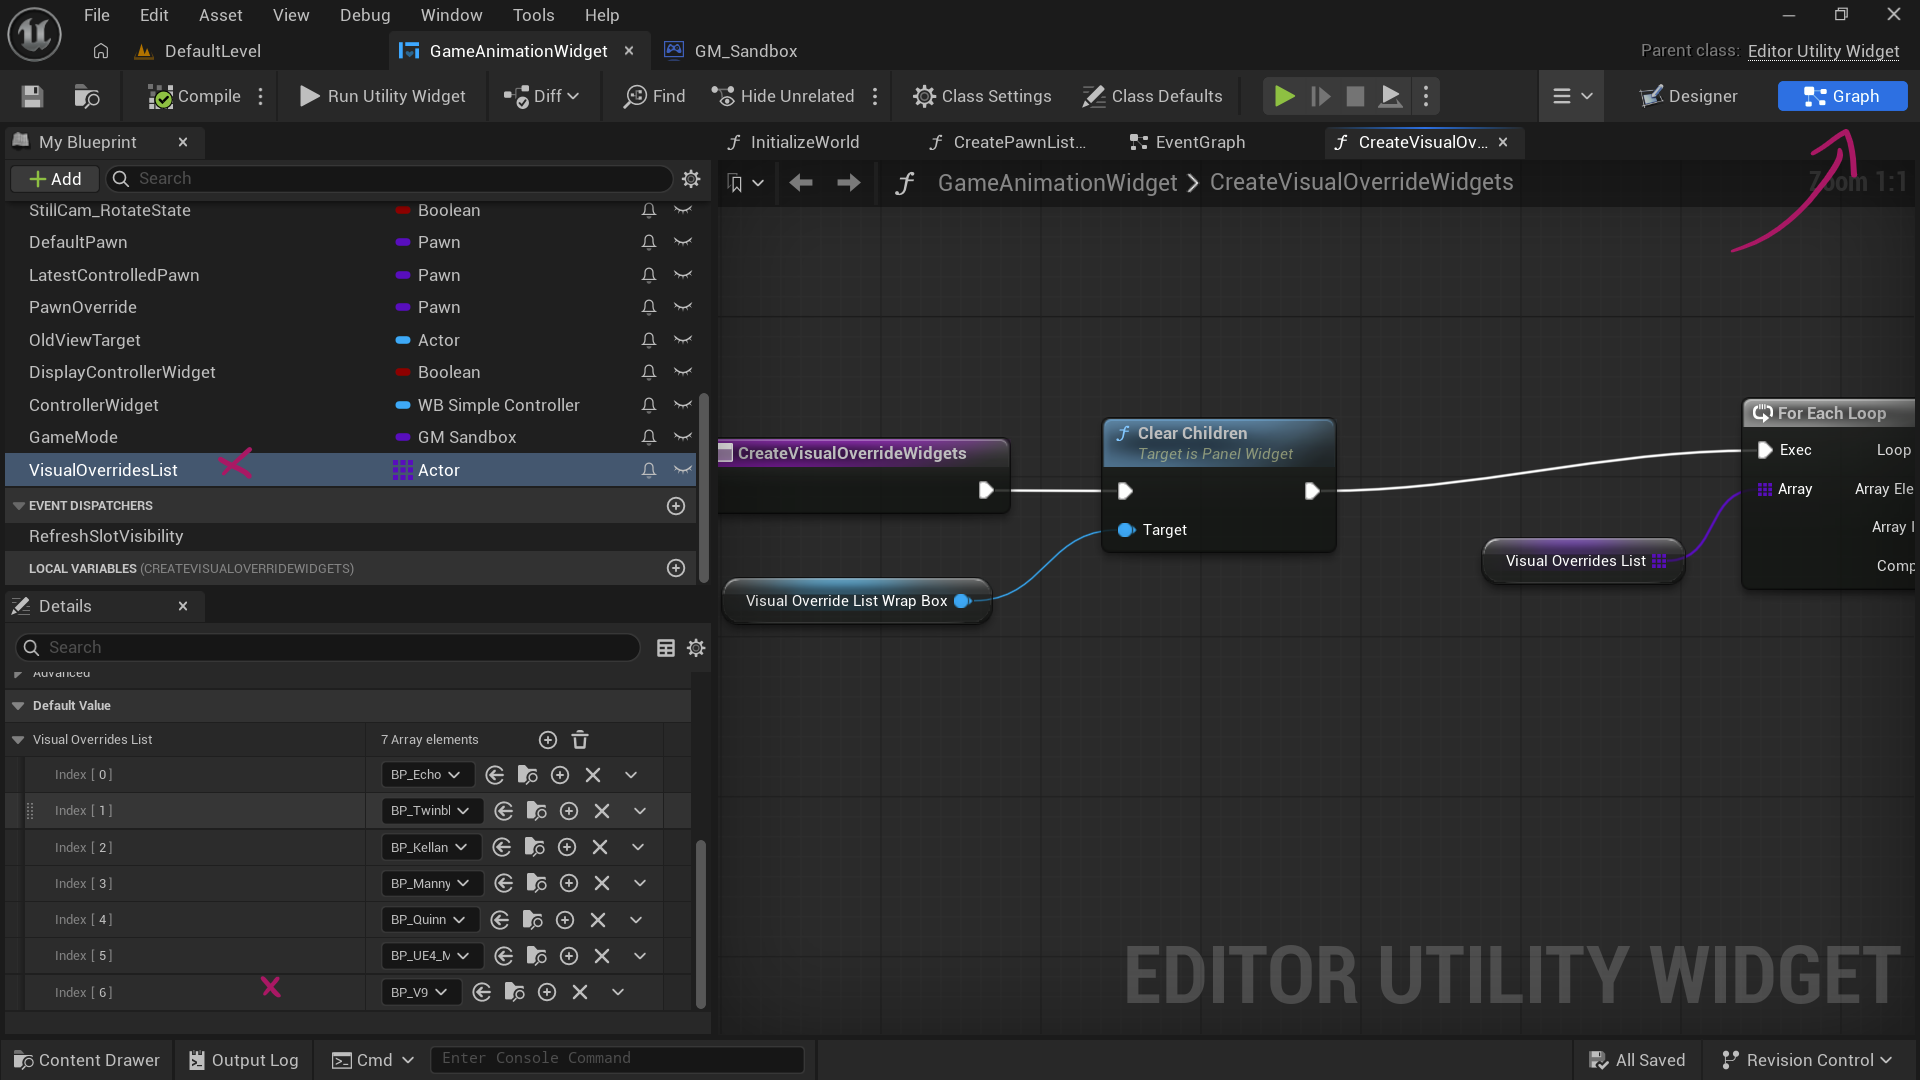
Open the GameAnimationWidget (under Widgets) and switch to the graph section. Find a variable called VisualOverridesList and add an additional entry to this array. Now pick your custom character blueprint from the list, compile and close.
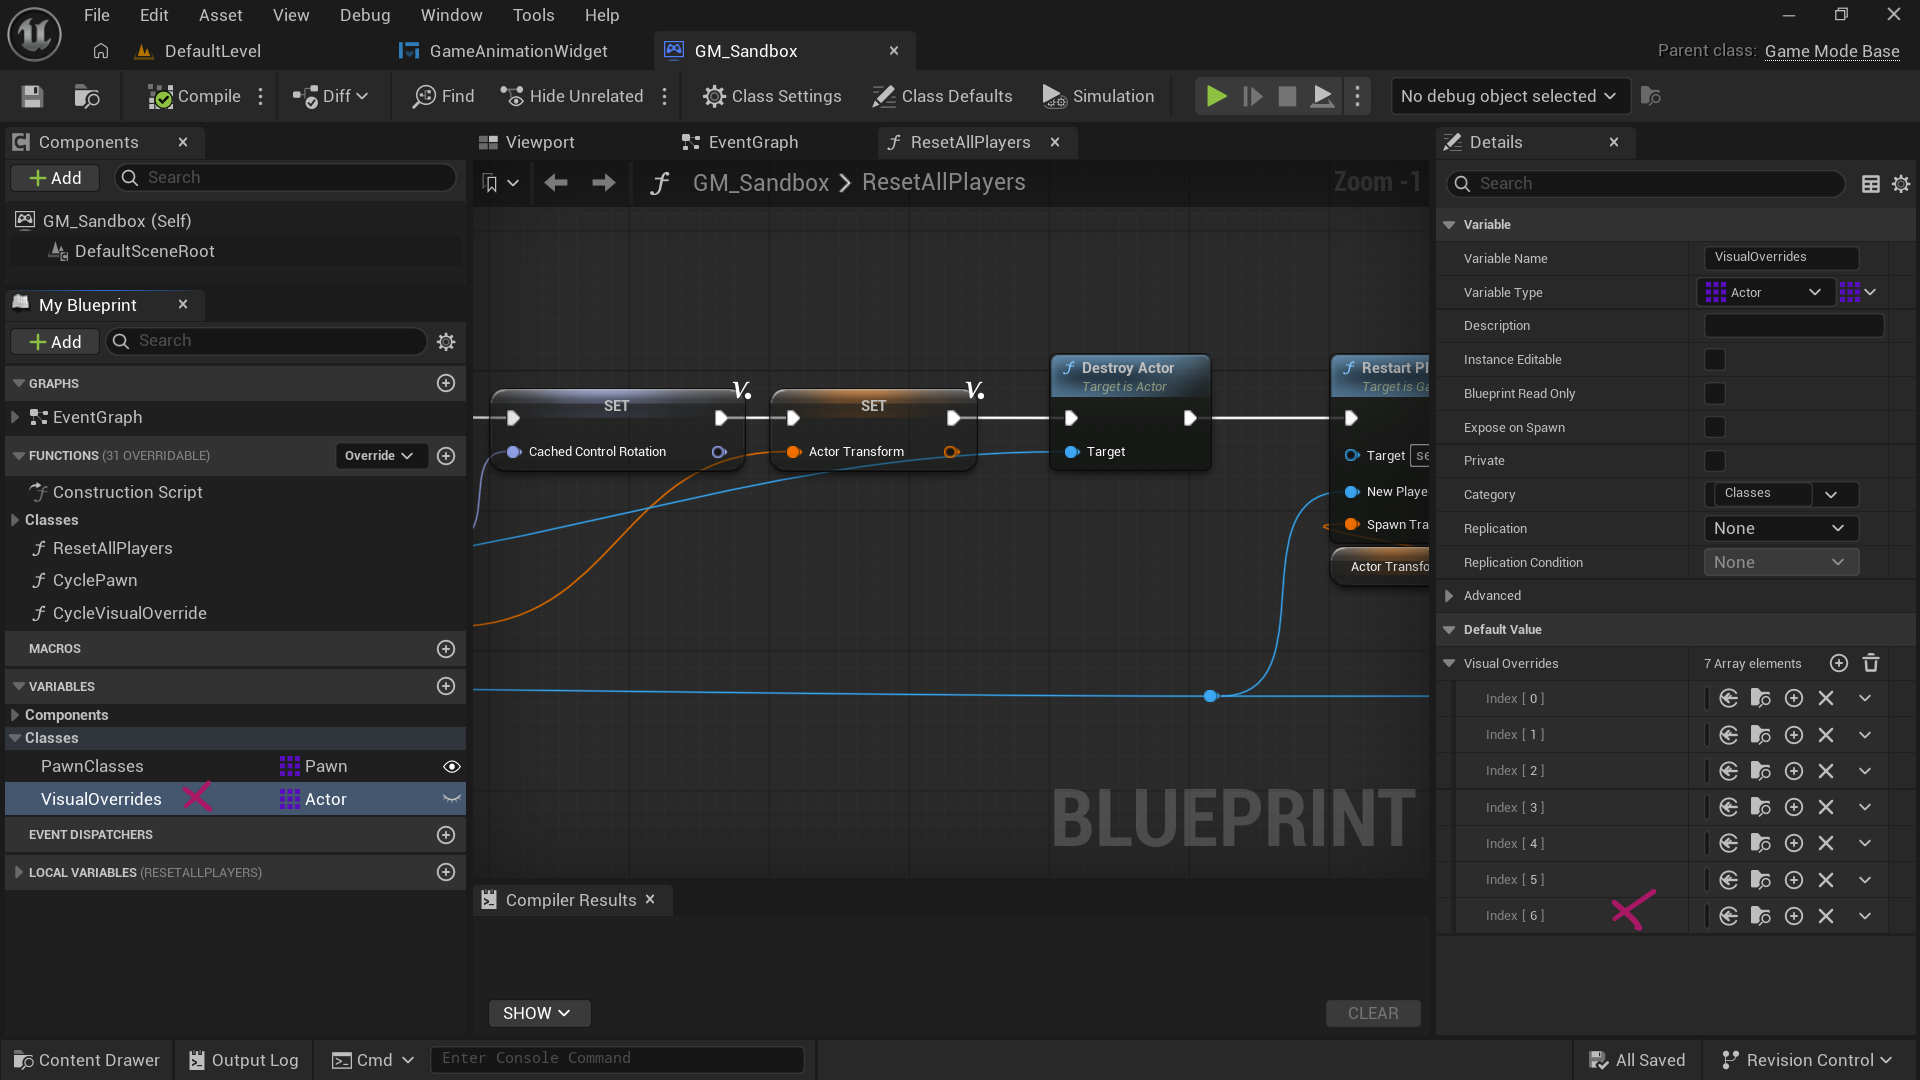
Next head over to the GASP Game mode (under Blueprints – GM_Sandbox). We need to do something similar here, so find a variable called VisualOverrides and add an entry to the array as well. Add your custom blueprint at the bottom and we’re done.
Now when you play the project, you should see your custom character at the end of the list, and when you select it, it’ll be swapped out in the viewport.