If you’ve read my previous article about rendering DAZ Studio files without DAZ Studio, you already know that I’m big fan of batch rendering my images. For this I mainly use the excellent Batch Render Script by Draagonstorm. It allows me to queue up several scenes, and while I do something else, DAZ Studio will load up one after the other and render like a champ.
Windows users have a special treat that can have the same script create a .bat file, allowing the 3Delight standalone renderer to work on a batch of files without using DAZ Studio. Mac users don’t have such luxuries, and will still “block” DAZ Studio until all renders in the batch have finished.
I have good news: for the hackers among us, we can create such a batch queue on the Mac manually, using a simple Shell Script. In this article I’ll show you how to do it. Some Mac/Linux command line experience is necessary to follow along.
Before we get started, we’ll have to render several images via RIB. I’ve explained how to do this in a previous article.
Those RIB files will live in a folder into which we need to change so that we can easily access our files from the command line. Direct paths will of course work, but that would mean a lot of typing – so let’s make it easier for ourselves.
Open a Terminal session and type cd, followed by a space, then drag the enclosing folder from Finder right into the Terminal window. Now hit Return.
You can use the renderdl command followed by the RIB file name, to kick off a render without DAZ Studio. This is done by the magic of 3Delight’s standalone render engine, called 3Delight Studio Pro (which needs to be installed for this to work by the way). Type ls to list all files in that directory if you like.
In my example I have three RIB files, called Test1.rib, Test2.rib and Test3.rib. To render the first one, I can type the following:
renderdl -id Test1.rib
This will open i-Display (thanks to the -id flag) and show me how the render is progressing. i-Display will also collate the renders and let me see which ones I’d like to save later. Still, this will only render a single image, and we want to utilise some command line magic to render multiple images without getting involved.
Well by far the easiest method is to specify more files with this command, like this:
renderdl -id Test1.rib Test2.rib Test3.rib
You can also create a shell script to do the same thing. It’s just a simple text file.
How you create the script is up to you: if you’re comfortable using vi you can do it from the command line, or if this freaks you out (don’t feel bad if it does), assemble the following lines in TextEdit and save the file into your RIB directory.
All we need to do for a simple shell script is to add each render command on a new line, like so:
renderdl -id Test1.rib
renderdl -id Test2.rib
renderdl -id Test3.rib
Amend with many more as desired. I’ll call my file batch.sh. Typically shell scripts have the ending .sh, but it’s not really necessary. Usually they have an opening line that tells the interpreter the location of the scripting engine, but we don’t need this for our purposes either. So it’ll just be a list of render commands, as many as you like.
To run the command, we need to give this file execute permissions. Back on the command line, type in the following (assuming of course that batch.sh is the name of your batch file):
chmod +x batch.sh
Now we can run the file by prefixing it with a “dot slash” – otherwise the shell will tell us it can’t find the file. We need to tell it to specifically look in the current directory, and that’s what ./ does:
./batch.sh
3Delight will spring into action and render the first file, the progress of which will be shown in i-Display. When it’s finished, it will automatically start rendering the next file, and so forth. Meanwhile you can keep working with DAZ Studio, go shopping, or go to sleep.
At the end of each render pass you’ll see some log output, feel free to read or ignore it – it’s similar to what DAZ Studio will tell you when a render has finished. When the whole batch is finished, i-Display will look similar to this:
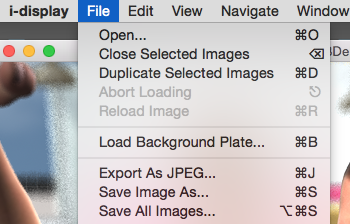
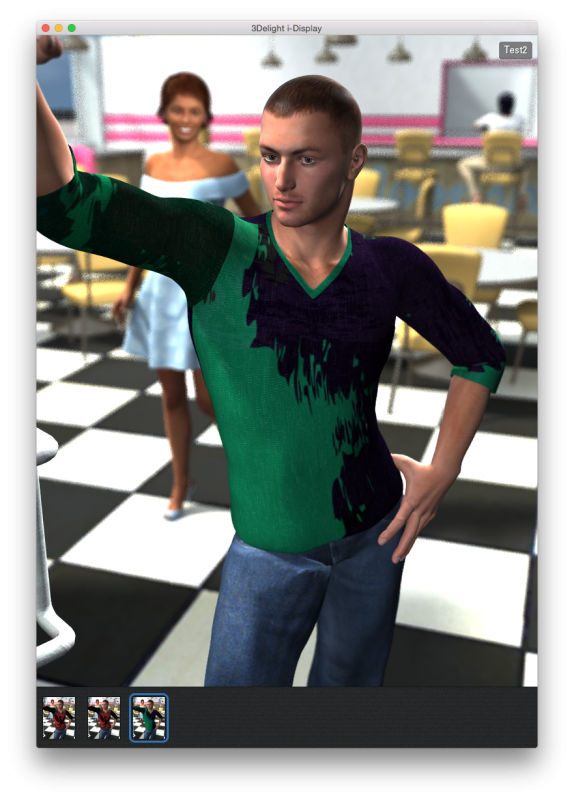 Your latest render will show, and all previous renders from this session will be displayed as thumbnails at the bottom. I haven’t worked out how to save them from the command line yet, so until such time, select each image and either choose Save Image As (it lets you select an image title and output format), or choose Save All Images (in which case, all will be saved as TIFFs).