Sometimes we need to render images that include shadows without objects to cast them on. In multi-pass rendering for example, where we may have a background and would like to render a figure separately, the figure’s shadows can only be cast if the background is rendered at the same time.
It’s easy to do by creating a plane primitive, have our character walk on that, and turn it transparent. However, if an object is transparent, then no shadows are cast upon it. So how do we solve this conniving conundrum?
With DAZ Studio’s Shadow Catcher function of course! Shadow Catcher is a node (or brick) in Shader Mixer, which will let us do just that: render shadows without the plane underneath it. Let’s see how we can set this up.
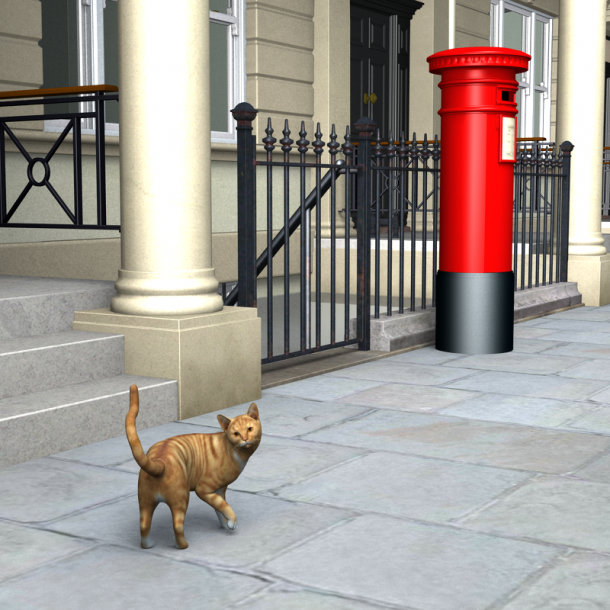
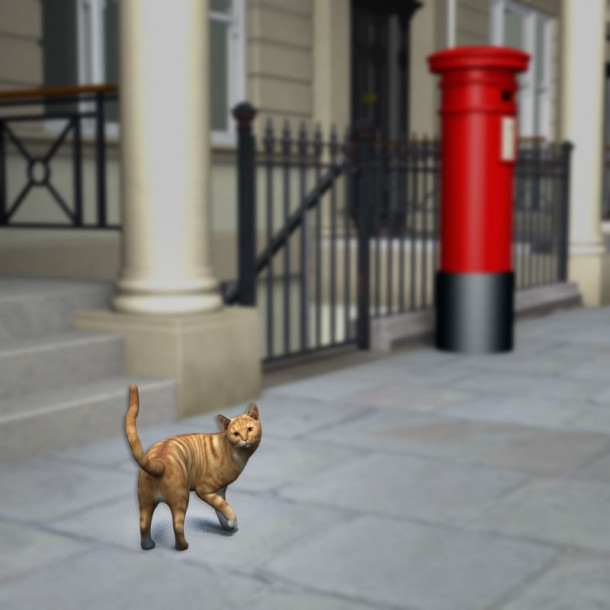
We’ll stick with the example of the cat above: imagine the background is incredibly complex to render and would take two hours. The cat alone would only take 2 minutes to render, so a quick change to the cat doesn’t require a full 2 hour render again. To compose the background and the foreground, we need the background on its own. That’s easy: simply switch off the cat and we have the background.
Next we’ll switch off everything in the image except for the cat. To emulate the pavement, we’ll create a plane primitive so that our car has something to walk and cast shadows on. The plane will be in the same place as the “real” ground would be. All other background elements (except for lights) can be made invisible.
Here’s what our cat looks like on a simple plane. Notice that it includes the shadows, but of course it also includes our plane at this point, making it difficult to compose our cat together with the background.
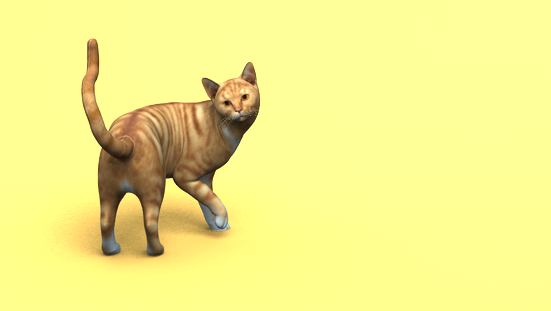
Note that I’ve coloured the plane to illustrate the effect: by default, it’ll be white and hence difficult to show in this article. Anyway, select the plane with the Surface Selection Tool and make sure all surfaces are selected (in the Surfaces Tab).
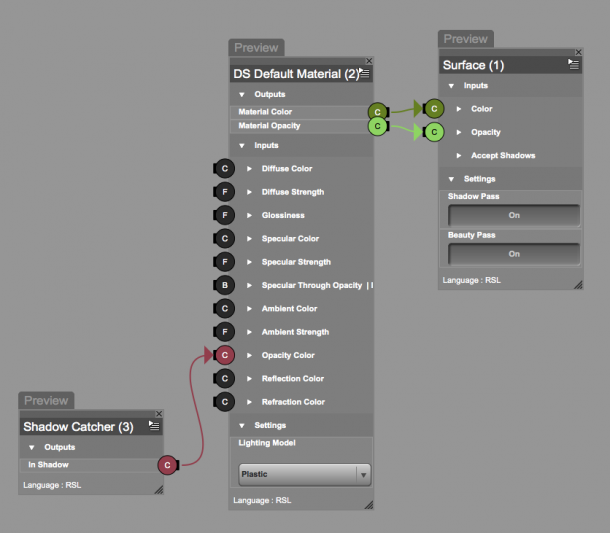
Now it’s time to head over to the Shadow Mixer Tab. This may be a little confusion if you’re never seen it before, but in essence it’s just a different representation of the Surfaces Tab. Here’s what it looks like:
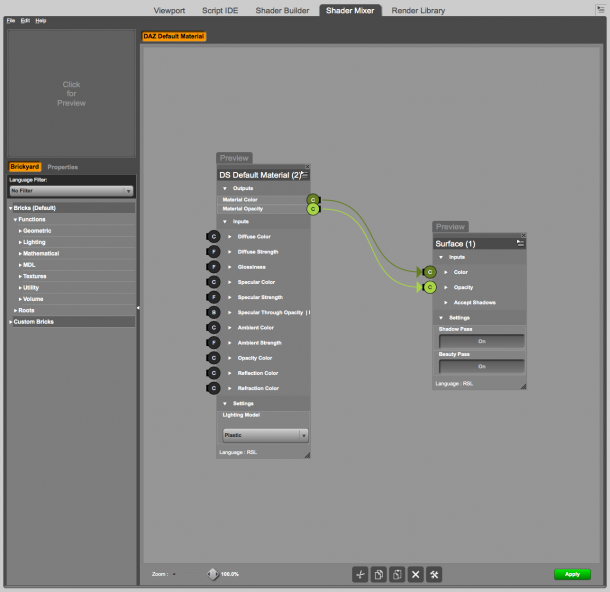
Since all we have on the plane is a default material, there’s no need to import anything from the scene. Shader Mixer will open with such a material (see above), which is perfect for our purposes. All we have to do is add a Shadow Catcher Brick to this default shader.
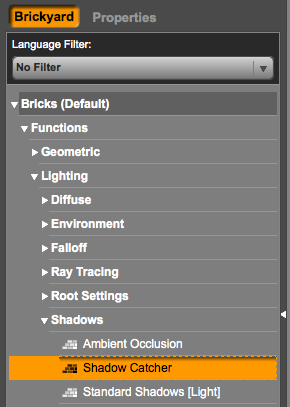
You can find it on the left hand side under Bricks – Functions – Lighting – Shadow Catcher. Alternatively you can right-click anywhere in the node editor and bring up the same menu.
The output of the Shadow Catcher needs to be plugged into the Opacity Colour input of the default material. Do this by click-dragging from output to input – just like in Poser.
Believe it or not: that’s it already! All we need to do now is apply the shader to our plane (green button at the bottom right). When rendered, the plane itself will now become invisible, but the shadows cast on it will show up – perfect for compositing our cat together with the background!
TIP: If you find that your shadows don’t render dark enough, change the colour of the plane to something that matches the image you’d like to combine it with, or otherwise to a dark grey. The default is a very light grey or white, which means that the shadow catcher will render your shadows onto that colour. By setting the plane’s diffuse colour to something else, shadows are rendered onto that colour.
Thank you very much!
Thanks so much!!
“You can find it on the left hand side under Bricks – Functions – Shadows – Shadow Catcher. ”
Should read “Bricks – Functions – Lighting – Shadows – Shadow Catcher”
Thank you for bringing that to my attention. I’ve corrected it 😊