Setting up a Shadow Catcher in Blender is a bit more tricky than in other applications, but nevertheless straightforward if you know what you’re doing. I certainly did not when I first tried it, but thanks to this short YouTube video by Nonsense Blender Tutorials, I was able to set this up.
Here’s how to do it:
Scene Setup
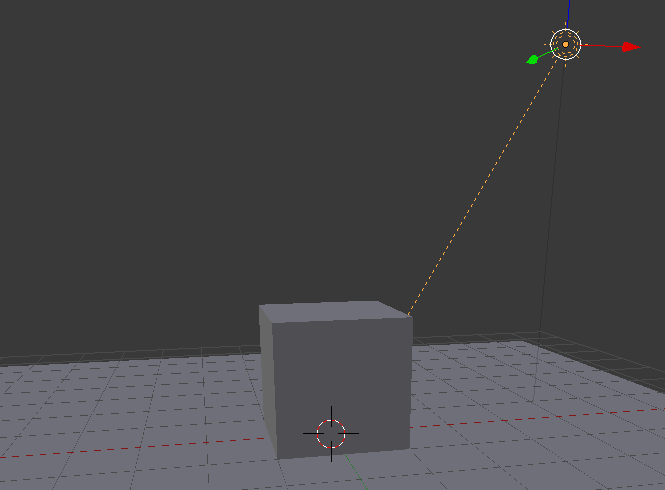
Let’s use the the default scene with the cube and add a plane. Move the plane to the second layer (by pressing M 2). SHIFT select the first two layers so that both objects are showing together.
Perhaps adjust the light a little and make it slightly brighter.
Render Layer Setup
Now we need to tell Blender that we’d like it to render our image in two passes onto two separate layers: one will be our object, the other one just the shadow on our plane.
To do that, head over to the Render Layers tab in the Properties Palette and create a second layer (one should already be there). Let’s name one Object and the other Shadow Catcher so we can tell them apart.
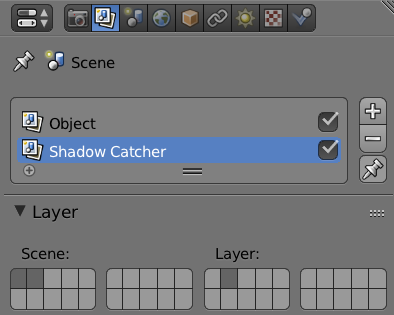
See those little layer tabs underneath this list? With those we can tell Blender which pass goes onto which layer. Under Scene, SHIFT select the first two layers, just like we did in the scene.
Under Layer, we need to associate our Object Layer with the first tab, and the Shadow Catcher with the second tab. So select your Object Layer first, then hit the first box under Layer. Now select the Shadow Catcher layer and choose the second tab under Layer (it’s more complicated to explain than it actually is).
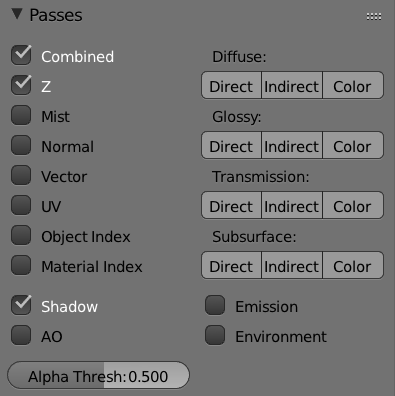
Further down there’s a Passes section. Tick the Shadow box here so that Blender does a separate render pass just for the shadow.
Render Setup
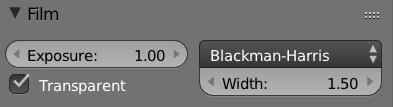
In the Render Tab in the Properties Palette (the one with the little camera icon), find the Film section and choose Transparent. We need this so that Blender will render our background transparent rather than dark grey.
We’re done with the setup now. Hit Render and see Blender go to work with two passes. Let’s combine these into a single transparent image that will show just the object and its cast shadow.
Compositing our layers
Split your viewport and switch to the Node Editor. Make sure it’s set to compositing mode (second icon) and select the Use Nodes option.

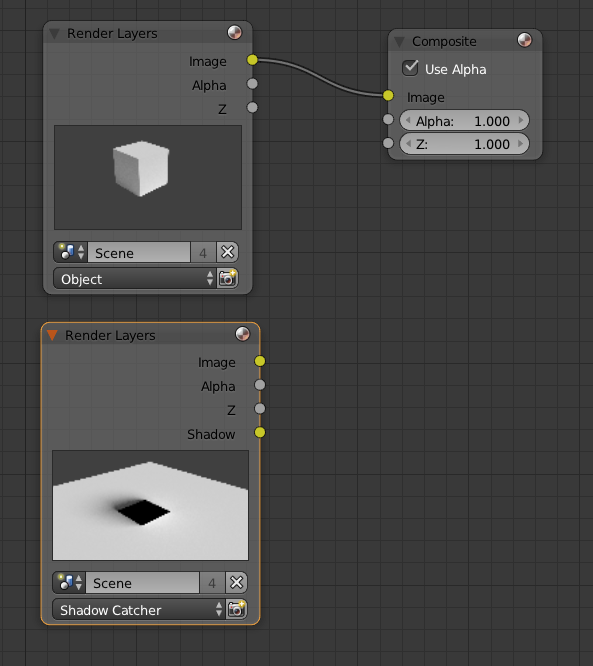
You’ll see two nodes now: the first Object render layer connected to a Composite node. Select this node and duplicate it with SHIFT + D. Change this new node to Shadow Catcher, which makes it display our second render layer. Now we have access to both layers that Blender has rendered for us.
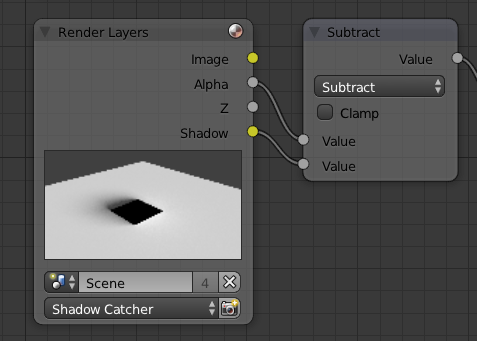
Now we’ll create a Math Node (Add – Converter – Math) and set it to Subtract. We’ll connect the Alpha of our Shadow Catcher node to the top value input, and the Shadow output to the second input.
Next we’ll create a Set Alpha node (Add – Converter – Set Alpha) and connect the Subtract node’s output to the Set Alpha node’s input.
Now we’ll create an Alpha Over node (Add – Color – Alpha Over) and connect the Set Alpha node’s output to the top input of the Alpha Over node. Connect the Alpha Over’s output to the input of the existing Composite node.
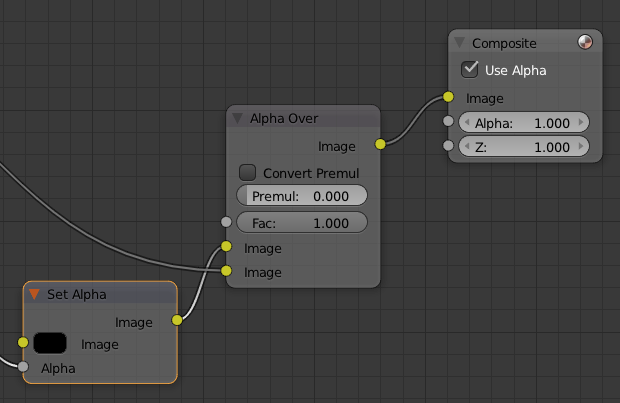
And finally, let’s connect our first Render Layer node (Object) to the bottom input of the Alpha Over node. This will now compose both render layers the way we want them to look, i.e. displaying a transparent image of just our object and the shadow being cast (minus the plane).
Here’s what the full node setup looks like:
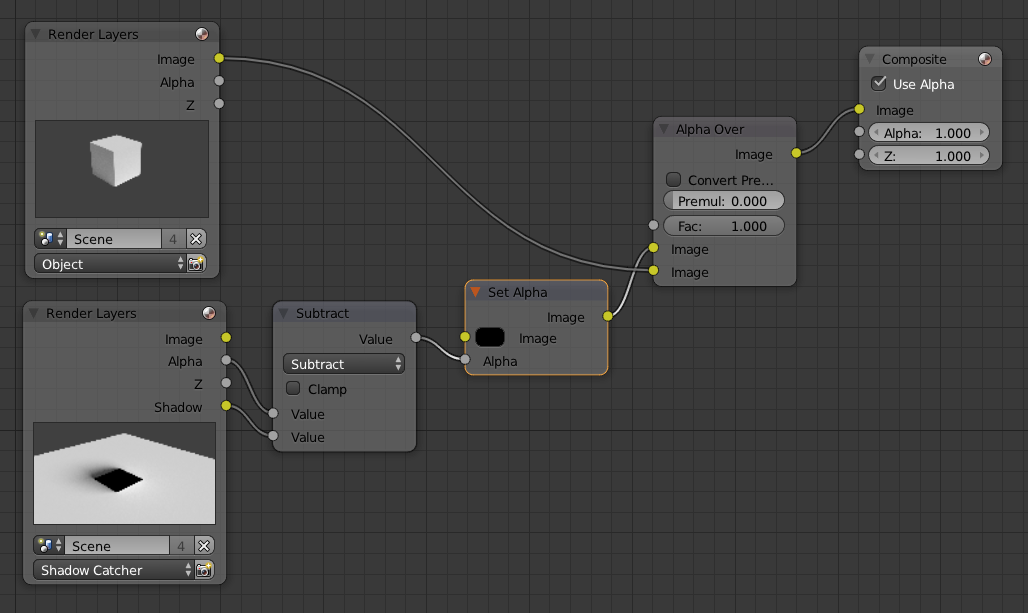
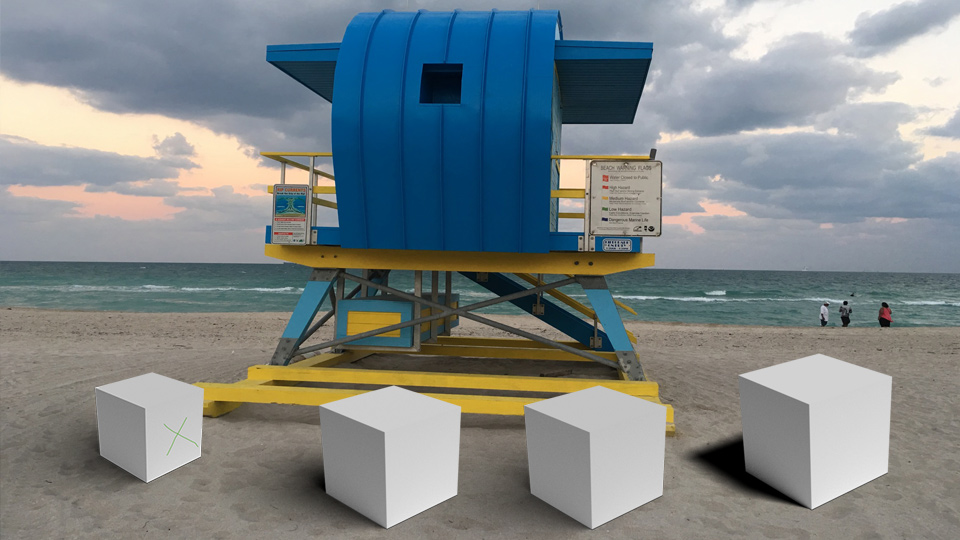
Now we can use our render and add it to our favourite backgrounds. To control the intensity of the shadow being cast, adjust your light source accordingly.