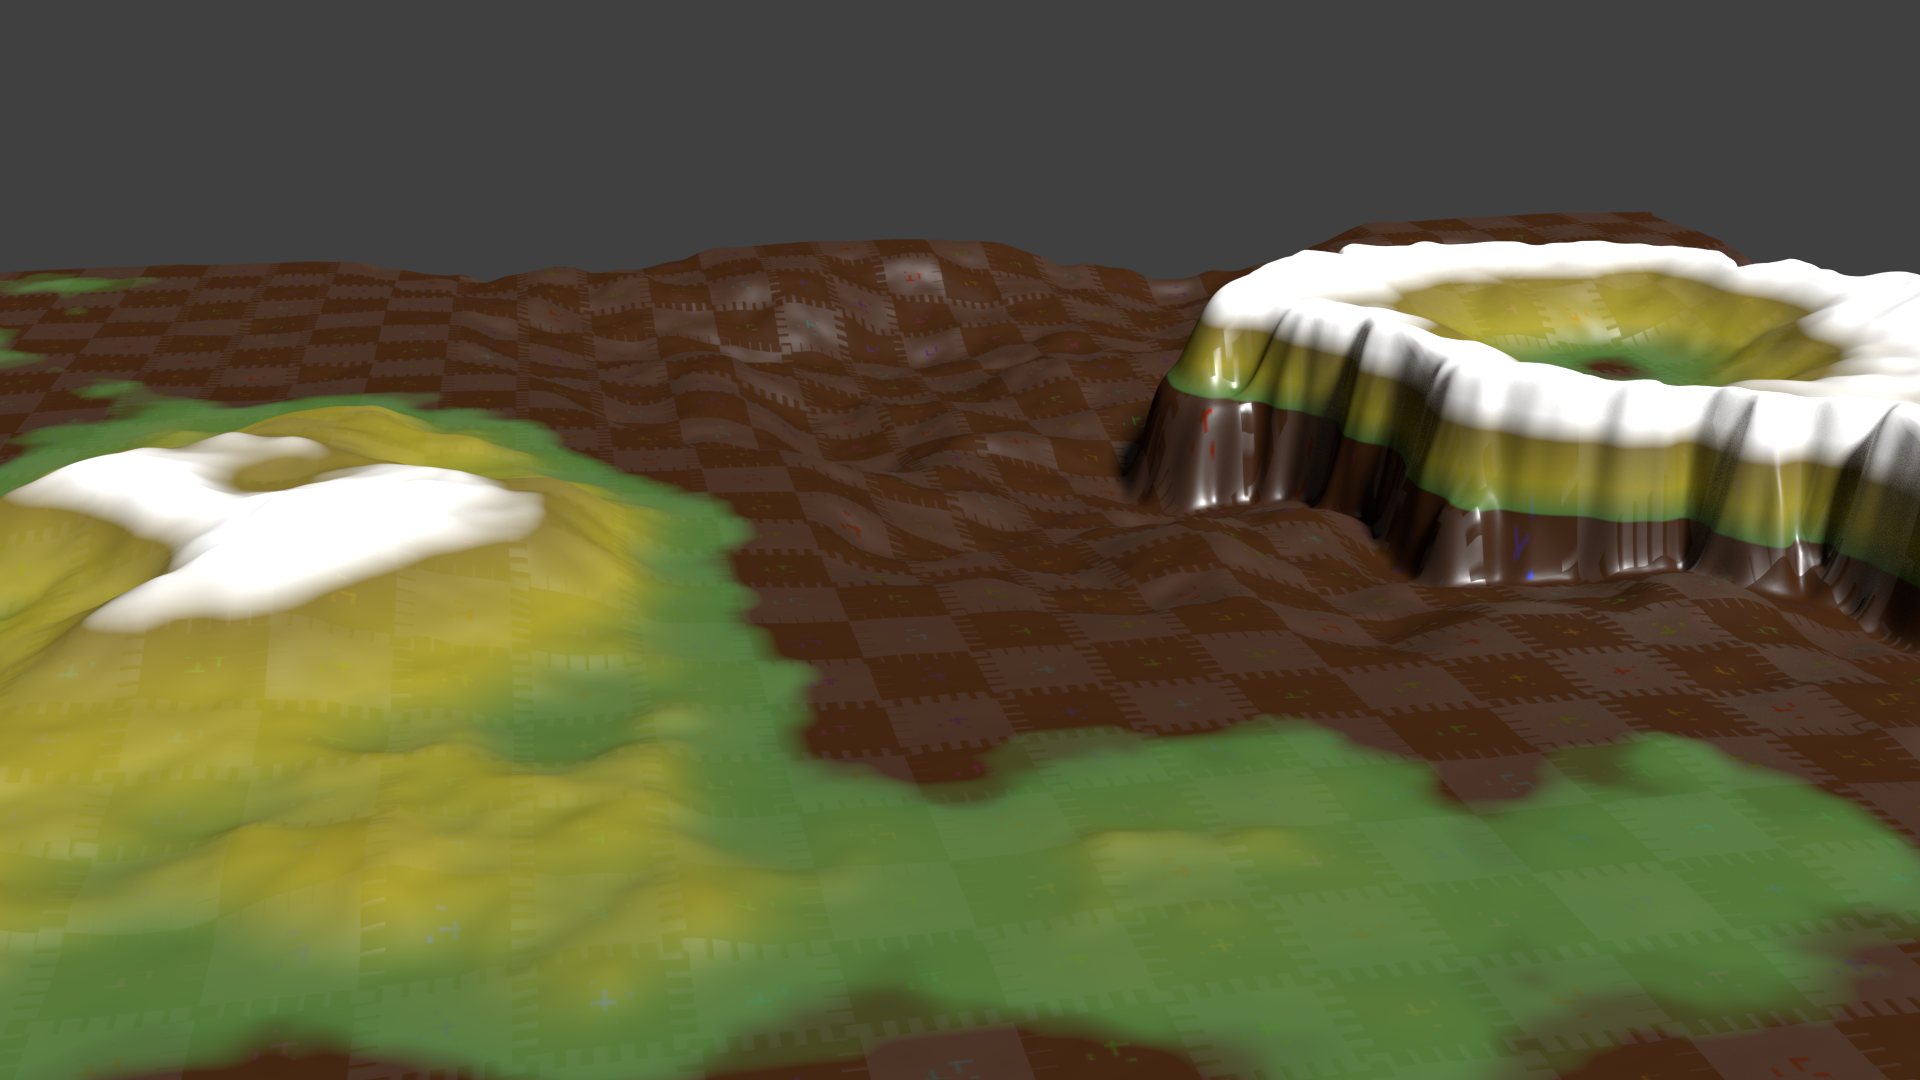
While we were discussing how to generate a terrain in my previous post, the next question is of course how to we give our terrain different colour values depending on its height.
For example, at the very top of our terrain we may have snow covered mountains. Slightly further down we have yellowish rocks on the steep walls, followed by green grassy planes, and more earthy brown tones further down.
Blender does not have a specific heigh shader like Carrara does, but we can use a Texture Coordinate node, extracting the Z axis value from it and feeding that into a colour ramp node. The result is something like the render above.
Here’s what the Cycles shader looks like: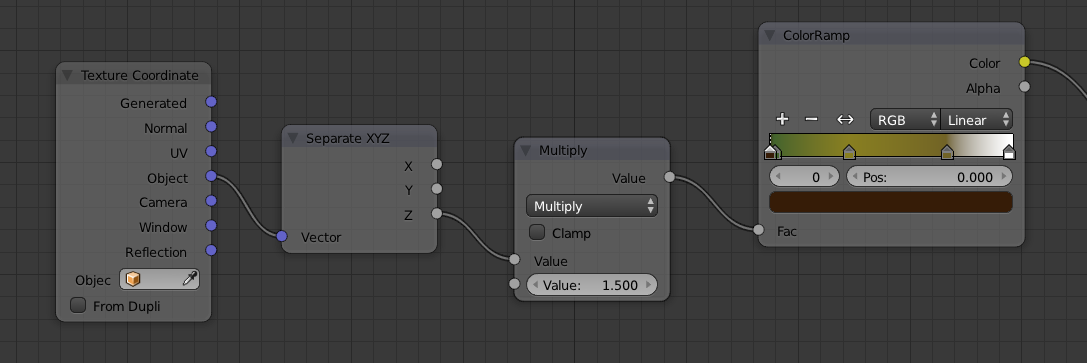
There are other approaches, and this does not cover how to give each height a distinct image texture, but perhaps we’ll cover how to do that in another article (when I figure out how it works).