In my quest to take a look behind the scenes of how game engines work, I’ve decided to take a closer look at the Unreal Engine, more specifically UE 4.22.3. I had installed it a few weeks ago but other than launch a template or two, I didn’t do anything else with it. After my recent deep dive into Unity, I thought this would make for a nice comparison writeup.
Here’s how I experienced the first 24 hours with Unreal. I’ve even added a video at the end to show you a level that I’ve built. For this review I’ve been following this tutorial series by Paul Kind. He’s a wonderful teacher!
Installation
Everything “Unreal” begins with a tool called the EPIC Games Launcher. It’s a hub kind of thing that brings a somewhat packed landing page app to your desktop. From what I understand, it’s not possible to install or use the Unreal Engine without it. You can get the whole package from unrealengine.com.
You’ll be prompted to sign up for an EPIC Account at the top right, which is a way to track all your licenses and purchases from a single place. It’s easy to setup and can be linked to other accounts, such as GitHub, Xbox, Playstation and Twitter. With this ID you’ll also be able to buy assets from the Unreal Marketplace, sell your own creations on that marketplace, track free learning modules and buy EPIC games. Once setup, look for a big blue download button at the top right corner of your screen.

Upon pressing it, you’ll be presented with a somewhat difficult and slightly confusing choice: which type of Unreal Engine would you like to download. You can either choose Game Developers or Enterprise, depending on what you’d like to do with it. It’s a tough call to make if you’re thinking of doing both at one point.
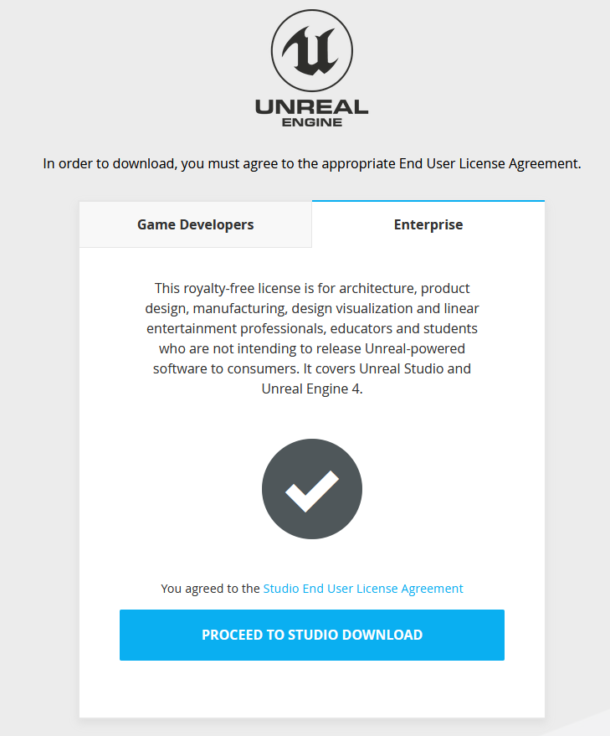
All kinds of questions sprang to mind when I sat in front of this screen. Would one option limit me to do the other? Would I get a different tool altogether? Could I change my mind sometime down the road? Would I need a separate account to get access to both? Is one free and the other one costs tons of cash?
I did some digging and it turns out that this decision is largely cosmetic and has more to do with additional tools that are installed with the Enterprise package, as well as the license you’ll be granted. Both options download the same engine and the same base programme. Enterprise has an additional plugin enabled called Datasmith. It’s a pipeline tool with which 3D artists can bring in assets from other applications, something I would have thought would be important for anybody. I decided to go with the Enterprise option, but from what I understand, it’s easy to get access to this tool at a later time, should you decide to go with the Game Dev instead.
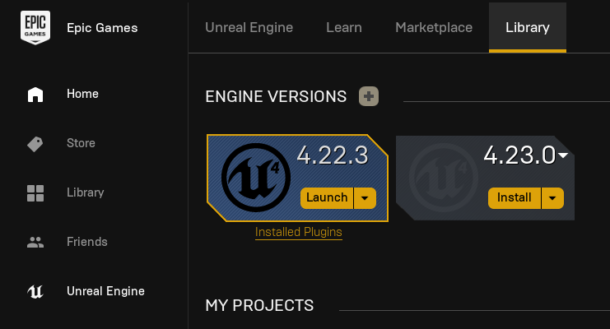
The “Proceed to download” button will give you access to the EPIC Games Launcher (40 MB), inside of which you’ll be able to download the actual Unreal Engine (25 GB – so grab a coffee while it downloads). You’ll find the yellow Install option on the left hand side under Unreal Engine, then on a tab at the top called Library.
When I first installed the engine, I was not an EPIC customer and had never purchased any of their games. As such, some of the tabs on the left were missing, namely those related to games (such as Store and Library). Recently I decided to buy a game from their marketplace, but it didn’t show up anywhere for me to download. I had to manually reset some configuration files for the relevant tabs to show up. Just in case you end up in a similar situation, I’ve made some notes on how to do this over here.
Speaking of quirky things: EPIC frequently release new versions of their Unreal Engine. They do not however let you “upgrade” in a traditional sense, in that a new version will overwrite the existing installation on your system. Instead, you can choose to download the new version alongside the old version and keep working with whichever version you prefer. That confused me slightly, even more so because this is not obvious to a simple user like myself. Regardless, I’ve described more details on this process in another article.
I get the feeling that I’m so used to badly designed software that “forward thinking” isn’t anything I expect anymore these days. While a little more complex and space intense, this approach means a project you create won’t stop working just because the software gets an upgrade. Thumbs Up!
Getting Started with Templates
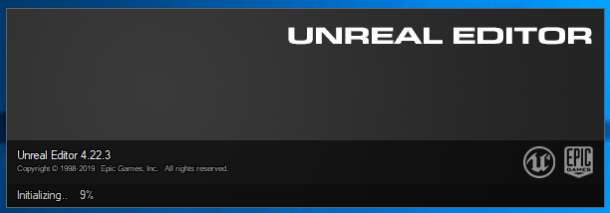
Once downloaded, you can launch something called the Unreal Editor. That’s the application through which we build our scenes, levels, logic, everything. It’s important to understand the difference: the “Unreal Engine” is the thing that makes real-time rendering happen. The “Unreal Editor” is the thing that lets us compile assets for the engine to display.
After launch, we’re presented with a welcoming and intuitive interface that lets us choose either an existing project we’ve been working on, or start afresh from a template. Take a moment to click through all these options before delving deeper. It shows the amount of thought that EPIC have put into starting the user off on the right track. I’ll go through the options here briefly.
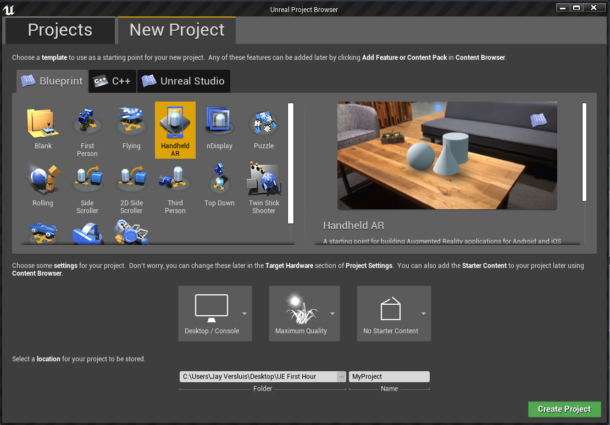
Under Blueprints you’ll find starter templates for every type of game you can imagine. They all come ready to play and dissect. A preview screenshot and description will tell you more about each option. I literally launched every single one of them, hit the PLAY button in the Editor and could play each template with my Xbox Controller. Seriously cool!
The C++ section has many of the same project templates, however the Windows SDK must be installed for those to work. I can only image that those will behave the same, but have the relevant code exposed for developers. I have not managed to get those to open on my system.
Under Unreal Studio there are three options for creating a scene designed without it to become a video game. They do not allow you to target specific platforms, nor do they allow the importing of starter content as other options do. The Studio Templates are designed to contain a single scene (level) instead, including a template to have multiple users view the same scene from different angles at the same time.
The Interface
Even though I had never seen a game engine interface before, all the menus felt strangely familiar. Everything seemed to make sense, like it (usually) does in other 3D applications. That’s a good start I thought! Click to enlarge for a closer look and see if you feel the same way.
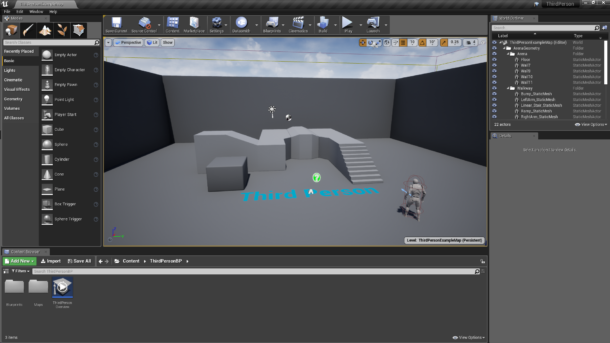
On the left of the main window we have options to drag items into our scenes, anything from a primitive to a light source, an atmospheric effect, or even a player start and an audio effect. Once they’re in the main scene window, we can select one and see a familiar 3D Gizmo for manipulation appear. We can change what it does either from the icons at the top of the window, or use the Maya style hotkeys W, E and R (for move, rotate and scale respectively).
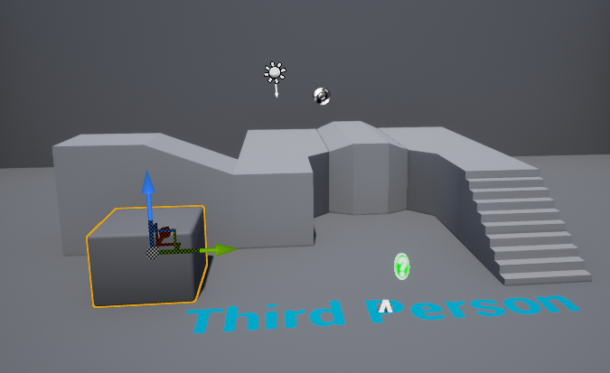
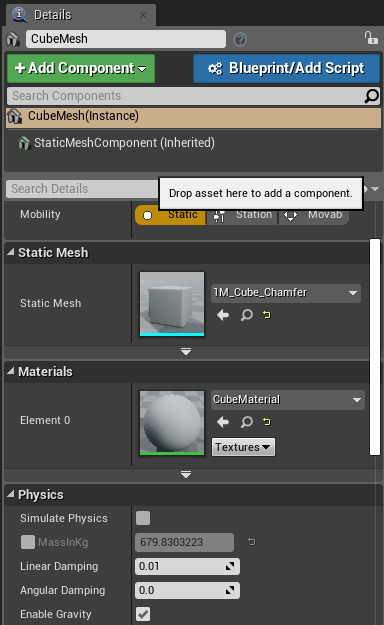
When an item is selected, a context sensitive Inspector type window labelled Details shows us the properties about the selected item. Here we can change its translation/location numerically, change material properties and whatever else is specific to this object (like intensity and boom for lights, or depth of field for cameras).
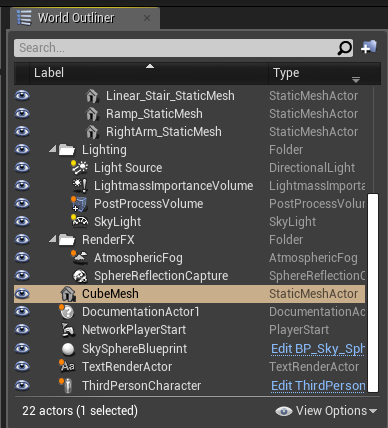
Above the Details Panel sits the World Outliner. It shows us a hierarchical view or all the items in our scene, with the option to parent and organise items into folders. We can also make objects disappear from view with the familiar eye icon controls. We also get filtering and search options, which is invaluable for larger scenes.
To round off the interface tour there’s a Content Browser at the bottom of the workspace. This is a file browser that lets us look at all files that make up our project, including assets we have decided to import. Note that assets need to be added to our project before we can use them in our scene.
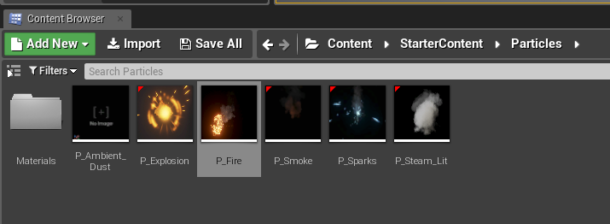
Unreal Engine doesn’t have a central library of “everything” like DAZ Studio or Poser have; instead you decide what items you’d like to use in your project and add content packs, which then appear in the Content Browser. At that point, it’s a matter of finding what you’d like to use (again with search and filtering options at your fingertips) and drag the items into your scene, or rather into your level. It is possible to add content packs to your project after you’ve started them of course.
A level in Unreal is what other 3D apps know as a scene. Being a video game engine, it is likely that we may have more than one scene to which we want to switch. Hence, our project can have several levels, each of which is an independent scene. A project can share assets across various levels, so in an adventure game we may have an indoor level and an outdoor level. All assets are part of our project, but each level is designed independently.
Navigating the Viewport
Much like my experience with the Unity Engine, navigating the viewport took a little time for me to get comfortable with. My main confusion stems from the fact that when you drag around the left mouse key, the interface defaults to “first person look mode”, not “tumble around an object” mode. Most of it is intuitive, but some of it requires further explanation that I couldn’t find easily.
Unreal does however have a system, and it’s easy to grasp once we understand it. So here’s what I found out – perhaps I’ll turn it into a Cheat Sheet later:
- LEFT CLICK and drag will pan left/right in your scene. Moving forward and back will navigate you through the scene. I guess the emphasis is on getting around, rather than examining objects.
- RIGHT CLICK and drag will look around the scene, as if you’re track balling from the position you’re standing. This is the first person view, as if a character was looking around in all directions
- MIDDLE CLICK and drag will pan your position in all directions. So moving up or down, left or right. It’s also known as strafing, but includes up and down.
- PRESS F to focus on a selected object, which means the camera shows it centre screen and move you to it.
- ALT + LEFT CLICK will tumble around the selected object, so you can look at it from all sides.
- ALT + RIGHT CLICK will zoom in/out of your scene. Scrolling the mouse wheel will do the same.
And that’s really all there is to navigating the Unreal Viewport. For me this is one of those super important things to understand: if I don’t get the basics, I’m just completely lost. Thankfully a single modifier key is easy to remember. I’m sure there are many other shortcuts (like the Maya style W, E and R to translate, rotate and scale an object), and backspace/delete to remove an object, but these should get us started.
Blueprints
Games need event triggers and logic, stuff that’s usually handled with a script in good old fashioned difficult to understand code. Unity solves this by letting us attach C# scripts to parts of our scene. Unreal uses C++ under the hood, and to be honest, I was expecting a similar solution to be implemented. Not knowing much about either language, this is always a slightly scary thing to think about for us creatives.
I was very happy to see that for many things in Unreal, actual code is not necessary. They’ve implemented a node based system called Blueprints for us to solve such tasks. Here’s what it looks like:
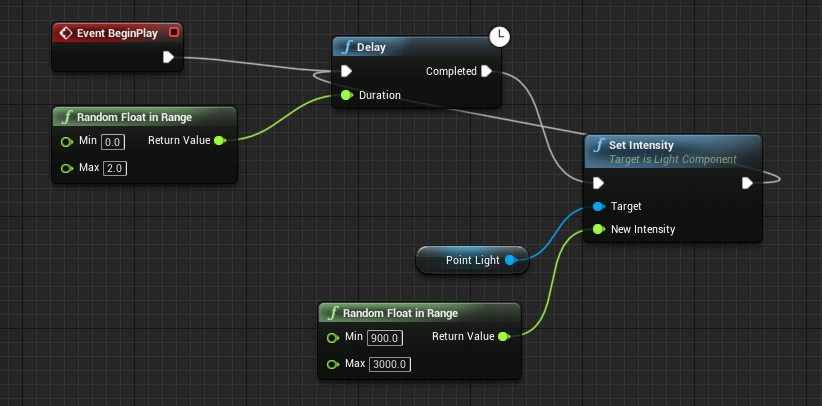
In the above example I’ve created an actor object. That’s much like a static mesh, except for the addition of certain behaviours. In my exercise, we made a lamp that was constructed of a base, a burning fire and a light source. To make it look different when placed as several instances around the scene, we added two random values each with a minimum and maximum value to both brightness and flicker duration to this object. We also connected an endless loop to the object so that it flickers in the wind forever.
Doing the same thing in code would be quite tedious, but with Blueprints, and knowing how they work, it’s just a matter of adding nodes and dragging their inputs and outputs.
Auto Saving Implementation
You know how we all wish that every app had an auto saving feature? It’s a double-edged sword though, because while useful, some saving operations take a a lot of time. I’m thinking of a particular video editor that usually saves at the most inopportune moments during which the interface freezes (yes Camtasia, I’m looking at you).
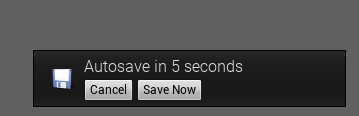
Unreal solves this conundrum with a little popup window at the bottom left and tells you that autosaving will commence in 10 seconds, followed by a countdown. During this time, you can choose to save manually or cancel the auto save. It’s a brilliant design choice that puts you in charge of when the computer can do what you want him to do, and leave you free to work at the times. I’ve never seen it implemented like this before.
While I was patiently waiting to take the screenshot, I’ve noticed that Unreal doesn’t auto save if there’s nothing to save. If no changes have been made, there’s no need to call that routine. Again, relatively simple to implement, and really clever – yet not every app does this. I love it! I’ve been working with apps not auto saving, or auto saving badly for too long I guess.
My Verdict after 24 Hours
I must say I’m very impressed by the whole package. There is of course a ton of things to explore, but right from the start I could feel that I can get used this suite of tools very quickly. Unreal Engine had an instantly familiar feel to someone like me. It was trying to be friendly and welcoming from the moment I opened it.
Sure, I have no idea how anything works just yet, but if I look at the above quick video of a level I created on the first day of digging my teeth into it, I can’t wait to see what happens when I bring in my own 3D assets. I’m looking forward to delving deeper into what can be done quickly, with the assets available from the Unreal Marketplace.
What they’ve done well here is to let us experience stunning real-time previews of what our scenes will look like, and “doing coding” without writing code. It’s little things here and there that I like. Snapping tiles into place for example is well implemented: you can either switch it on or off, or set a snapping value to accurately things pop into place. That’s great for avoiding small cracks or overlaps. The launcher app is nice, letting you run several Unreal Versions side by side. Getting started is a breeze, the learning tools are plentiful (videos and written documentation) and the whole suite is free – including full access to learn.unrealengine.com.
I can’t say that I found anything really annoying that’s worth mentioning. I’m usually pretty good at spotting that. I think they’ve made something as complex as a real-time rendering and game scripting engine as user friendly as you can possibly make it. It’s still difficult, but that’s the subject matter rather than the tool.
One thing I have not tried on this occasion was the Unreal Studio environment. I shall do that forthwith and let you know how it goes. For now I can say that I see the potential, I have a desire to explore more.
If you find this review helpful, consider using my creator code JAY-VERSLUIS when you buy anything from EPIC. It’ll help me buy coffee and write articles like this.
Hi Jay,
again: Thank you so much! Incredible how much information you give us. This article reinforces my opinion that UE is the right engine for me. I am really looking forward to using UE. What a difference to Unity. Thanks for all the time and effort!
Best, Chrissy
You’re very welcome! I felt so at home with Unreal, it’s… unreal ? I can’t wait do more with it and see how easy/difficult it is to import assets and use them. Also, considering the later EPIC/Blender developments, it’ll be citing to see how that integration will be implemented (I’m assuming it will be somehow, maybe via U3D, maybe with a plugin, who knows).