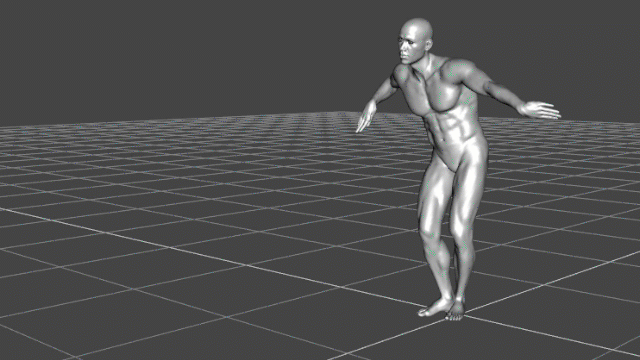
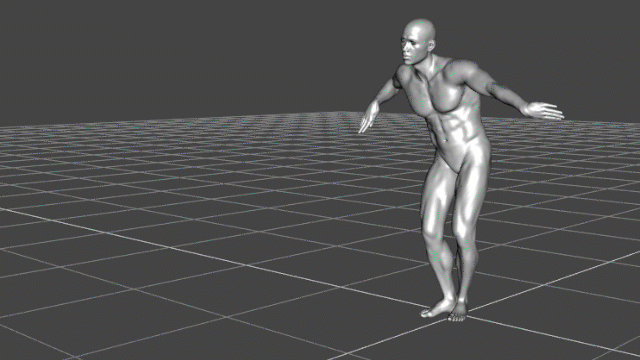
When you convert keyframes to an aniBlock, there’s a phenomenon that can happen in that the figure seems to sway left/right. It’s not something that is present in the keyframe animation, and I’m not entirely sure why this happens on conversion. The above shows how Darius 7 does his keyframe funny walk, while the bottom shows what happens after conversion to an aniBlock. In a word: terrible!
aniMate is a powerful tool, and in this article I’ll take a look on how to fix such shenanigans.
Converting keyframes into aniBlocks
Let’s start with a quick refresher on how to convert a keyframe sequence into an aniBlock. I’ve made a quick video about this too, check it out if you like.
For this example, I’ve loaded a Mixamo animation I had saved as a pose file, like I’ve explained in my previous article. In the regular Timeline you’ll see all the keyframes as little orange triangles now. Feel free to trim off what you’d like to save as an aniBlock. The above animation is just over 50 keyframes.
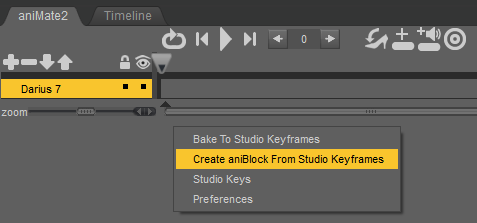
On the aniMate Timeline, right-click anywhere in the bottom part to bring up a context menu. Select Create aniBlock from Studio Keyframes.
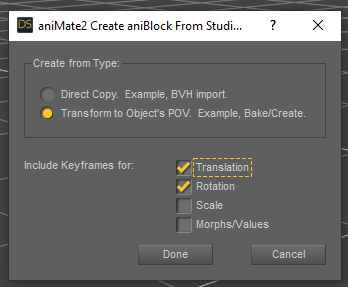
This will bring up another menu I find a tad confusion – mainly because I don’t really know what these options do. I can tell you what works best though, and that is to choose the second option, Translate to Object’s POV. The default option doesn’t always create a usable aniBlock. Feel free to tick all the options, they don’t make a difference if you’re not animating morphs or the scale of your character.
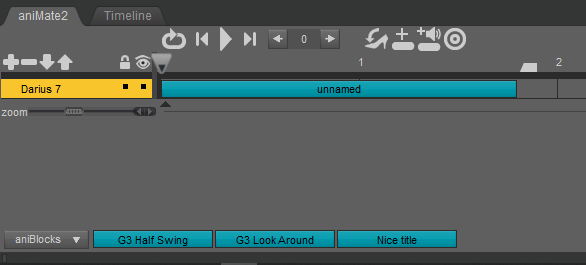
Moments later, all your keyframes will have vanished from the regular timeline, but you’ll see an unnamed aniBlock on your aniMate Timeline. Nice!
Reorienting Loops and Starts
Just to finish this refresher off before we address the main issue: if your animation includes a motion that shifts the position of your character (say forward for a walk cycle, or sideways for a positional change, or a combination of those things), you may be interested in a very cool feature that aniMate uses called Reorientation. With it, you can shift the beginning position of the next animation to the end of the previous one. This will make more sense as you assemble multiple aniBlocks on your timeline, so that you can mix and match animations, without awkward pops and jumps.
To make these options show up, single-click your aniBlock to make its colour change from the default blue to grey. It’ll bring up a plethora of options with it:
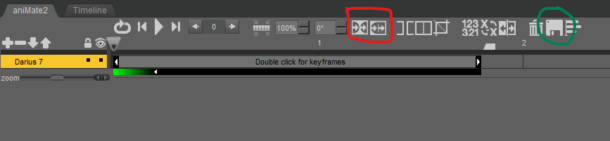
Notice the two symbols I’ve circled in red in the above screenshot. The first one is “reorient start”, the second one is “reorient loops”. They’re enabled by default. One takes care of making sure your whole aniBlock is reoriented, the other one will set how an internal loop will be taken care of. Clicking on either of them brings up this context menu:
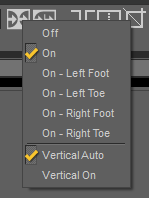
The defaults work well enough, but depending on your animation you can override these and have aniMate look at a particular body part instead of the median hip position. I don’t know the difference between Vertical Audio and Vertical On. You may find the answer in this archived user guide though.
While we’re in this section, the green circled icon will save your current aniBlock.
Removing strenuous X-Swaying
Now that we have our converted aniBlock, there is a chance that my character doesn’t behave like he/she did when it was a keyframe animation. In my example, I can see that Darius is moving strenuously left and right, much more pronounced than he did before. That’s terrible! Let’s fix this by tweaking this inside aniMate’s keyframe editor.
As you can imagine, under the hood my keyframes are still intact and live inside the aniBlock. We can take a look at them by double-clicking our block to bring up yet another menu inside aniMate. Note that you need to double-click on the block when it’s grey, NOT when it’s blue. If it’s blue, click on the block, then double-click again… UI design (much like documentation) was never DAZ’s strong suit.
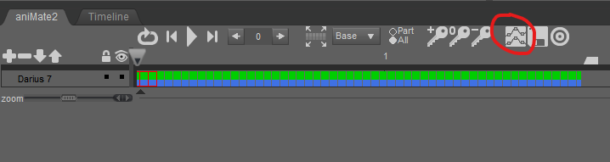
To make our strenuous x-translation show up, we need to click the Graph Editor icon (circled in red). It’ll bring up the hierarchy of our character’s parts. Mine is on the x-translation of the hip bone, and it seems to be doing that consistently for Mixamo conversions. Open the left hand menu accordingly to reveal the swaying motion displayed as a graph (under hip – pos_x).
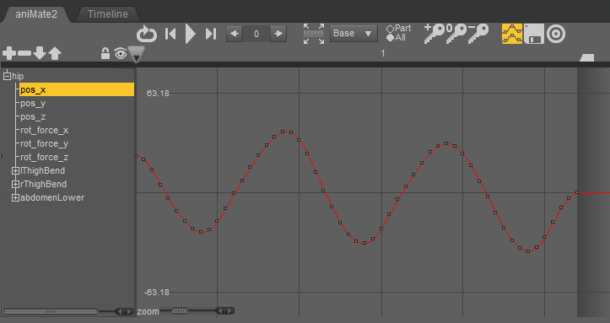
Each of the little grey dots on the graph is a keyframe. You can amend them one by one, or tweak them in bulk. My character is supposed to funny-walk in a straight line, so I can marquee selected the whole lot and hit the “key with a minus sign” icon at the top of the toolbar, named Delete Selected Keyframes. Alternatively, you can choose to keep the keyframes, but set them to zero instead. That’s handy if there is movement that you’d like to retain or otherwise re-tweak at a later point.
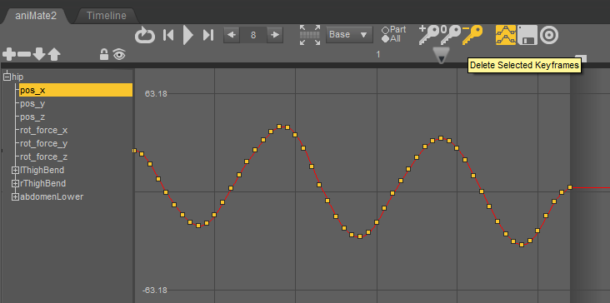
When done, this will be a flat line and my character now walks straight forward. Make sure to save your new amended aniBlock when you’re happy with the results.
Further Reading
- Original aniMate User Guide from back in the day (on archive.org)