I always forget how to rotate HDRIs in Blender. It’s really not that difficult, but somehow this information doesn’t seem to save in my brain. I’ve given up trying understand why, so I thought I’d write it down for a future visit. At least I know where to look now 🙂
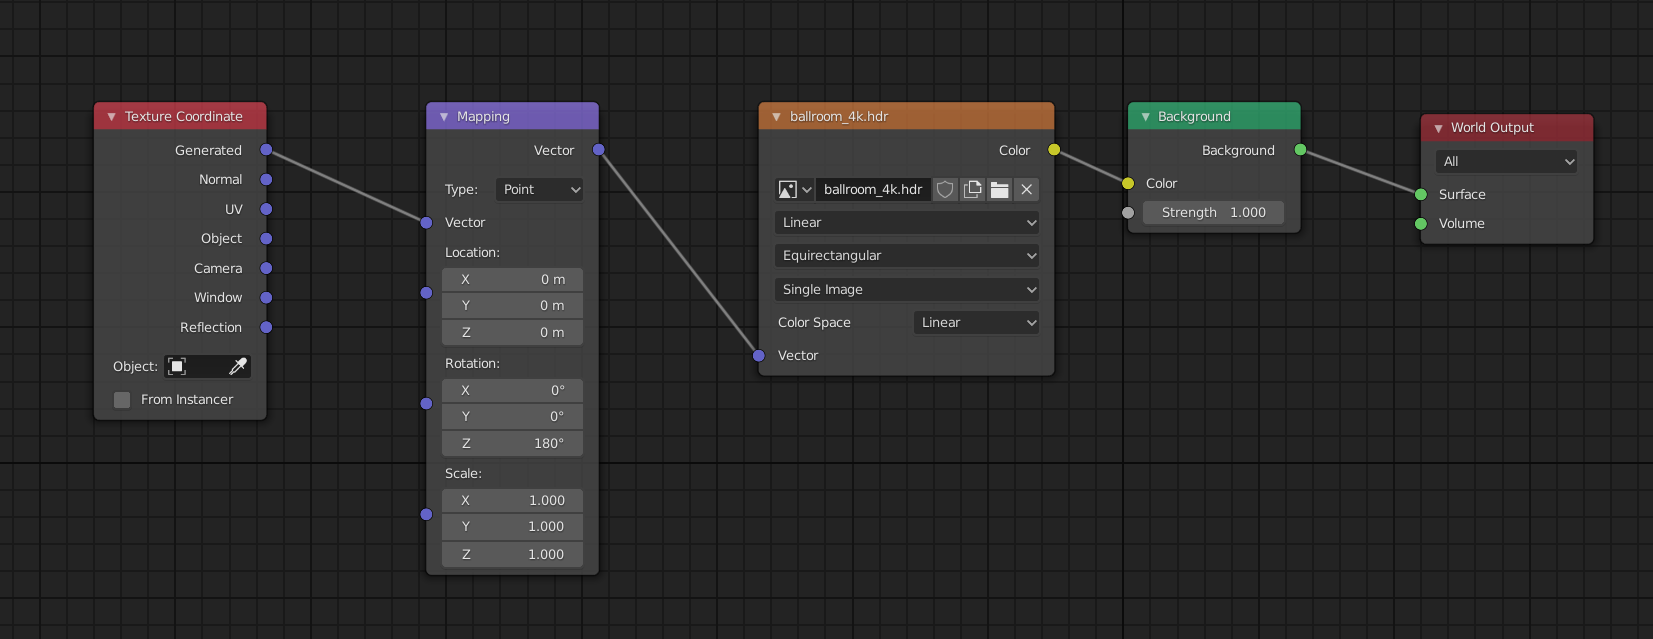
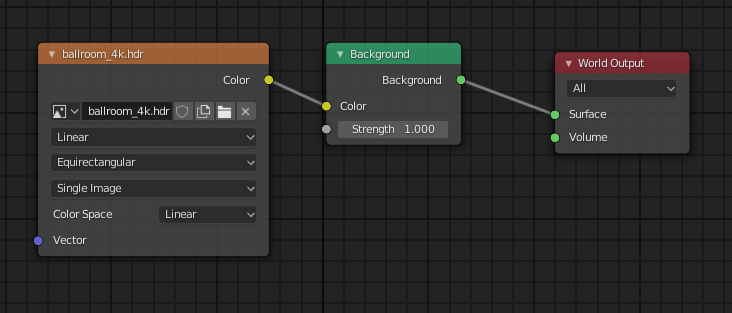
In the Shading Tab, switch over to World. Add your HDRI image as you usually would (with an Environment Texture).
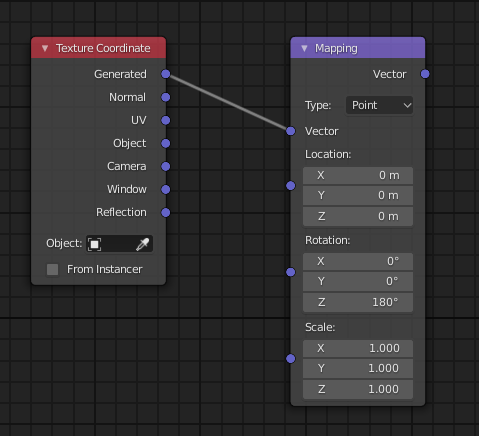
To make this thing rotate, we need to make ourselves a Texture Coordinate (under Input) and plug that into a Mapping Node (under Vector). Connect the Generated output into the Vector input, then plug the Vector output into the Environment Texture so that we can control the various aspects of our HDRI now.
We’re after the Z rotation, which will make or HDRI rotate horizontally. Here’s the complete node setup (click to enlarge):