Getting characters and scenes from DAZ Studio into Blender is one of the toughest things to get right. It’s an endlessly time consuming, confusion and generally un-fun process. Several scripts exist to make this happen, yet many of them fail to make it a one-click solution. Jacques aka mCasual has been working for years on something called TeleBlender. Steve aka Backdoor 3D recently did a live stream on the process, and I finally had a chance to try it out myself.
In this article I’ll show you the workflow that I found worked best for me. You may know a better way, and perhaps it’s not the intended way of working, but it thought it might come in handy (since usage instructions on the download page of TeleBlender are literally non-existent).
I’m using the following versions, which will probably no longer exist by the time you read this article:
- Blender 2.83.1 LTS
- DAZ Studio 4.12.1
- TeleBlender 4 (Beta 06252020)
Installing the scripts
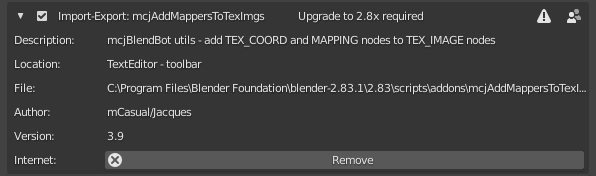
At the very bottom of the download page (whichever the current version is), you’ll find – rather hidden and un-obvious, two ZIP files. The DAZ Studio script can be extracted into the Scripts folder of your preferred library, while the BlendBot file can be installed like a regular add-on in Blender (using Edit – Preferences – Add-Ons -Install).
Previous versions of TeleBlender lived in the scripts/modules directory of the Blender installation, which meant they needed to be copied manually. Thankfully this has been changed in favour of the scripts/add-ons directory. After successful installation, TeleBlender will show up as mcjBlendBot utils. I guess we can disregard the warning for now, as the script does not hook in to Blender and will be launched manually later.
Exporting from DAZ Studio
With your scene setup as usual, head over to your Content Library tab, choose the Scripts folder and find an icon to launch TeleBlender. This will open a very detailed dialogue, many of whose options I have yet to explore. It offers a few too many details in my opinion, but as soon as you grasp the concept it’ll all make sense.
The dialogue has three tabs along the top, Main, Auxiliary and Animation. Let’s focus on the Main tab, whose purpose it is to setup the settings that will be available to us when our scene is imported into Blender. Think of it as a way to tweak settings in Blender, without actually being in Blender.
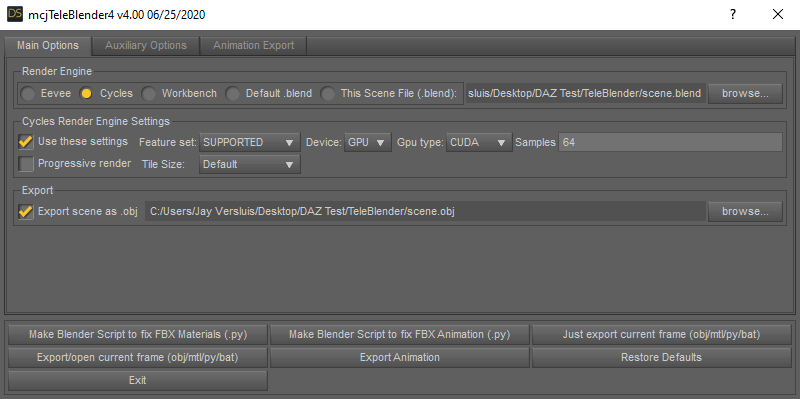
We need to pick our preferred render engine and render settings, as well as paths to where temporary files will be stored. The default path is the root directory of your main drive, which is never a good idea (but at the same time, it’s a safe place that makes TeleBlender work out of the box). I recommend changing this to something else.
TeleBlender will export an OBJ file, several texture files and a .blend file. Click “just export current frame” and all necessary files will be created. You can move on to the next step if you wish and we’ll load our scene manually in Blender.
TeleBlender will also create a Windows .bat file that can be executed with a single click, opening Blender for your automatically. I don’t work that way, but if you’d like to try it out, make sure the path to Blender is set correctly on the second Auxiliary tab of this dialogue – otherwise TeleBlender doesn’t’ know where Blender lives and it wont’ be able to start it.
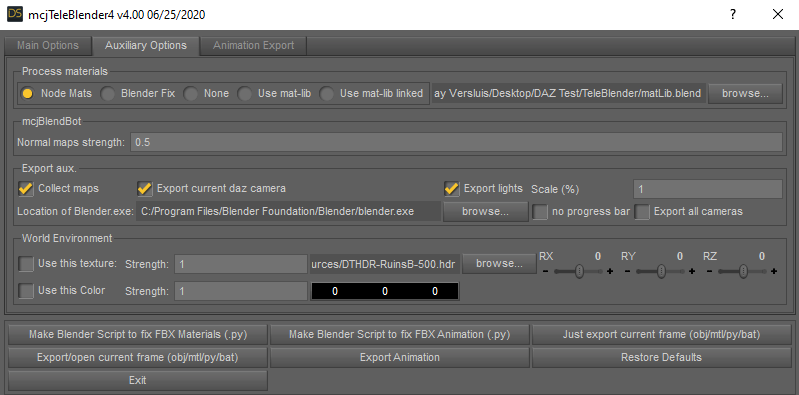
While we’re here, you can setup a HDRI for your background, rotational properties for it, and even a background colour. I prefer to set these things directly in Blender, just know that you have the options here on this second tab. There are a few other interesting options here, such as optional camera and light export. In case you prefer not to export those items, de-select them here. I’ll leave mine on for now.
To use the one-click Blender opening option, select “Export/open current frame”. Be patient as the process can take a while, but eventually you should see your scene opening up in Blender. This has never worked for me and ends with an error message, but from what I gather this is the idea behind the one-click export. Perhaps you’ll have better luck.
Importing in Blender
Even if the one-click export thing would work, I don’t like launching Blender automatically. Instead prefer to import the scene manually and here’s how to do it. It’s not enough to open the .blend file, because TeleBlender needs to do some more work and convert materials and objects in the process. This happens via Python scripts, so we’ll have to head over to the Scripting Tab layout and run an import script instead. It’s all easy though, trust me:
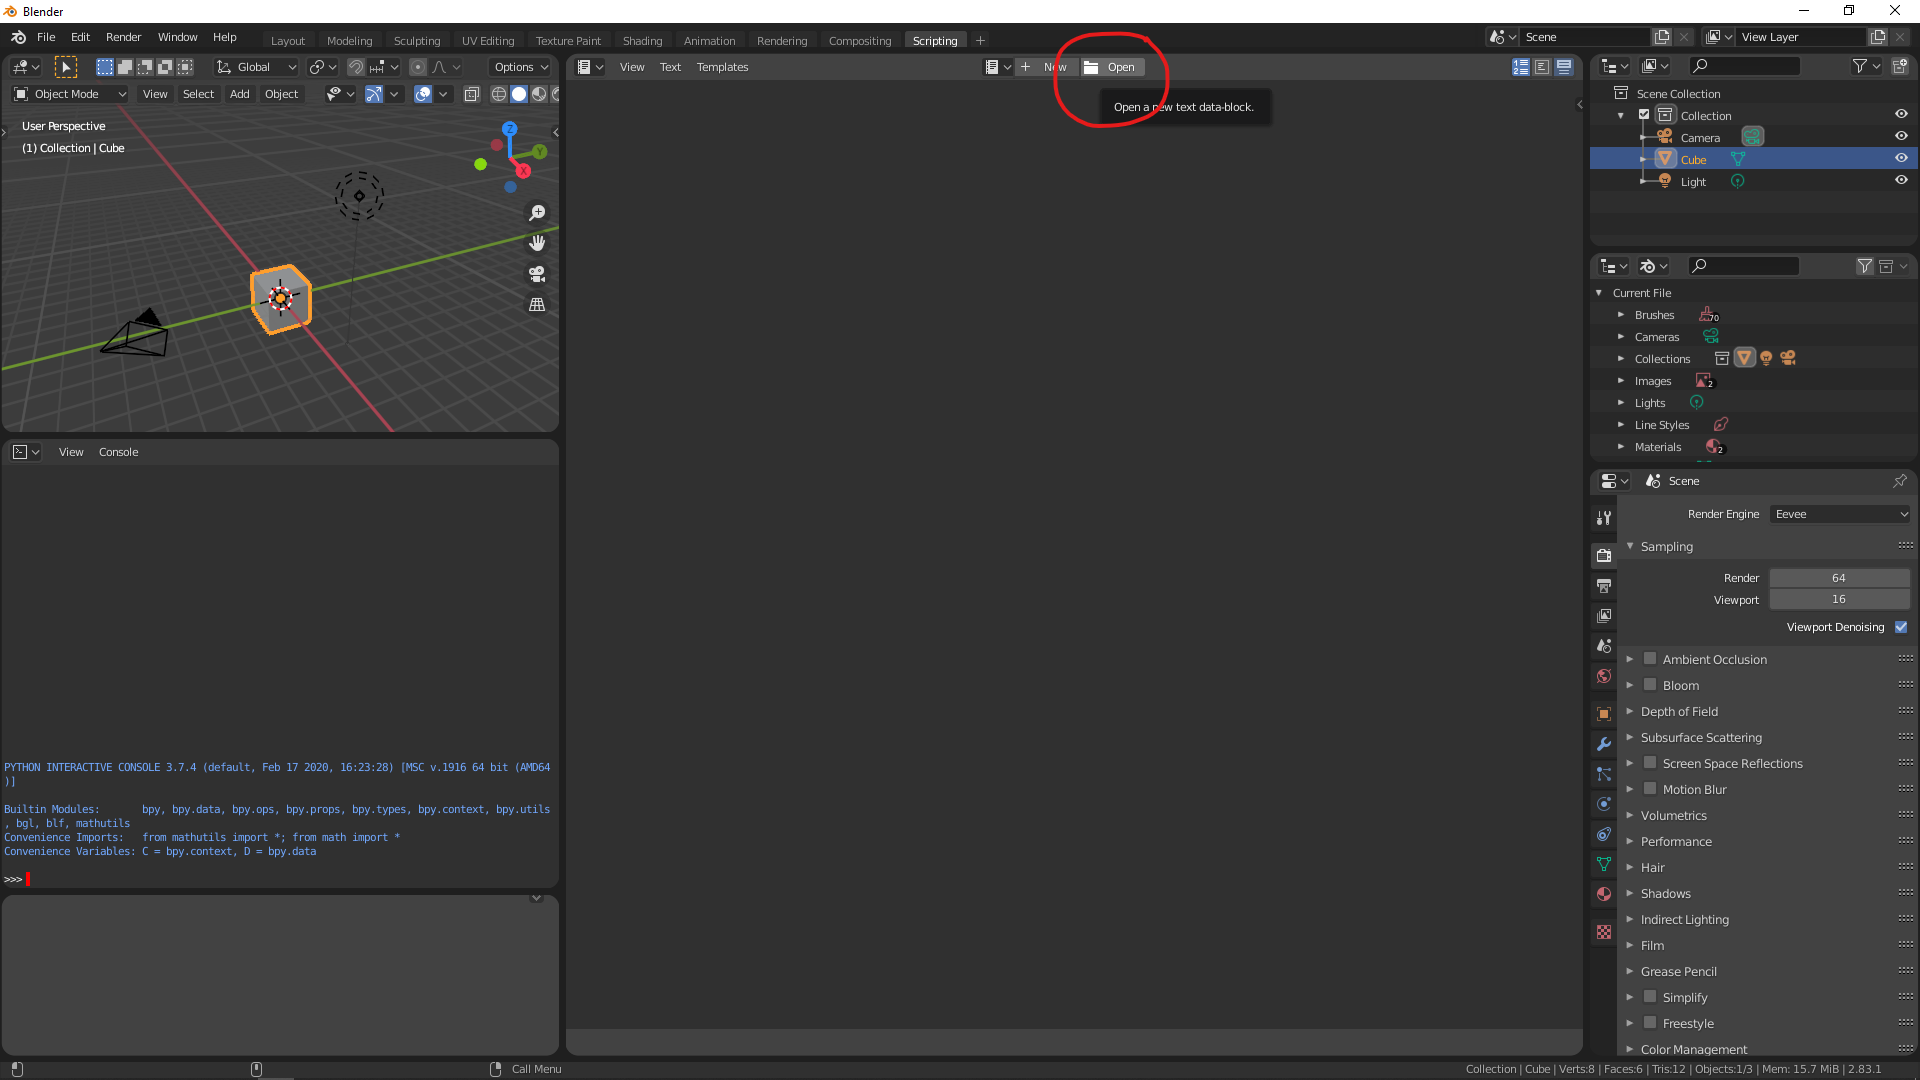
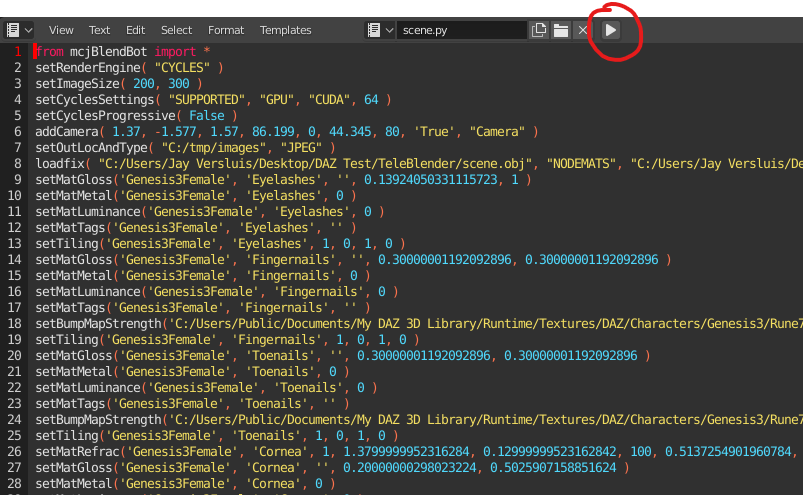
See that big window in the middle, with an open option at the top? Click that and open a script called scene.py from the directory that you chose to export your files to in DAZ Studio. You can examine what it does, or if you’re eager to get on, click the little play button at the top of the window to launch the script. This will load all your objects, convert materials, and bring it everything else we need for our scene. This might take a while, so be patient.
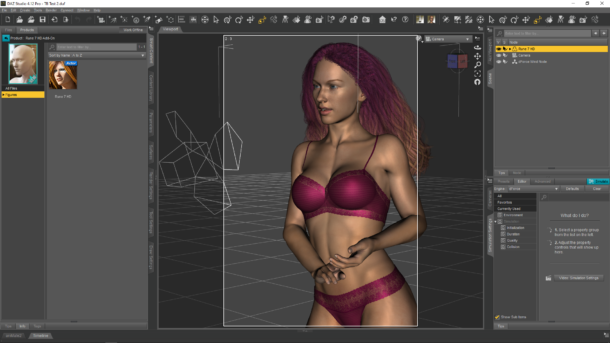
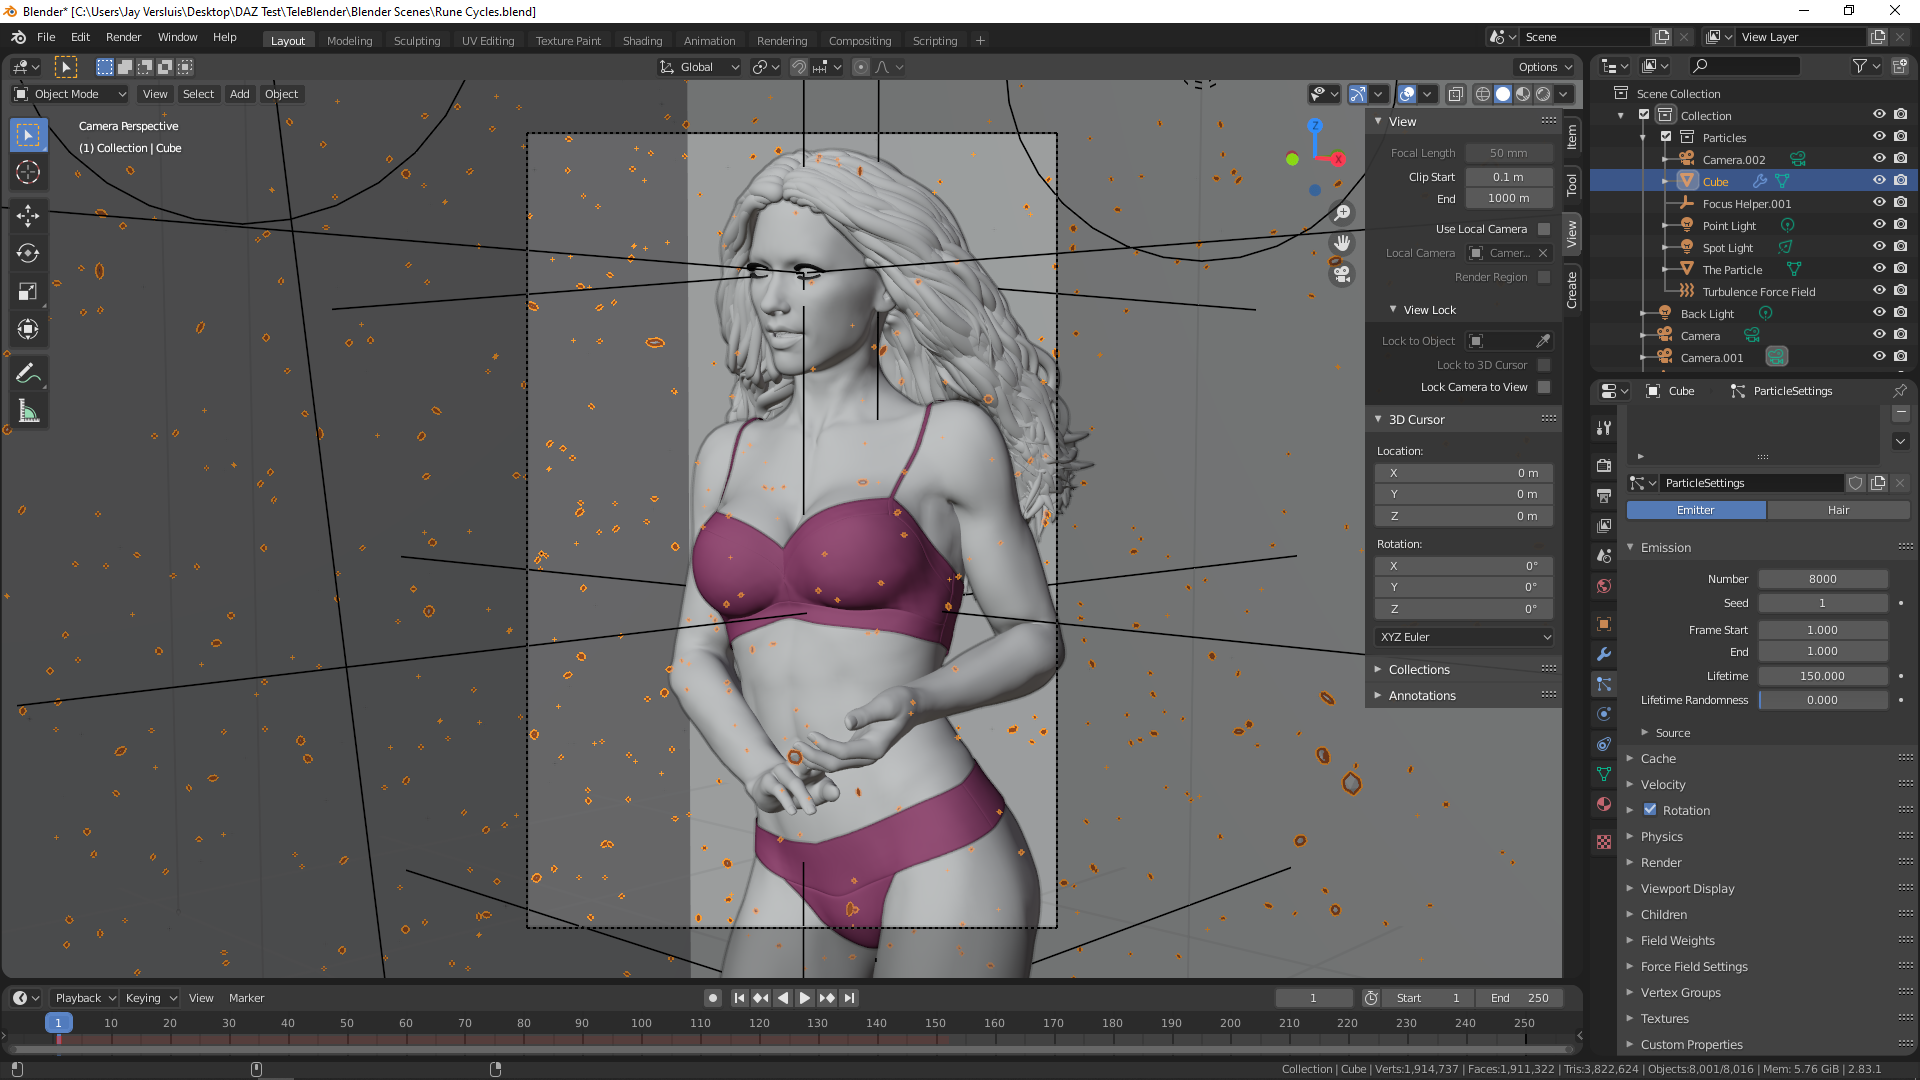
Eventually you’ll see a very similar scene setup in Blender that we had in DAZ Studio. Here’s a comparison:
Conclusion
I really like how versatile TeleBlender is: it allows a great deal of flexibility, whether you want to do a one-click render in Cycles or Eevee, or if you prefer to simply export a character and build most of your scene from scratch in Blender. Each workflow will be different, and everyone will prefer different options. Although the DAZ Studio export options do look overwhelming at first, after a few scenes it’ll grow on you. Plus, TeleBlender remembers your preferences so you won’t have to set those pesky paths again next time. Pick a working directory and overwrite those temp files in a location of your choice with a click of a button.
This script is still a bit beta, and the material conversions may require a tweak here or there. It’s gotten a lot better than it was in the past. My main issue is bump map that’s a bit strong. I haven’t found a way to being this down on export, or at least it didn’t work with my Genesis 8 Male and Genesis 3 Female test subjects. Some materials may not convert well, such as hair shaders for use with Eevee.
Those minor issues aside, this script lets is great news for anyone who wants to reap the benefits of Blenders many features, and those who can’t / don’t want to render in Iray.
Happy TeleBlendering!