I’ve been investigating Substance Painter and how to best select parts of a model. One such option is by using an ID Map, essentially a flood-fill of random colours per material zone. Wendy very kindly brought this to my attention in a recent stream (thanks, Wendy!), and before I forget, here’s how to do it.
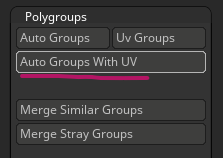
First we’ll import out model and enter Edit Mode. I’ll pick a white mat cap and display the polygroups in the viewport, then head over to the Tool – Polygroups Menu and select Auto Groups with UV. Notice how the colours on your model change when you do this.
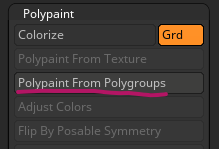
Now we’ll head over to the Polygroups menu and choose Polypaint from Polygroups to transfer this information over as vertex paint.
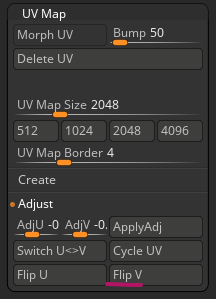
Let’s create a texture next and bake this out so we can use it in Substance Painter later. To do that, head over to the UV Map option and set a suitable texture size. Also under Adjust, select Flip V to rotate our texture by 180 degrees otherwise our map won’t work in Substance Painter.
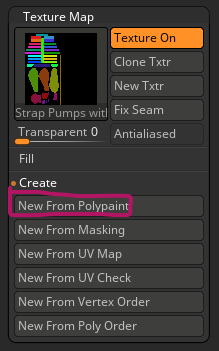
Under Texture Map, select New from Polypaint. This will create a new texture for us, enable it on out model, then transfer the polypaint colours over.
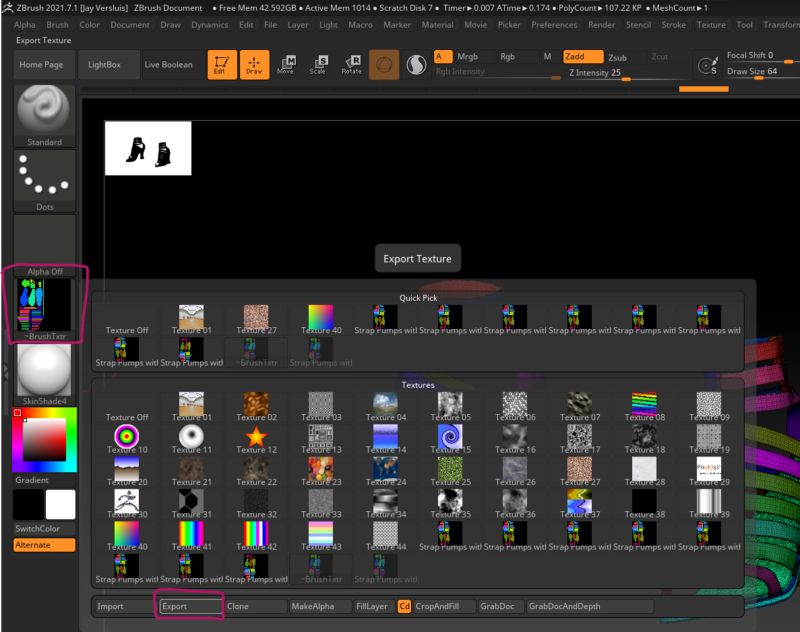
Our final step in this process is to export the map. Select Clone Texture and it’ll be made available in the brush settings tab on the left. Right-click on it and select export. You can also do this from the Texture menu (same approach, right-click on the texture).
That’s it! With this new ID Map, we can go ahead and select/mask parts of our model in Substance Painter. I’ll cover how to do this in another article.