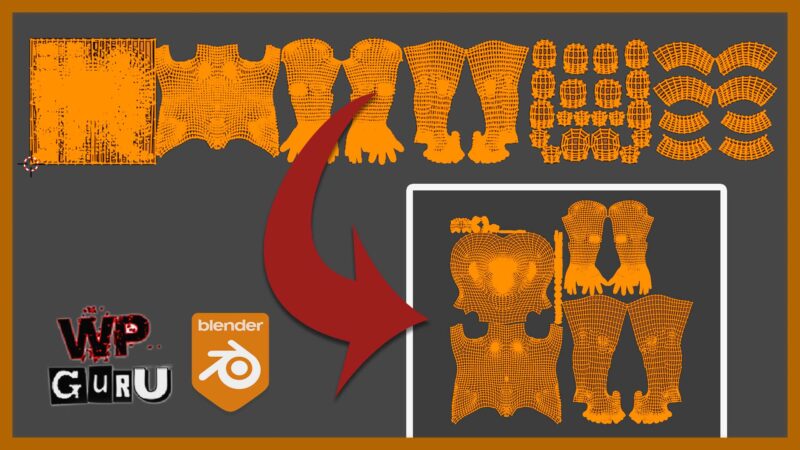
In this article I’ll show you how to combine various UV islands that are spread across multiple UDIMs onto a single texture set. Blender has this capability built-in, but an add-on called SimpleBake makes our job even easier. For this example I’m using the the base Character Creator model. Many thanks to Brian for showing me how this works.
In principle we need to:
- create a new UV Set
- move all our maps to the 0-1 space
- run SimpleBake and export our textures
Combining UV islands
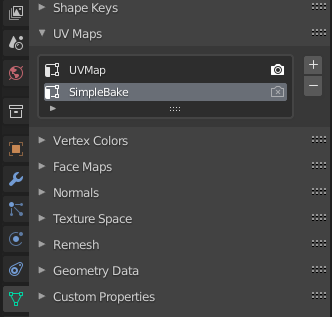
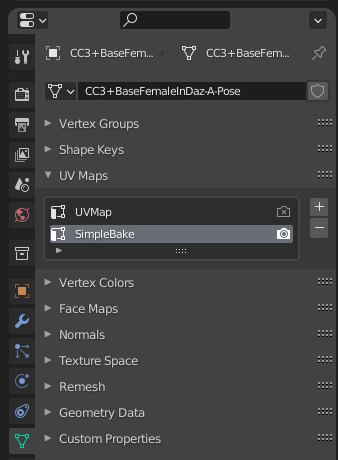
My character comes with several maps and I’ve setup most of them via Node Wrangler. The first thing I’ll do is to create a second UV set and call it SimpleBake (the name is necessary for the add-on to find it later). Make sure the camera icon is enabled on your original UV set though.
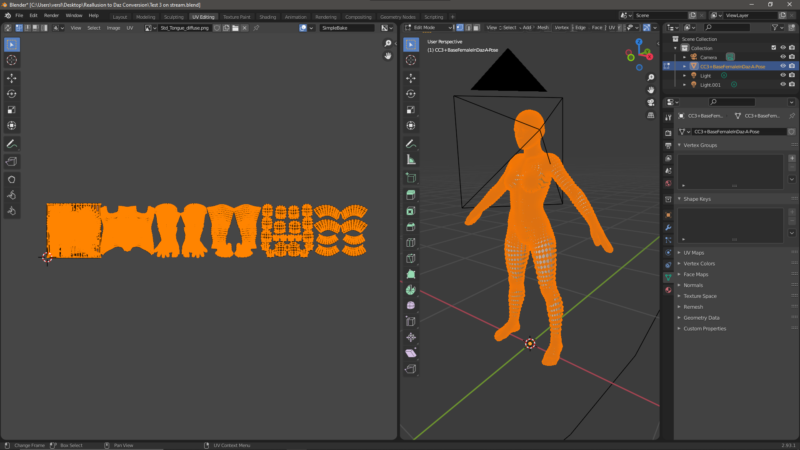
Now I’ll head over to the UV Layout tab and select all my UV islands.
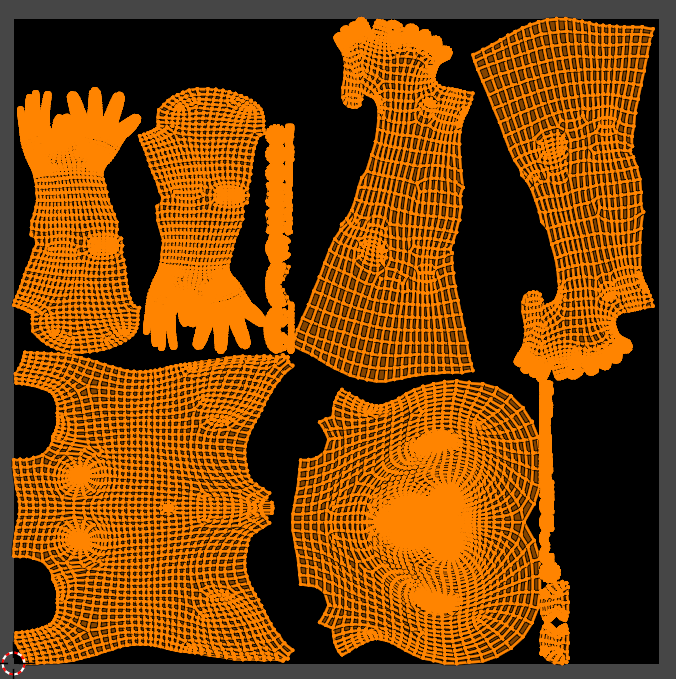
The two options to use next are Pack Islands and Average Islands Scale. You can also grab individual islands by hovering over an island and pressing L (for Linked), then move them using G and scale them with S. In my case, I’d like the head to have slightly more space on the map than the rest of the body.
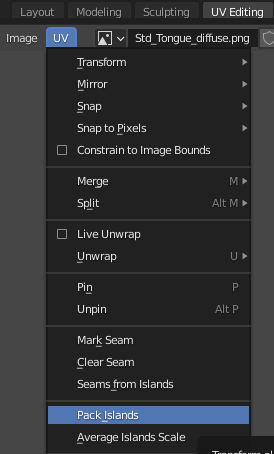
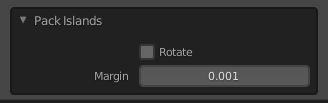
If you see issues with normal map seams, have a look at this little dialogue at the bottom of the page. After hitting Pack Islands for the first time, open the triangle and disable the Rotate option. This will pack islands without rotating them, which appears to help some normal maps.
Here’s what my packed islands look like now:
Baking Textures onto the new UV Set
The term “baking” in this context refers to transferring the textures from one UV set onto the other. We don’t exactly know how this voodoo magic works under the hood, but the results are excellent. This is where SimpleBake comes in. It can be found at the bottom of the Render Settings tab (little camera icon).
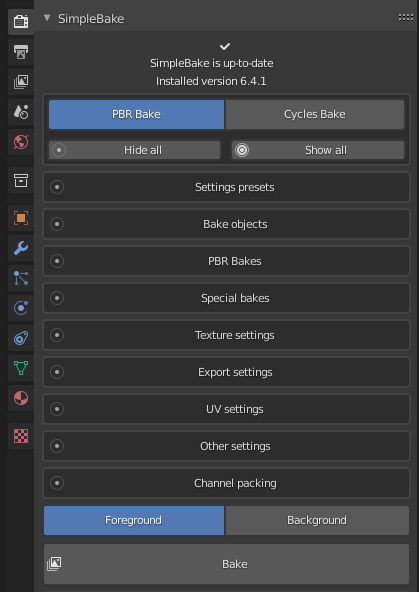
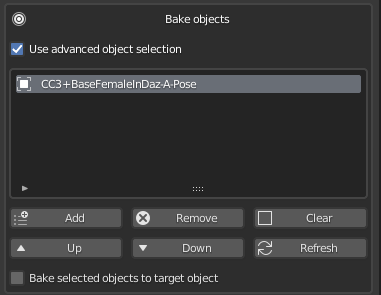
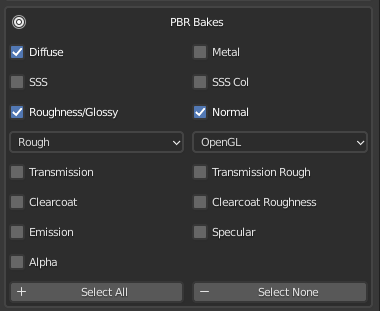
Choose PBR Bake at the top, then add your object under Bake Objects (click on any of these buttons to open options).
Select the maps you’d like to bake out under PBR Bakes. I only need the diffuse, roughness and normal maps. Note how you can pick the type of certain maps, like OpenGL vs DirectX under normal (seriously cool!!)
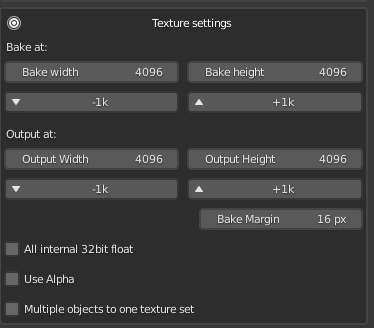
Pick the resolution of your new maps under Texture Settings. Increase sizes in 1k increments here and a new texture is created automagically as needed. There’s also an option to combine the textures of multiple objects onto a single map, which is handy for game engine performance optimizations. I won’t need this for my project so I’ll leave it off.
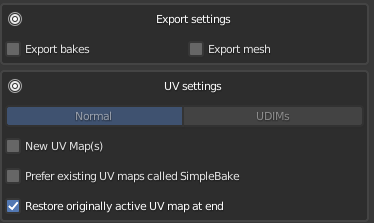
The last thing we need to take a look at is Export and UV Settings. Export Settings lets you have SimpleBake export an FBX of your mesh (with the the UV set) as well as maps automatically. Note that some file names may cause issues, like a plus sign, in which case leave them off and export your assets manually (like I will).
UV Settings lets you change back to your original maps so you don’t see weird results in the viewport after baking. Since we’ve made our own combined UV Set, I’ll enable “Prefer existing UV maps called SimpleBake”. If you didn’t do that, I believe “New UV Maps” can also be selected, but I haven’t tried that option yet.
All that remains to be done is to hit the big grey Bake button to let SimpleBake do its thing. You won’t see a progress bar (too novel a concept for Blender), so it just appears to hang unresponsively with the spinning cursor thing. That’s Blender for you!
Exporting Things
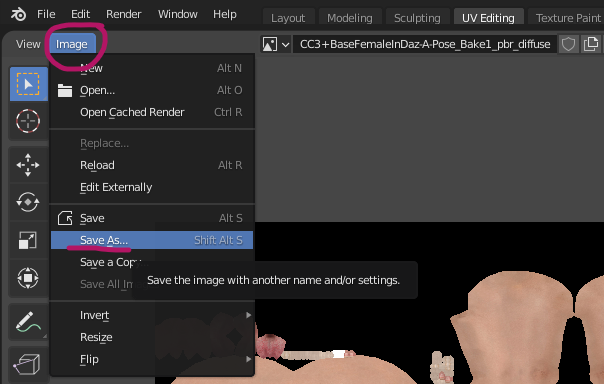
When SimpleBake is done, head back to the UV Editor and pick one of the newly generated textures from the drop down menu. They’re called whatever your file name was, appended with Bake1, followed by the type of map.
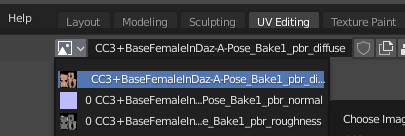
Select one, see it in the window below, then click Image – Save As from the second menu row (yes… things are a little complicated in Blender). Do this for all maps.
To use these maps on your original object, we’ll need to export a copy with the new UV set too. To switch over, click the little camera icon on the SimpleBake UV Map we’ve made earlier, then select your object and export it in the format of your choice. Note that your object will look like it has the wrong textures on it, but that’s OK since the original maps won’t work anymore with the new UV sets (but your shiny new baked ones will, as soon as you apply them in your target application).
And that’s it! Have fun with combining texture maps 🙂