Depth of Field is extremely difficult to judge in Unreal Engine, at least visually in the preview. It’s also a little intimidating to setup, and I don’t mind telling you that it was very difficult for me to grasp the concept. Yet like so many things in Unreal Engine, there is method behind the madness, and I’m happy to share with you (and my future self) what I’ve learnt about this topic. Let’s take a look at how to set it up from scratch, and what tools are available to adjust it.
Using a Cine Camera Actor
While several objects can produce depth of field (including the Post Process Volume), the best class to use for this is the Cine Camera Actor. It’s a child class of the Camera Actor object, which in turn has less options to adjust. It too has depth of field (DOF), but less parameters are available. Hence, let’s stick to the Cine Camera Actor for now. Add one to your scene, then select it in the World Outliner. You’ll see a small inset of what the camera sees at the bottom right of your viewport.
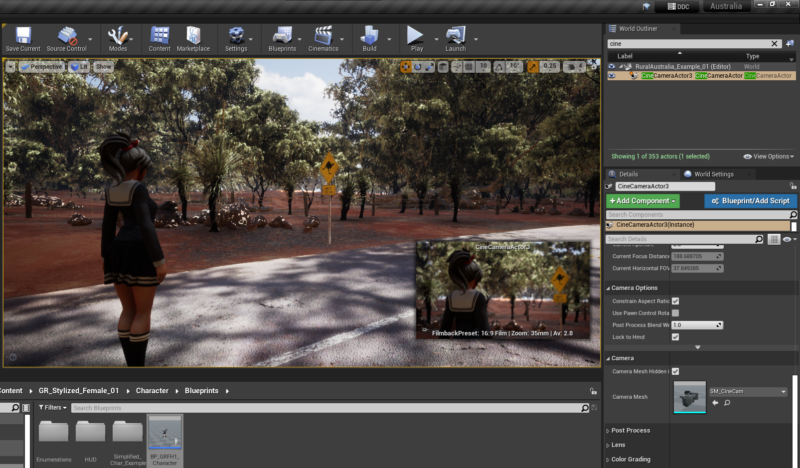
If you were to select something else in your scene, that little preview window would go away. It would be really helpful if it would just stay around for a bit so that we can keep an eye on what’s currently framed up, like a viewfinder. Thankfully there is such an option: a small pin icon in the viewport lets us literally pin this window so it’ll stay put, no matter what we select. That’s a neat start, right?
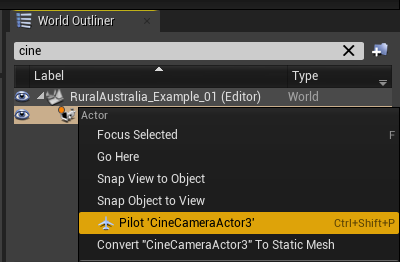
It gets better though: we can “pilot” the camera too, which means we make it full screen and our viewport will be transformed into what the camera sees. To switch over, right-click on the camera in the World Outliner and choose Pilot or press CTRL+SHIFT+P.
Now we can use the WASD navigation keys to move around as usual in Unreal Engine and position the camera. To switch back to the Perspective View, click the small “eject” button at the top left corner of the viewport, or right-click the camera again and choose “stop piloting”.
Cine Camera Properties
The idea of the Cine Camera is that we can specify things we’d find on real life motion picture film cameras. The interesting ones are grouped under the Current Camera Settings tab in the Details Panel. Filmback lets us specify the aspect ratio (or more accurately, the sensor size in millimetres, as well as aperture, focal length and where/what we’d like to focus our camera on (note the eye dropper as well as a numeric option here – very handy to pick an object, or move the slider depending on the situation).
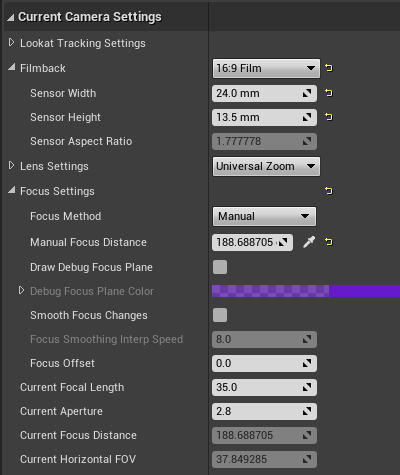
I’m assuming (perhaps foolishly) that you are already familiar with how the aperture, sensor size and focal length all have influence on how much or how little depth of field will be rendered; in case you aren’t, take a look at EPIC’s extensive documentation on this subject. Set the aperture to a maximum of 1.2 and play with the manual focus distance slider, then watch what happens in the viewport.
Visualising Depth of Field
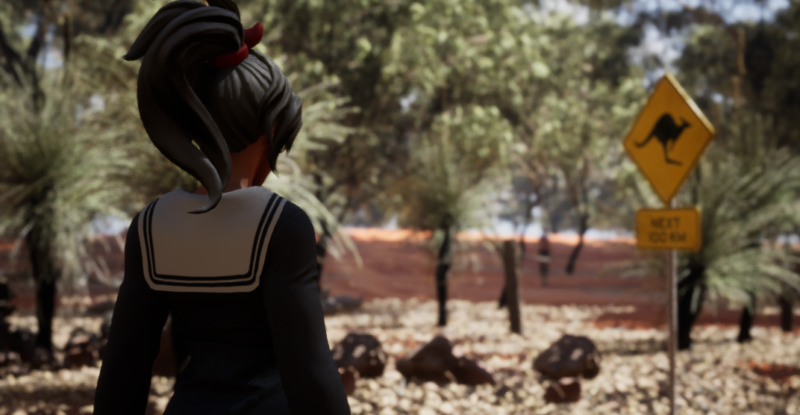
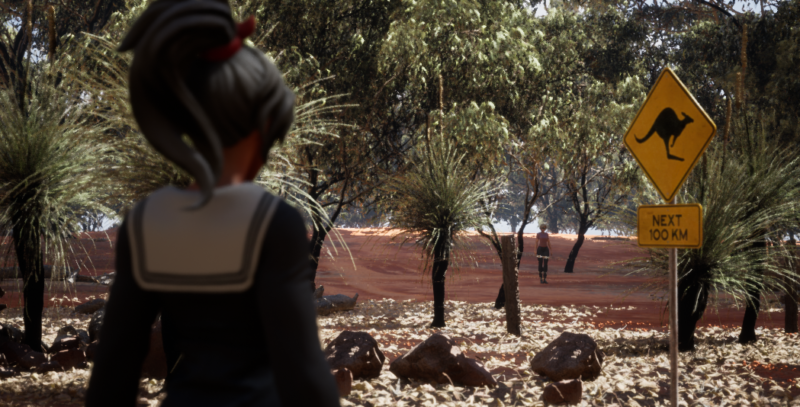
If you’re like me, you might be a little disappointed with how accurate we can preview depth of field in the full-screen viewport. In my scene above, I have two characters relatively far apart from one another, in a handsome looking nature set (Australian Outback). As I move the manual focus distance, I can’t really tell when exactly which object is in focus. When I use the eyedropper it’s somewhat easier, but even that gets it wrong sometimes.
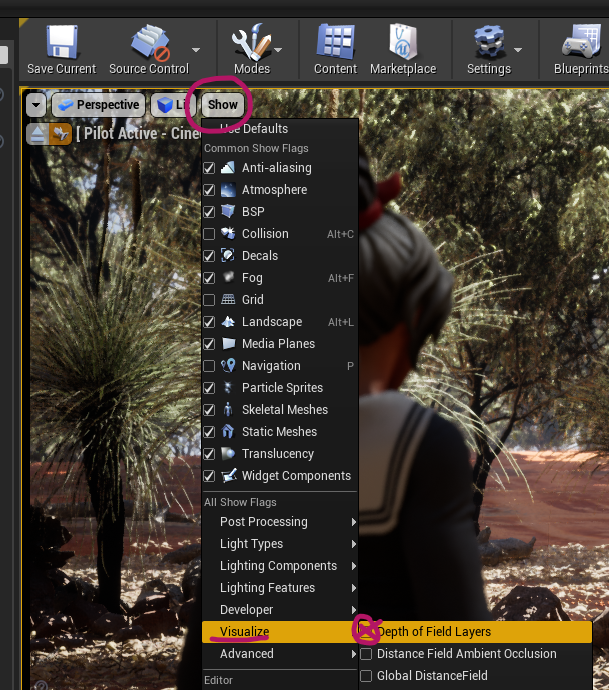
Thankfully there is a way for us to visualise exactly what part will be rendered in absolute focus, and which parts are blurred out. It’s a special viewport mode that can be accessed via Show – Visualize – Depth of Field Layers.
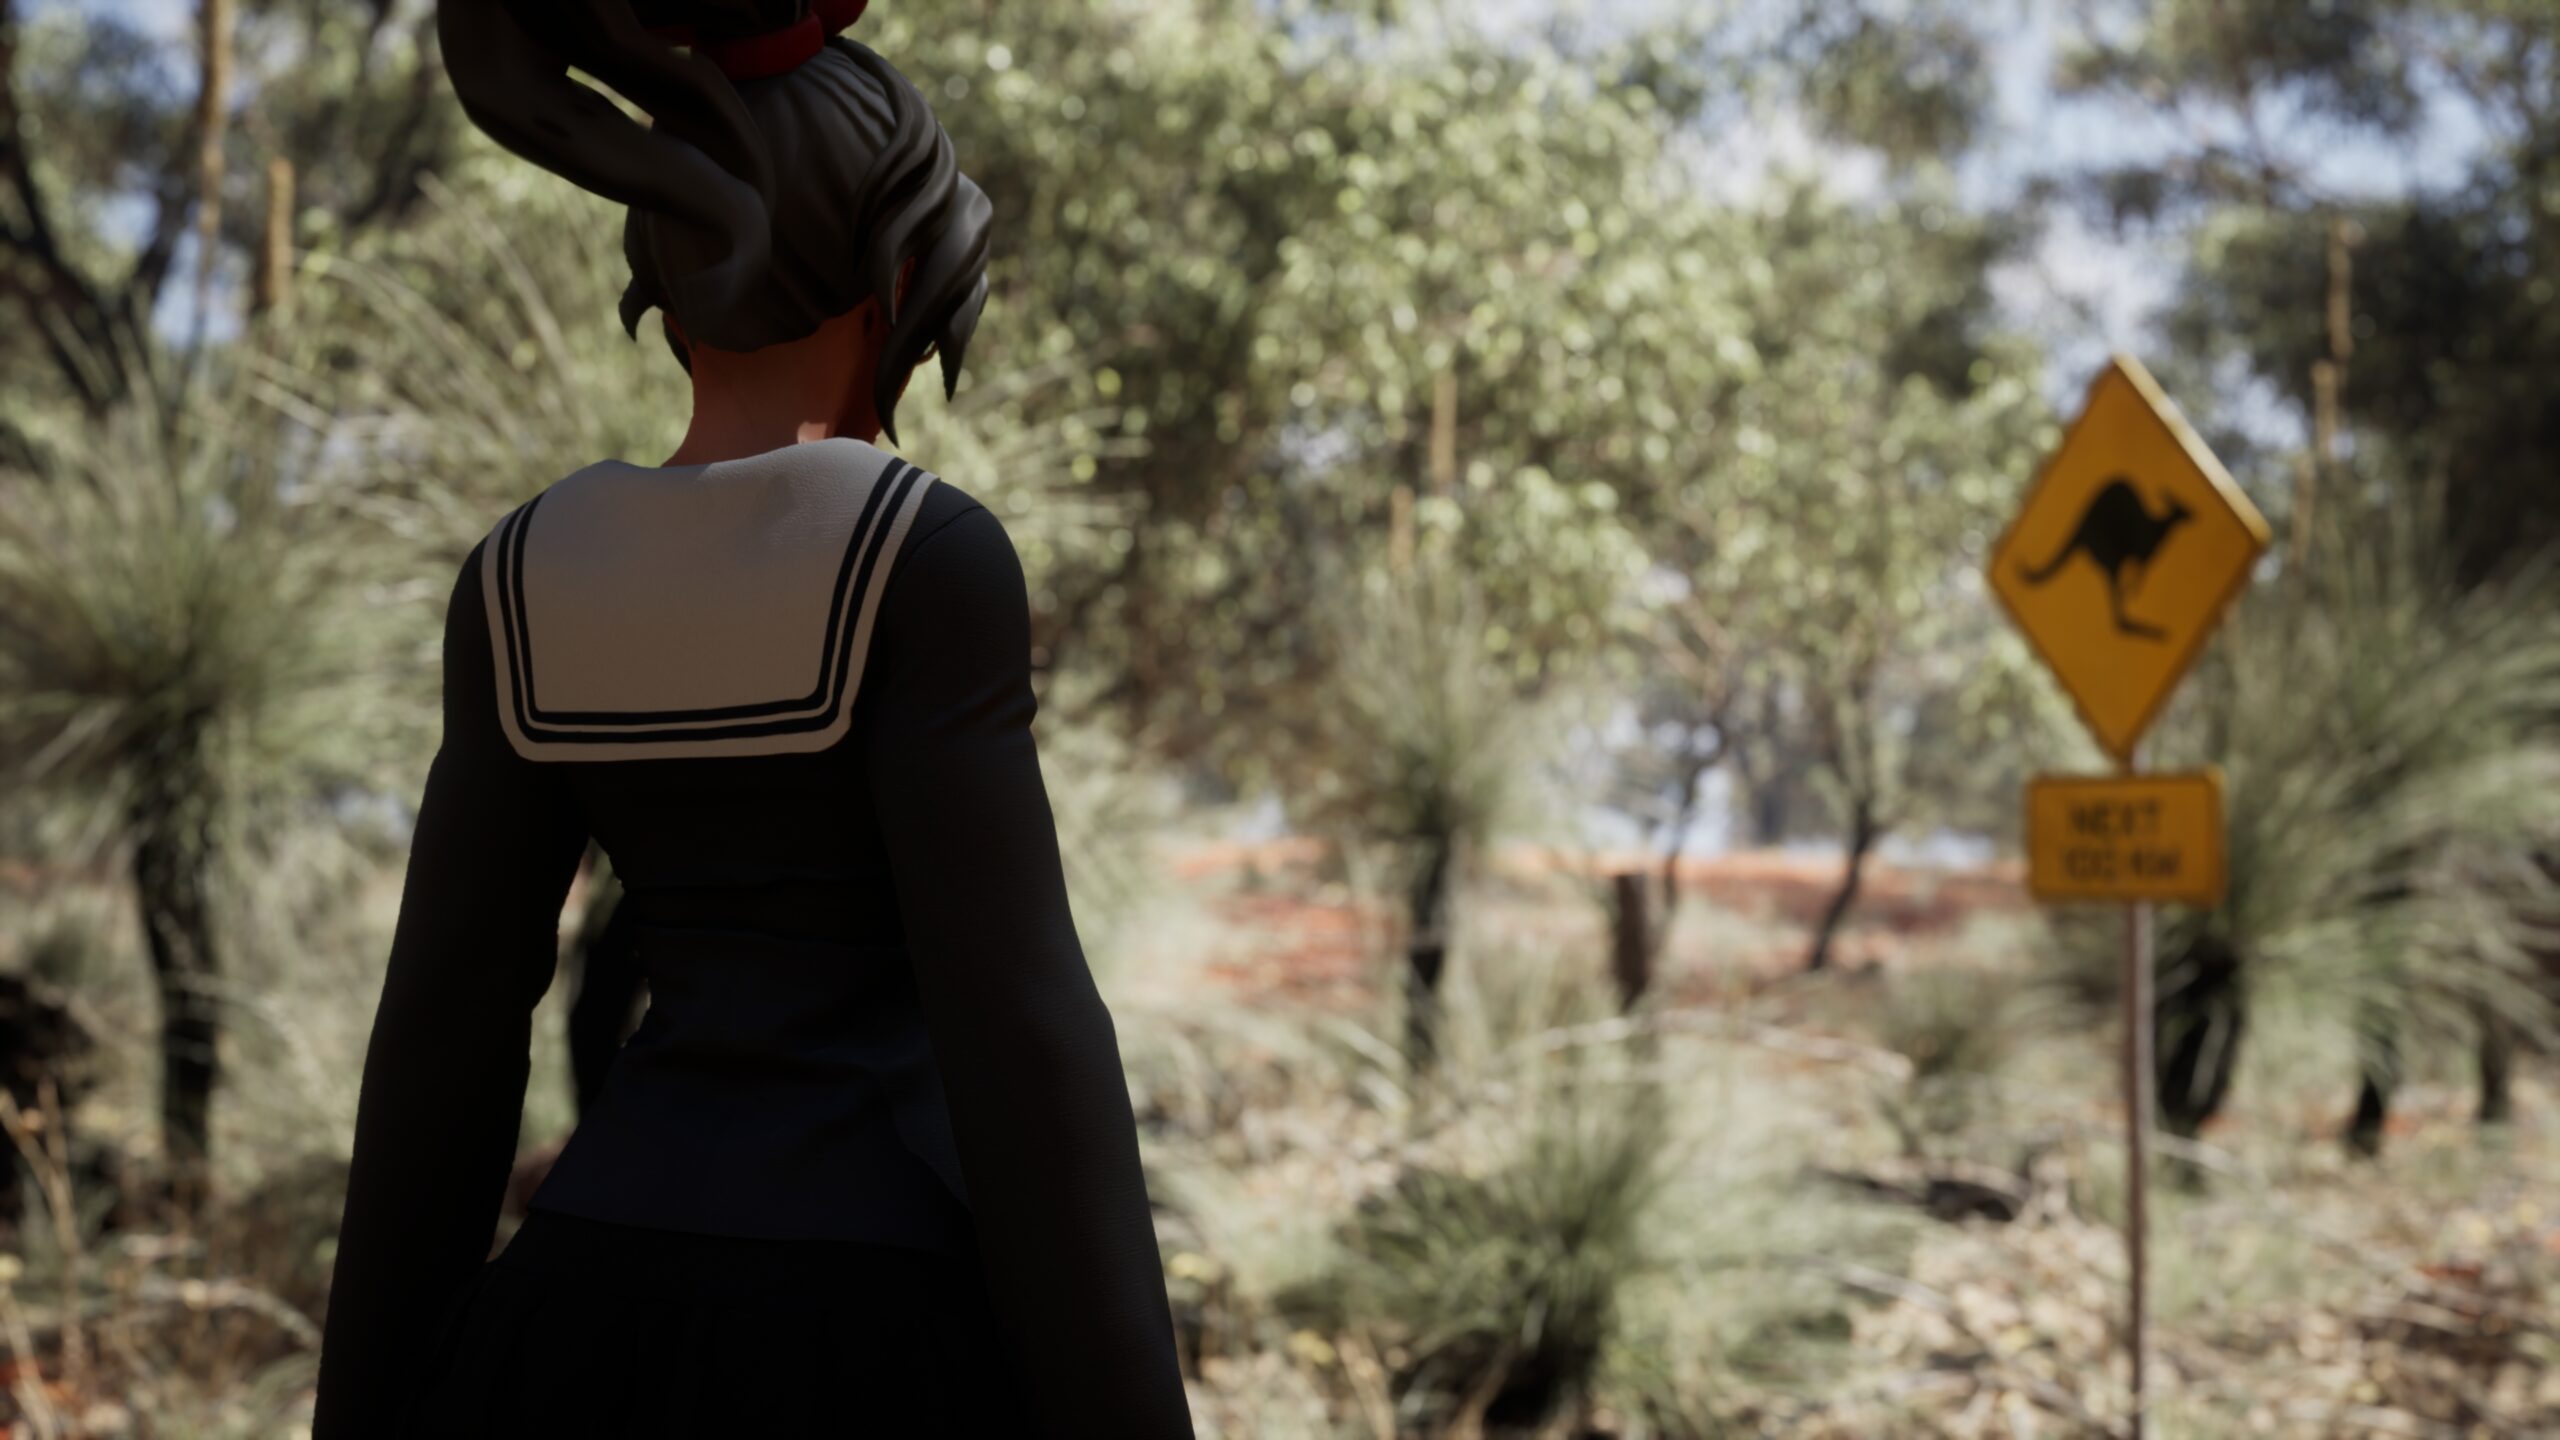
Once enabled we can see how Unreal Engine generates the effect. It’s all fake under the hood really, but very cleverly done: in essence we have three layers that will be composited together:
- a far render (blue)
- an in-focus layer (black)
- and a near layer (green)
Depending on the amount of depth of field that’s needed, the near and far layers are blurred out. As we shift the manual focal length of the Cine Camera Actor, the black in-focus plane moves and colours/depth layers change accordingly.

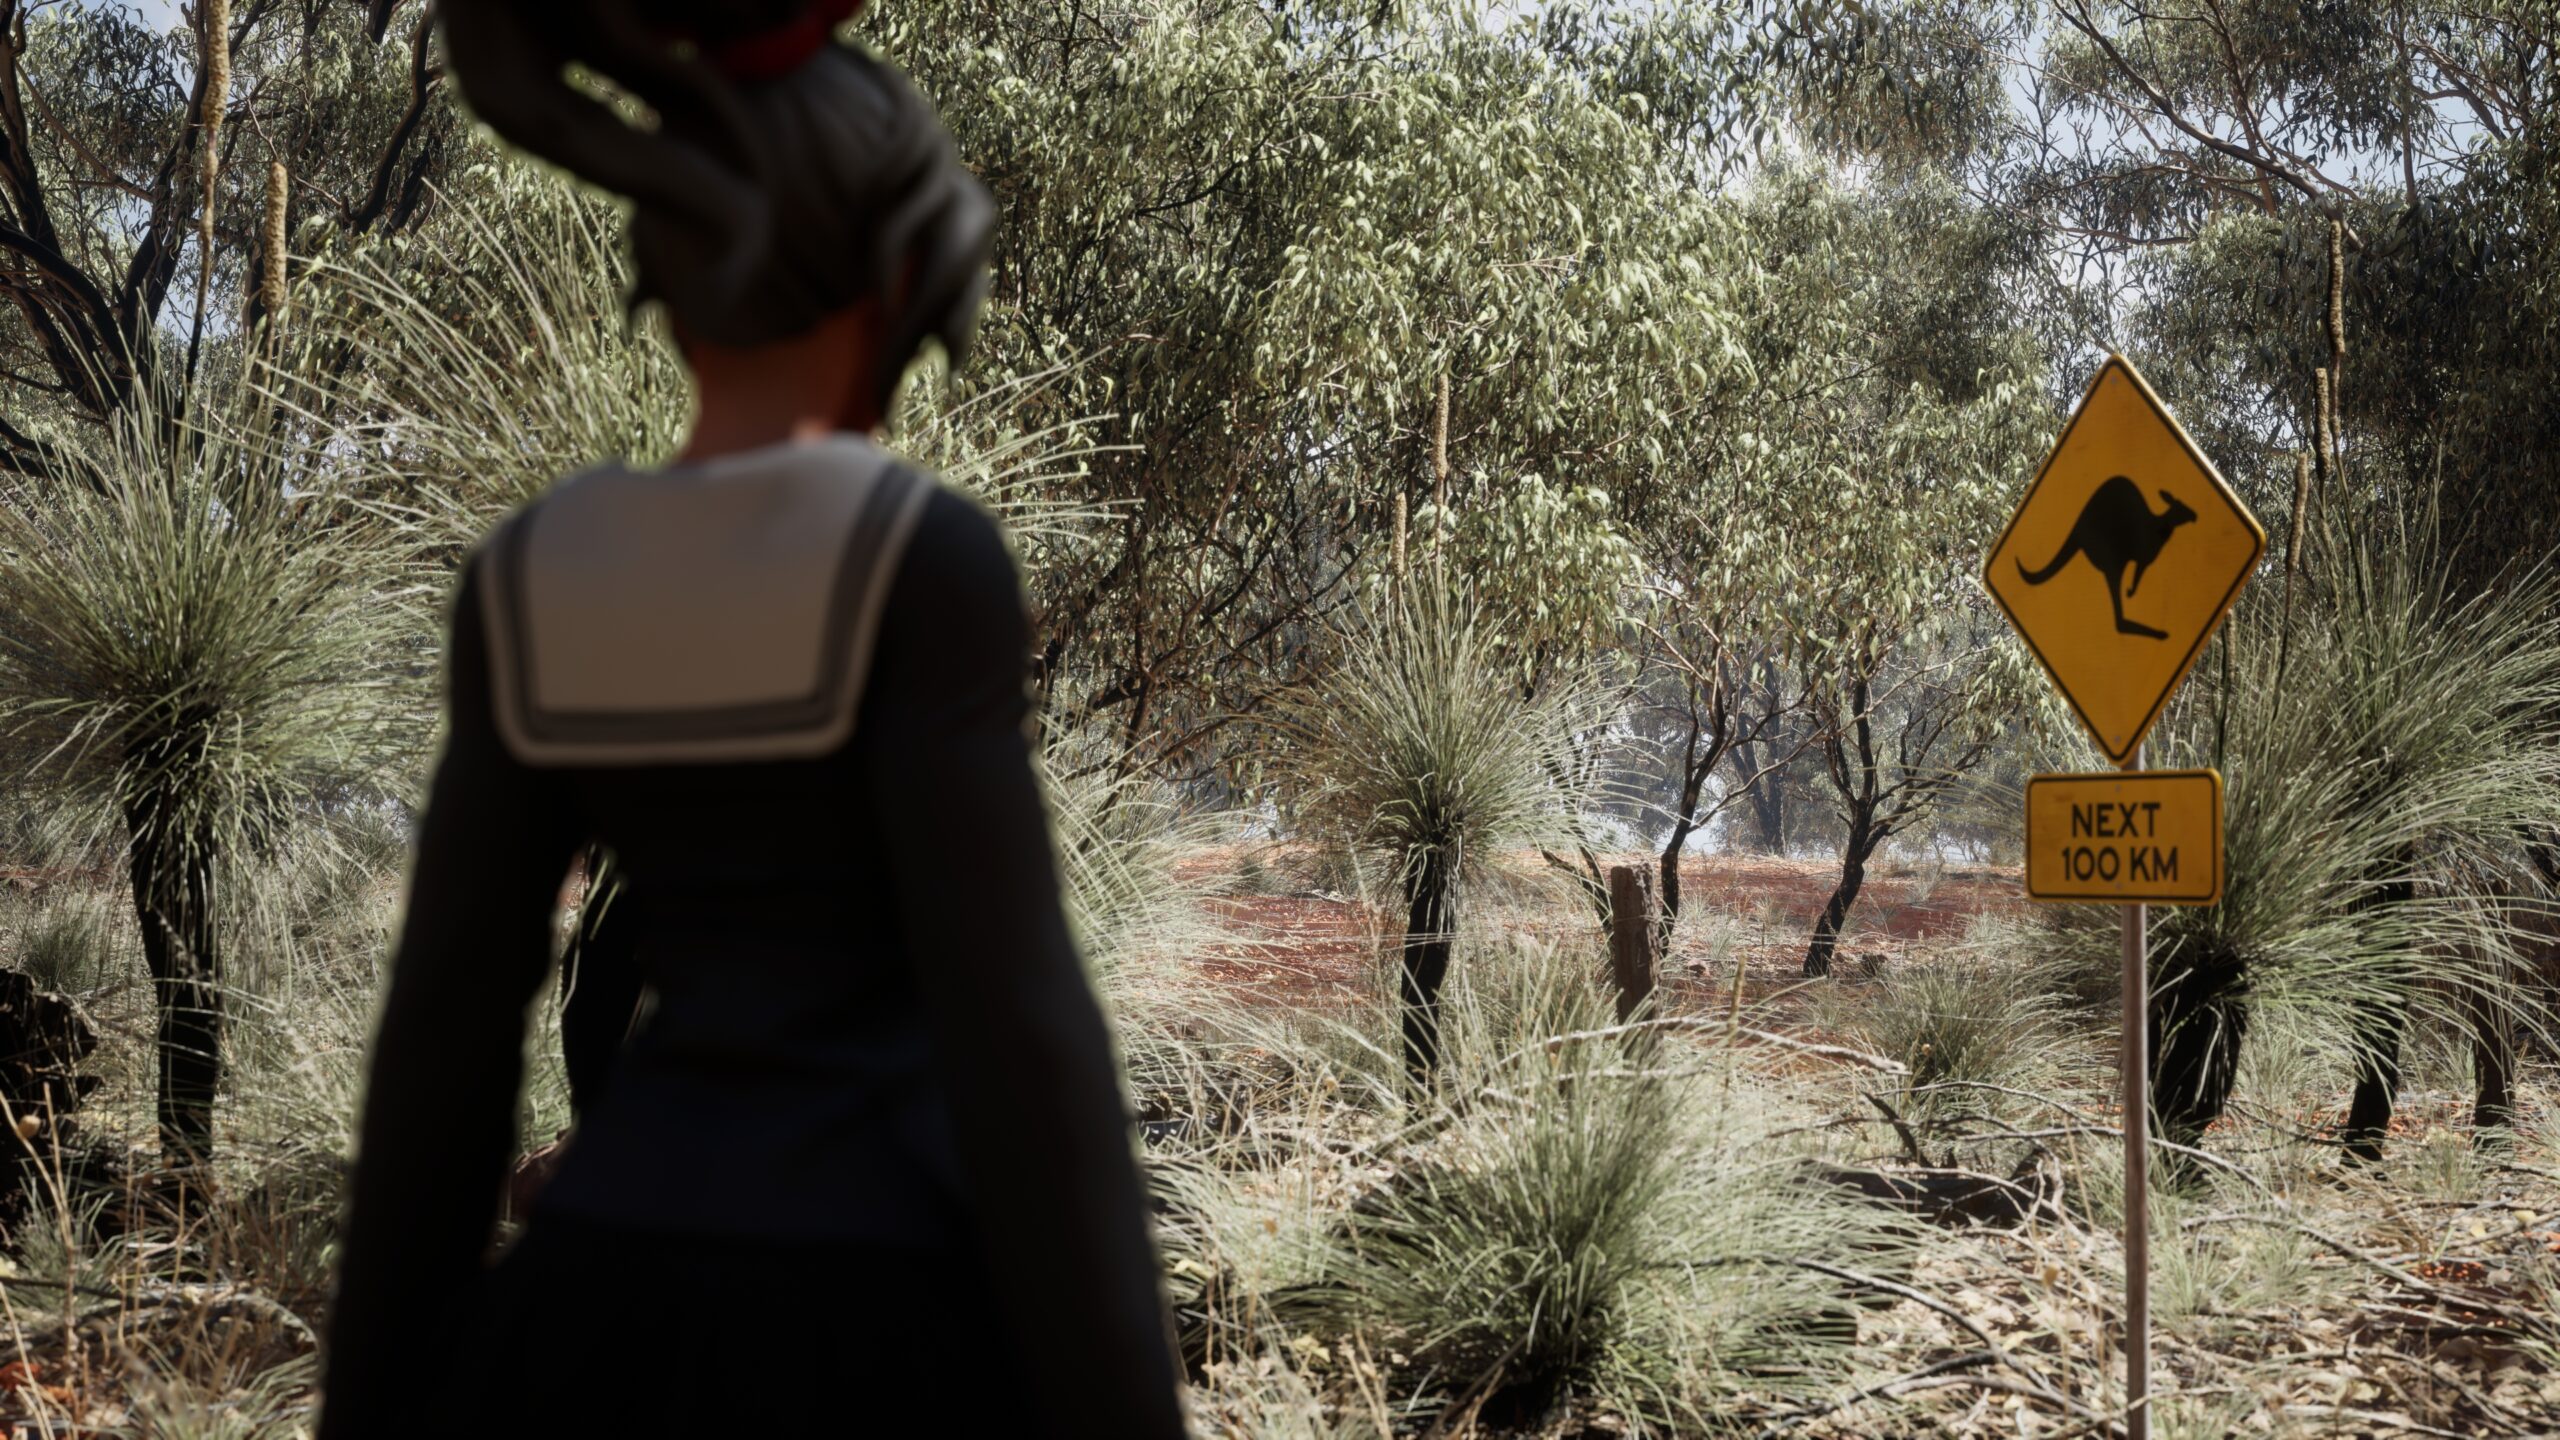
Note that these indicators do not preview how much depth of field effect will be rendered, it’s more of a focus aid for us operators. Disable the visualisation to get a preview of the actual effect. Adjust the aperture until you’re happy. Here are two shots for you to compare, both rendered with an aperture of 2.8, focussing on the character or the faraway field. These were done at without anti aliasing, but with an increased spatial and temporal sample count of 16.
Previewing Depth of Field
Depending on how your viewport is setup, you may not actually see the depth of field until you render, which makes it difficult to set the values for your needs. To see what will appear on the render, switch your viewport to Cinematic mode. This may make it harder to play the sequence, but you’ll get an impression at least. Switch it back to a lower setting to keep working.