We can rig simple figures manually and without the Figure Setup Tool in Daz Studio. It occurred to me that I didn’t know much about this process, until a viewer on Twitch asked me about it. I thought I’d best do some research, make a video and write an article so we won’t forget for next time. Here’s that article 🙂
Rigging is a bit of a puzzle, but in essence we need three things to make it happen:
- bones that move parts of our object
- vertex groups that tell each bone which part of the object can move
- and weight maps that describe how much of the geometry can be moved when it’s told to move by the bones
Let’s set all these things up and make a regular plane primitive bend in the middle for this exercise.
Setting up Face Groups
I’ll start by creating a plane primitive with 4 divisions, Z positive rotation so that it stands up. Face Groups are selections on our object, and typically you’d set these up in the 3D modeller of your choice. Face Groups aren’t always called Face Groups though, but when we import an object they’ll be known as such in Daz Studio (Blender for example calls them Vertex Groups).
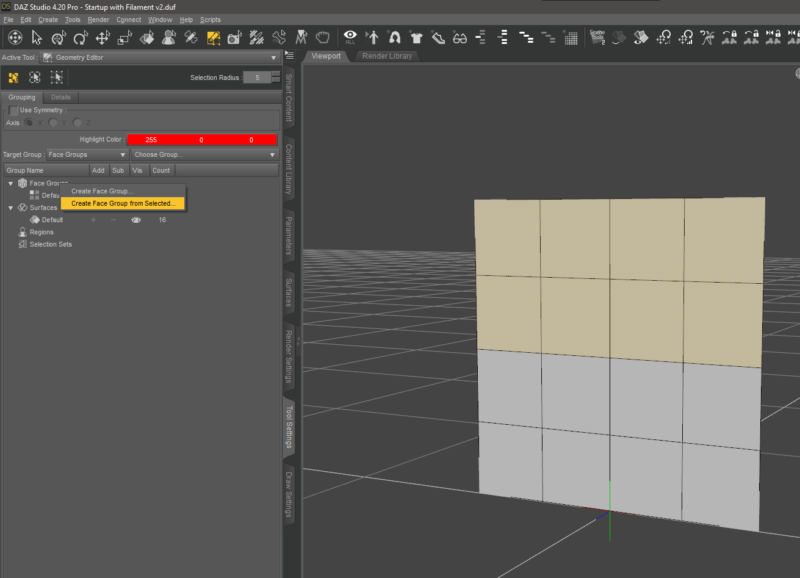
We can use the Geometry Editor to create them directly inside Daz Studio. Make sure to open up the Tool Settings tab and keep it open during this session. Also make sure to select our object in the Scene Tab for the following bits and pieces to work. I’ll select the polygons in first half of my plane and create a new Face Group that I’ll call Top. To do this, right-click on Face Groups and choose “Create Face Group from Selected”.
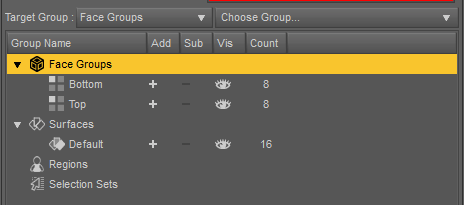
This will leave us with two Face Groups: Top and Default. The latter is essentially “all polygons minus the Top group”, which in our case is exactly what we need to make a second Bottom group. For a more complex object, you’d select more polygons and create as many bones in the places you’ll need them later, but for our example I’ll just double-click the Default group and rename it into Bottom.
Creating our Bones
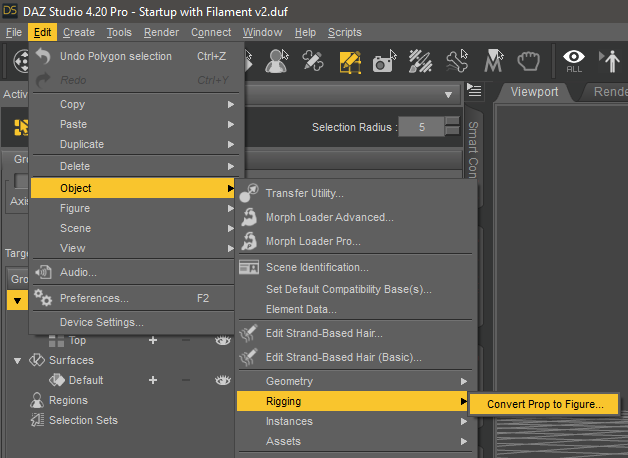
Right now our object is a prop, which means that it doesn’t have any adjustable bones. To convert it into what Daz Studio knows as a Figure (i.e. an object that has bones), head over to Edit – Object – Rigging – Convert Prop to Figure.
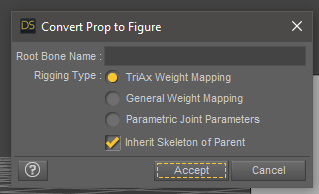
A dialogue will offer various options, of which I’ll leave the defaults and hit OK.
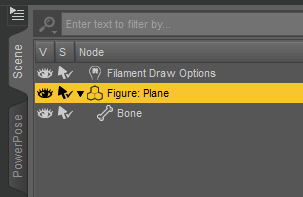
Take a look at your object in the Scene Tab and notice that its icon has changed from a cube to the familiar figure icon now. If you expand it, you’ll see that it has a single bone underneath its top node. This is good news because it means we can now add child bones and expand our hierarchy in the next step.
Adjusting the Root Bone
Currently our one and only root bone is not in the correct place, nor is it named anything sensible. Let’s change this by switching over to the Joint Editor Tool. Notice the manipulator change into two independent little gizmos, a red one and a green one. In between those is the bone, barely noticeable right now because it’s so tiny. Move the gizmos apart from one another and the bone will grow.
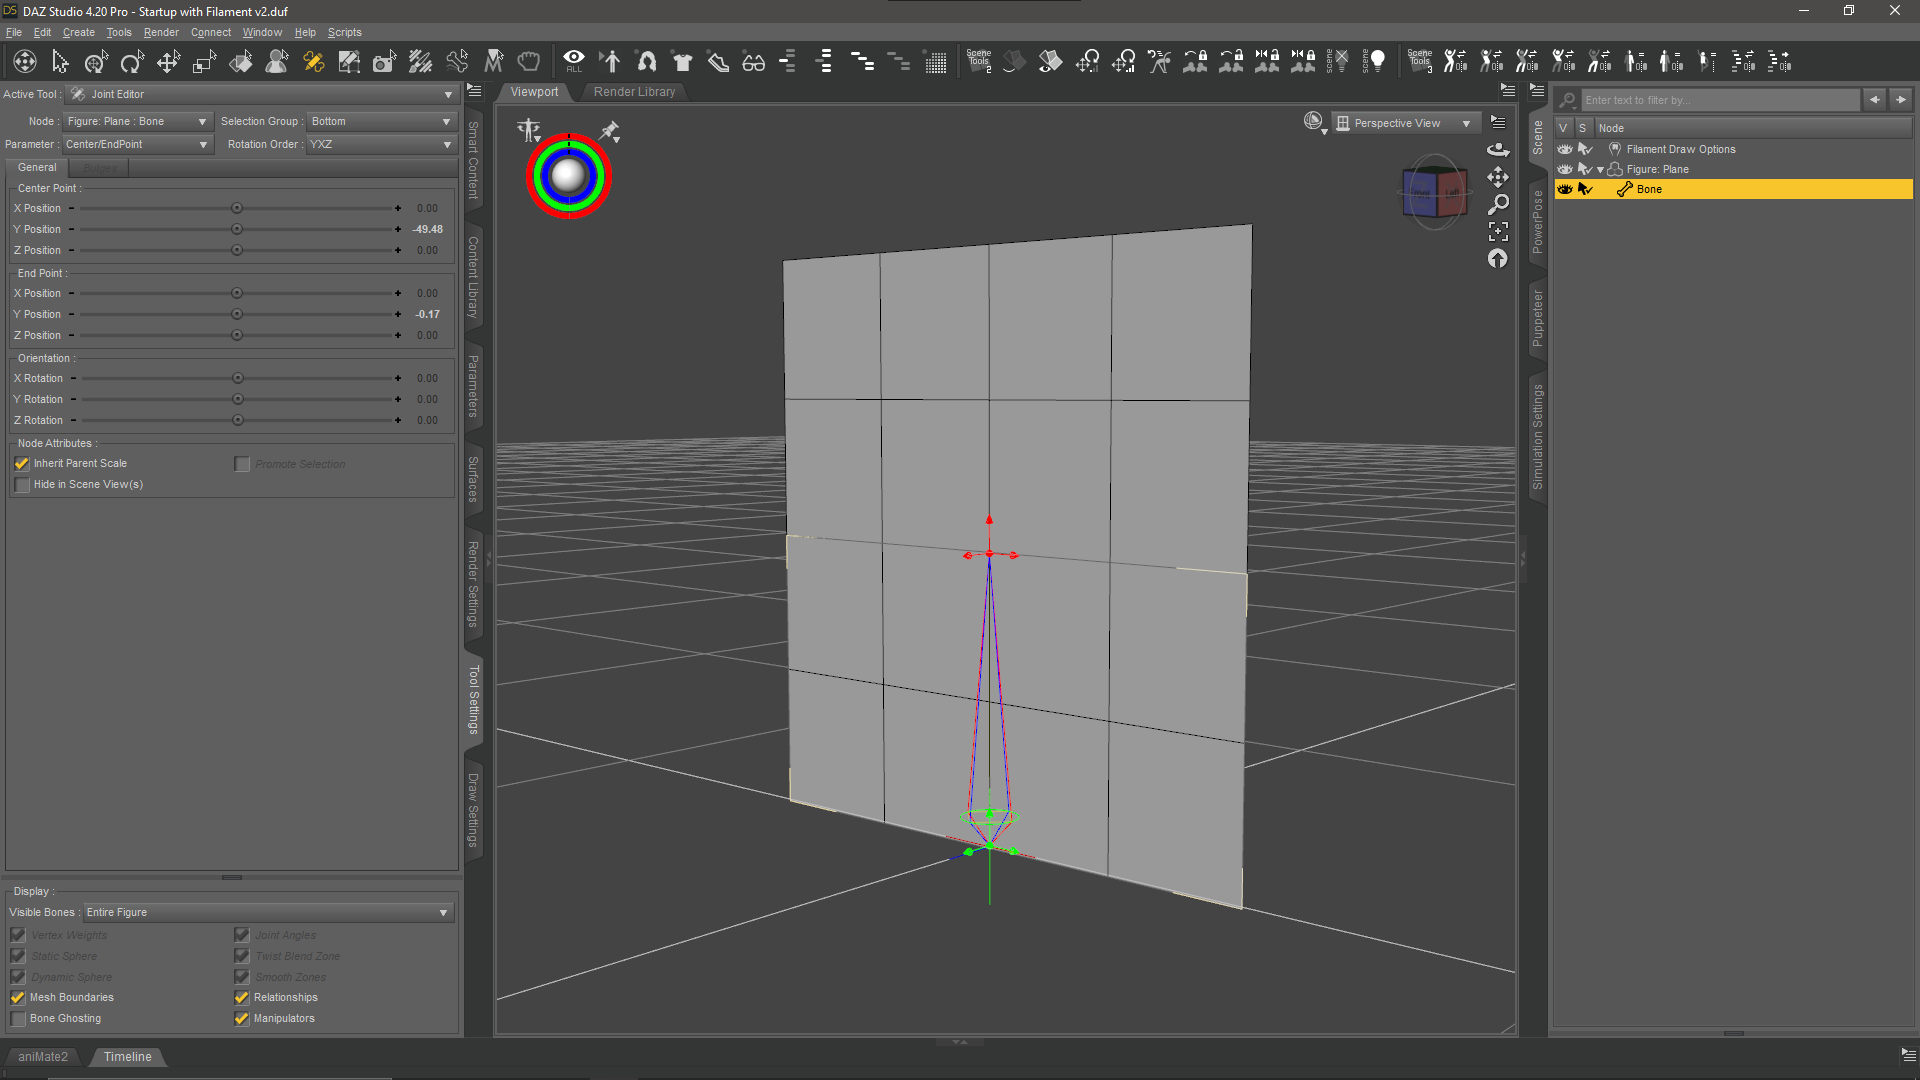
Let’s move the green gizmo to the very bottom of the plane, and the red one to the centre so that our bone looks like the bottom screenshot. Make sure to select the actual bone in the scene tab for this to work, otherwise only one gizmo will show up.
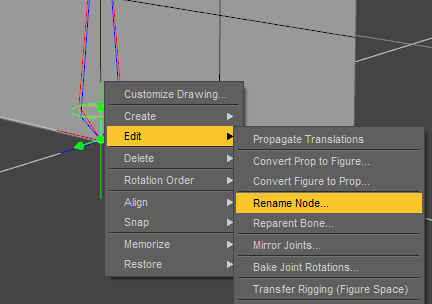
Let’s rename our root bone to something that makes more sense by right-clicking on it, then select Rename Node. I’ll call mine Bottom for now, but use whatever makes sense for your figure. Make sure to change both its Name and its Label, the latter being what’s shown in the Scene Tab (the former being what Daz Studio uses under the hood).
Let’s create another bone now that extends from the first bone’s end point (red gizmo). To do this, right-click on the bone and choose Create – Create Child Bone. This will bring up another dialogue asking for the new bone’s name and it’s Rotation Order. This somewhat confusing concept describes how the bone is oriented when it is created. I’d like my new bone to follow my old bone, so I’ll take a look at its rotation order in the Tool Settings Tab and match it, then hit accept.

As a rule of thumb I try to imagine which axis my bone should point towards (up in my case, which is Y in Daz Studio). This gives me a clue which letter comes first, the rest is guesswork for me (could be YXZ or YZX).
Thankfully our new bone extends all the way to the top of our plane, so it’s positioning does not need to be adjusted for this example. In a real life situation, move the gizmos accordingly and create additional bones as necessary. Here’s what we have so far:

Associating Bones with Face Groups
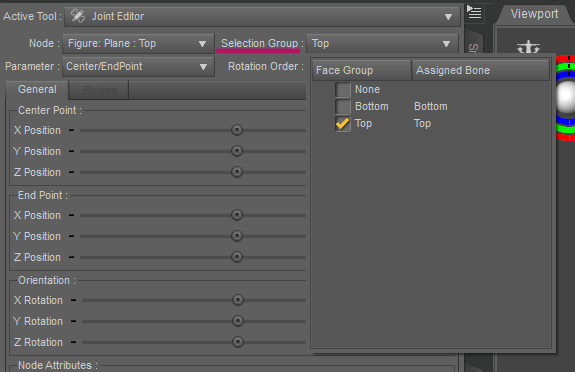
We need to tell Daz Studio which bone should control which Face Group next. This is done still with the Joint Editor Tool selected on the Tool Settings Tab. Select each bone and take a look at the drop down called Selection Group. This will show the relationship between bones and face groups. Select each bone, bring up this menu, then pick its corresponding Face Group until all match. Here’s what it should look like for our example:
Filling Weight Maps
Weight Maps are necessary to tell our geometry how much of it should be moved when a bone moves. Weight Maps are created by default for each bone, but their value is nil so even when the bone moves, the geometry does not follow as their influence is zero. Weight Maps are a little tricky to understand: each bone has multiple maps, one per rotational axis, and depending on the situation sometimes more than that.
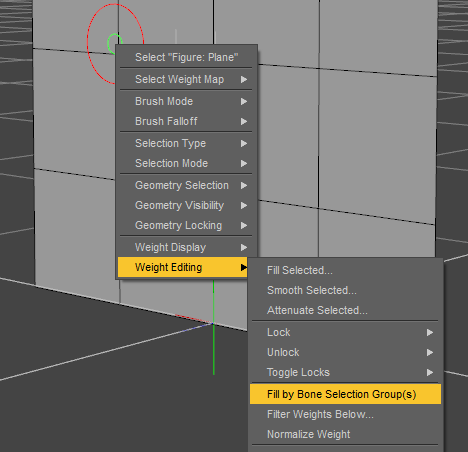
Let’s switch to the Node Weight Brush Tool to fill all maps with 100% for now so that our geometry can move. Right-click on your object and select Weight Editing – Fill by Bone Selection Groups.
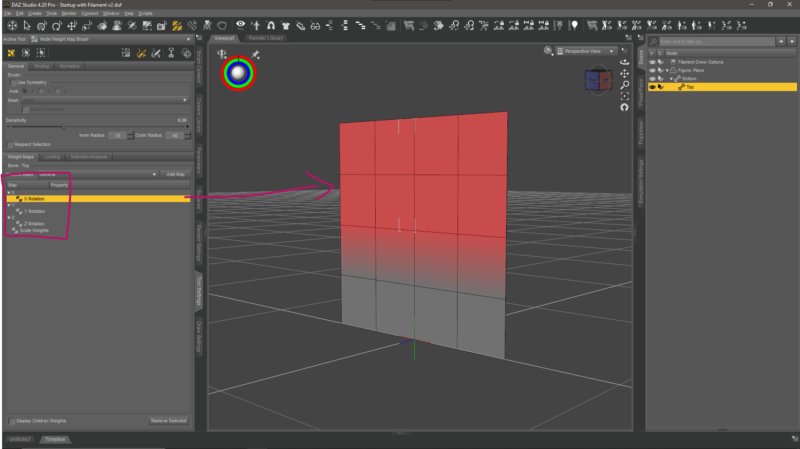
To check this, select a bone of your choice, then head over to the Weight Maps column in the Tool Settings tab and see the effect. For my top bone, the top part for each rotational map appears red, for my bottom bone it’ll be the bottom part. Those colours are guide values of how much influence each map has. Red means 100%, grey means 0%, and colours like blue, green and yellow are somewhere in between.
Testing our Rigging
We’ve done everything necessary to make the top part of our plane bend, so let’s see if things are working as expected. Switch back to the rotational or universal manipulator tool, select the top bone of our figure and rotate it left and right. Notice how the plane bends where there was bending was possible before. Result!
Note that there’s a small bug in Daz Studio that prevents this interactive preview from appearing after rigging. So while you move your mouse, the geometry doesn’t move, but it will pop into place once you let go. To get round this, save your scene and load it again. Now the geometry moves as shown in my example.
Happy Rigging!
It seems that some things have changed since you made this tutorial. Near the end of this tutorial the assignment of weight maps to the bones via the Node Weight Brush Tool does not work the way you described. After testing the plane for the bending, only the bone moves, and the geometry stays where it is. Yes the upper part “Top” is red, but it is still not affected by the rotation of the bone.
I think there needs to be an updated version of the tutorial, as I am left in the dark concerning how to fix this problem. I am using DAZ Studio 4.10 Pro. So a tutorial more in line with that version would be best for me.
4.10 is a fairly old version and no longer available for download I’m afraid. I’m using 4.20 in this tutorial and things may have indeed changed since your version was published. Having said that, if you have the bones, weight maps and face groups setup, and the geometry does not move, it could be that the bones are not associated with the face groups. Check with the Joint Editor tool on the Tools Settings tab, in the top left there’s a “Node” drop down to select the bone, and next to it there’s a “Selection Group” to associate the two.