A while ago I watched a nice video by CG Cookie about pouring some coffee into a cup in Blender. It’s a great starter video, even though I found it really tough to follow when I tried it for the first time. I thought I had made some notes on the process back then, but must have forgotten – so here’s the principle for creating simple fluid simulations in Blender 3.1.
This is what we need:
- a Fluid Domain (default cube, with Fluid Dynamics enabled)
- a Flow Object (small sphere)
- an Obstacle (like a cup)
Let’s set these things up step by step.
Creating the Fluid Domain
For this example I’ll use the default cube that comes with a new Blender scene. No need to delete the little guy for a change, we’ll put him to good use! I’ll move him up so that he sits right on the ground plane (GZ1 will do the trick). With the cube selected, head over to the Physics Tab and click Fluid.
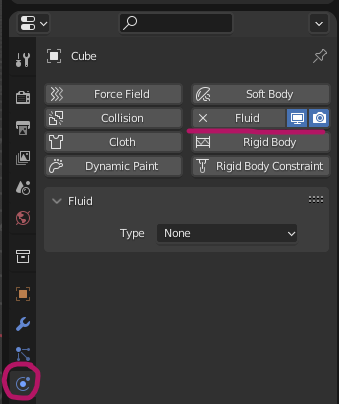
Change the type to Domain, and the Domain Type to Liquid. Our liquid can now be poured inside this cube, and in fact this object will become out liquid later. Make a mental note of the Resolution Divisions under Fluid – Settings, that’s the voxel size of our liquid. The higher the value is, the more detailed our simulation will become (at the expense of simulation time). Leave the default value of 32 in place for now.
Further down under Cache you’ll see a directory that Blender will use for saving our VDB files. The default will work fine, but be aware that these files will be overwritten next time we run a new simulation. I suggest to use a known cache directory of your choice, or use a folder that’s saved with your project if you’d like to store the calculation.
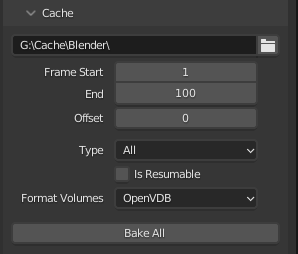
Pick a duration for your simulation (let’s say 100 frames for this demo), and adjust your timeline accordingly for easier previews. Set the Type to All and you’ll see a Bake All button appear. Don’t press it just yet, but remember where it is for later. This will calculate the fluid sim when we’re ready in a moment.
Creating our Liquid
Next I’ll create a small Ico Sphere and place it at the top centre, inside our Domain Cube. It’s best to switch to wireframe mode for placement. Any object will do, imagine this to be the point from which we pour liquid. Here’s what my viewport looks like:

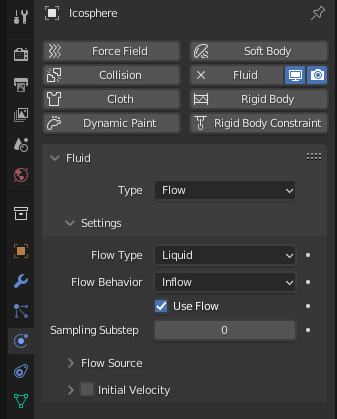
With the sphere selected, head over to the Physics Tab and choose Flow. This will tell Blender that this object will participate in our simulation, and what type it should be. Under Flow Type choose Liquid. For Flow Behaviour, choose Inflow. Here’s what we have:
The Flow Behaviour is an interesting one, it has three settings you may want to experiment with:
- Geometry means our flow object will turn into liquid and fall down inside the domain, depending on gravity settings (think of a fixed amount of liquid being spilled).
- Inflow means our flow object will keep pouring liquid into the domain from this point (think of an open tap).
- Outflow means our object will be used to drain liquid from the domain (think of a plug hole).
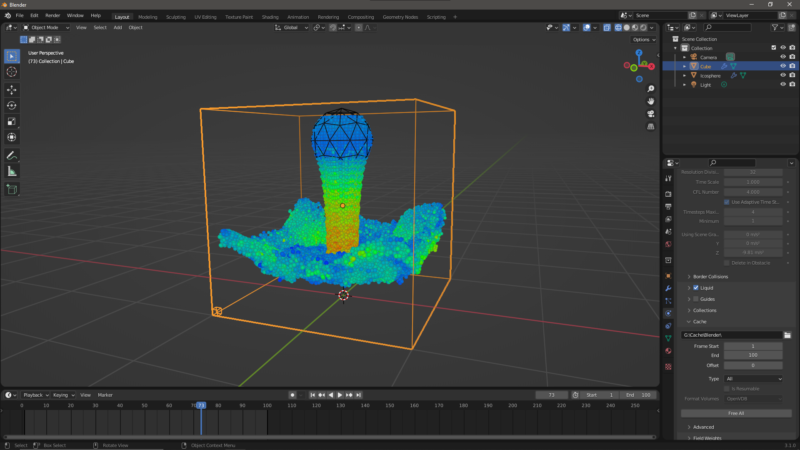
We can test our simulation now by selecting the Cube Domain, then head over to Bake All. It’s a promising start, at least in wireframe mode!
Adding a Cup Object
Chances are we want to collect our liquid in a cup type object, so I’ll add a cylinder to my scene. I’ll extrude the top face and move it inwards so that we have a crude thick walled cup. I’ll place it underneath my sphere, as if it was a coffee cup being filled in a vending machine. Crude yet effective!
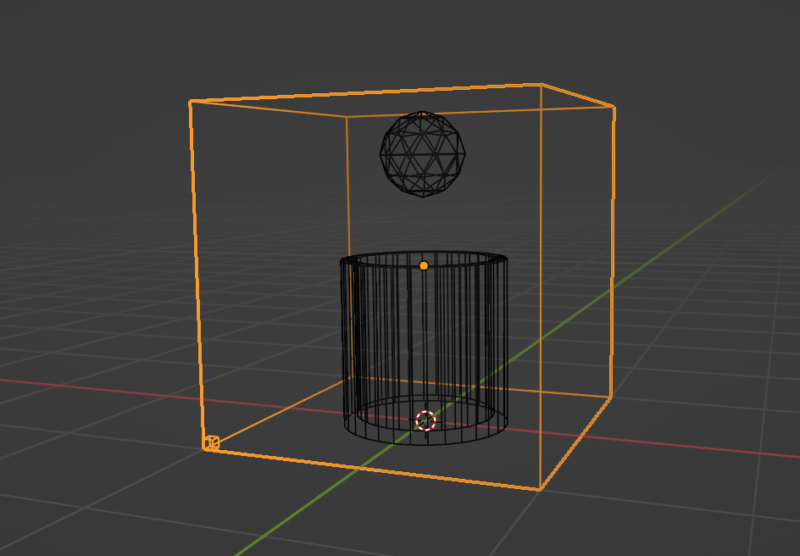
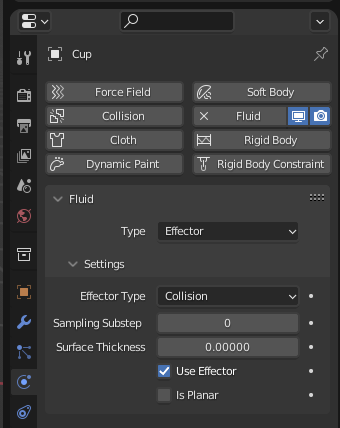
With our cup selected, we’ll head back to the Physics Tab, choose Fluid once more and make our object an Effector. This means it will interact with the flow of water. In case you don’t have a closed object, like a plane, enable the “is planar” option so that Blender can calculate the collisions properly.
All that remains to be done is to re-calculate the simulation. This happens on the Cube Domain, under Bake. Free All will clear the previous calculation, re-enabling some of the parameters on that tab. Click Bake All, wait for it to finish and play your animation.
Turning our Liquid into a Mesh
In wireframe mode we will see a preview of our simulation. However, when we switch to Workbench or Rendered View, we’ll see a solid cube and no animation at all. I remember this to be a great point of frustration for me, because I didn’t understand the “preview vs mesh” concept. One is easier to calculate and visualise than the other, and the preview is great to get the look and feel of our simulation right before having to fiddle with too many settings. The idea is to change the size of the inflow object, animation duration, voxel density and so forth, and when we’re happy in principle, we need to tell Blender to display a mesh object instead of the preview object.
To do that, head over to the Cube Domain, and under Liquid, enable Mesh. As soon as you do that, the solid cube disappears in the render and turns into the actual liquid mesh. Disable Liquid to remove the colourful preview balls. We now have a real animating object, courtesy of VDB files under the hood. Add your favourite shader and see what you can come up with.
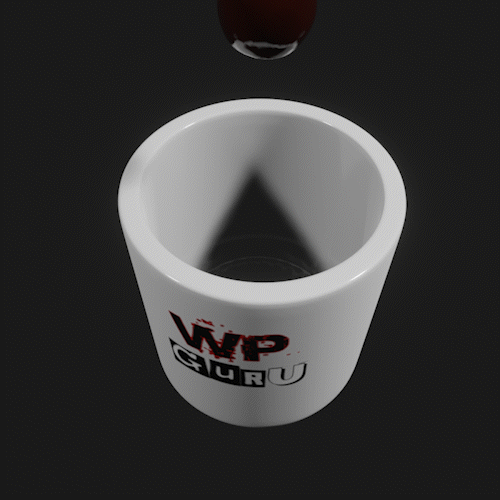
That’s it! Now we know the basics of fluid simulations in Blender. Run rivers, make oceans, pour tea and coffee, and most importantly have fun with it 🙂
- CG Cookie Video: https://www.youtube.com/watch?v=6B0QM4Cft5c
- Blender 3.1 Fluid Documentation: https://docs.blender.org/manual/en/latest/physics/fluid/index.html
- Helpful StackExchange Thread: https://blender.stackexchange.com/questions/172639/fluid-simulation-domain-visible