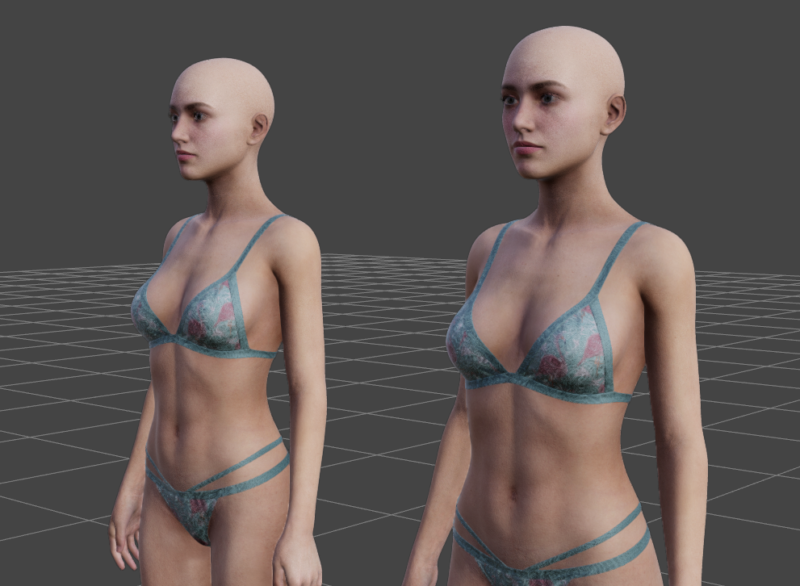
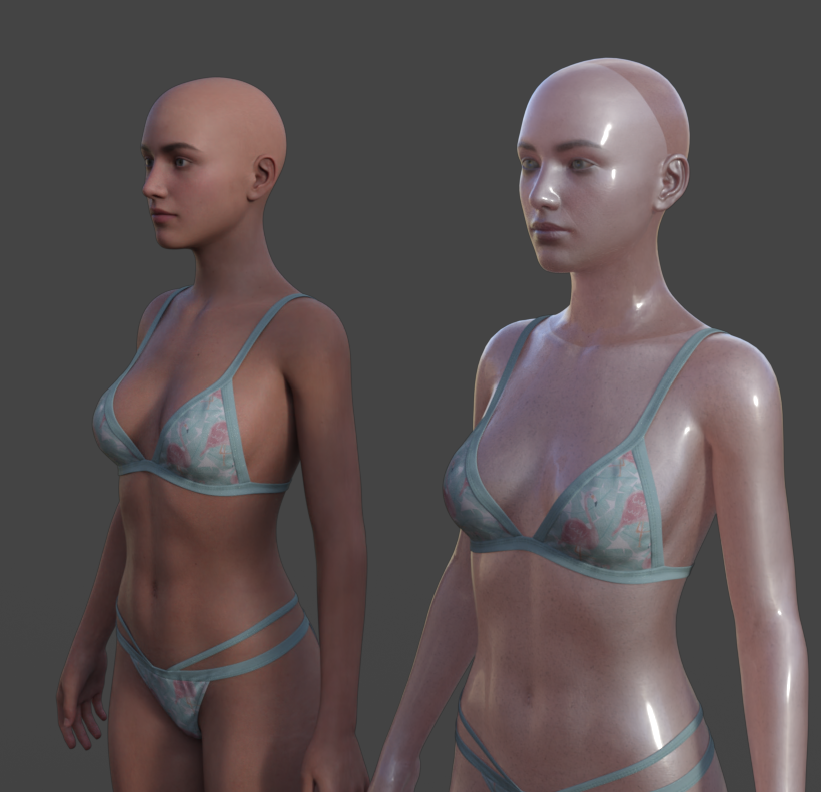
One of my supporters was asking if there was a way to use Genesis 8.1 materials on the older Genesis 8 figures, and if the reverse of my character conversion video on the opposite process could be used. It got me thinking and experimenting, and while it’s not a one-click process, I’ve made it work. The above shows the Genesis 8.1 Base figure with Victoria 8.1 shaders on the left, and the same shaders applied on the Genesis 8 figure on the right.
Here’s what we need to do on G8 to make this work:
- import the Genesis 8.1 UV Set
- create a new surface for the head
- save out each shader from 8.1 and apply it to 8 manually
I’ll elaborate about the ins and outs of the process.
Creating a Genesis 8.1 UV Set
The two main differences between G8 and G8.1 are that the Torso material zone has been split into Body and Head, and slightly different UV layouts. This means we’ll need to bring these changes to G8 so that the textures look handsome. Without this step, we’ll see missing ugly white strips.
Let’s start by loading G8.1 into the scene and switch them to Base Resolution. Make sure to delete/invisibilise the tear duct and eye lashes, or make it even easier on yourself my loading the great Dev Load character. Export as OBJ. Leave the character in place and move him/her/them over to the right and out of the way a bit.
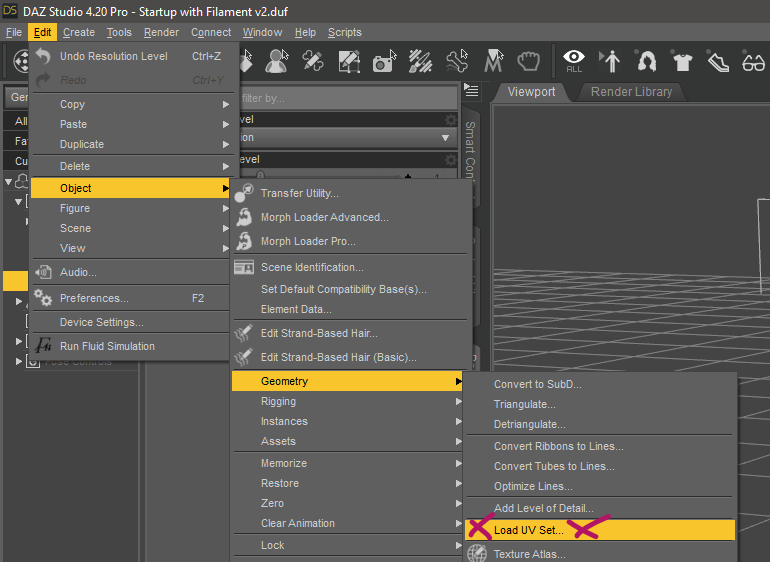
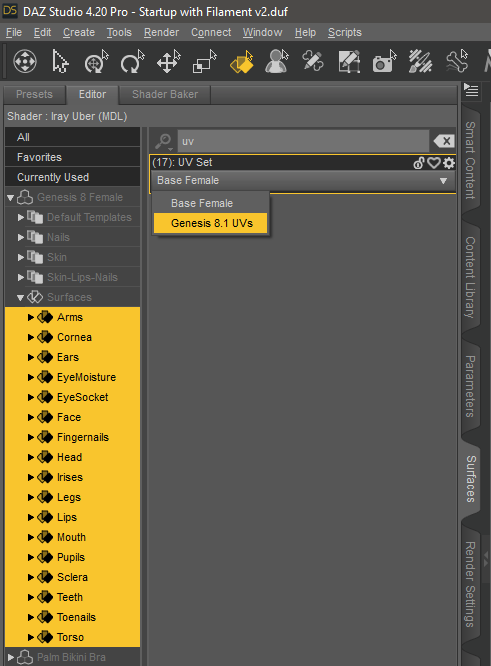
Next load the equivalent G8 character and import G8.1 as a new UV set. This happens under Edit – Object – Geometry – Load UV Set. Give it a name and make sure there are no import errors. If there are, the same rules apply here as they do for creating morph targets (base resolution, and no additional items must be exported).
With this in place, let’s move on to the next step:
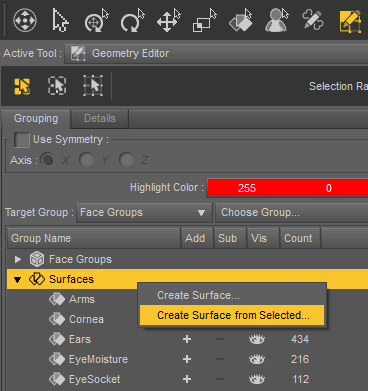
Creating a new surface zone for the G8 Head
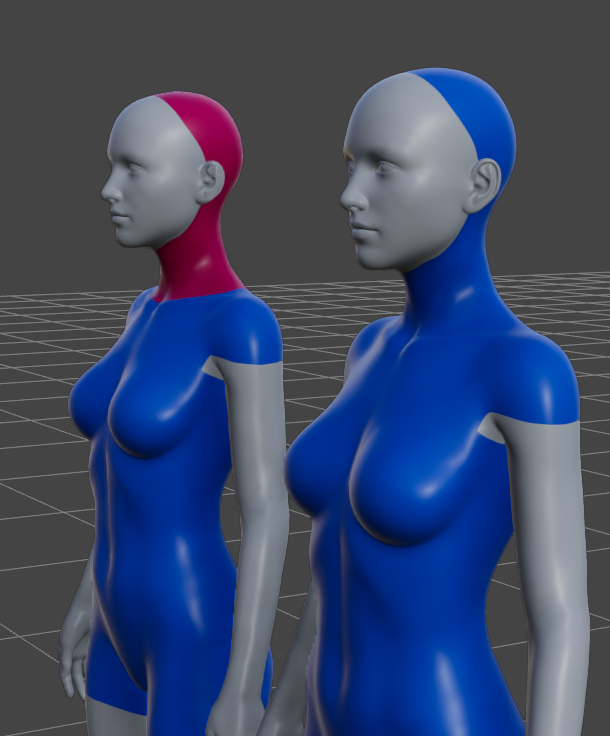
Genesis 8.1 has a new material zone called Head that gives more resolution to the back of the head and neck. This was part of the same UV map for the Torso on Genesis 8 (now renamed Body in 8.1). All other surfaces have remained the same, aside from some UV layout tweaks. We need to create this separate Head surface on G8 to apply the appropriate shader.
To do that, switch into the Geometry Editor, select G8 and start paint-selecting the Head area. Keep a coloured-in version of G8.1 nearby as a reference. You can also paste a skin texture from the G8.1 Body onto the G8 Torso and see where things start looking bad. Here’s how I’ve setup my scene (G8 on the left, painting the selection):
With the selection in place, head over to the list of surfaces, right-click on the heading and choose Create Surface from Selected. Call the new group “Head” and you’re good to transfer the materials.
Now head over to the Surfaces Tab, select all surfaces on G8 and switch the UV Set over to the one we had imported in the previous step. I find it easiest to search for “UV” and flick the switch on all surfaces simultaneously.
Transferring Genesis 8.1 Shaders onto Genesis 8
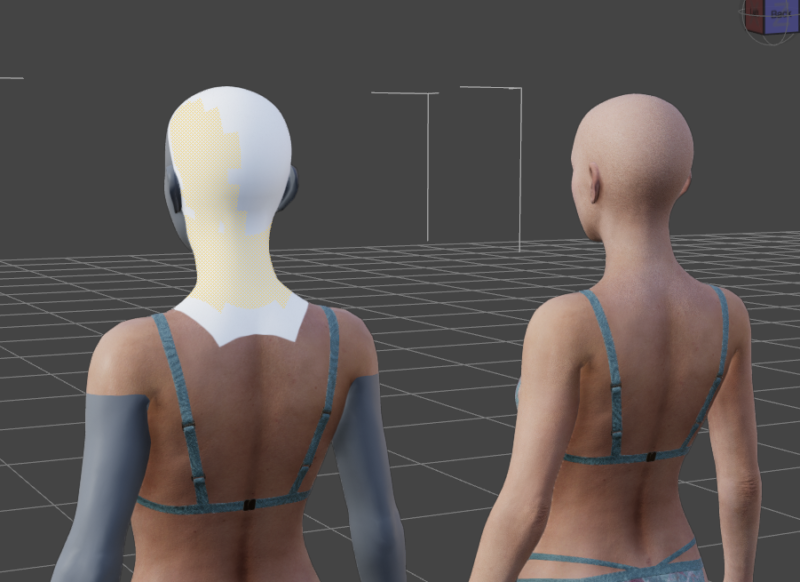
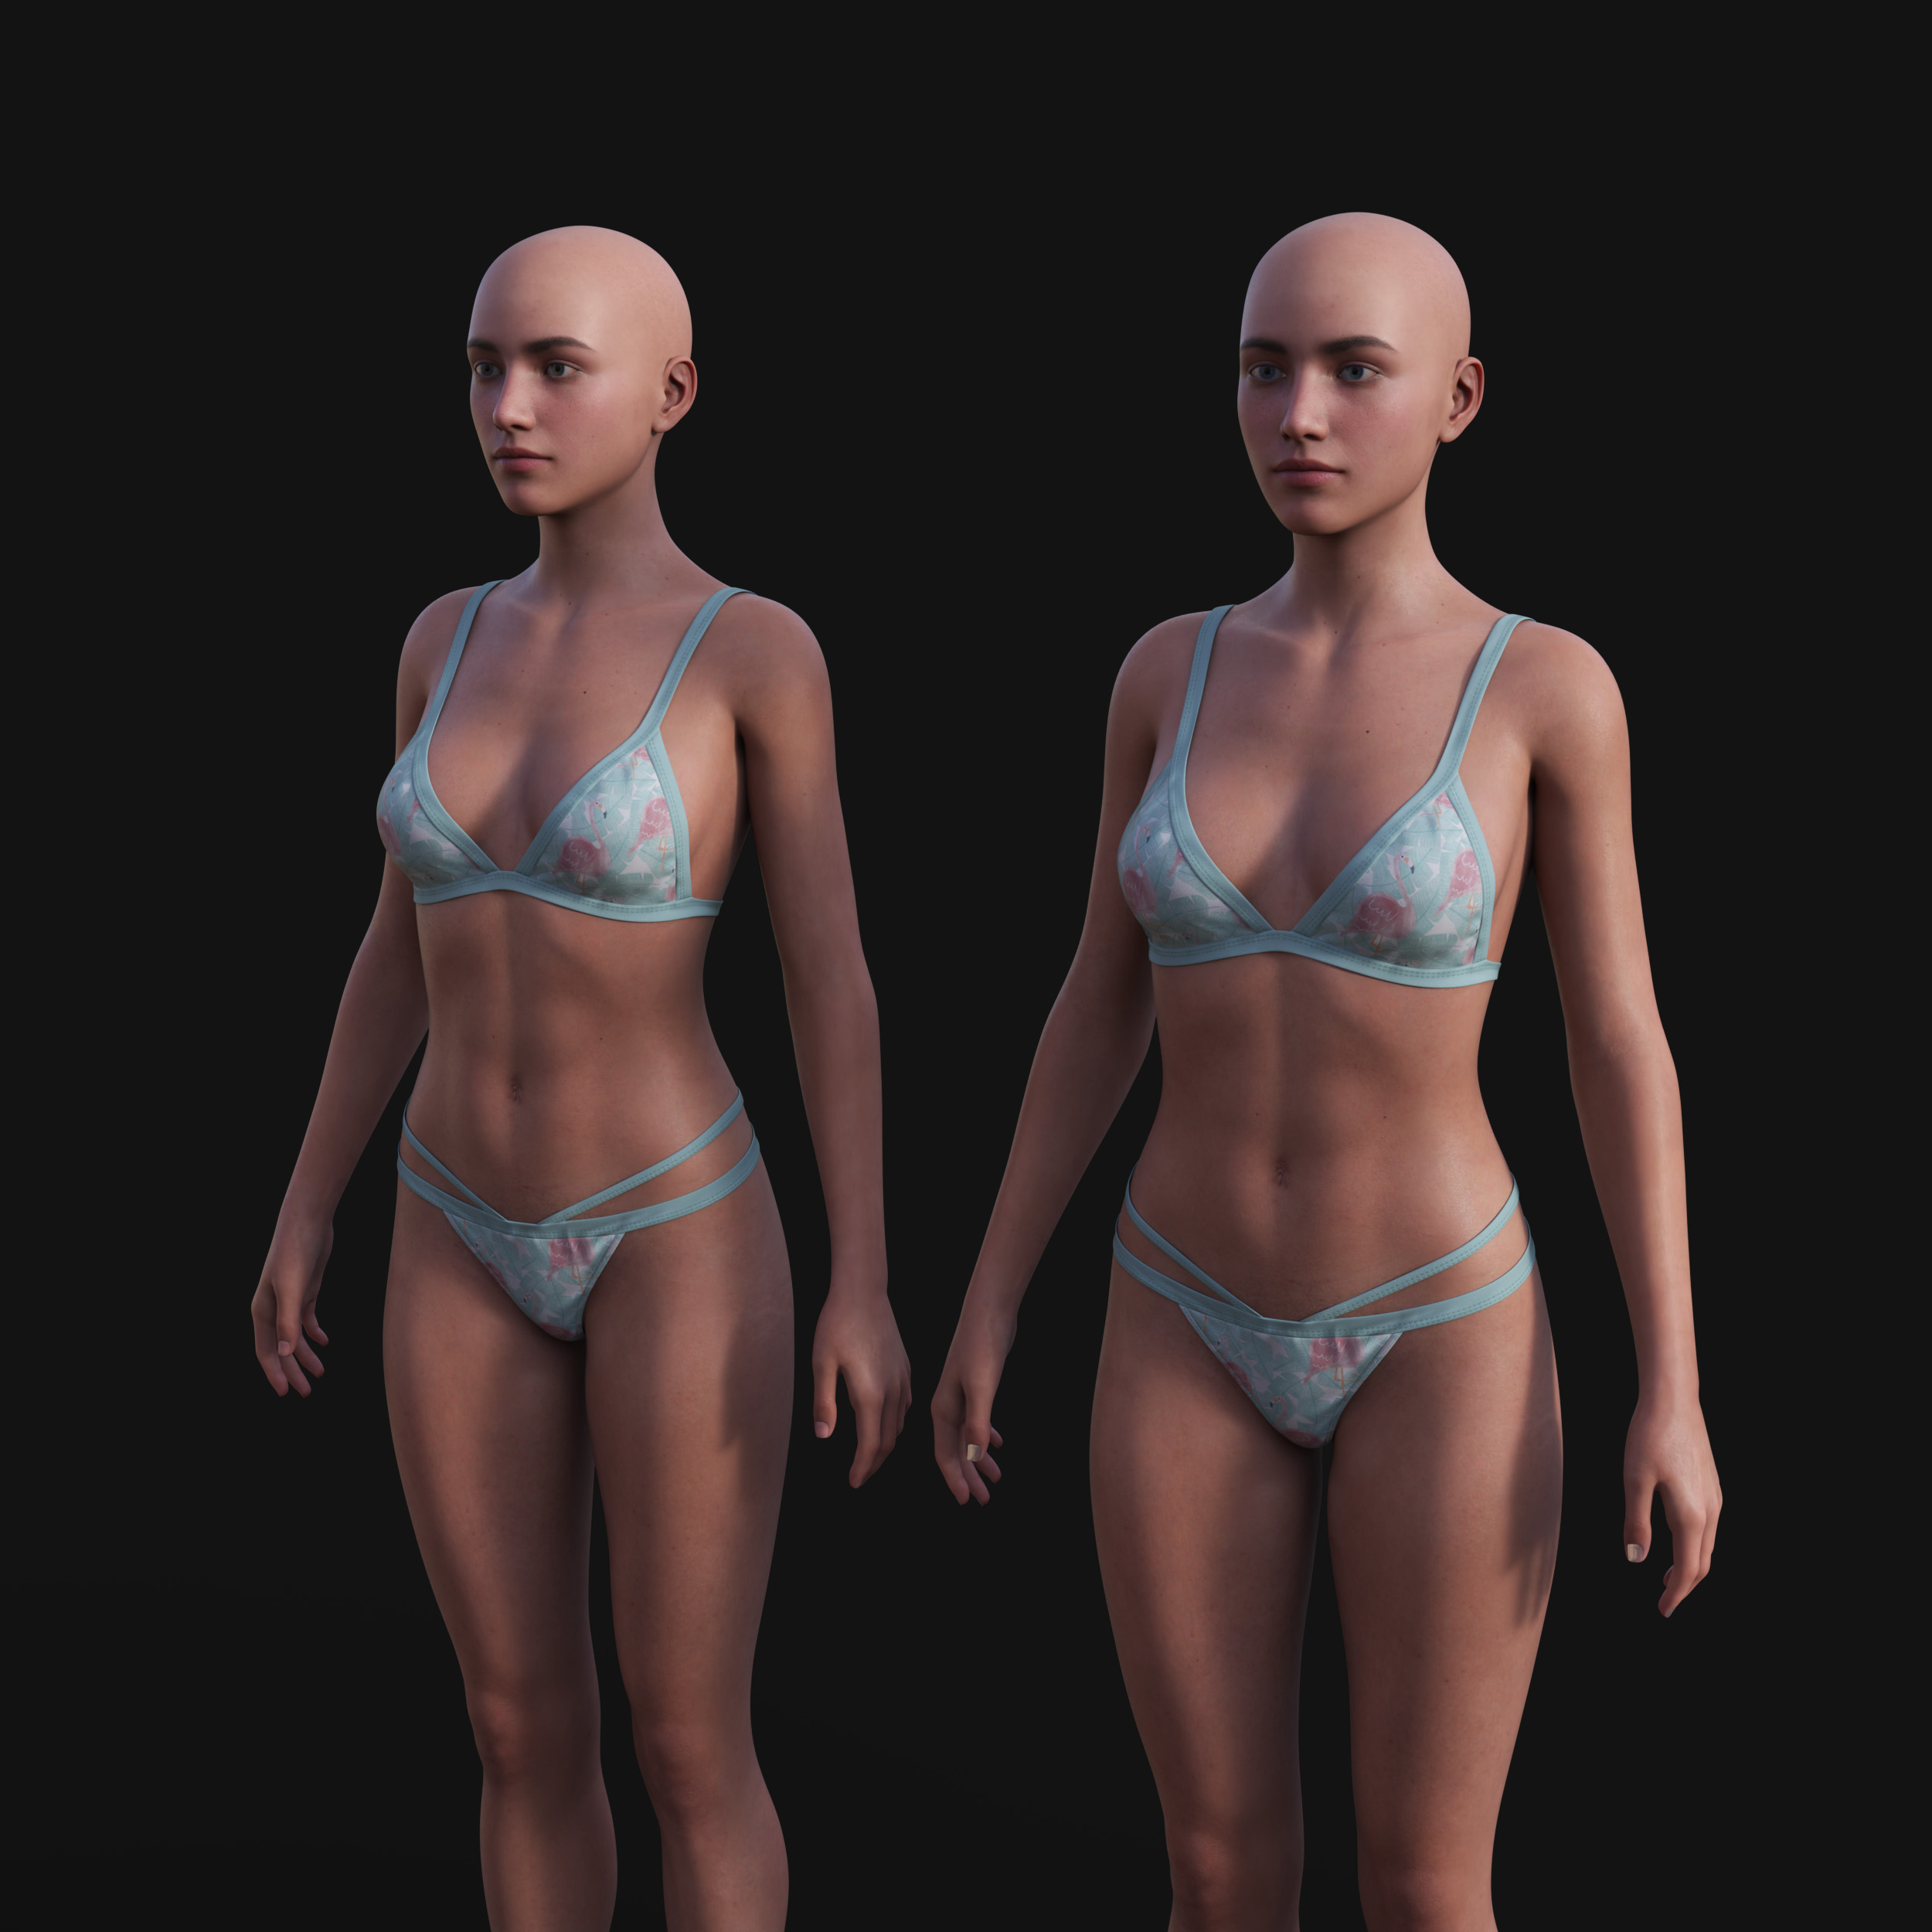
Theoretically it should be enough to switch over to the Surfaces Tool, select all surface zones on G8.1, choose Edit – Copy Selected Surfaces, then paste this on the equivalent G8 surfaces. While it works for textures, it appears that some properties are not transferred this way – presumably channels that do not exist on the G8 version are not created, like Occlusion and Makeup. If it’s not noticeable enough in the preview, switch to Iray and see something like this (with our G8 conversion on the right).
Not what we were looking for indeed. The only way I know how to rectify this is to save out each shader manually from G8.1, then apply it to the equivalent surface on G8. Sadly a material preset will fail when it’s applied to G8. If there is an easier way to do this, please let me know.
I don’t tend to worry about the small inner parts and just convert the outer ones, like arms, legs, lips, ears, face, body, head etc. To do this, use the Surface Selection tool, select say the head surface on G8.1, use File – Save As – Shader Preset. Better yet, map your own library and use the little plus icon on the Content Library. Once saved, select the equivalent surface on G8 and load the shader onto it. Do this for all outer surfaces and you’ve made yourself a Genesis 8 character with 8.1 materials!
And there we have it! While not the fastest process, if you do want those delicious 8.1 skin shaders on any of your older characters for whatever reason, there is a way to do this. Have fun!