Most 3D apps have a concept of 2D planes that can show pre-rendered images and videos. They’re often called billboards, splats or simply image planes, they usually involve transparency and they’re a great way to conserve some rendering power. The principle is used with LODs as well, where usually the lowest LOD is a flat plane. We can create these billboards manually in Unreal Engine in two different ways:
- the traditional/legacy option with Media Texture and Player (works in all versions of UE)
- and a more modern approach with a Media Plate Actor (works since UE 5.1)
I’ll describe the traditional approach in this article, but I have another one describing the newer Media Plate Actor workflow in UE 5.1. I’m using an image sequence of Josie 9 rendered previously in Daz Studio. I’ll describe the setup and how to start our animation both from Blueprint and from the Sequencer.
The Media Texture/Player Option
For this option we’ll need the following ingredients:
- an Image Media Source for our image sequence or video (can be referenced or included in the project folder)
- a Media Player object (used to load/start/stop our animation)
- a Plane Object onto which we’ll drag an auto-created texture (which in turn will auto-create a material for us)
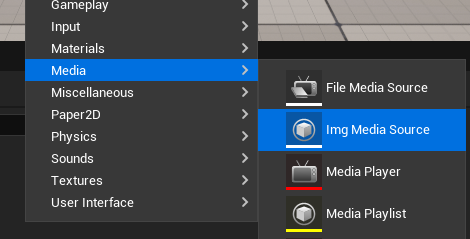
Let’s create an IMG Media Source object first and call it SEQ_MyAnimation. This object will hold our image sequence.
Open it and specify the folder for your image sequence. It can be PNG, JPG or EXR and should be sequentially numbered. Unreal Engine doesn’t know the frame rate, so we’ll have to specify this here as well. Note the little triangle icon, telling me that my sequence resides outside of the project directory, so it wouldn’t be packaged with the rest of my project if I were to distribute it. I’m OK with referencing my images at their current location.
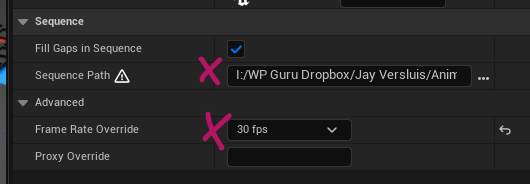
Also notice the Proxy Override option. If you want, you can specify a low res version that UE can use for previews. This is useful if your source images are very large and you want a fluid preview while you work. Glad to know we have this option. Apparently the proxy images should be in a separate folder inside the high-res image folder.
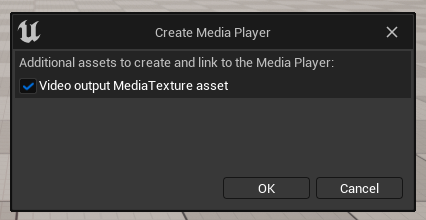
Now we need a Media Player object that can load and play this sequence. Make sure to enable the Video output Media Texture asset option on the dialogue that follows to create our texture automatically. I’ll name mine MP_Demo and open it.

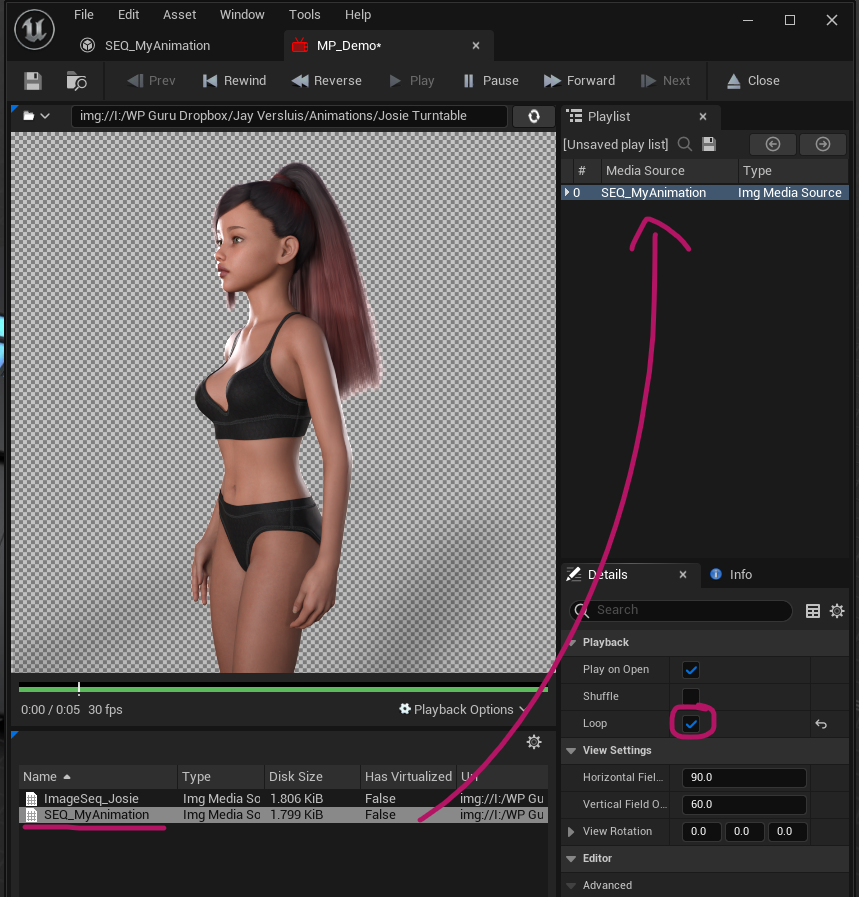
At the bottom of this window you’ll find all sequences available in your project. Pick one and double-click it to load it onto the Media Player (the list view on the right). Contrary to popular belief, you cannot drag and drop the sequence, you have to double-click to make it appear on the right. In the details panel there’s a loop option that I’ll enable for mine.
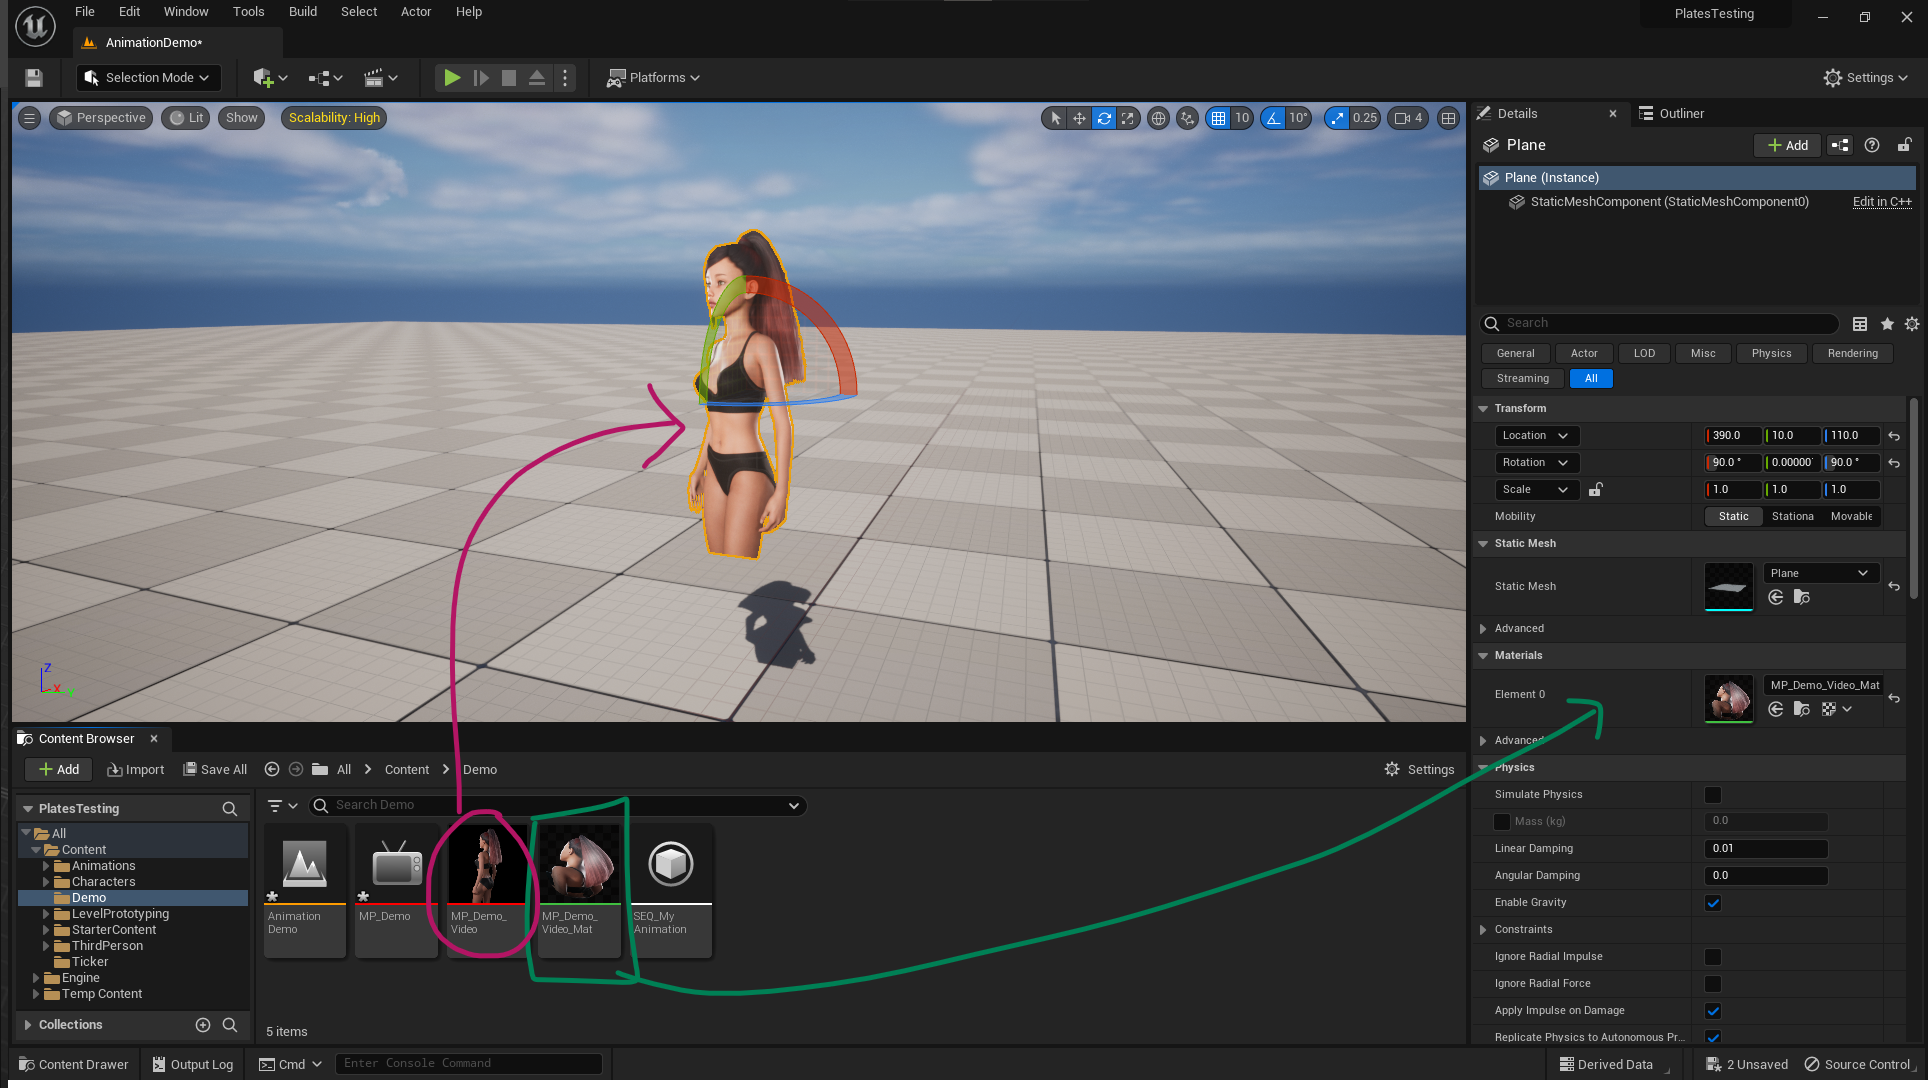
The last thing we need is a primitive object to display our image sequence on. I’ll use a regular plane from the shapes section and rotate it 90 degrees on the X and Z axis so it faces the camera and displays my animation the right way up.
Remember that texture the Media Player has created for us automatically? It has the same name as the media player, with “_video” appended at the end, so in my case it’s called MP_Demo_Video. Drag that texture onto the plane, and UE automatically creates a material from it. This will display my animation. Result!
If you’re seeing black on your plane at this point, start the Media Player manually while its window is open in the background. The moment you close it, the plane will show black again. It’s a charming quirk.
Starting the animation programmatically
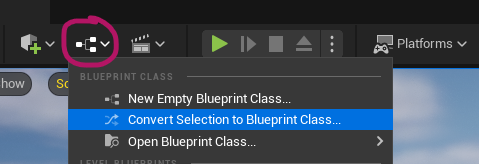
It’s likely that my animation needs to be queued as part of some game logic, so let’s see how to implement this. There are various ways to do this, but it’s probably best if we turn our static plane into a Blueprint Actor so we can attach logic to it.
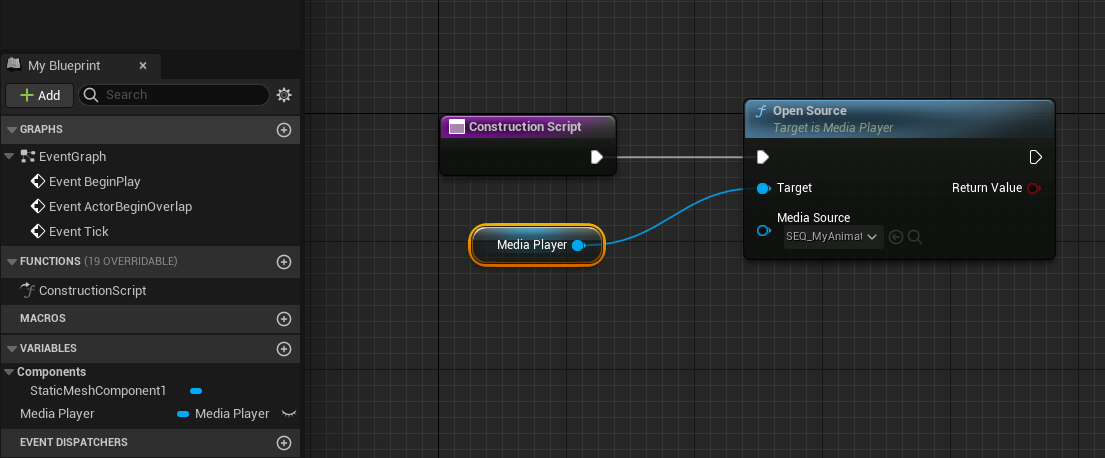
I’ll choose Harvest Components and call it BP_AnimationPlane. First we’ll need a Media Player object reference, so let’s create a variable for this. I’ll call mine Media Player. In he construction script, I’ll load our image sequence so that it’s ready to be played.
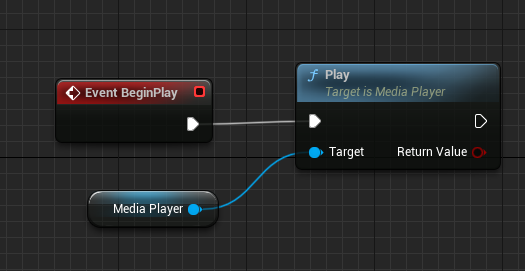
Although we can start playing our sequence right here from the construction script, it’s more likely you want for this to happen as part of an event that’s triggered. Let’s use the Begin Play event as an example. All we need to do is to call the Play event on our media player. It has various other useful features, like Pause, as well as a boolean to test if playback is currently paused.
Starting the animation from Sequencer
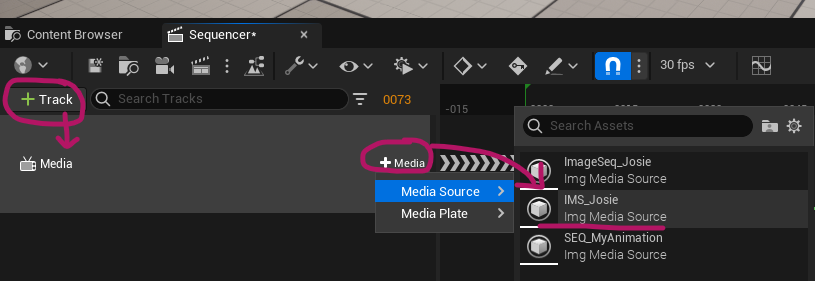
When dealing with cinematics, we can add a Media Track directly to our Level Sequence, track our image sequence, and the footage will magically scrub as if we were in a video editor. We don’t even need to create a Blueprint with logic to make this happen. All we need is a plane with the media texture. Here’s the workflow:
- create a Level Sequence
- add a Media Track, inside of which track the Image Sequence
- right-click on that track and attach the Media Player
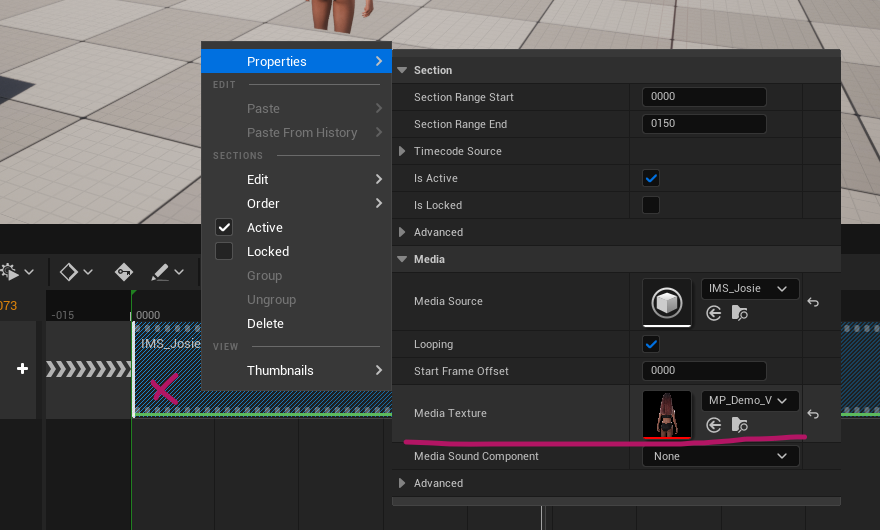
That’s it! Scrubbing will now move the image sequence. Extend the shot as needed, and move it to a later spot in the timeline to make it start whenever it needs to. I think this implementation of image sequences and the sequencer is extremely well done, and it’s been around for years. Thanks EPIC!
Using the Media Plates Actor (UE 5.1 and above)
In Unreal Engine 5.1, EPIC have tried to make it a little easier for us to deal with such matters and introduced a new class called Media Plate actors. The idea is that there’s less to create and more parameters to adjust, while also bringing performance benefits, but sadly this approach has drawbacks. In principle we need to
- create a our Image Sequence as above
- then just drag it into the scene (this will create the Media Plate actor with a plane)
- to control it from Sequencer, add a Media Track
- then track the Plate Actor and everything just works
This does however not produce shadows or reflections. I’ve described how to animate the Media Plate actors here.
That’s it! Happy rendering 🙂