I’ve finally worked out how to properly create and render animations from Unreal Engine. The concept is very elegant, but also very different from most other 3D applications that I’m familiar with. This threw me on more than one occasion and lead to multiple frustrations, so let me share what I’ve learnt and explain the principle so that it perhaps helps more of us understand how Unreal Engine thinks about animations.
Animating Objects in Principle
From other applications, I’m used to selecting an object, then moving a timeline slider and setting keyframes that describe changes to my selected object. In those apps the timeline is a global object that holds the keyframes for all objects in the scene. This can get quite cluttered though when animating multiple objects over time.
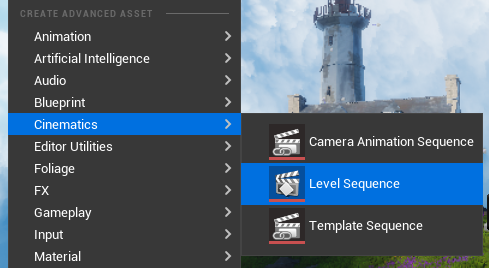
In Unreal Engine this process is abstracted a bit further, possibly to make it easier to isolate complex motions. Therefore by default, there is no global timeline and objects cannot be keyframed immediately. Instead, we need to create a Level Sequence object and track/drag the object(s) we want to animate onto it. This will give us access to a timeline and all animate-able properties including custom exposed variables. The Level Sequence object can either be queued via the Level Blueprint from an event, or from other sequences.
Although a single Level Sequence can take care of as many properties as we like, spreading objects across multiple sequences opens up great new possibilities for us. For one, we’re not facing a timeline with 50 objects and potentially tens of thousands keyframes. Furthermore, we can queue different sequences at different times, play them at different speeds and compartmentalise reusable animations. For example, the two doors I’ve animated in a previous article can be queued open and close independently from the linear progression of time in the level, and I can re-use the animation multiple times.
Animating Cameras
Once I had wrapped my head around animating regular objects, I still didn’t understand how to render out a camera sequence or how to cut between different cameras for the final render. Turns out we need multiple Level Sequences for that to work: ideally one for every camera we want to animate, and another (master) sequence to hold our animated camera/object sequences to queue/cut between.
The Master Sequence can be an ordinary Level Sequence, or it can be a dedicated Master Sequence object designed to bring existing shots together. The latter is a little more involved, and when we create one it’ll ask for an existing sequence to duplicate and a number of shots that it will compile. It adds a level of complexity that doesn’t make sense to me, and I tend to use a regular Level Sequence without problems.
Our Master Sequence is used to cut between several other sequences and generate our final animation. It can also be used to queue non-linear actions like my door opening example, and essentially bring other animations together. This makes for a lot less keyframe hassle and isolated objects, which is great when you work as part of a team on a larger project. I do agree that it does take a little getting used to though, but as your projects grow in size and complexity, this makes a lot of sense.
EPIC do say that you can work on a single Level Sequence for a whole project when you’re on your own, or if you’re used to working this way, but I can tell you from experience that not having to look at 10 animated objects with 50 tracks each is a serious delight for the eyes, so I prefer the Master Sequence approach even for smaller projects.
Compiling a Master Sequence
A little practical example is in order here. Let’s use two cameras, animate them on a separate Level Sequence each, then compile it into a Master Sequence that intercuts between them.
For my first shot, I’ll create a new Level Sequence, add a camera and position it with a static shot. Feel free to animate it. Repeat the step for the second camera: new Level Sequence, new Cinematic Camera, new position. Each camera with track will look a little like this:
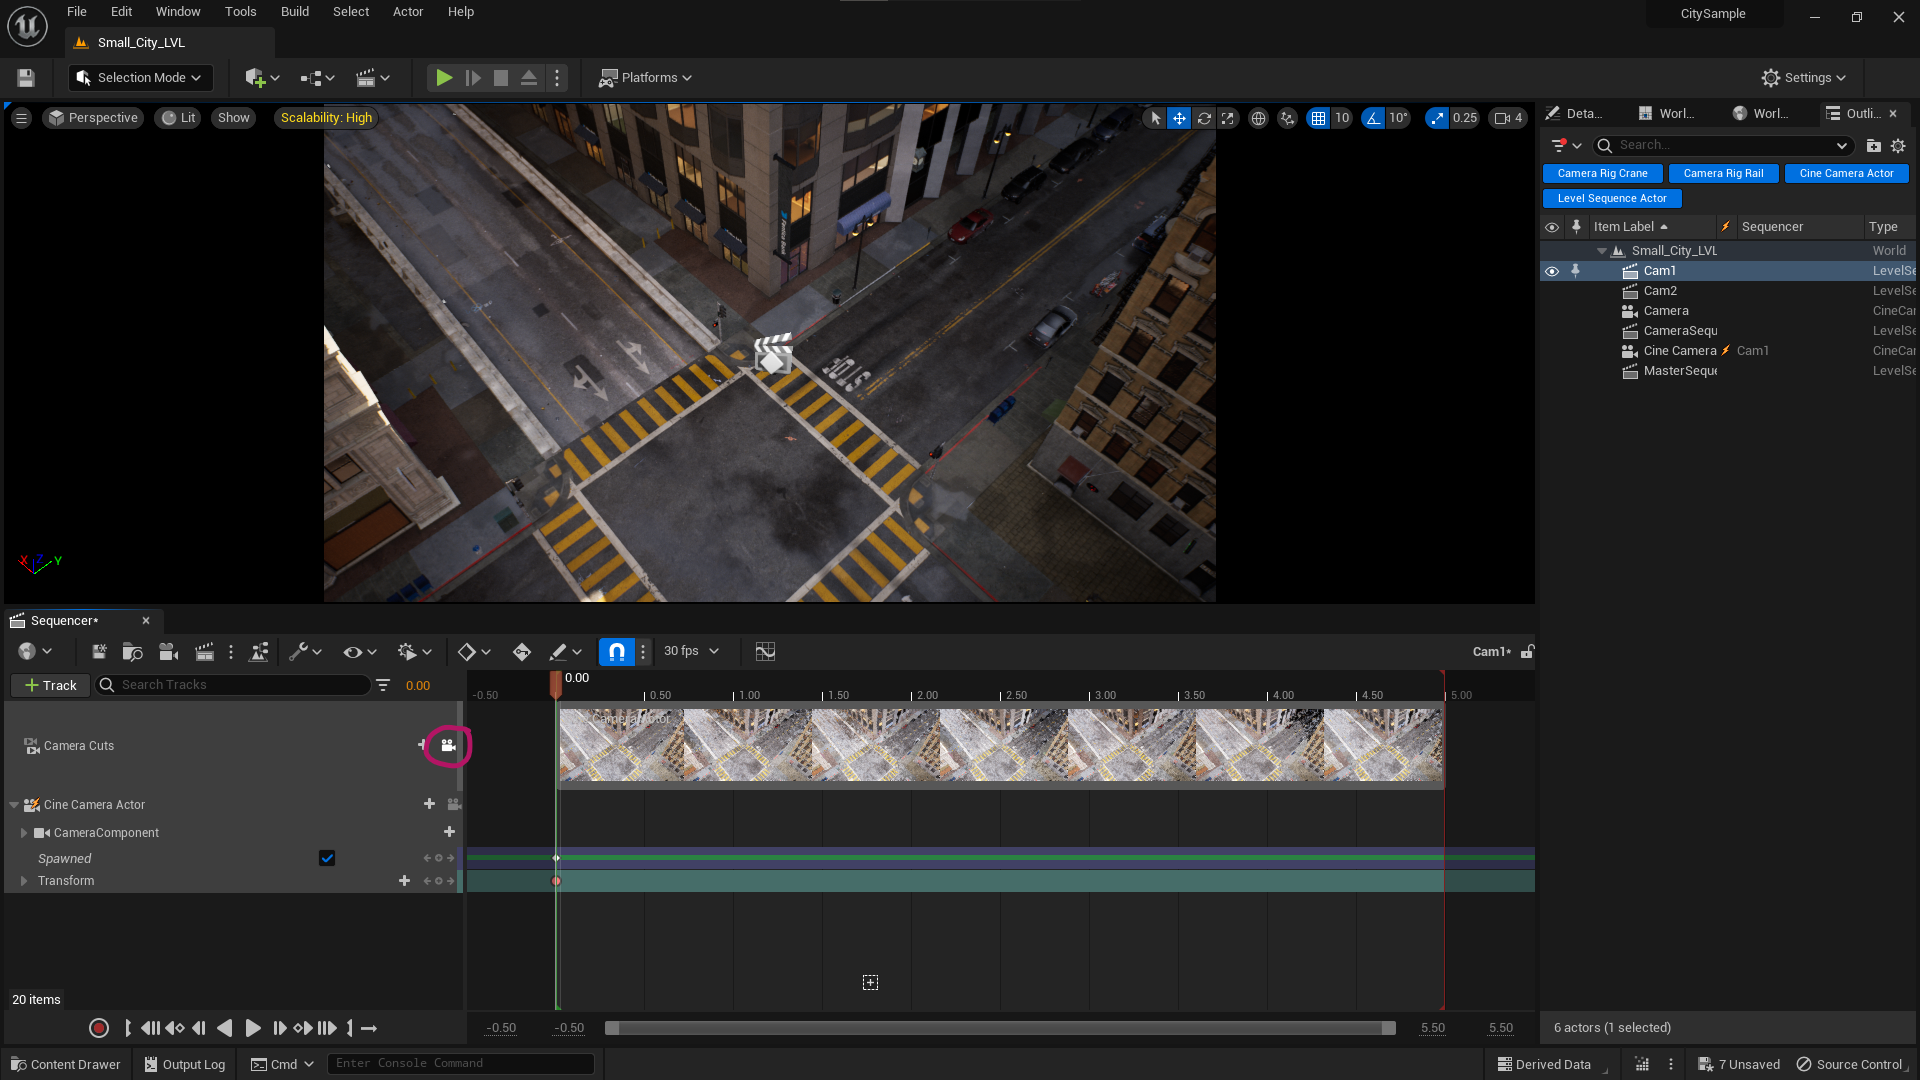
See that little camera icon in the camera cuts track? Click that to see what the camera sees in the viewport. Under Perspective, you can also switch over to the Cinematic Viewport if you like (makes you feel like a proper Hollywood cinematographer). Press the camera icon again to actually see your camera.
Also note the Camera Cuts track at the very top. This is an abstract oddity and needs to be dragged out to the full duration for the shot to appear, otherwise it won’t appear in renders. It’ll make more sense in the next step. By default the Camera Cut is only 150 frames, for real world projects it’ll likely be much longer. Make sure to extend that track to the full duration of the timeline for every camera sequence you create.
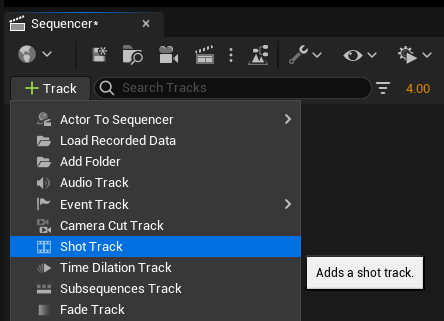
Next we’ll create our Master Sequence. I’ll call mine Master, and it’ll be a regular Level Sequence. Double-click to open it up from the content browser to open it up in the Sequencer Tab. It’ll be empty, so let’s add a Shot Track.
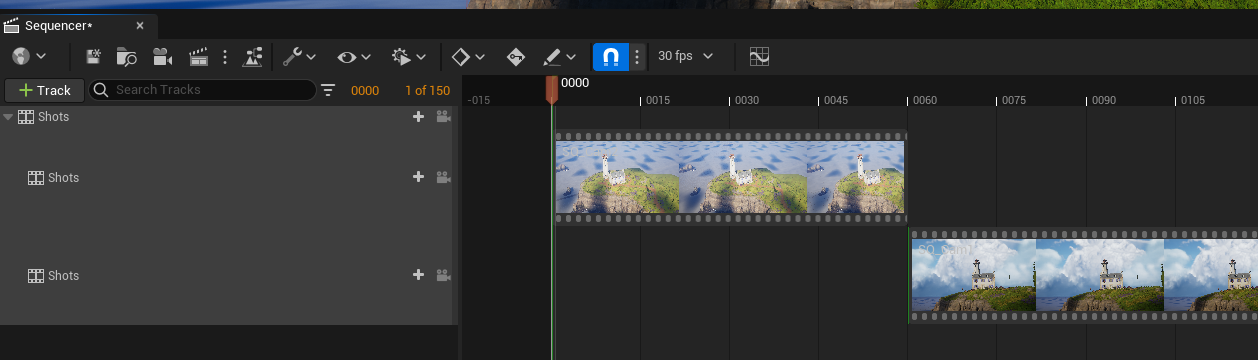
Each “shot” will be a cut to another sequence. To add one, park the play-head where you want to drop the next shot, then click the plus icon on the track and pick an item from the search menu that appears. I’ll add CAM1 at the beginning of my timeline.
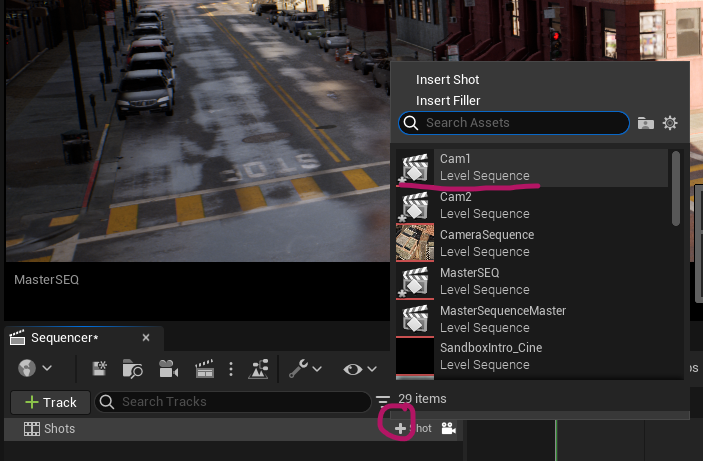
Now I’ll move my play-head to another spot, say 3 seconds in, and repeat the process for CAM2. This will drop another shot into my track, and as I move the play-head, the shot changes. How cool is that?
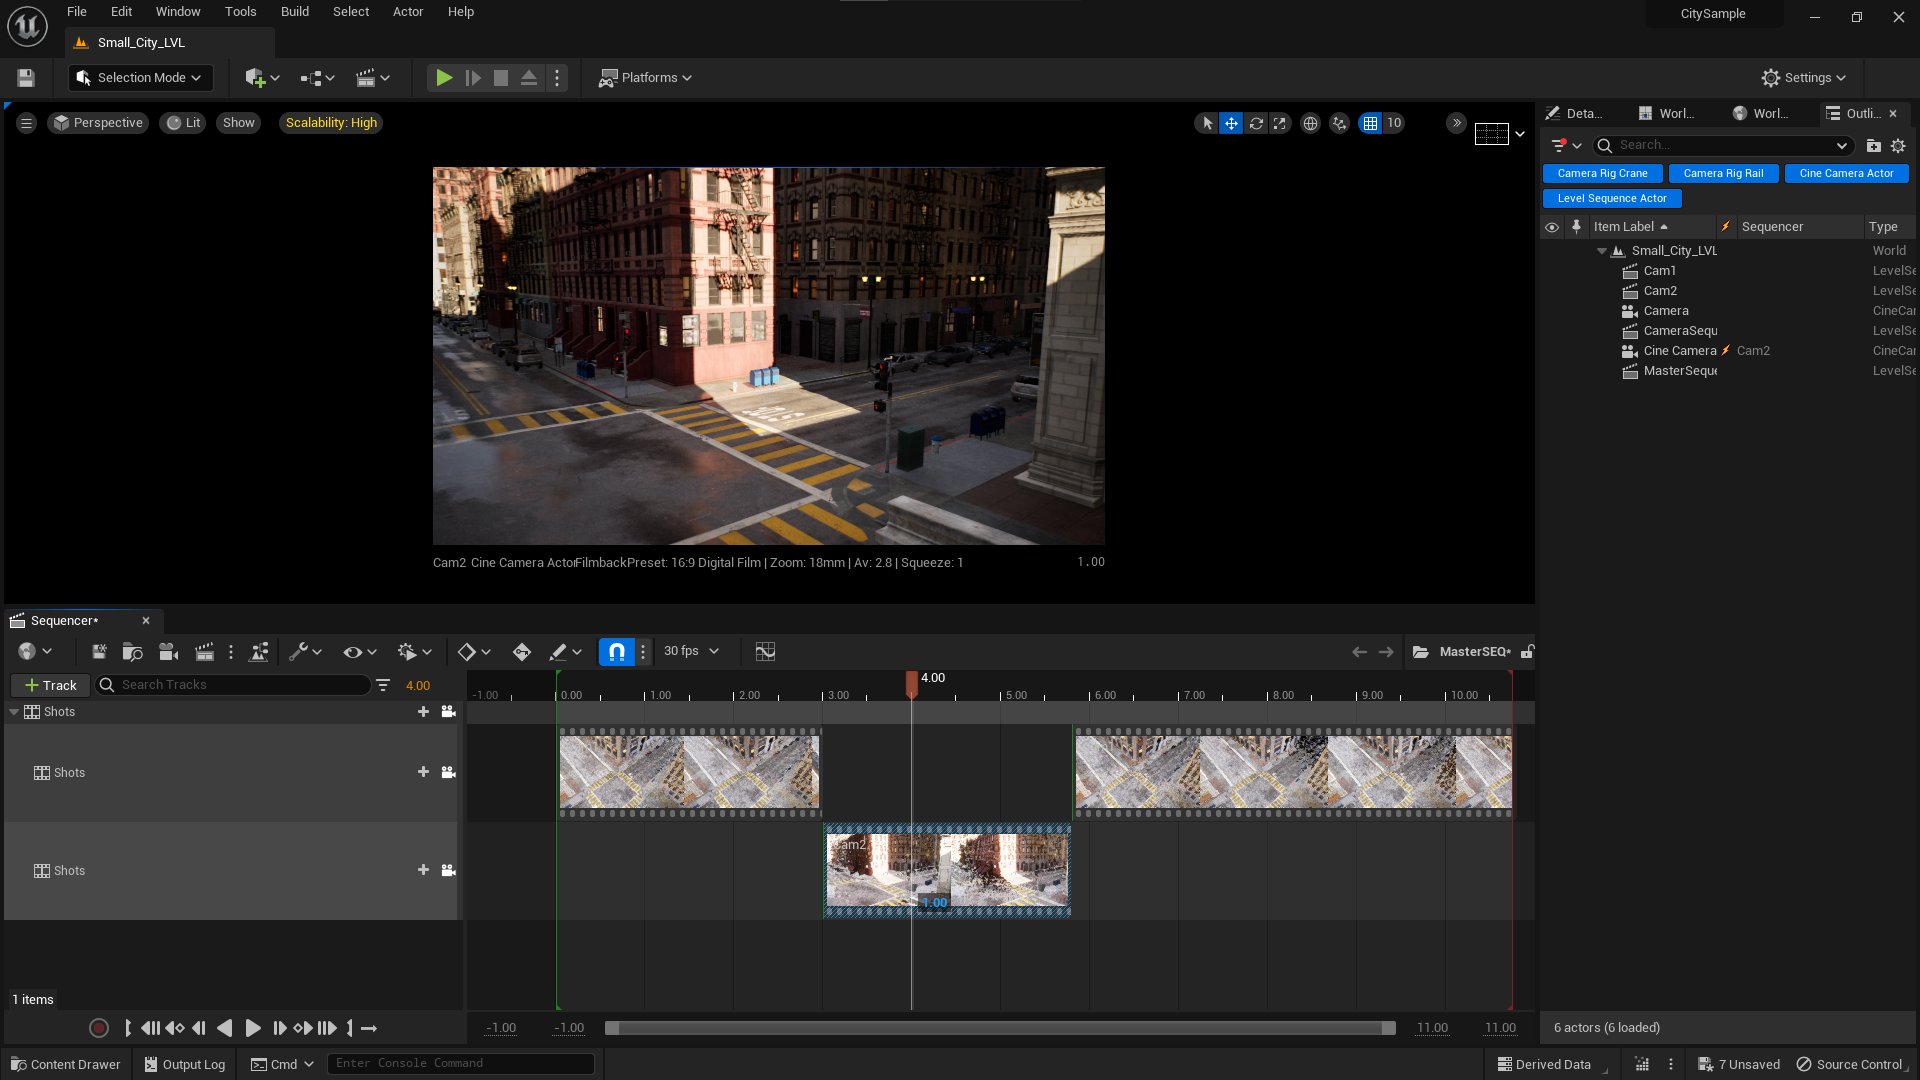
We can stagger the shots (like in A/B editing) to see our edits easier. You can overlap shots as well, but the one on the top of the stack takes preference. Curb the handles as necessary.
While we’re here, we can create simple fade-to-black animations with a Fade Track. A value of 0 means 100% opacity (no fade), and 1 is 0% opacity (full fade to black). Like with Shot Tracks, there can only be a single Fade Track in a sequence. For more elaborate transitions, I recommend a video editor or adding the fade to the source level sequence.
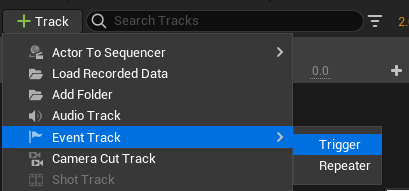
Queueing Events
If we want to trigger something from our sequence (from the timeline) we can use Event Tracks. These are keyframes bound to in-game events, and they’re handled like Custom Events in Blueprints. We can create one much like the Shot and Fade tracks.
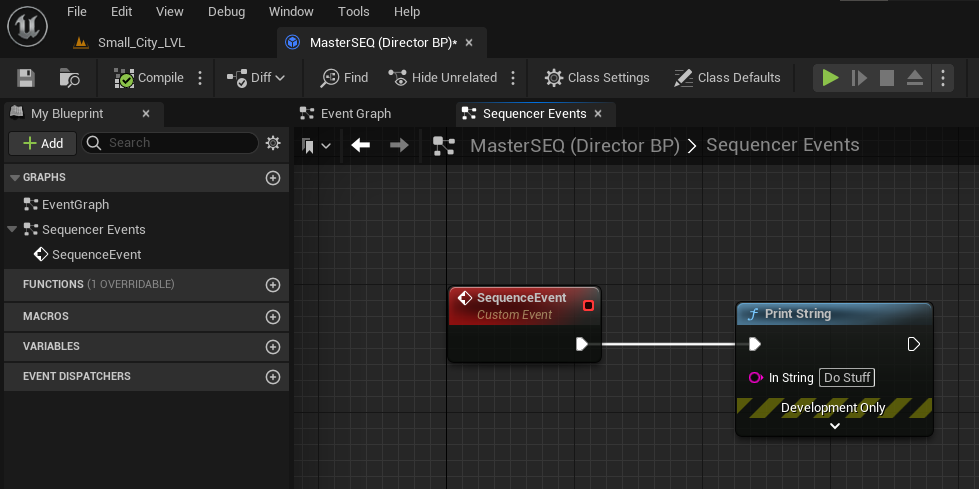
When we set set a keyframe on this track, it seemingly doesn’t do anything. However, lo and behold, double-click the keyframe and a Blueprint Editor will open up, giving us a custom event to hook into. We can use this to kick off all kinds of shenanigans.
I’m not sure how Repeater Events work, or if there’s an easy way to trigger the same event twice (other than duplicating an existing event keyframe). I’m sure it’s possible though.
Rendering your Animation
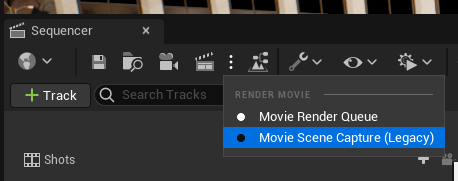
Unreal Engine is as weird as it is wonderful in so many ways. The way we get footage out of the engine (that doesn’t involve pressing the “play” button and doing a screen capture) belongs to the “weird” department. We need to activate a plugin called Movie Render Queue for best results. While it once was a beta plug-in in UE4, it is now the standard way to render animations in UE5. The interface hasn’t changed and the same insanity applies as I’ve described in this UE4 article.
In a nutshell, we
- click the “Add to Render Queue” button on the sequence we’d like to render
- click on “Unsaved Config”
- under Output, adjust the export location, size and other options (if desired)
- click Render Local or Render Queue (bottom right)

By default Unreal Engine will save an image sequence of JPG files in a folder called Saved/Movie Renders inside your current project, in 1920×1080.
A word of warning: Unreal Engine needs to compile all shaders for the project the first time you start a new render. This can take a considerable amount of time. While the actual “rendering” happens in seconds, the amount of prep time the whole export process takes is not insignificant on complex projects. Make sure you have another system to work on while UE is doing stuff, or choose the Render Remote option. This will start a second UE process for the render and leaves your current session responsive rather than blocked for rendering.
If you find the Movie Render Queue a tad “too complex”, feel free to use the legacy Movie Scene Capture system that is still available as of Unreal Engine 5.1.1. I’ve described both options in the video above.
And that’s it! I hope this overview will help you get started with rendering cinematics in Unreal Engine. Trust me when I say this looks overly complex at first, but with a bit of practive, it will soon become second nature to you.
Happy rendering!