The base Genesis figure can close their eyes thanks to the Eye Blink Morphs on Genesis 9, and the Eyes Closed Morphs on Genesis 8 respectively. When we create custom character, we need a Morph Corrective Morph to adjust those so that the geometry doesn’t look mangled when said morphs are being used. In this article I’ll show you how to accomplish this intimidating task.
Understanding Eye Blinks
First of all, let’s take a look at the eye blink sliders we have available on Genesis 9. The principle is the same for older generations, but the sliders themselves will be called something different. We see three sliders:
- Eye Blink
- Eye Blink Left
- Eye Blink Right
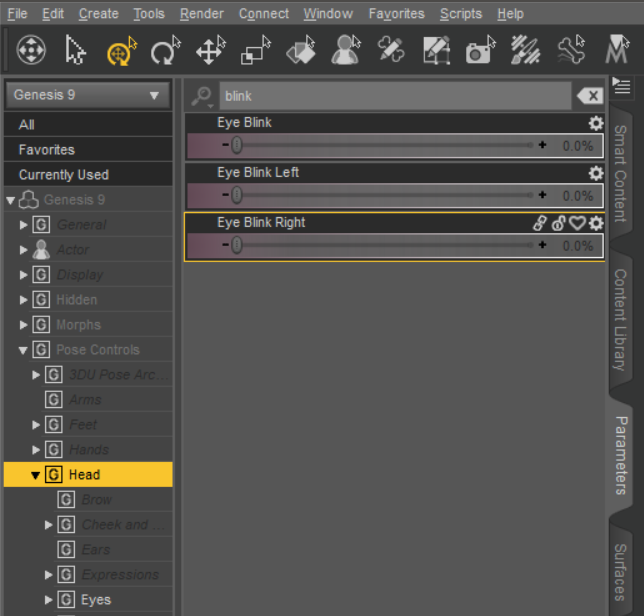
The first one (Eye Blink) is actually a controller that dials up the other two together, so it’s not a morph. The Eye Blink Left and Right sliders are real morph targets though, which means the Daz Developers would have sculpted and imported them with Morph Loader to make the geometric change operational on the figure.
Default Eye Blinks with a Custom Character Morph
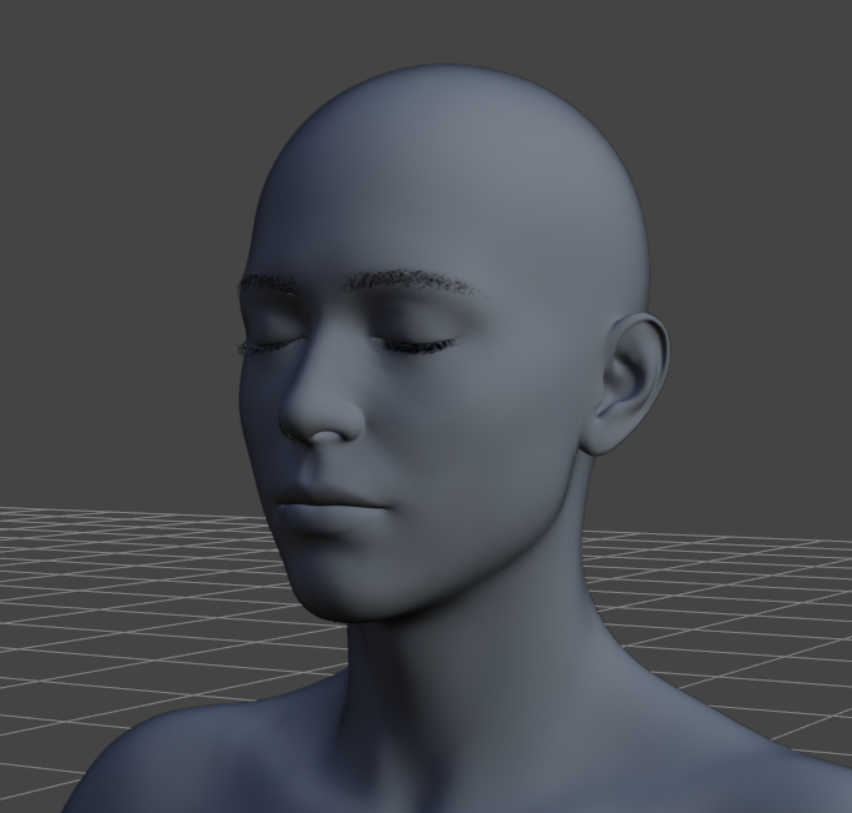
When we create a new character in an external modeller and import a new full body shape with Morph Loader, the existing eye blink morphs will very likely be off and look rather distorted. This is because they were designed for the original Genesis base shape and our custom character is a deviation thereof. Here’s an example character I’ve imported. Looking OK so far:
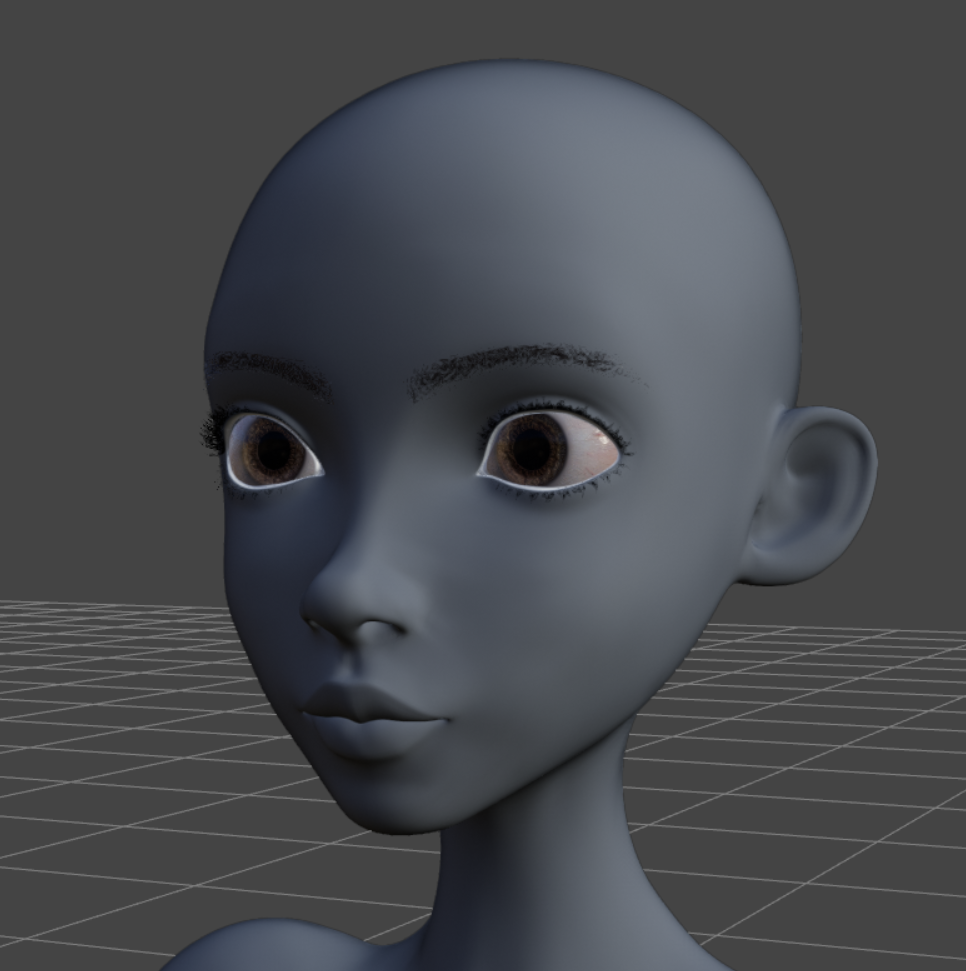
However, if I dial up the Eye Blink morphs, it looks rather terrible:
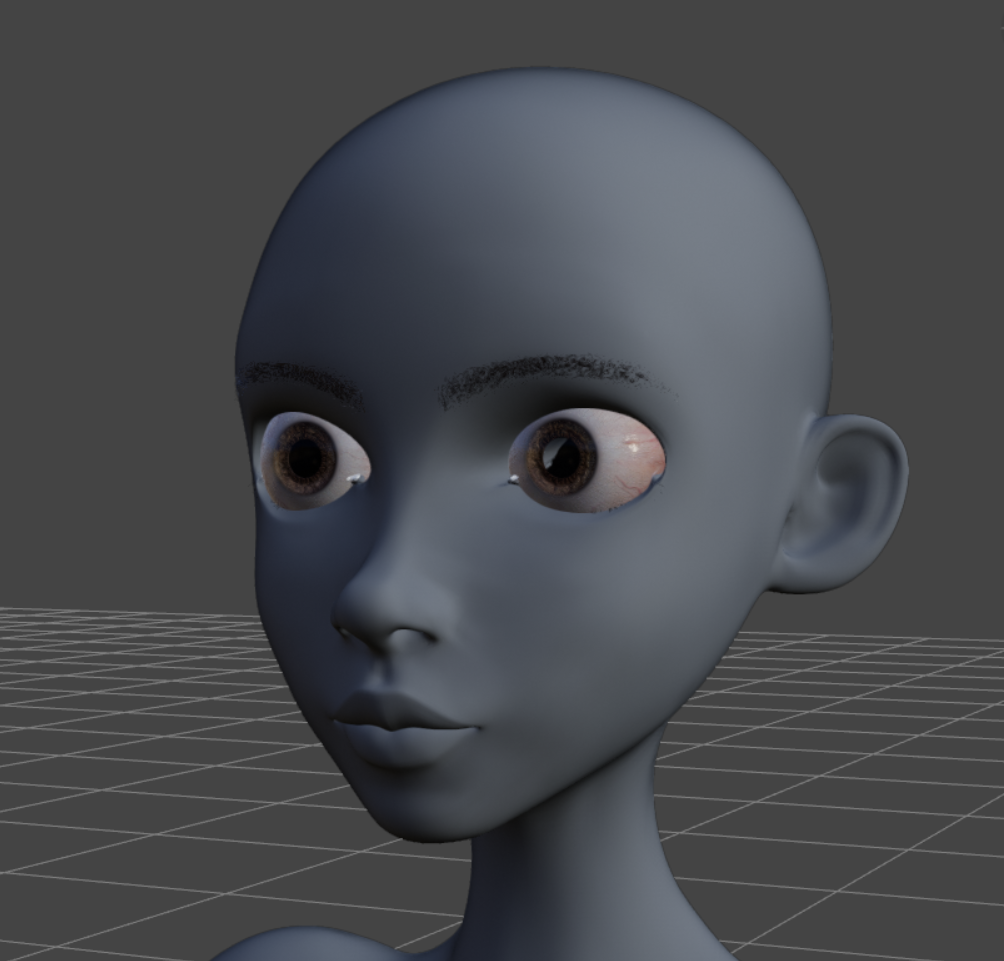
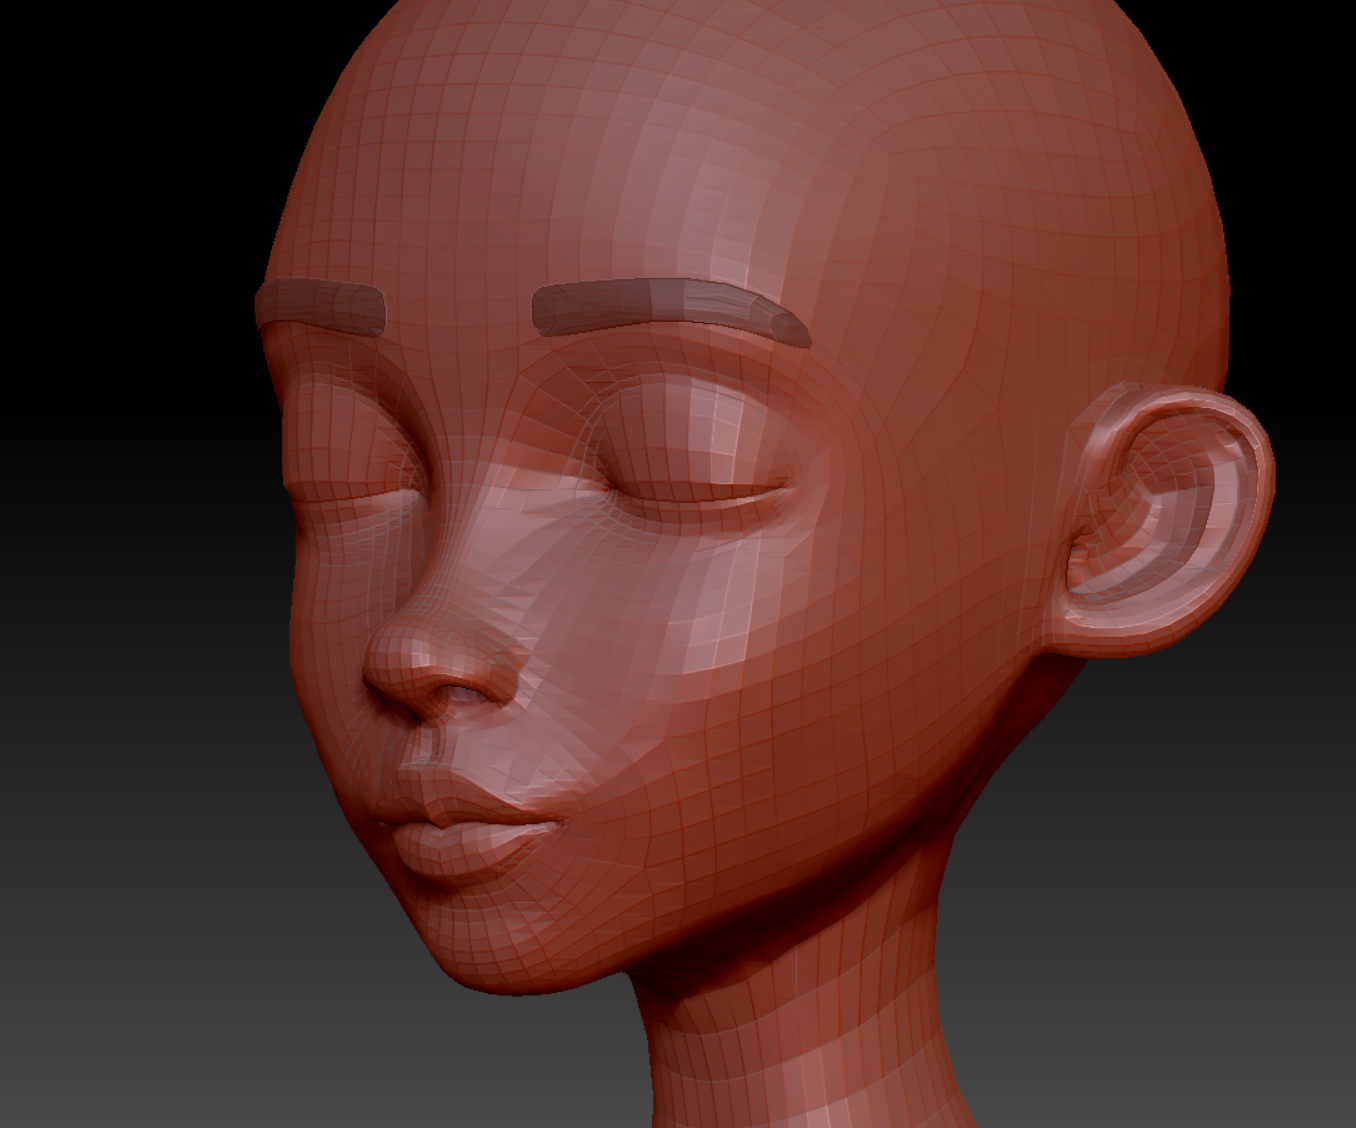
Your mileage may vary, and you may find that the morphs work if you don’t dial them up to 100%, but that solution isn’t something I’d expect from a quality product. So I’ll go ahead and sculpt two separate eye close morphs in my favourite 3D modelling application, something that looks like this:
Now I export two morphs out from this: one with the left eye closed, and one with the right eye closed. You can use any tool you like, just make sure you end up with two separate OBJ files.
Importing my custom Eye Blink Morphs
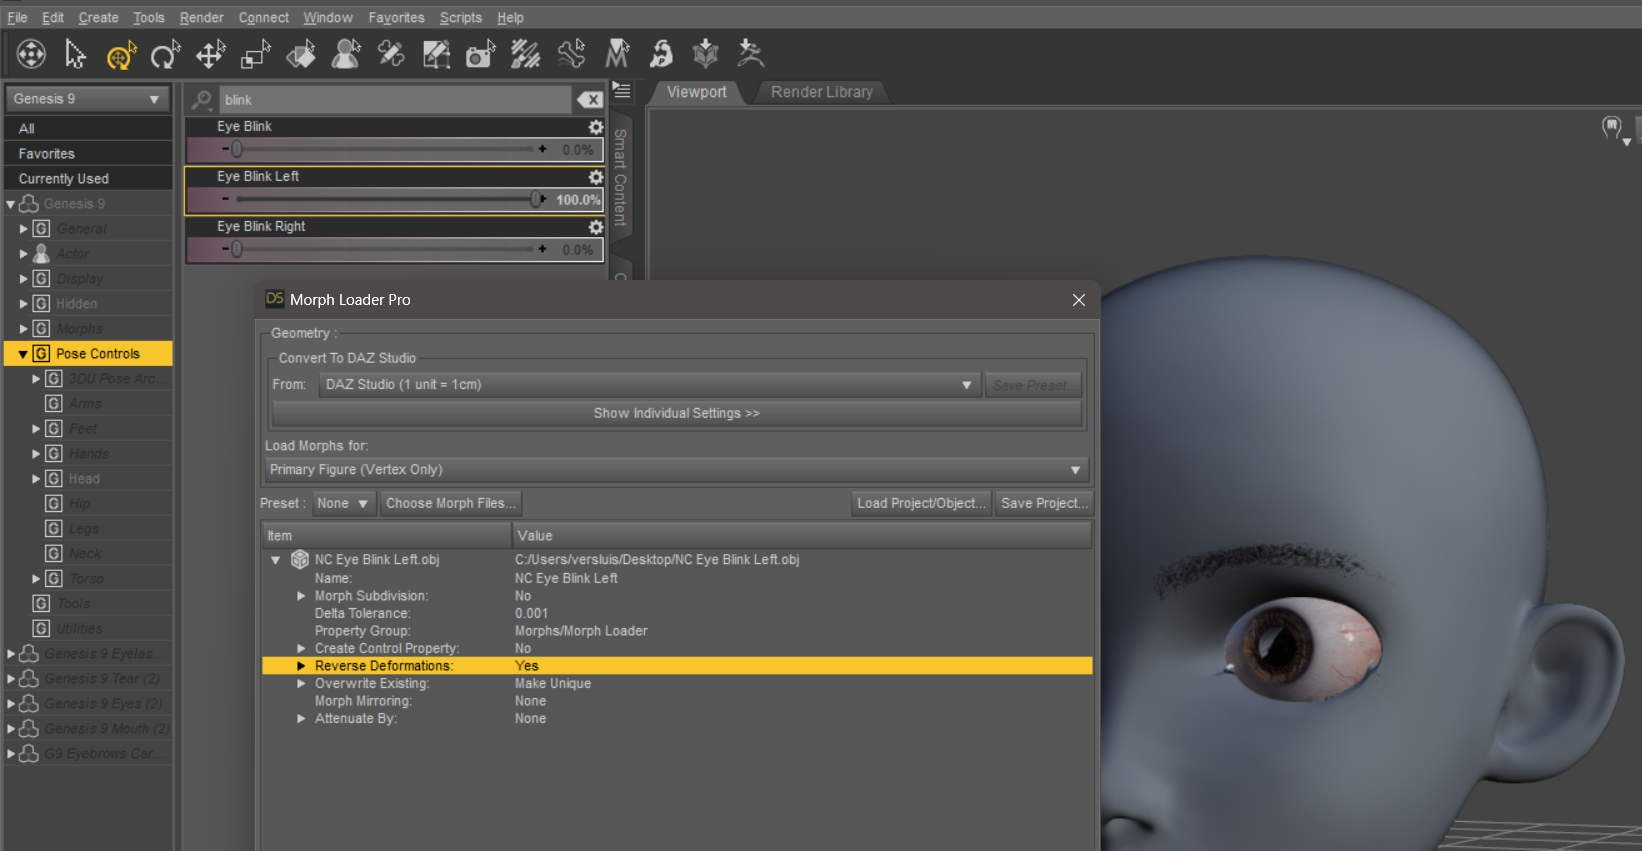
The way we import each eye blink morph is crucial for our success. Let’s start with the left eye. Make sure everything other than your custom head morph is dialed up, then add the regular Eye Blink Left morph to this (the one that doesn’t work). Now head over to Edit – Object – Morph Loader Pro and import your morph. Enable Reverse Deformations and make sure the scale is correct.
Repeat the process for the other eye: dial out the first eye blink, dial in the second, then import the right eye blink as before. It is important that the regular (currently not working) eye blink is dialed up when you import your morph.
Hooking up our the Controllers
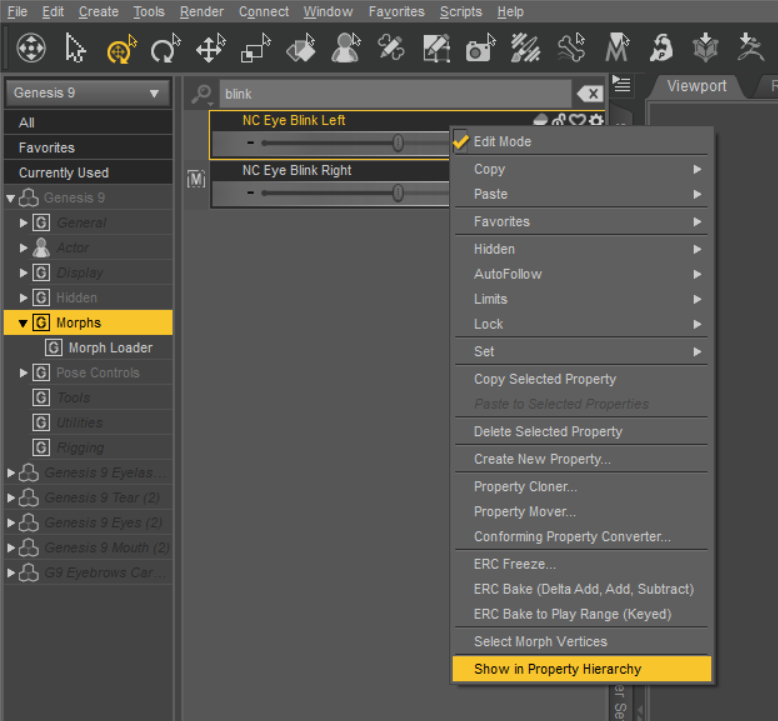
Now that we have two morphs, let’s see how we can use the Property Hierarchy to hook them up so that our corrective morphs can be triggered instead of the default ones. To do that, find your custom blink morphs in the Parameters Tab end switch it to Edit Mode. Right-click the left morph and choose “Show in Property Hierarchy”.
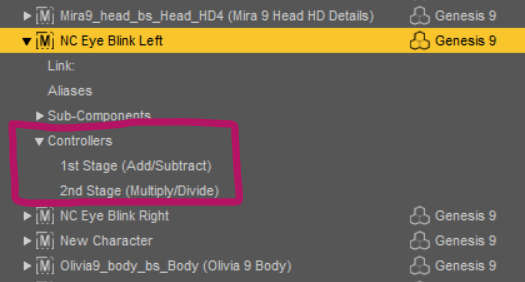
A rather scary pane opens with even scarier values. Don’t be alarmed, it’s all perfectly fine. Open up your morph here and also open the Controllers section. We need to hook up two things: the dial we want our morph to trigger (1st stage), and the condition we want when this is supposed to happen (2nd stage).
Let’s think about this: when we dial up the Eye Blink Left slider, we want our corrective morph to fire. However, we only want for this to happen if our custom character is actually dialled in rather than all the time. Daz Studio is clever enough to apply even a percentage to this condition, say if someone were to use only 10% of our character (in which case, our corrective is only applied by 10%).
To make this happen, let’s return to the Parameters Tab and find the regular Eye Blink Left morph (under Pose Controls). Still in Edit Mode, drag the slider over to our Property Hierarchy window and drop it onto the 1st Stage Controller of our custom left blink morph. Do the same with the Eye Blink Right morph (obviously dragging it to the custom right eye blink controller).
Next, find your custom character morph. If you have a split head/body morph, it’ll be the head portion. If you have a combined slider, use that. Drag it to the 2nd Stage Controller of both your custom morphs. This will assure our blinks will only kick in if our custom character is being used. Here’s what it looks like for me:
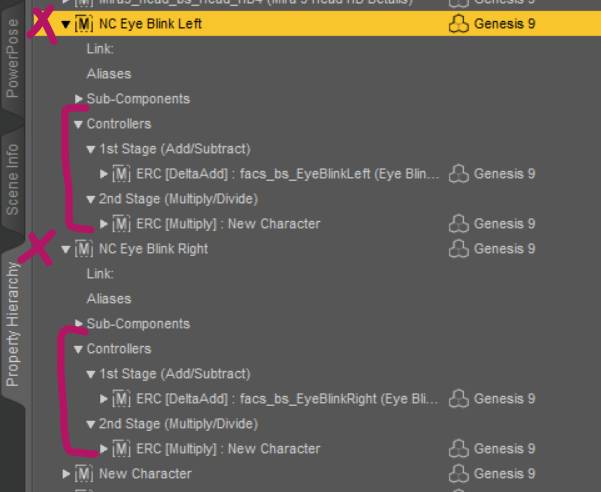
That’s it! Now we get our own corrective morphs when we dial up the regular blink morphs, but only when our custom character is also dialed up.
Many thanks to Josh Darling for pointing me in the right direction on this. Check out his video on Morph Corrective Morphs
Is it possible to add a bit on how to save the corrective morphs and/or how to package the corrected character
Packaging products is a little “deep” in Daz Studio 😁 You save morphs with File – Save As – Support Asset – Morph Asset, then select the ones you want to save (in our case the two blink morphs). Any controllers and formulas will be saved with them. This article explains a little more: https://www.versluis.com/2019/02/where-does-daz-studio-save-morph-files/
This will be saved to a “product”, so you’ll have to create that too. I have a couple of videos that explain it. This one is about packaging morphs: https://www.youtube.com/watch?v=OfANAxC1zyk and this one is about packaging props: https://www.youtube.com/watch?v=v4mqoKoq_8o
Hope this helps!
This was a great help. For reasons that escape me, I struggle with this. (I managed to save something (maybe a couple of times and a couple of ways) to G9 (default character) and after trying to clean up my mess I ended up with what I think was a circle of references that took a bit to sort out and perhaps a reinstall of G9 – though that might not have been necessary. When I followed the instructions more carefully and didn’t try to over-ride what DAZ was trying to do (here I mean the content paths) I was able to create a controller morph, put it where I wanted, and even use Content Package Assist to bundle it with the product so DIM would install and remove it with the artist created content. Thanks for your generous help.