The brief is simple: you have an object, and we want it to move along a path. Something that many animation apps have built-in by default is not so easy or obvious to implement, unless we code this functionality ourselves in Unreal Engine. Because that’s how hip and cool UE users have to be. Why there isn’t a default mechanism for this totally escapes me. Let me show you how to set this up step by step.
In principle we need two Actor Blueprints to make this re-usable
- a moving object (I’ll call mine BP_SplineTraveller)
- and a path object (I’ll call mine BP_SplinePath)
The Spline Path
Let’s create a simple Actor type blueprint and add a spline component to it. That’s really all we need here. Compile and close it, then drag it into the viewport.

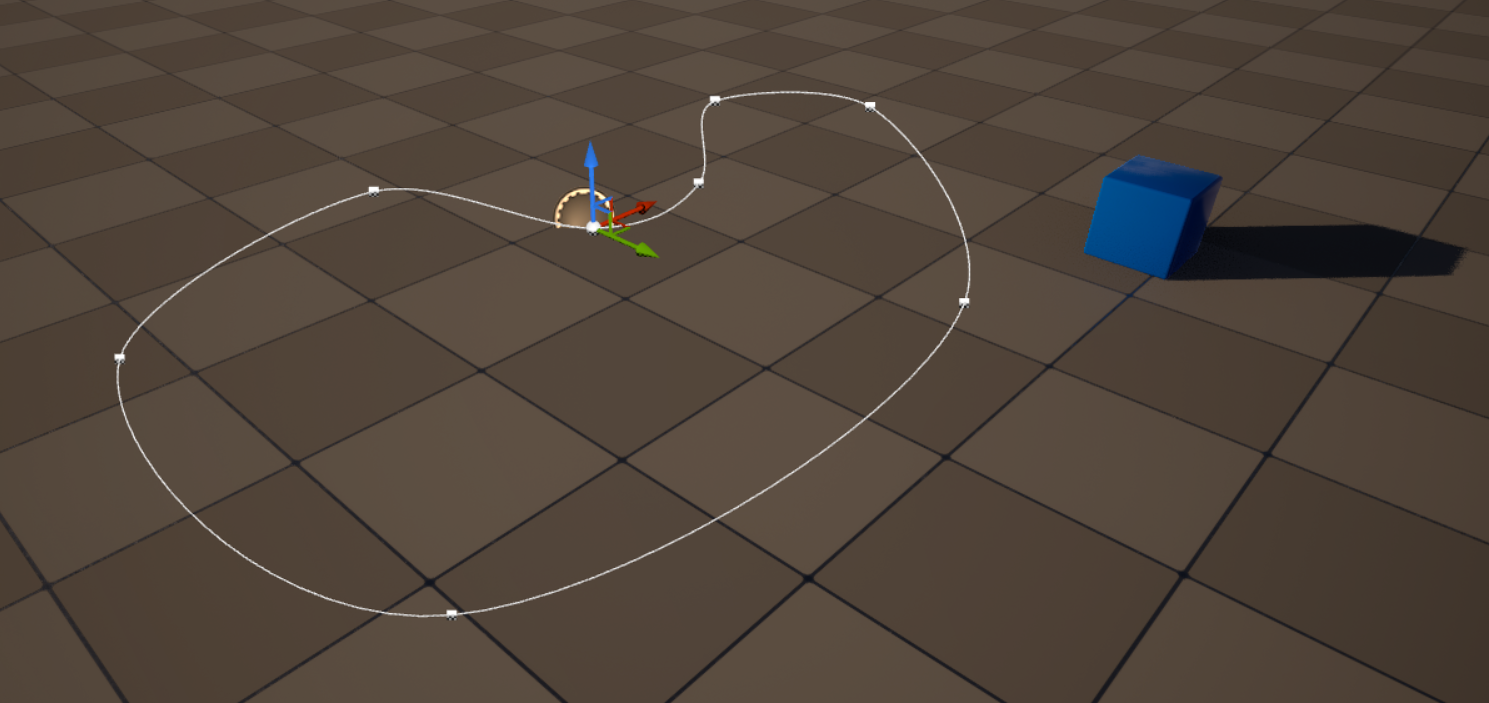
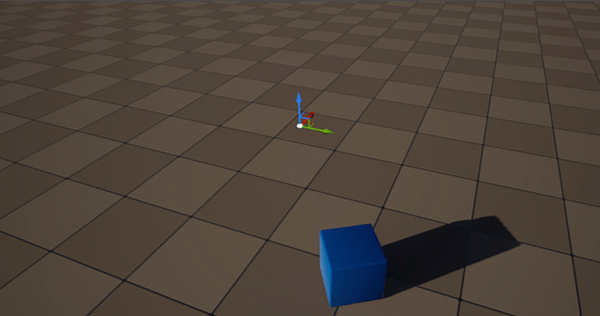
Notice how it shows the scene root component, and two spline handles. Click on either end, then hold down ALT and drag out to create more spline points. Rotate and move them as you see fit to draw out your dream path, much like I have in the screenshot at the top.
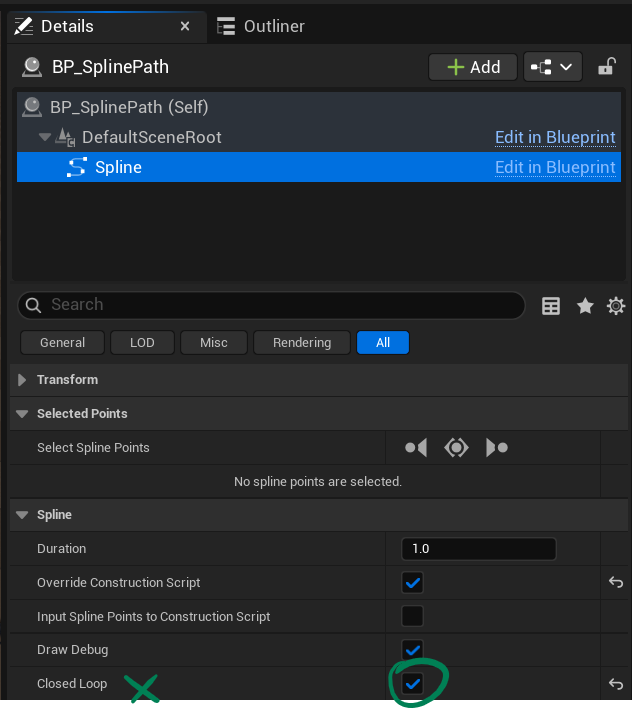
I want my path to become a loop, which is easy to accomplish thanks to the Closed Loop tickbox. Enable it towards the end, when your last point is in close vicinity to the first point.
The Travelling Object
Next I’ll create a new Actor blueprint called BP_SplineTraveller. This is the object that’ll have all the code in it to make this work. I’ll add two components to it: a static mesh and a skeletal mesh. I’m doing this so I can replace them later on with the object I’d like to travel along the path. I’ll add the Chamfer Cube to the static mesh component as a default, just so that we can see a debug object travelling (we can set this to “none” when we no longer need it).
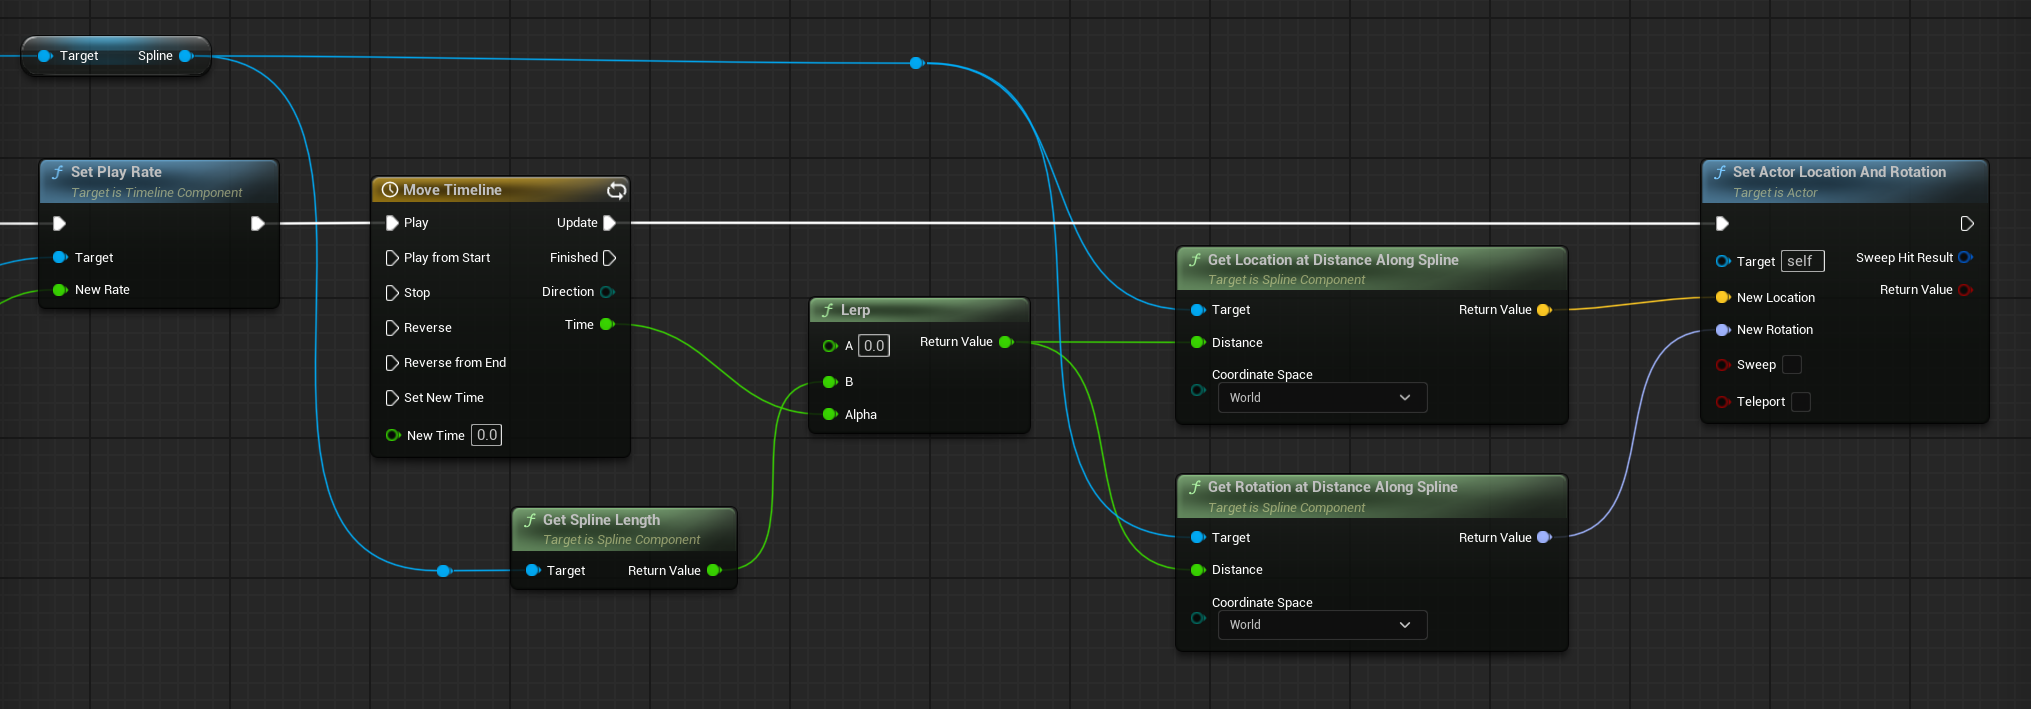
Next we’ll create a custom event, I’ll call it Move Spline Object. To it we’ll add a Timeline via a Set Play Rate node, and a new Float variable I’ll call Duration. Here’s what the first part of the code looks like.
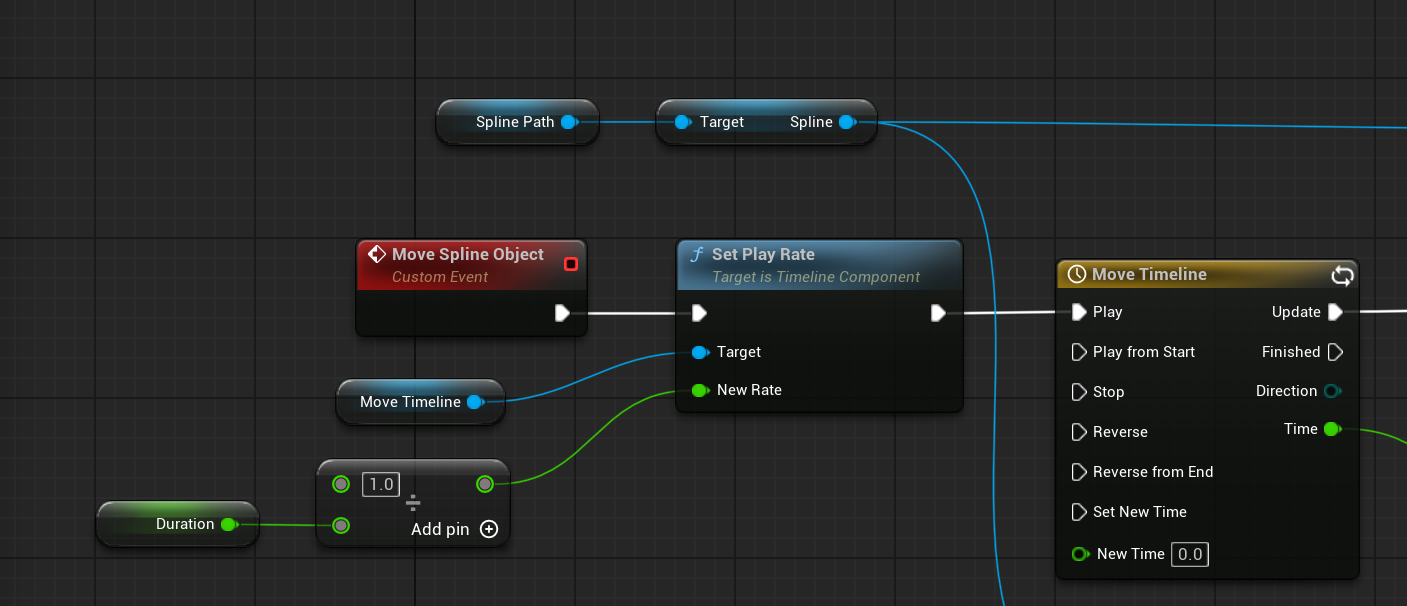
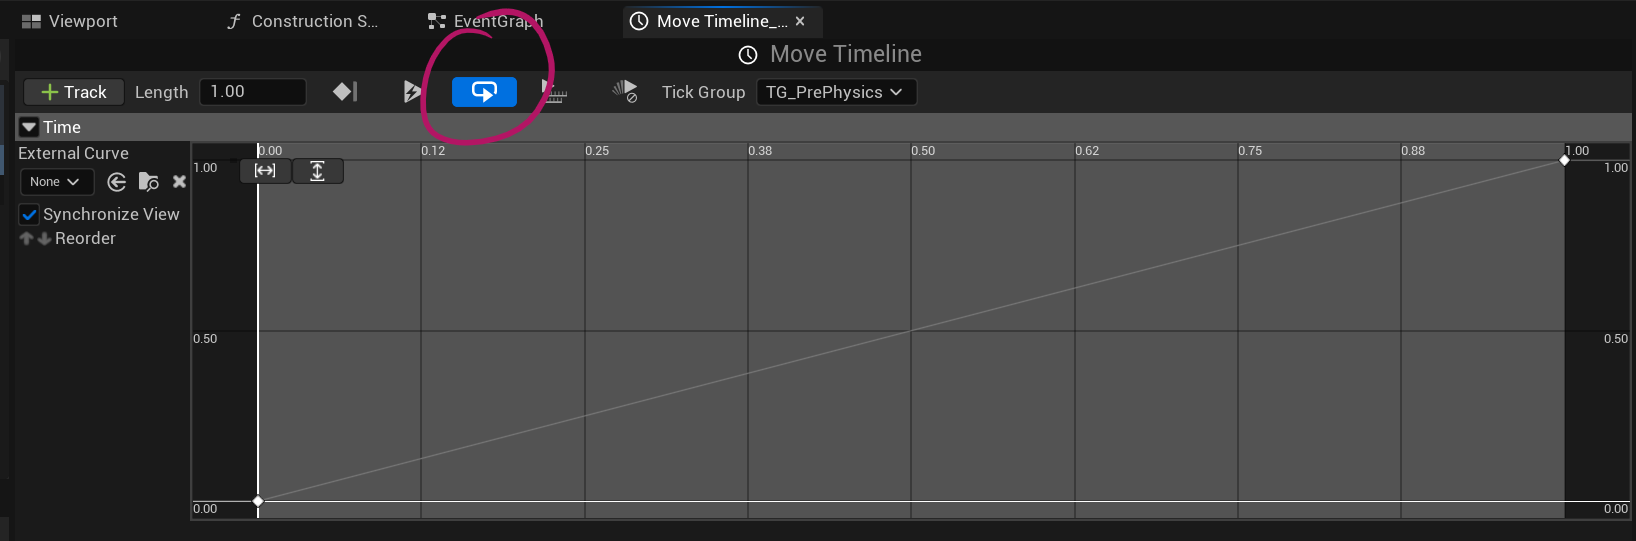
We do this so that we can specify how long it should take for our object to traverse the path (in seconds). The Move Timeline variable is just the timeline reference, on which we set the Play Rate. Inside the timeline nothing spectacular is happening, it has a 1-second duration, with a float track that’s set to 0 at frame 0, and 1 on the last frame. The only thing of note here is the loop option that’s enabled.
Using the float track that comes out of the timeline, we add it to the Alpha input of a Lerp node, leave the A value at 0 and put the Spline Length into B. This means that we interpolate from 0 to the end of the spline path as time progresses, the duration of which is set using the Set Playrate node and some clever maths from earlier. We then set the position of our travelling actor (self) to the new location and rotation along the spline in World Space.
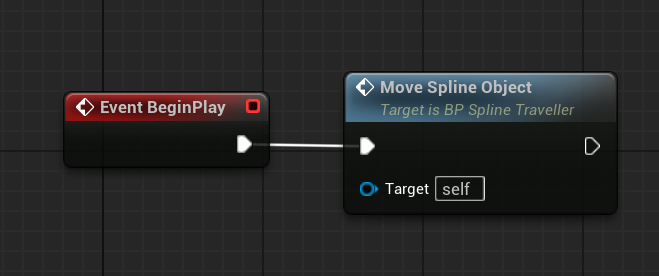
That’s it! To make this magic happen at the beginning of play, we can call our event at the familiar location.
Play your level, or simulate to see it in action.
Further Reading
- My method is based on this tutorial by by Matt Aspland: https://www.youtube.com/watch?v=fm0_W6YV_8k
- a different way by Horse and Cart: https://www.youtube.com/watch?v=iAay5SGeN80
- and another option by JemGames with a Tick-based solution: https://www.youtube.com/watch?v=dEjHHnvlLNU