

Mesh Blend is an Unreal Engine plugin that blends materials on intersecting objects, including static and skeletal meshes, as well as landscapes. It’s available for UE 5.5 and up, relatively easy to setup and works beautifully for cinematics as well as real-time gameplay.
Let’s take a look at how to get it going.
DefaultEngine.ini Tweak
We need a couple of entries in our project’s Config/DefaultEngine.ini file, in a section that begins with [/Script/Engine.RendererSettings]. This exists already, so add the following lines at the end of it. Do this before opening the project.
[/Script/Engine.RendererSettings]

r.AllowStaticLighting=False
r.Lumen.ScreenProbeGather.MaterialAO=0
Enabling the Plugin
Mesh Blend is an Engine plugin, which means that by default it’ll install itself into the shared Marketplace directory of your Unreal Engine version (typically under /Engine/Plugins/Marketplace/MeshBle*) This will work for projects on your own account, but not for team projects (unless every team member has the plugin installed).
A better way to make the project more portable is to copy the folder into your project’s Plugins directory. Once done, enable it under Plugins.
Patching Engine Shaders
The default shaders need to be patched on first run. This needs to happen only once. To do this, find the B icon on the toolbar and select Readme to open the Mesh Blend editor utility.
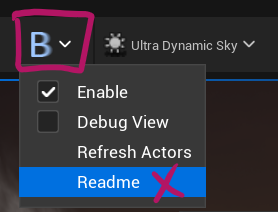
Now choose Open Shader Patcher Tool at the bottom, select “apply all” then restart UE one more time.

Adding Mesh Blend to your Material
Each master material needs to have a Mesh Blend Activator node added to the Ambient Occlusion channel. This means that materials that use AO won’t be able to use that channel as part of the material. Index 0 should work fine.
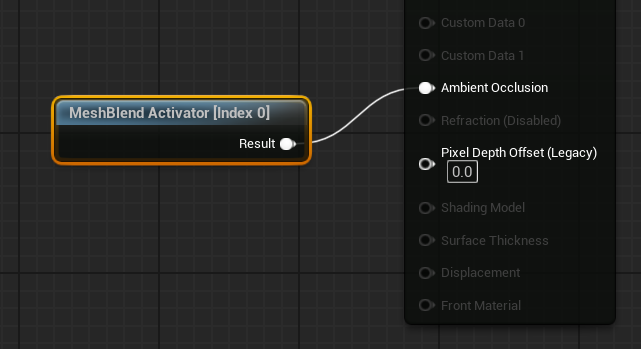
If your material doesn’t seem to have an AO input and instead goes straight into a Material Properties node, you can break and re-combine the material attributes, connect all and plug the Mesh Blend Activator into the AO like this.
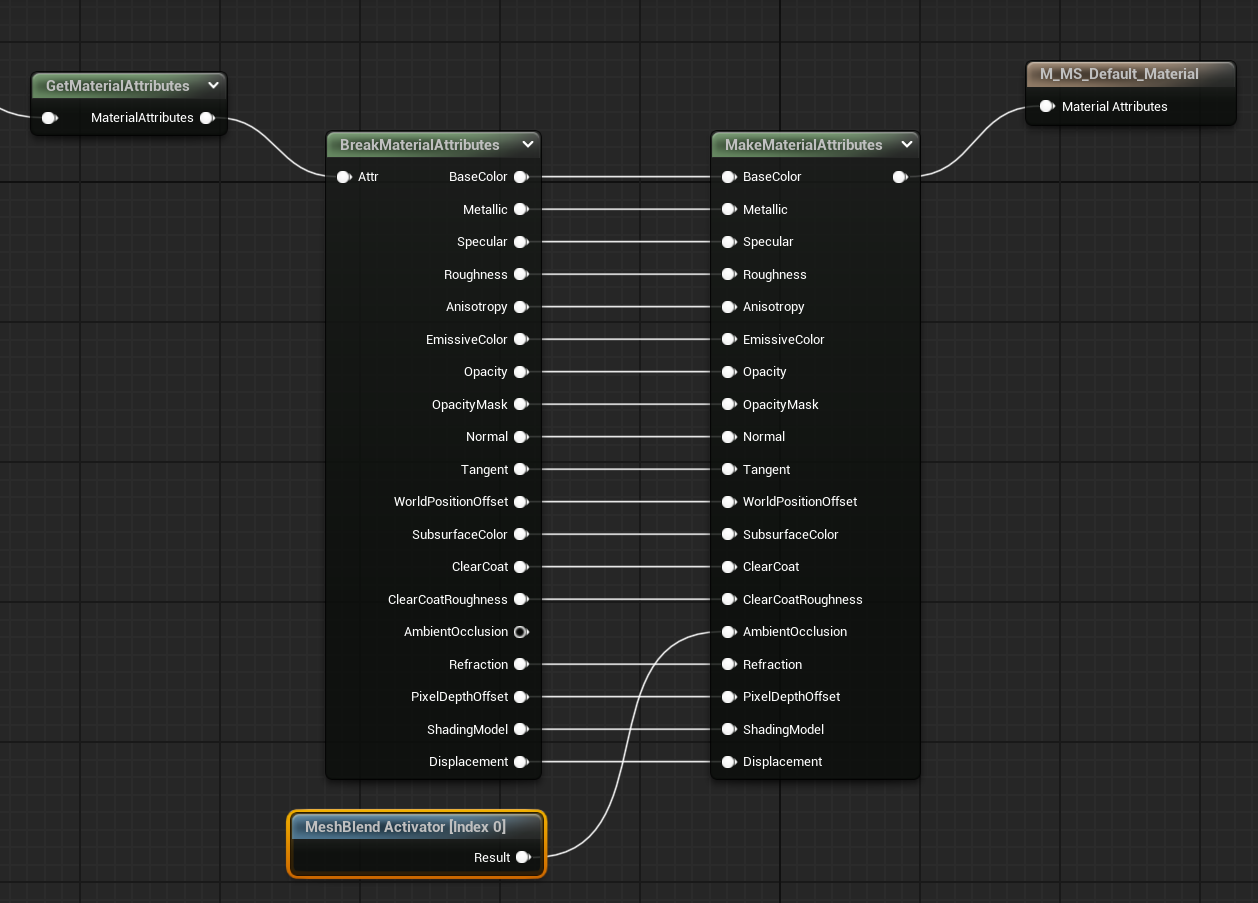
Make sure to save the Master Material to make the shader re-compile.
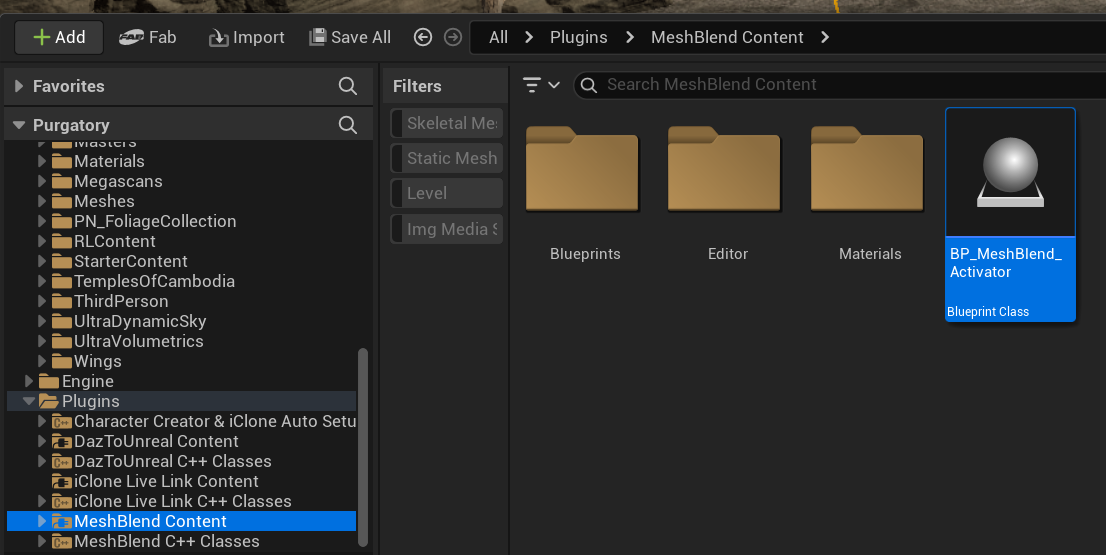
Adding the Mesh Blend Activator
We need a single BP_MeshBlend_Activator in our level. Drag it in from the Plugins/MeshBlend Content folder.
Activating Mesh Blending per Instance
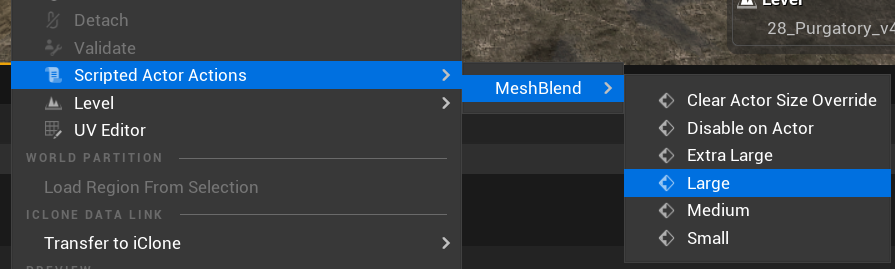
With objects that are already in our level, we can select one or multiple in the viewport, right-click them and choose Scripted Actor Actions – Mesh Blend and pick a size. It’ll depend on the size of the objects and how far they are away from the camera.
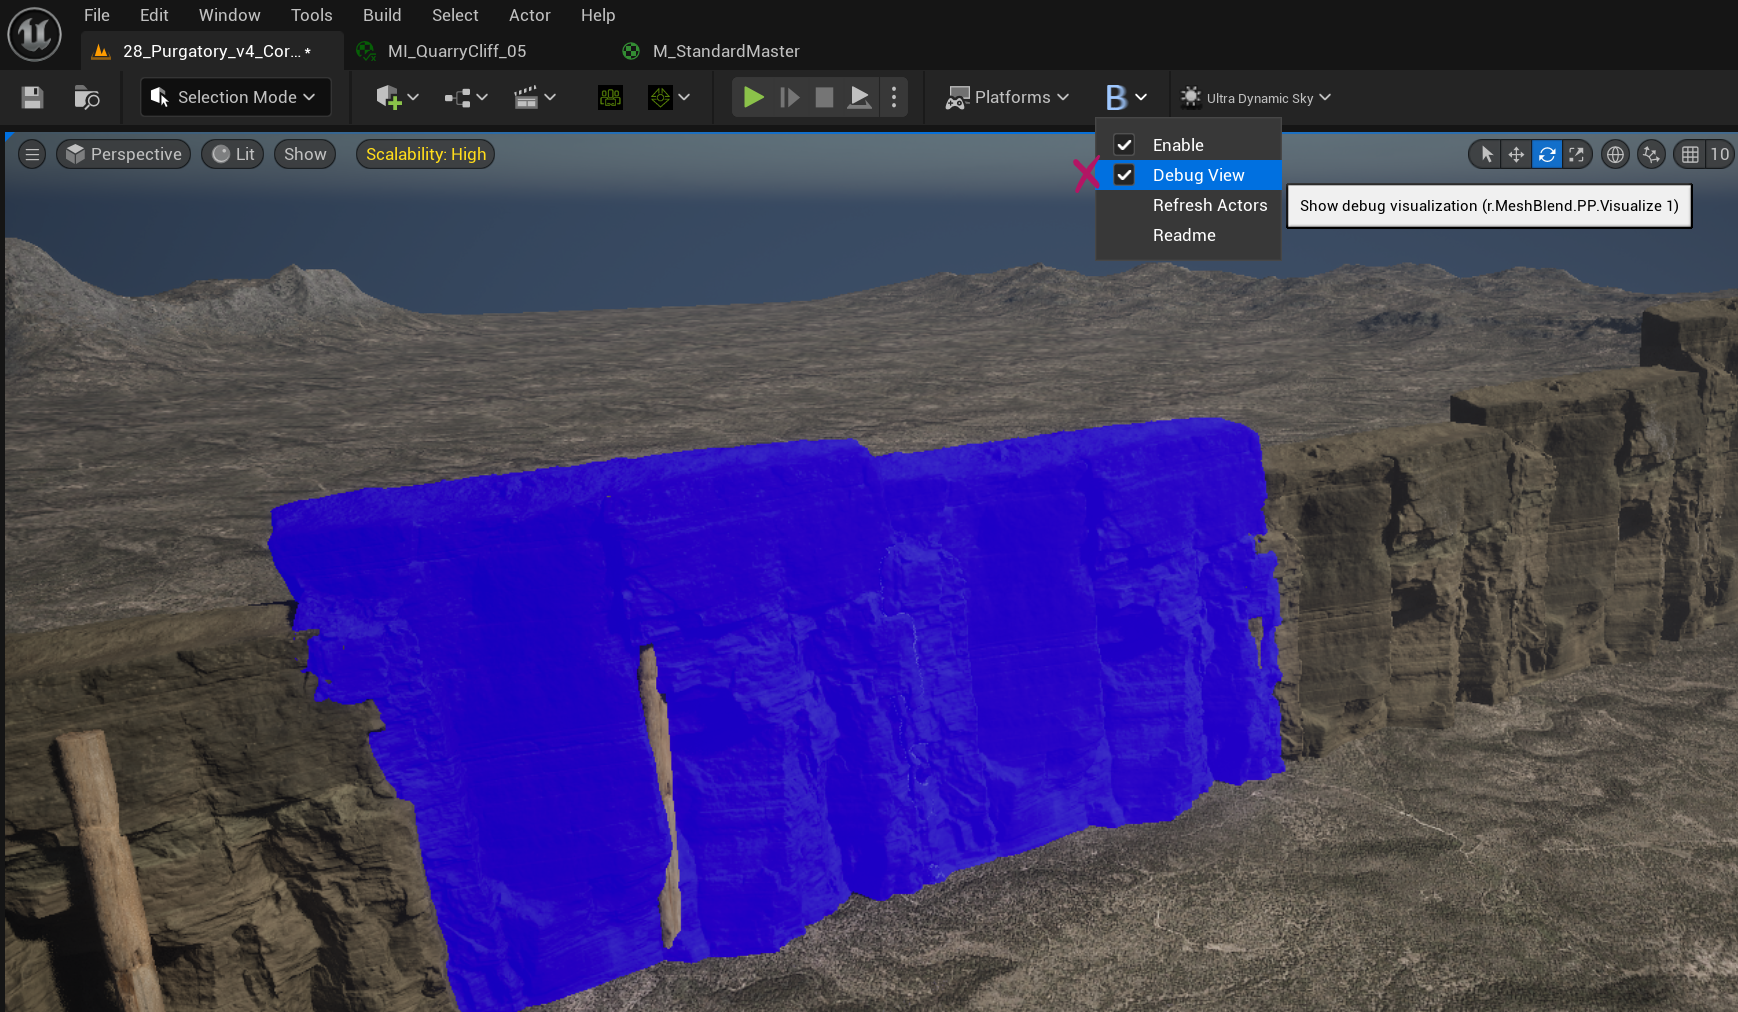
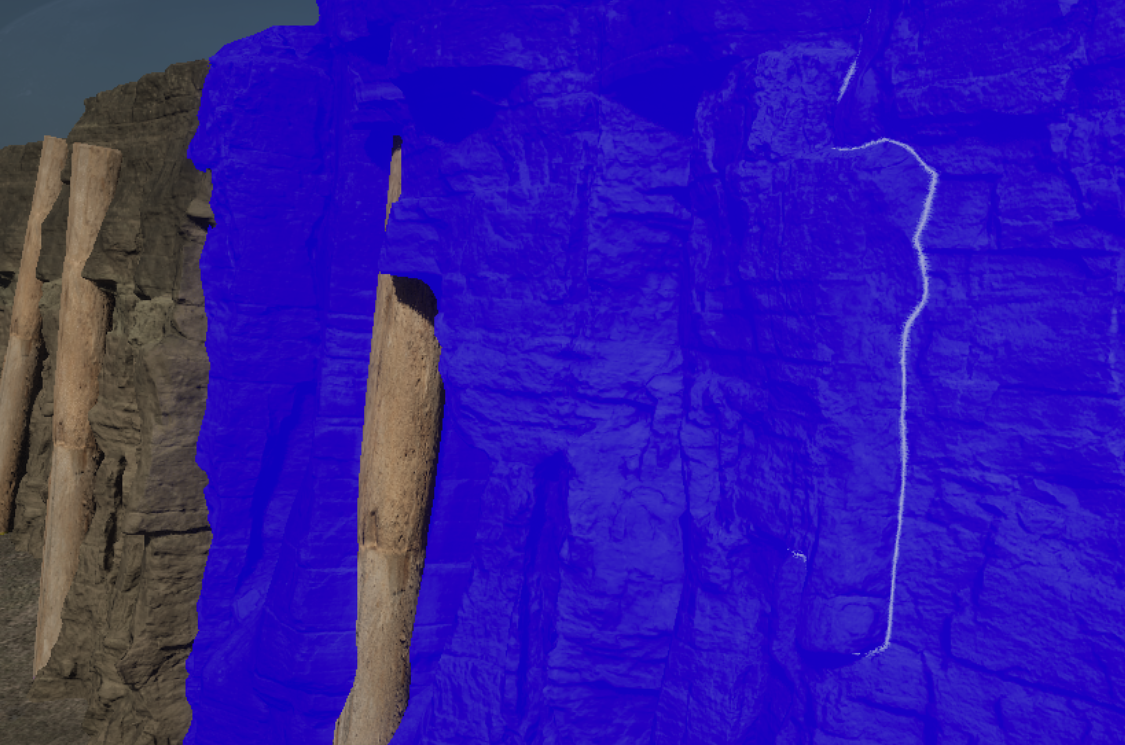
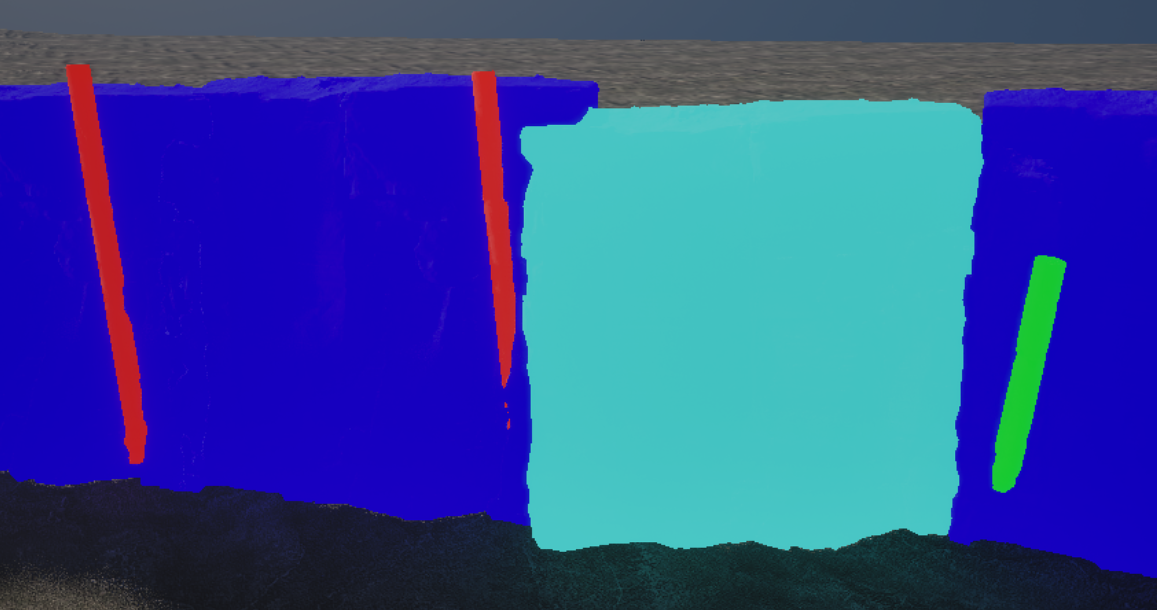
Note that all actors you want to blend need to have this enabled. If one of them does not participate, no blending will show. We can visualise all actors with blending enabled using the Debug View that can be enabled with B icon on the toolbar. The two blue meshes have blending enabled. The thin white line shows how much blending is being applied.
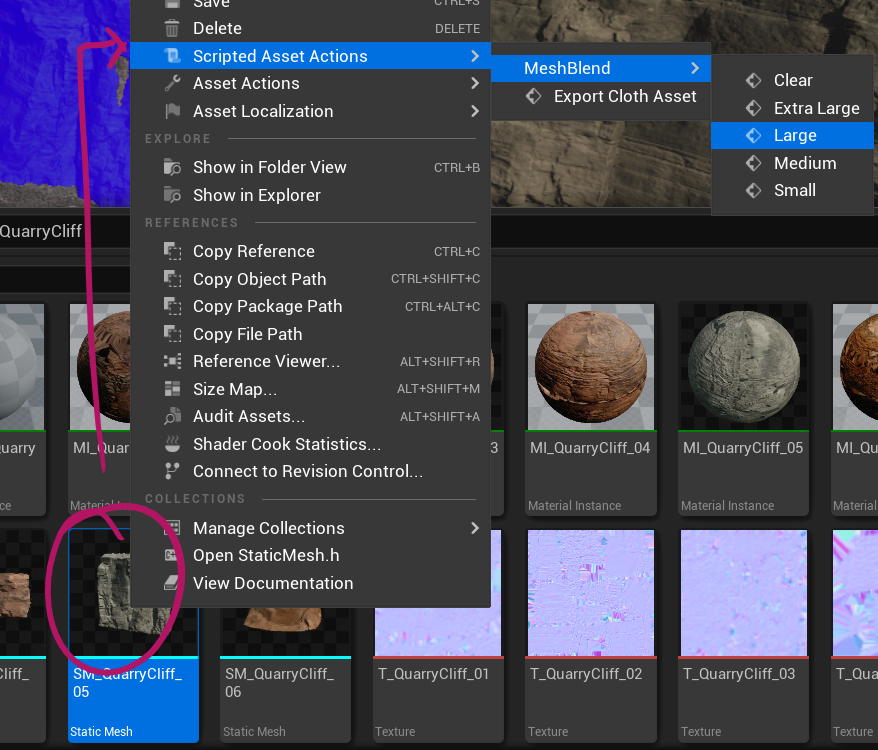
We can also enable blending directly on the mesh class in the Content Browser. This will immediately convert all instances in all levels to the desired setting.
The Debug View will show different colours depending on how much blending is applied.
- Red = Extra Large
- Blue = Large
- Cyan = Medium
- Green = Small
Blending Lanscapes and Foliage
The Landscape and Foliage Materials need special treatment and cannot be setup like the other meshes. Something about everything potentially blending with them, so they need a static value rather than a dynamic one or whatnot. It’s relatively easy to setup though:
- add the Mesh Blend Actovator node to the AO input as above on the Master material
- then on the Material Instance, under Mesh Blend, enable a Static Value
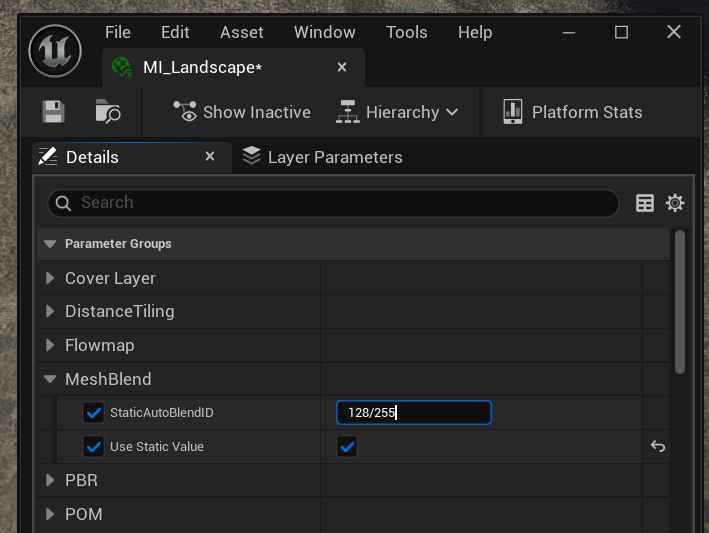
Note that we’ll have to do some maths in the input field: pick a number for the size, then divide by 255 to turn it into a float value, according to this table:
Small:       2-6
Medium:      65-69
Large:       128-132
Extra Large: 191-195
For example, if I type in 128/255, UE turns it into 0.501961, thereby applying a large blend to my material.
Further Reading
- Official Documentation: https://meshblend.lervik.com/
- Get Mesh Blend on FAB: https://www.fab.com/listings/1f4abe73-4cda-42db-995a-c9f8ca4790e5