Landscapes in Unreal Engine typically don’t have a lot of detail. For close-up shots, we usually have to place static meshes manually or use foliage painting tools, but it can be time consuming to get right and tricky to change later. PCG Geometry Decals makes this a breeze: These decals project a texture onto a piece of circular geometry that’s subdivided, snapping to the landscape object, providing high-res detail where we need it. Moving the decals is super easy and they auto-snap to a sculpted landscape.
Based on EPIC’s PCG framework and some seriously clever scripting, I’m having so much fun playing with these wherever our landcapes need additional detail. Combined with Mesh Blend, it’s a powerful tool I no longer want to live without. In this guide I’ll show you how to get started with PCG Geometry Decals.
Enabling Plugins
PCG Geometry Decals comes as content that can be added to any project. To use said content however, we need to enable the following plugins that ship with Unreal Engine:
- Geometry Script
- Procedural Content Generation Framework (PCG)
- Procedural Content Generation Framework (PCG) Geometry Script Interop
- Modeling Tools Editor Mode (enabled by default in 5.5+)
Restart the editor after enabling them all, and agree to all messages telling you “it’s beta stuff and you shouldn’t be using it”. It’ll all be fine.
You’ll also need a Landscape in your level. This product will not confirm itself to static or skeletal meshes.
Using the built-in Presets
The product only works with
The preset decals that ship with this product are so good and versatile, I can’t see myself having to create my own from scratch anytime soon. In your content browser, navigate to
- PCGGeometryDecals
- Demo
- Examples
and drag any of these blueprints into your scene. There are 7 in total and they’re great to examine as starting points. You can build your own with tileable textures and tweak the parameters as needed.
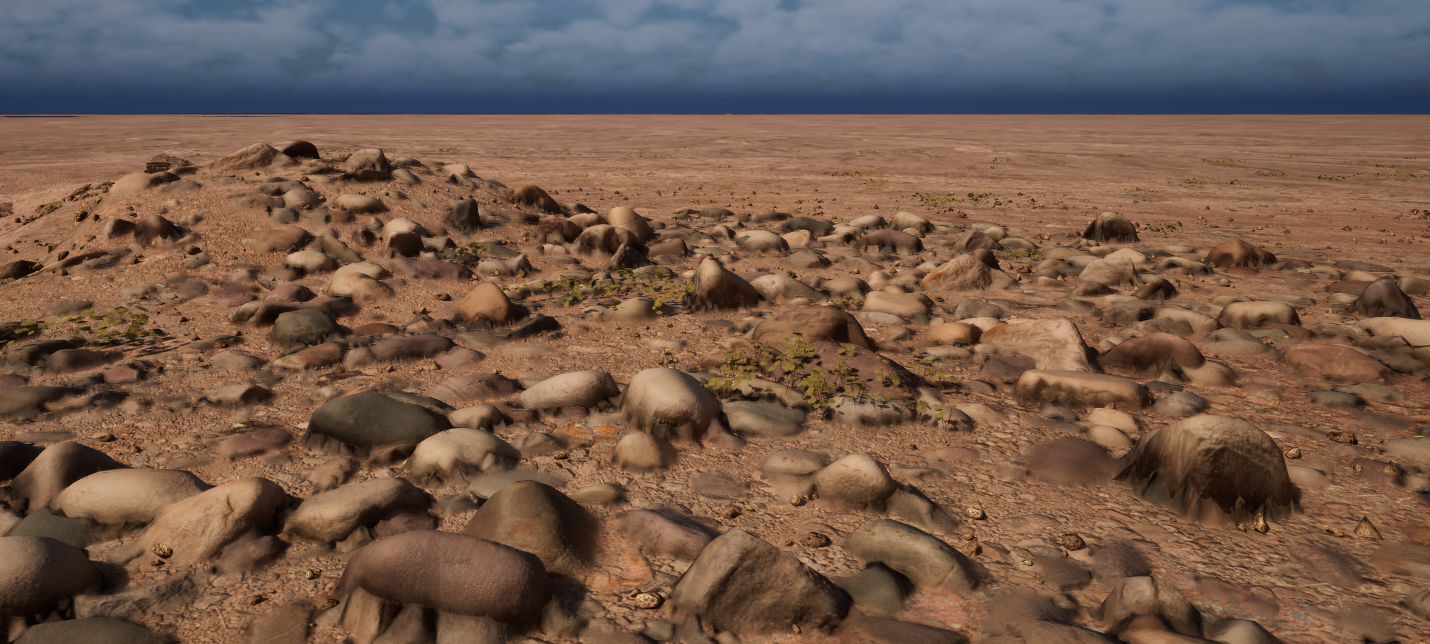
The decals snap to your landscape object and keep adjusting as you move them. Might take a second, depending on your system and the decal/landscape resolution. Once in place, you’ll see something like this:
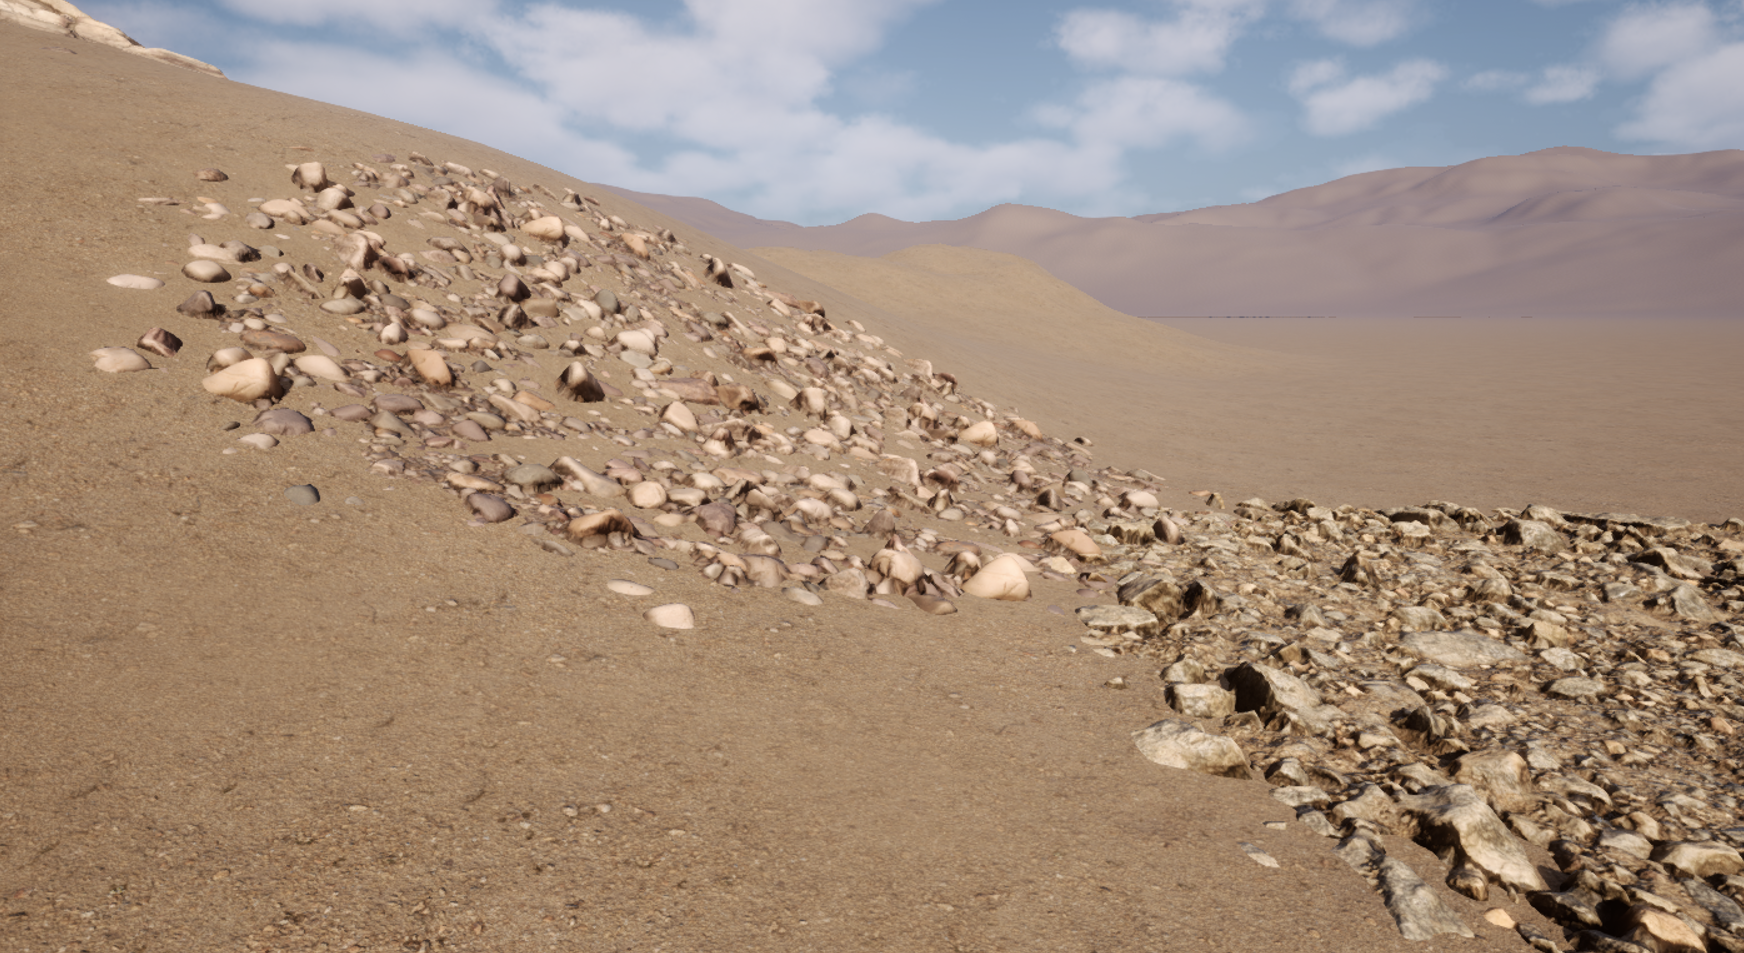
Here we have two decals that have been adjusted to match the landscape. Let’s look at the adjustments we can make to the default values.
Parameters
Click on a decal in your viewport, then take a look at your Details panel. Find the Geometry Decal section. Most parameters are self explanatory, but I’ll go through them below.
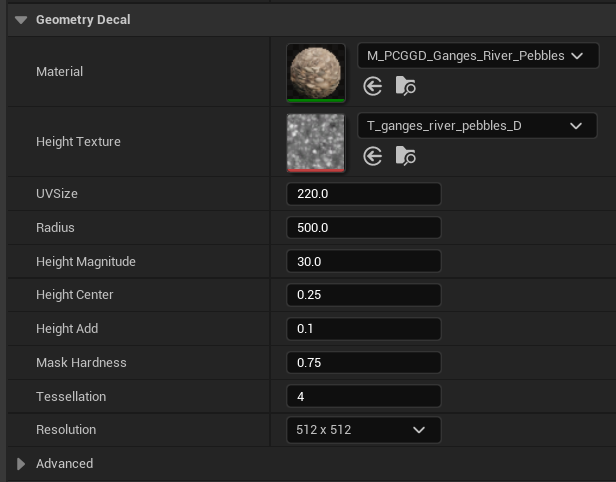
The Material and Height Texture fields are the Material instance and displacement map for the decal. This is where you would add your own textures (make sure they’re tileable). Right below we’ll see the UV Size, which determines how large the texture appears after projection. The Radius parameter determines how large your decal circle will be (note that the scale and rotation transforms won’t work)
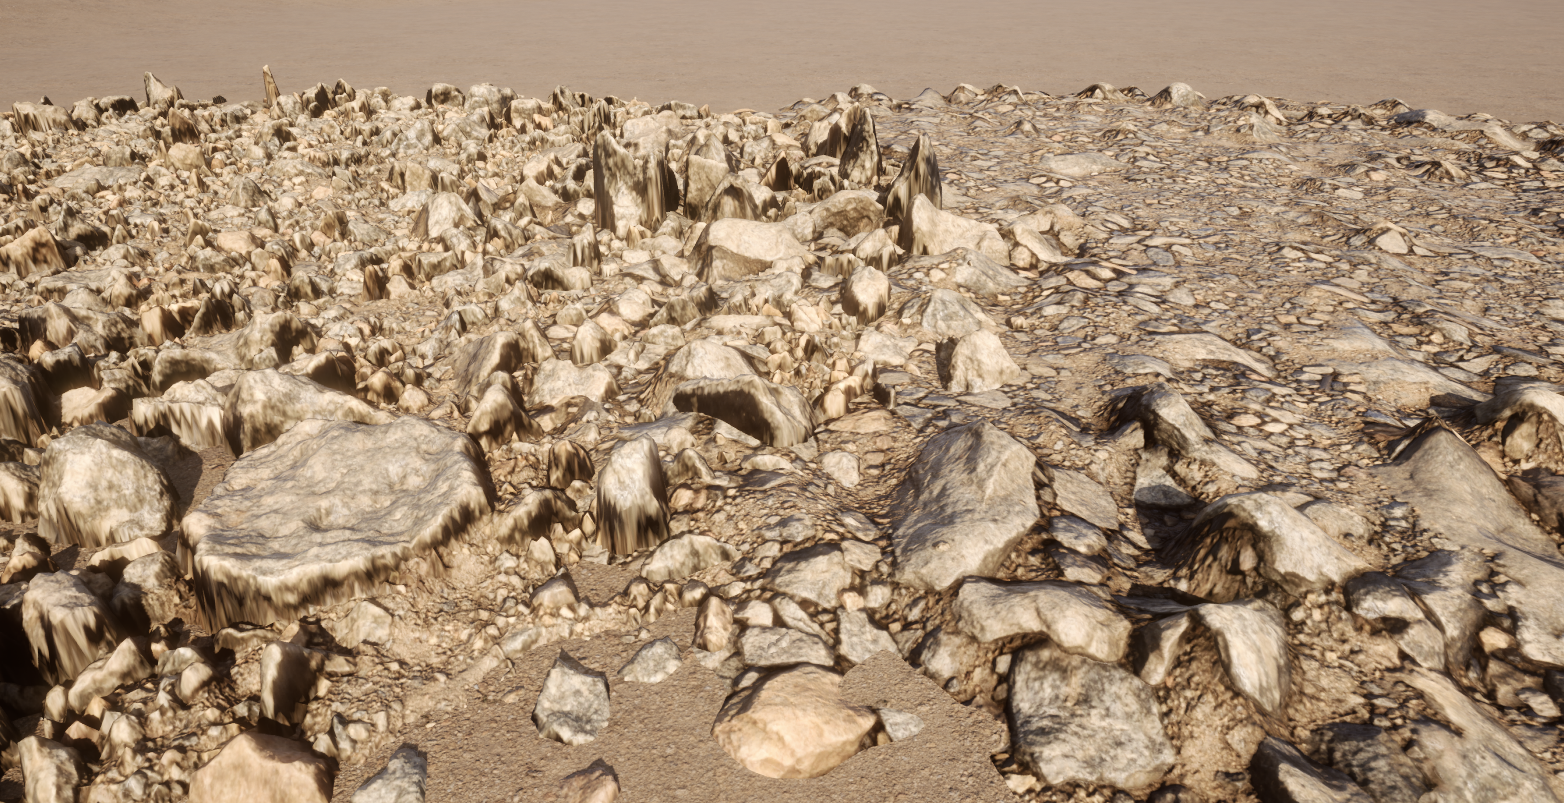
Height Magnitude describes how much displacement will be used to bring out the geometry. A higher value means you’ll see more. Here we have the same decal, with a Height Magnitude of 20 on the left, and 80 on the right.
Height Center is basically the falloff value. 0 means you’ll see the edges of the decal, 1 means it disappears the whole object is under the surface. Play with this if you want to hide much of the object and only have a few rocks poke through the landscape.
Height Add adjusts how far away the projection occurs. 0 works fine as a default, something like 10 will raise the whole decal above the landscape.
Mask Hardness is the falloff feather, essentially a blur that’s applied to the outside of the projection. 1 means there’s no falloff and you’ll see the full circle, while 0 shows only a few objects in the very center of the projection. Default is 0.75.
Tessellation and Resolution
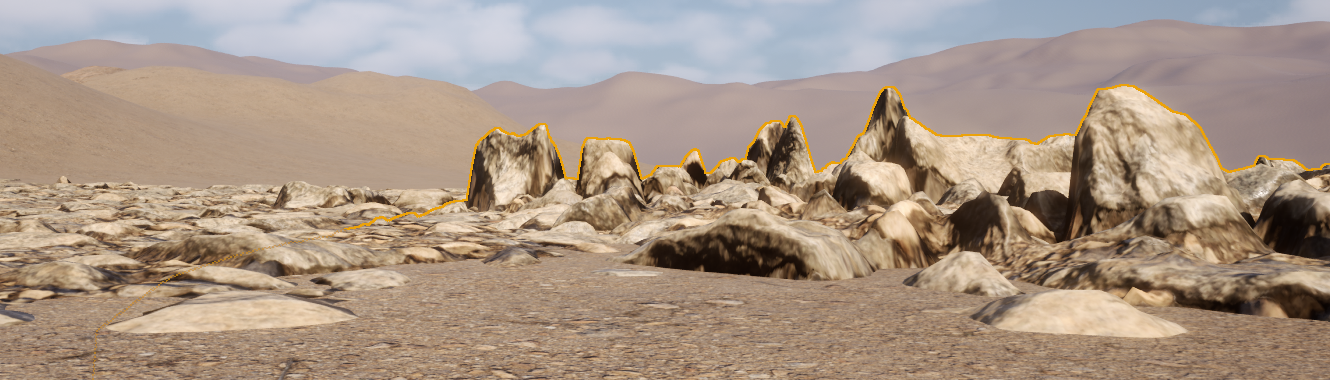
Tessellation is the subdivision of the geometry that’s created from the projection. A higher value means the geometry will be able to resolve detail better. A good result here will depend on the source texture and its resolution. Here’s he same decal in wireframe mode, on the left with Tessellation set to 2, on the right with 8 (default is 4). Also note the landscape resolution by comparison.
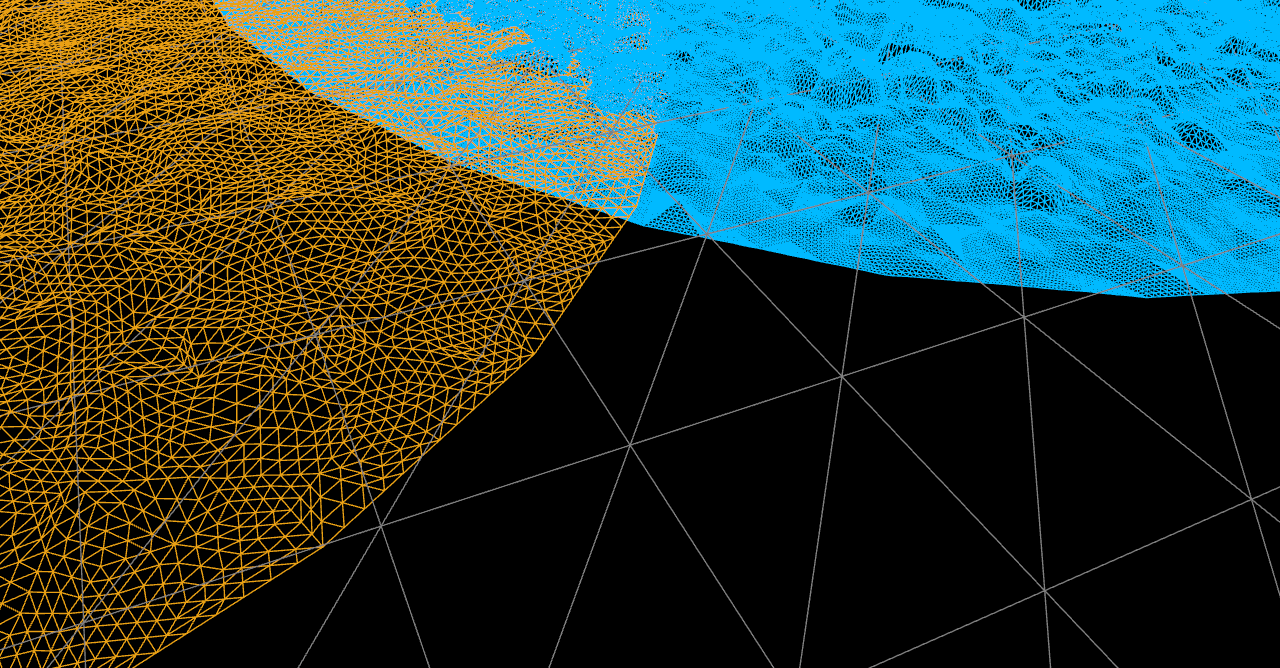
Resolution is the size of the projected texture. A higher value will yield more detail, but to bring it out also requires a higher Tessellation value. Here’s a 4K resolution with Tessellation 10 (left) compared to the default values of 128K and Tessellation 4 (right). Higher values always mean more resource consumption.
Material Adjustments
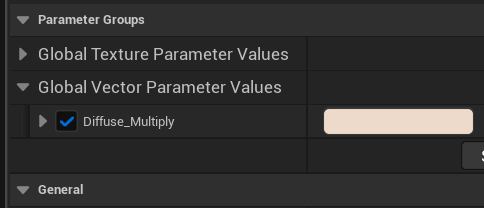
To make the decal texture blend in with your landscape, we may need to override the Diffuse Multiply value in the Material Instance (under Global Vector Parameters). Note that this will change all instances of the decal using the same material. If you need to make adjustments individually, consider duplicating the instance first.
Here’s the same decal on a Brushify landscape, with default values on the left, and my adjustments on the right.
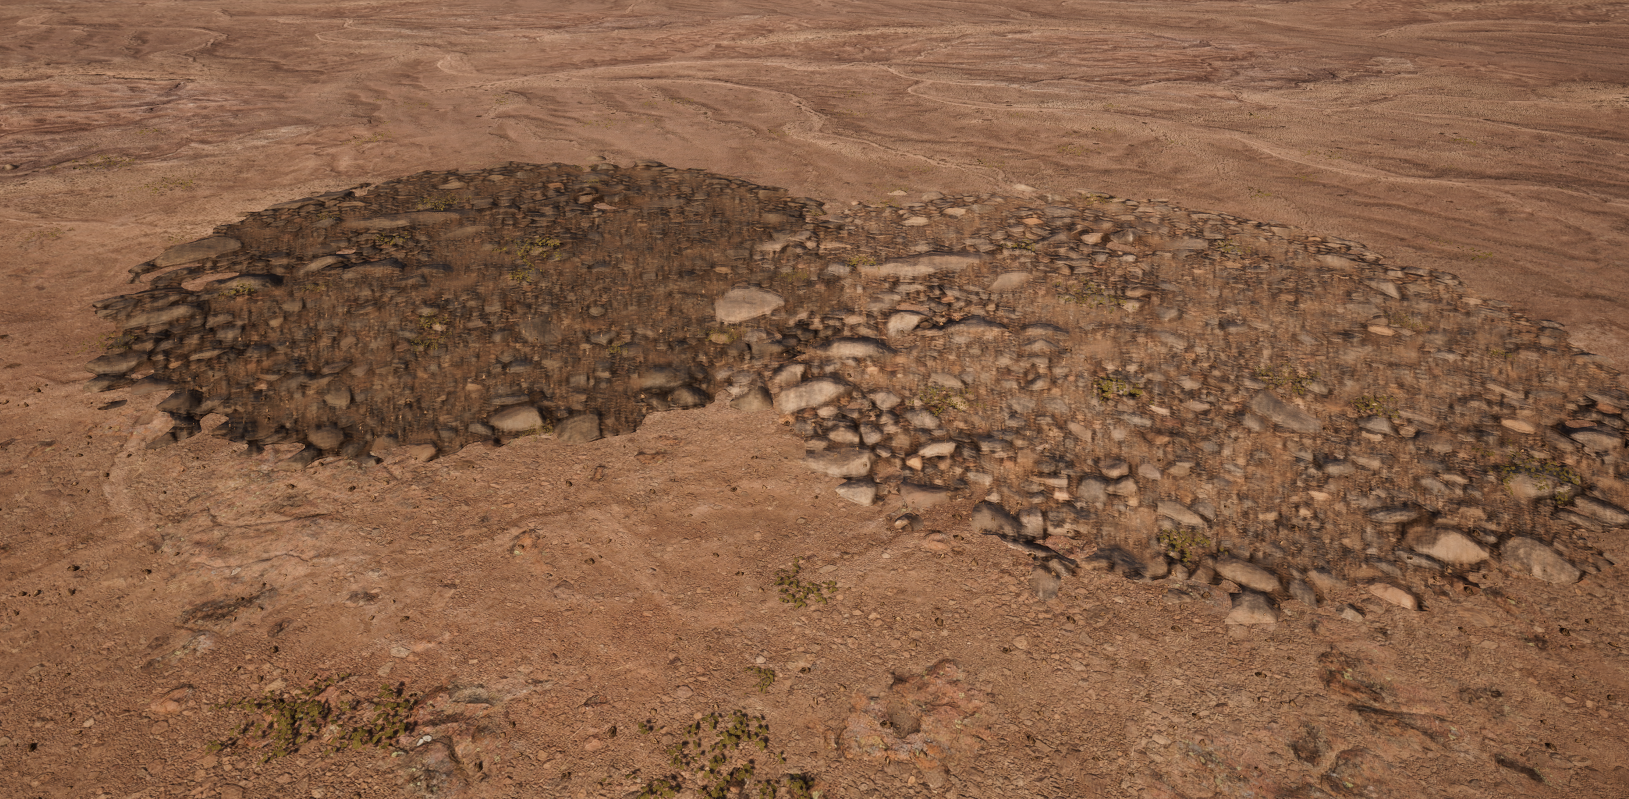
In case the lightest value isn’t quite light enough, feel free to crank up the V value in the color picker above its max value of 1 by typing in a higher number like 2, then adjust down from there.

Baking Decals
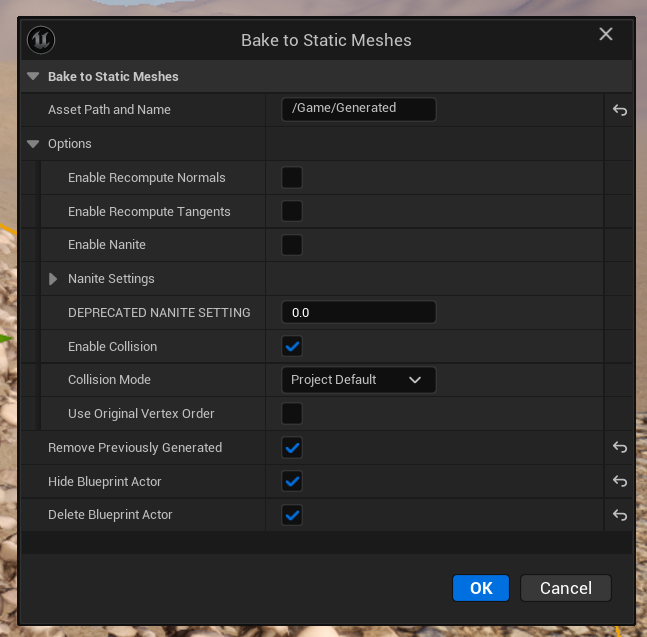
If you’re happy with the placement of your decals, the product contains a script that lets you turn them into static meshes with optional Nanite. This is not required if you intend to render your project with MRQ, but can make a big performance difference for real-time gameplay projects.
To bake, simply right-click on your decal in the viewport, then choose Scripted Actor Actions – Bake to Static Meshes (this works with multiple objects.

A context menu with options will appear that lets us specify a destination for the generated meshes, whether we’d like to remove the decal object or just hide it (for potential adjustments down the road), very detailed Nanite options and several other useful settings.
That’s all I have for now. If you want to blend in the edges of your decals, consider using these with Mesh Blend, another incredible product that’s completely changed the way I work in Unreal Engine. It blends the intersections of meshes, in our case between the landscape and the decal geometry. I have a getting started guide here. Here’s what a PCG Decal looks like when combined with Mesh Blend. It rocks!
macOS Notes
Sadly the product currently doesn’t work well on Mac, likely due to the PCG framework still being in beta. While I was able to open an existing project and see existing decals in place, UE 5.5 and 5.6 crashes when I move them or add new decals to the level. This is not a problem on Windows. I haven’t had a chance to try it out Linux yet.
Further Reading
- Official Documentation: https://www.munduscreatus.be/pcg-geometry-decals-documentation/
- Get PCG Geometry Decals on FAB: https://www.fab.com/listings/98539376-5a9d-4fc4-9793-e921e5332056