I’ve been using Premiere Pro since version 5. That was before it became “Pro” or CS. It was just called Premiere back then. At the time of writing that’s been around 25 years ago, perhaps even longer. As such, it really isn’t easy for me to un-learn all that muscle memory. Premiere is such a big part how I’ve been working for years, and if it wasn’t for reasons I may discuss elsewhere, I would probably never switch.
Having said that, the time has come for me to gradually leave Premiere behind and get used to DaVinci Resolve. To accommodate how I work, I had to make some shortcut changes I don’t want to forget, and that’s what this article is all about: getting an old Premiere guy comfortable whizzing around in Resolve.
Q and W
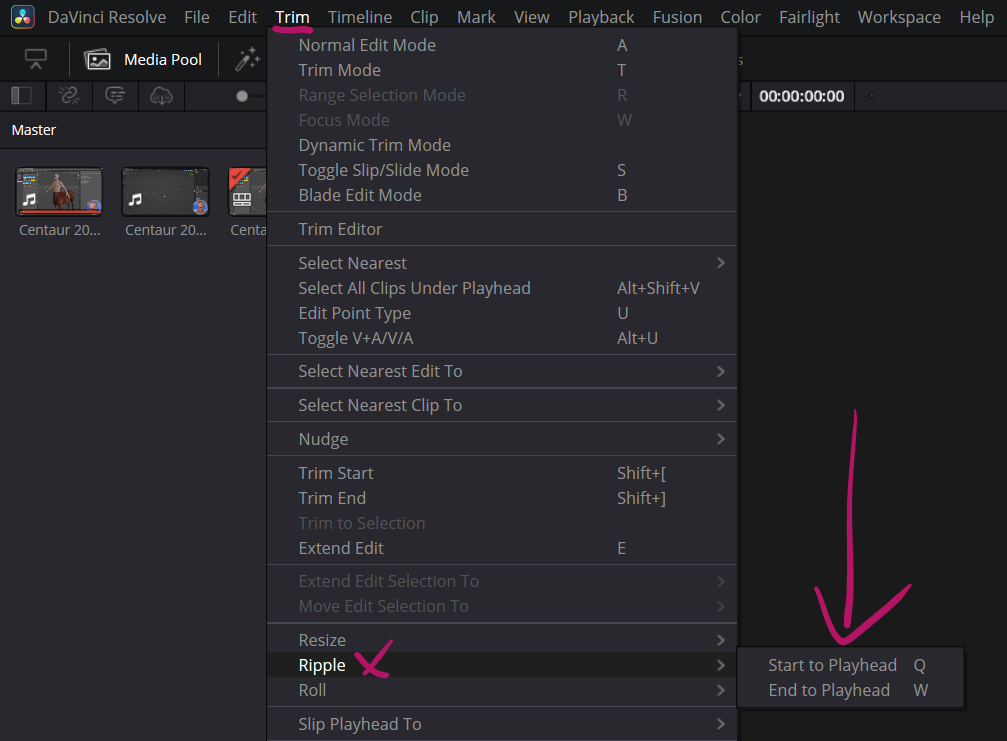
One of the biggest eye openers for me was the discovery of editing with Q and W. In conjunction with the cut tool, the allow me to trim the start or end of a clip to where the playhead is parked, then auto-ripple the footage. It’s ideal for rough cuts and refinements, and I wouldn’t want to live without it. It’s like 5 operations with a single key. Premiere has this mapped to the Q and W keys.
Resolve calls these operations “Start to Playhead” and “End to Playhead” (under Trim – Ripple). Their default shortcuts use three keys (SHIFT+CTRL+[ I believe), but by mapping them to Q and W we get the same behaviour as in Premiere.
Split Clip at Playhead
I use the cut tool in Premiere to split clips, or use CTRL+K (albeit with a re-mapped shortcut that’s easier to reach with my left hand). Resolve has the same tools and calls them
- Blade Edit Mode (B shortcut), equivalent to Premiere’s Cut Tool
- and Razor (CTRL+B), equivalent to Premiere’s Cut at Playhead
I’ve left the Blade Edit as is, but re-mapped CTRL+B to C for a single key that’s easier for me to reach.
Make the Timeline Scroll
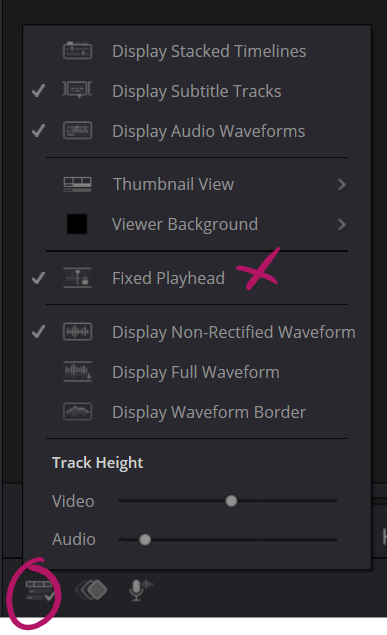
On the Edit page, Resolve defaults to paginating the timeline with a moving playhead (like Premiere does). I’ve changed this to a “smooth scrolling” timeline with a static playhead, which lets me keep an eye on the footage as it scrolls by. Thankfully that option is available in Resolve on the Timeline View Options and is called “Fixed Playhead”.
Single Viewer in Edit Mode
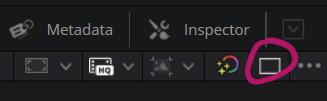
The Edit Page is setup to show the source and programme views side by side. When I edit I like seeing a larger preview of my footage, without another clip to the left of it. Resolve makes this easy with the Viewer Mode switch.
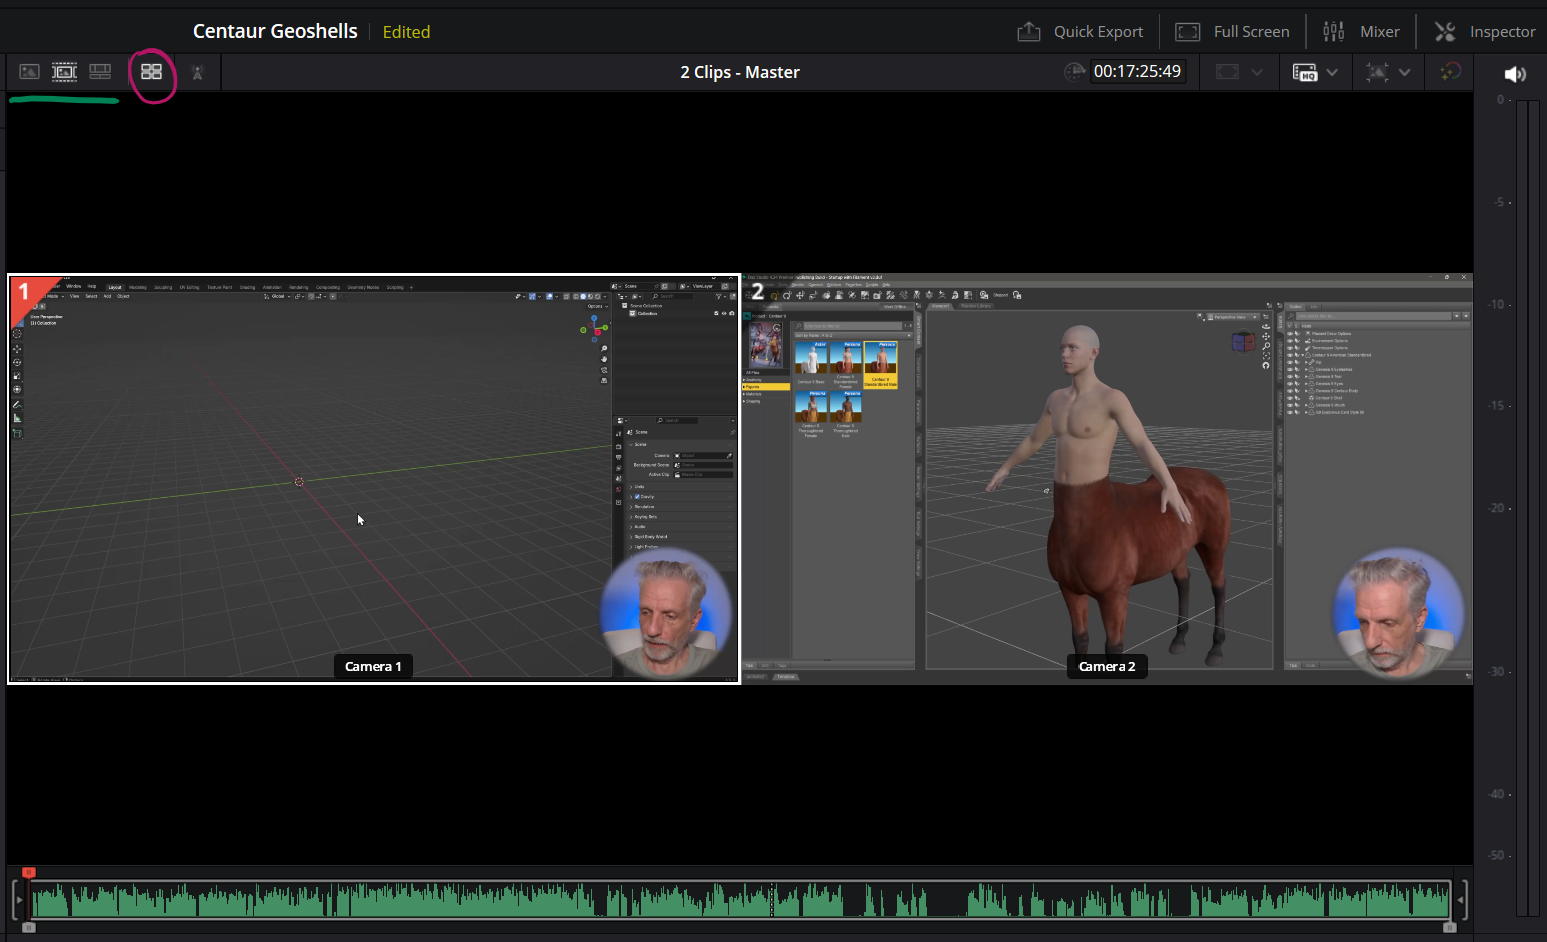
The Cut Page has a similar option. Although it already shows our footage full screen, we can switch it to Multi Source footage. Also on the Cut Page, there’s an option for what the display shows. The default is Source Tape, but switching this to Timeline will give us a view similar to the Edit Page.
Viewing your footage Full Screen
Premiere has the CTRL+Tilde shortcut to make the viewport temporarily full screen. In Resolve it’s CTRL+F.
Apparently there are other ways to show this with scopes and whatnot, but that doesn’t work for me (it’s SHIFT+F and ALT+F apparently, perhaps those work for you).
Remapping Keyboard Shortcuts
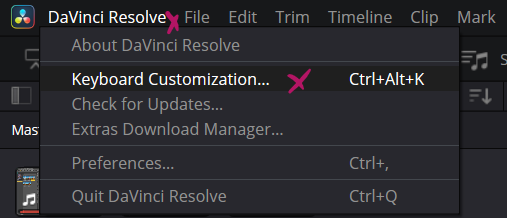
It’s a little unintuitive at first, but remapping shortcuts in Resolve is a powerful tool to make the app work for you. Head over to DaVinci Resolve – Keyboard Customization (or hit CTRL+ALT+K).
A window will show you the whole keyboard, as well as a list of pre-defined shortcut presets. Pick any of them to get started (DaVinci Resolve being the default). You’ll be prompted to save over the existing one or create your own as soon as you’ve made your first change.
To do so, select a key on the virtual keyboard and you’ll see what said key does in the Active Key window. On the right is shown what that command is called from a “menu perspective”. To re-map something, you first have to un-map it by finding it in the Commands window, then re-map it with your desired shortcut.
For example, let’s re-map the Razor command (CTRL+B by default) to the regular C key. First, we press the C on the virtual keyboard. All we see under “Active Key” is Mouse pointer, which means that’s what C is currently mapped to. It’s a nice way to figure out what keyboard shortcut does what.
Since we know the command we’re looking for is “Razor”, let’s search for it in the Commands window. If we don’t know what the command is called… I don’t know how to handle that.
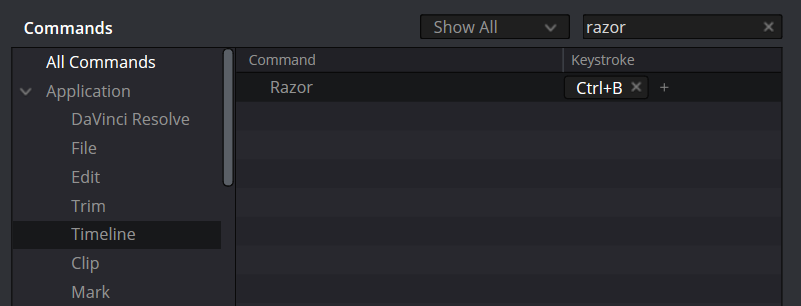
Now click the little X icon next to the keystroke entry, leaving a red empty field. Click on it, then press the keyboard shortcut you want it to become on your physical keyboard. Since our C shortcut was already in use, Resolve tells us this and lets us override it or change our minds. I’ll click Assign to go ahead.

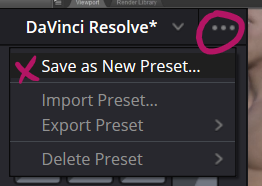
When I’m done, I can click the little three-dots icon next to the presets list and save my handy work. Here I can also export my shortcuts for use on another system.
Further Reading
- The Q and W edit explained for Resolve (and a good explanation about remapping shortcut keys): https://www.youtube.com/watch?v=–ijHUTFMHA