When I render an EXR sequence in Unreal Engine using ACES, it looks OK in Premiere but way too dark in Resolve. That’s because Premiere sort of brute-forces an OKish look so we can work with the footage, although it’s not properly converted by default. Resolve handles this differently and doesn’t convert the footage at all, reasoning “either you tell me EXACTLY how to do it, or I’m not doing it”. Fair point!
Thankfully there’s an easy to way setup the Resolve project so that a proper conversion happens, but of course I’ll forget how this works next week, so let me show you how to do it. There’s several ways to do this, and it’ll entirely depend on the project of what you need.
ACES Project Setup
This assumes you have ACES footage that needs to look good in the viewport. We’ll discuss exporting with and without conversion later, as well as mixing footage with different colour spaces. Head over to File – Project Settings – Color Mangement.
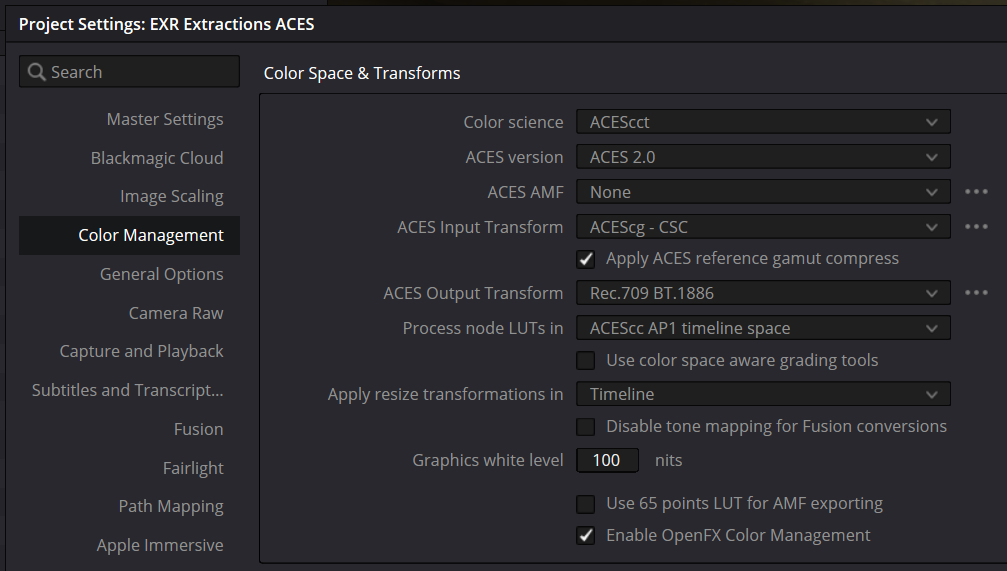
Note the Color Science, Input Transform and Output Transform options here:
- Color Science: ACEScct (leave the default values)
- Input Transform: ACEScg – CSC (that’s what the footage is made with)
- Output Transform Rec.709 BT.1886 (that’s for your monitor)
Result: footage now looks as it should.
Footage Override
To change a particular clip over to something that doesn’t match your display colour space, right-click on the clip in question and choose ACES Input Transform.
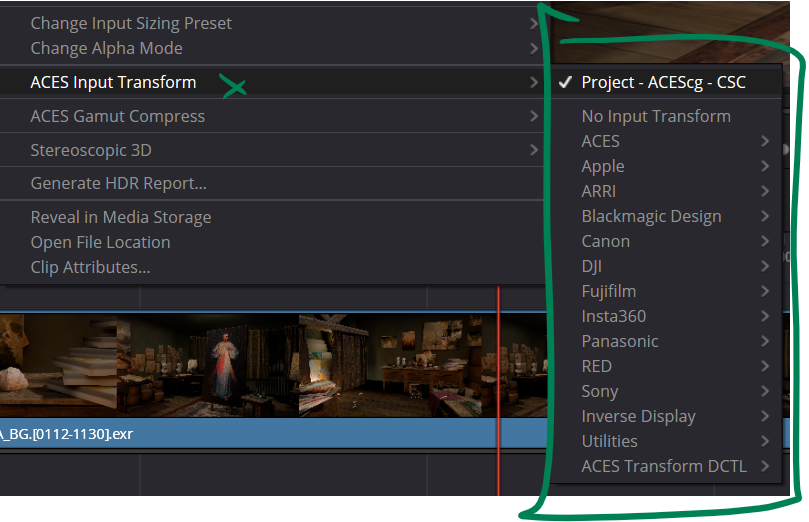
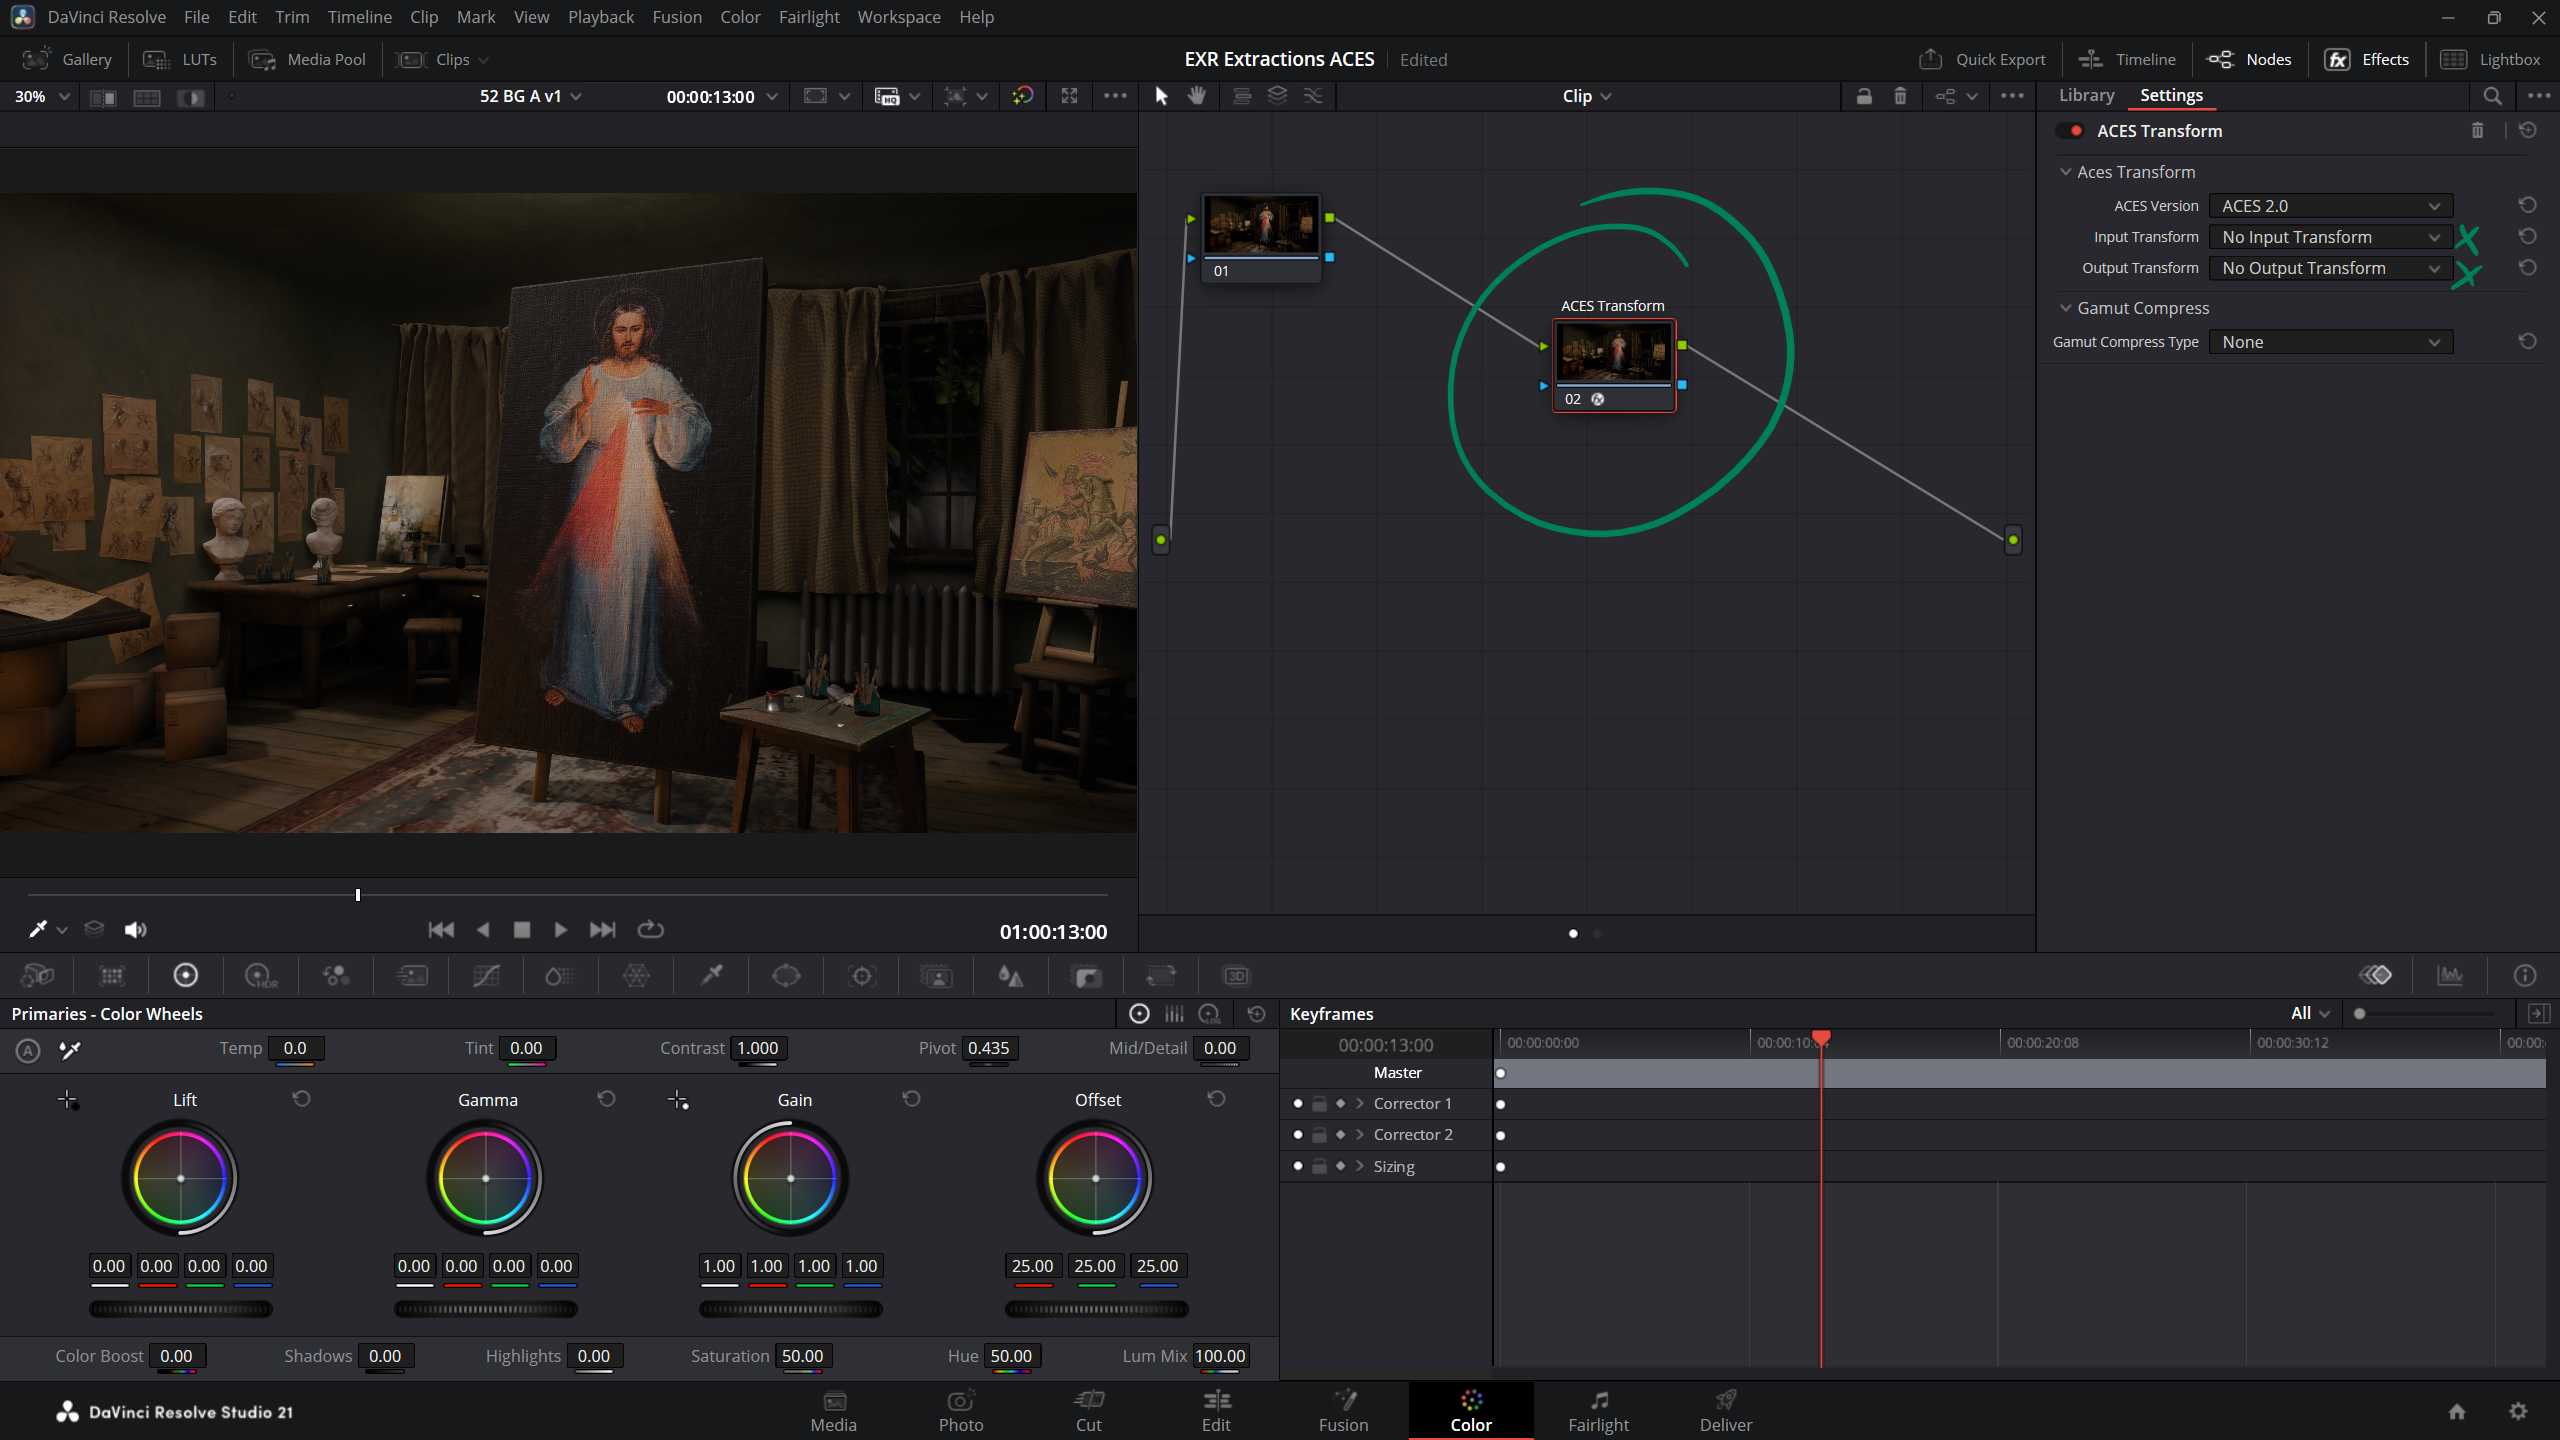
A list of options appears. Pick the one you need and see the footage change colour. Something similar can be achieved with an ACES Transform Node on the Color Tab. Drag it in from the library, then make the input/output changes as needed.
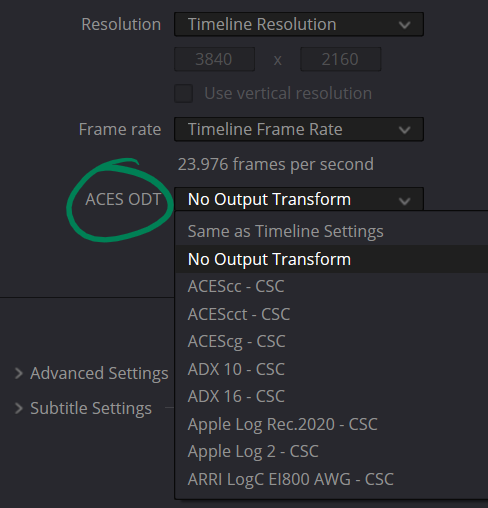
Export/Delivery Settings
On export, you can either strip out the ACES profile and convert the clip into something else, or leave it as is for further post production.
That’s all I have for now.