Modifiers are forces that act upon your vertex objects, with the added advantage that you can manipulate them later. Carrara has the same concept. Here’s how to create a Modifier in Blender.
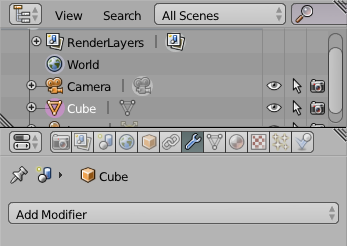
First, select an object in your scene. Underneath the scene tree, find the little wrench icon and click it. This opens the Modifier Pane on the right hand side.
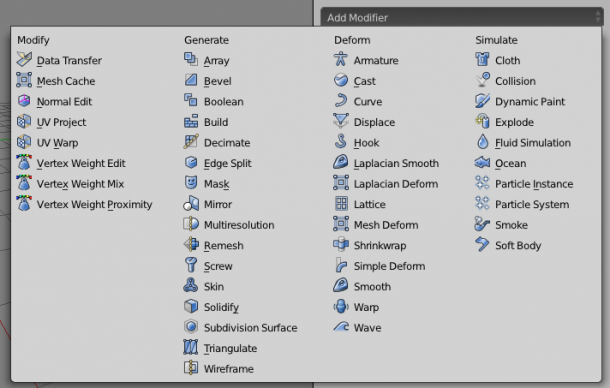
Click on the Add Modifier drop down menu and pick a modifier of your choice. The list is rather extensive. In fact, pick as many modifiers as you like and the all appear as a stack.
You can rename each modifier and change its position in the stack with the little arrow icons on the right.
See those little icons at the top of a modifier? The camera toggles visibility of this modifier in the render, the eye toggles visibility in the scene preview, the little box icon shows the modifier if you’re in Edit Mode, and the final icon synchronises the modified mesh with the real mesh in edit mode (otherwise you’d see two different meshes overlaid).
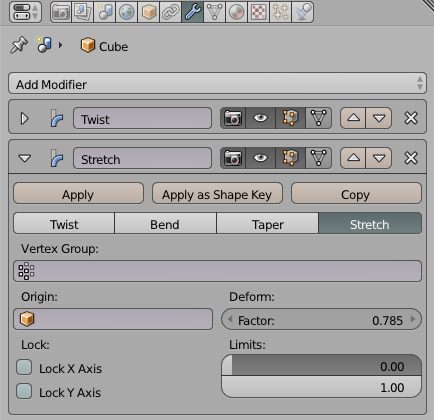
If you no longer need a modifier, click the x icon to remove it from the list. You can also apply the modifier to the mesh, which means it will disappear and the mesh will change for good.
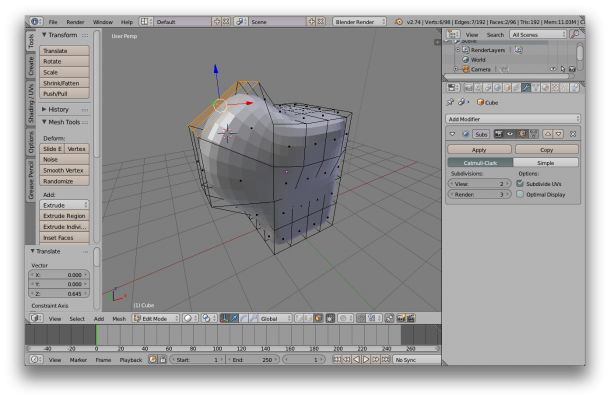
One extremely useful example is the Subdivision Modifier: apply it to a low-res mesh, edit the low-res mesh, and see come to life at a much higher resolution as if by magic:
Have fun with modifiers 😉
1 thought on “How to apply a Modifier in Blender”