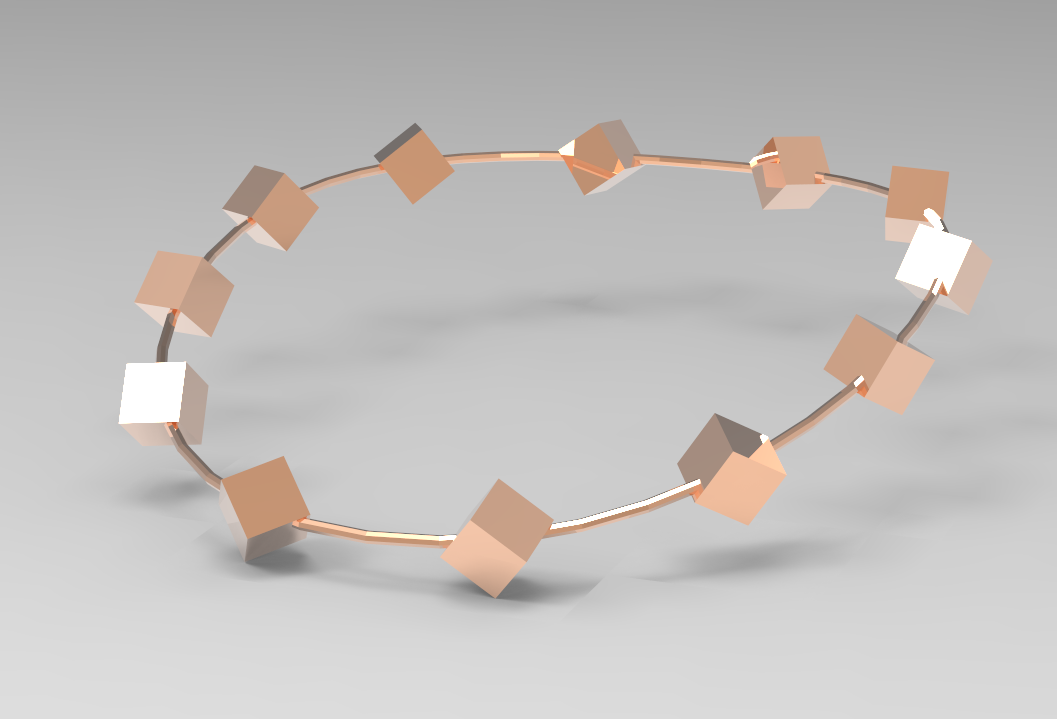
Hexagon had a nice feature called “copy on support”. With it we can create duplicates of
an object along a path, something that comes in handy when creating a ladder or a necklace. I wondered if Blender too had such a feature, and of course it has – even though it’s perhaps a little bit unintuitive (read: impossible) to figure out. Pretty much like the rest of Blender.
So here’s what we have to do in order to duplicate an object along a path in Blender, where this technique is called DupliFrames. Don’t worry about looking it up in the plethora of menus – it’s not to be found anywhere.
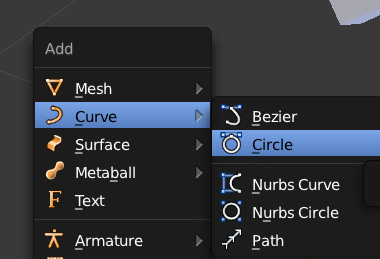
First we’ll need an object to duplicate, and we need a path. For this example I’ll use the default cube as my object and add a circle to my scene (under Add – Curve – Circle).
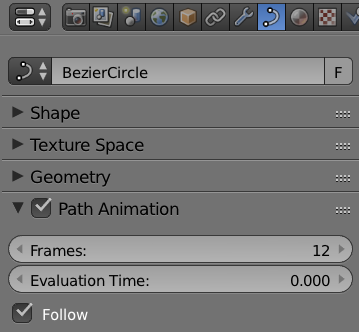
With the circle selected, head over to the Path menu in the Properties Palette. It’s the one with the little curved line for an icon. Check the boxes that reads Path Animation and Follow. The number of Frames is 100 by default. We’ll use something smaller, i.e. the number of times we want to duplicate our object. Perhaps 12 is a good start. You can change this value when you see the duplication in action in a moment.
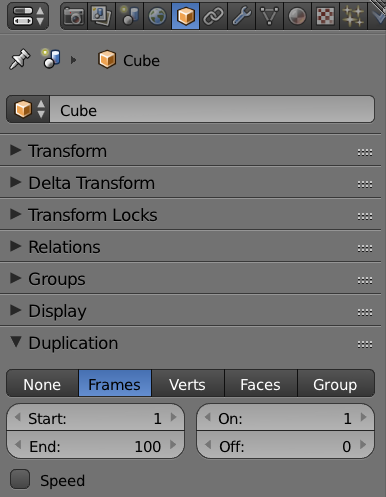
Now select the object you’d like to duplicate and find the Object menu in the Properties Palette. It’s the one with the little cube for an icon. Find a section called Duplication, and in it a menu with a number of choice. Select Frames, then deselect the Speed tick box. This will ensure that our duplication won’t happen one frame at a time, but all on the same image.
Next thing we need to do is to parent our cube to the path. To do that, first select the object, then SHIFT select the path (so that it’s selected last and hence the active object), then hit CTRL + P and choose Object. Our Outliner / Scene Selection should hence look something like this:

One last thing we need to do is to reset the origin of our cube so that it snaps to the path. To do that, select the object you want to duplicate (i.e. our cube) and hit ALT + O (as in “the letter).
Feel free to move the object around, and see all those copies move proportionally with it in relation to the path. Press ALT + O again at any time to snap them all back to the path.
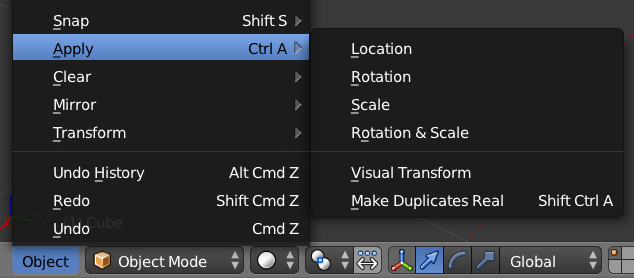
Note that until now, all objects are not yet real geometry, instead they are generated by Blender the fly (much like a Modifier works until you apply it). To turn all copies into real objects, head over to Object – Apply – Make Duplicates Real (or hit SHIFT + CTRL + A).
This step is not necessary when exporting your mesh as OBJ though, as Blender kindly exports real geometry while leaving the editable copies intact in the .blend file.
Thank you very much! Excellent article.
Thanks Michael, I’m glad to hear it was helpful.
Great walkthrough. Thanks!
Thanks, Jason!
Am I the only one who thinks that this is just not a very intuitive way to do this? Anyways thank you very much!
I couldn’t agree more, Dan 🙂