
Parameter Dials are everywhere in DAZ Studio. But sometimes they’re not in the right place, or they’re not called what we’d like them to be called. For example, if you bring in a Morph Target via Morph Loader, DAZ Studio will create a folder by that same name.
It’s easy to change most Parameter Dials. Here’s how to do it.
I’m using a Morph Target as an example. Currently it’s called Morph Loader, located in my Parameters Tab in a folder called Morphs.
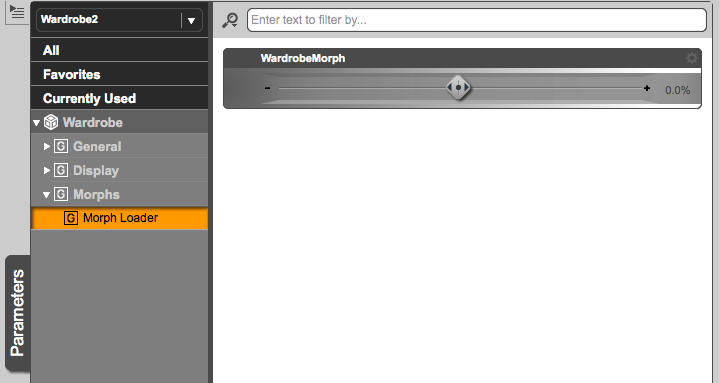
It’s a generic name and therefore not very descriptive. Besides, it lets users twiddle the dial to infinity in both directions, and I would like to restrain that from zero to 100%.
All I have to do is click the little gear icon at the top right corner of the parameter. Clicking it will bring up a little context menu. Select Parameter Settings and you’ll see something like this:
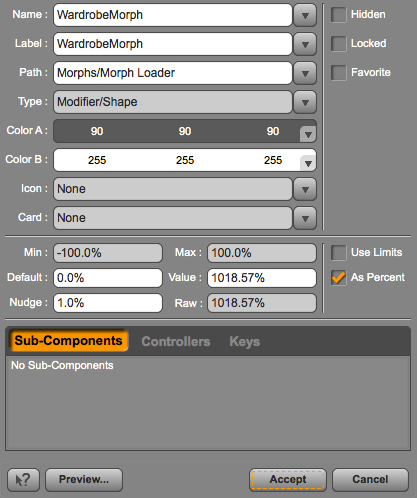
Let’s go ahead and change some of the properties in here:
- Name and Label both describe what the parameter is called. So rather than WardrobeMorph, I’d like to change mine to Open Doors
- Path tells DAZ Studio which sub-folder our parameter appears to be in. Right now it’s Morphs – Morph Loader. We can either make it a single entry under out object (let’s call it Movement for example), or we can make our entry appear in a subfolder (for example, Movement/Doors would create an entry called Doors inside a folder called Movement).
- Type lets us change what the slider does. Let’s leave it alone, because it does what we want in principle.
- With Color A to Color B we can describe colours for the gradient on the Parameter Dial. That’s how some vendors make their values stand out from the crowd (some more successfully than others). The default is 90 90 90 and 255 255 255 for a grey to white gradient.
- Icon and Card let us add a little graphic to our slider. Shaping Morphs for characters often have this. Totally optional of course.
- Min and Max let us set the limits of our slider. To use this feature, check the Use Limits tick box. I’m going to set my Min to 0 and Max to 100 for my Morph to deliver desired results.
- We can also specify a Default value to which our slider can be set, say 50%. This way users can choose the Reset option to bring the slider back to its default.
- Nudge lets us specify the amount by which the slider adds or subtracts a value when users slide it. If you have a really large range, increase this value. If it’s not a percent value we’re after, unchecking the As Percent option will give us an integer value.
Choose Preview at the bottom of the window to get an impression of what the slider will look and feel like, or hit Accept to turn it into a working version. Now it’s ready for use inside the Parameters Tab. Feel free to make changes the same way as described.
Changes are saved with your scene, or with the actual object.