By default, some keyframes in the DAZ Studio timeline just don’t show up. Morph dials and any other options that appear on the Parameters Tab are such culprits. We can see their effect, but not necessarily a corresponding keyframe. I’ve just found out how to make those values how up and thought I’d make a note of it here.
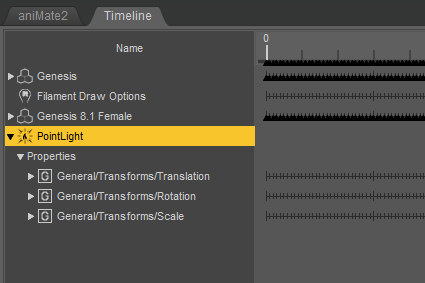
Let’s take a point light as an example. By default, all I can see are keyframes for translation, rotation and scale. Light intensity is missing.
Let’s make those additional parameters show up. For this to work, make sure the timeline is in Advanced View Mode. At the very bottom of the timeline, find the Types menu. It’s set to TRS by default, which means the timeline will show the keyframes for Translation, Rotation and Scale. Click on it and enable Other.
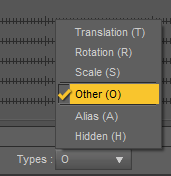
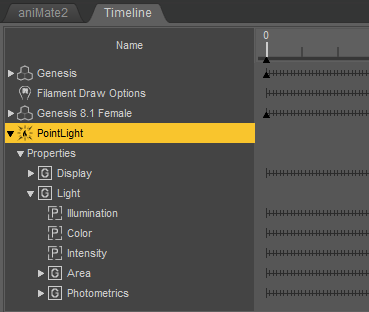
This is a filer menu that lets us enable more (or less) stuff on the timeline. If you don’t want to see anything to do with translation, you can disable it here and the timeline will now show it. Very neat. Now when I look at my timeline I can see all kinds of other properties for my animation pleasure:
For my Genesis figure there’s an equally exciting revelation: all the previously missing morph-able parameters now show up on the timeline. Result!
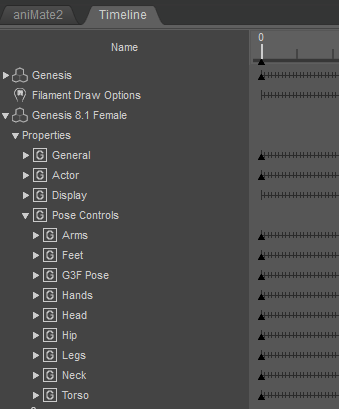
Custom character morphs can be found under Actor, while adjustment moprhs are under Pose Controls (same hierarchy as in the Parameters tab).
Happy animating 🙂