I’ve made myself an animated walking Slinky last week! I thought it would be nice to have him join the other figures on my stream overlay. It seems a simple-ish feat to do, but since I’ve built him from scratch in Blender, then rigged and animated him in DAZ Studio, there were quite a few steps and pitfalls involved. While it’s all fresh in my head, I thought I’d make some notes on how I did it all.
These are the steps in principle:
- build Slinky in Blender
- think about the rigging and setup Vertex Groups
- use the Figure Setup Tab in DAZ Studio to add bones
- animate his “walk cycle”
- render it out and turn it into a seamless looping animation in Premiere
Patreon and Ko-fi Supporters have access to the Scene Files I’ve created.
Building Slinky in Blender
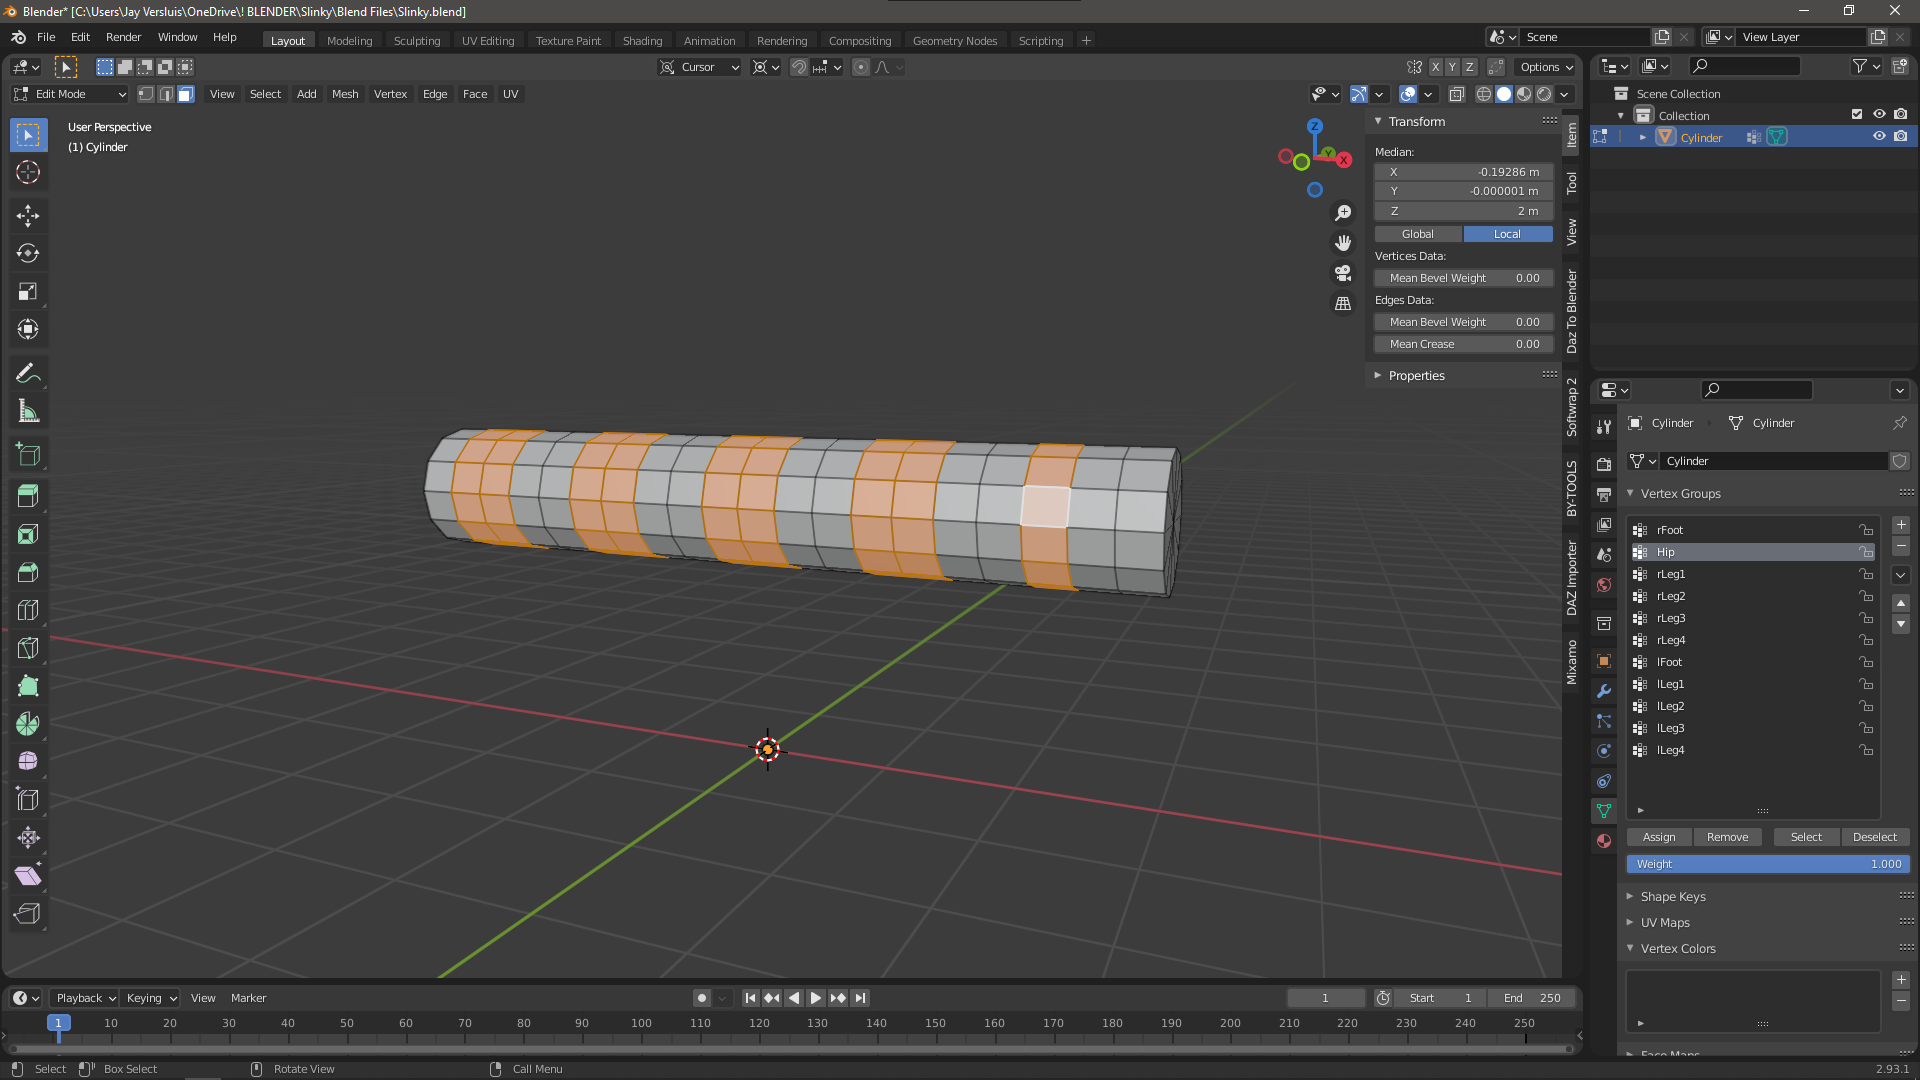
As you may have guessed, Slinky is a simple cylinder. That being said, he needs a certain amount of geometry to bend properly. I’ve experimented a bit with his length and divided him so that each leg should fit 5 bones – that’s 11 bones in total, one being the hip (or whatever else the middle point might be called on a Slinky). Here’s what he looks like, with alternate Vertex Groups shown. Each group will lead to a bone-controlled group in DAZ Studio (click to enlarge):
Rigging in DAZ Studio
I’ve described how to rig a cylinder in my previous article, the concept is almost the same here with the difference that I’ve made the Face Groups in Blender. Scale is another matter, so I import whatever OBJ comes out of Blender with a 1% scale in DAZ Studio. This is less important for Slinky here as he won’t need to fit in with existing items or people. Thinking of a 6m wide Slinky, Genesis would probably get scared of him!
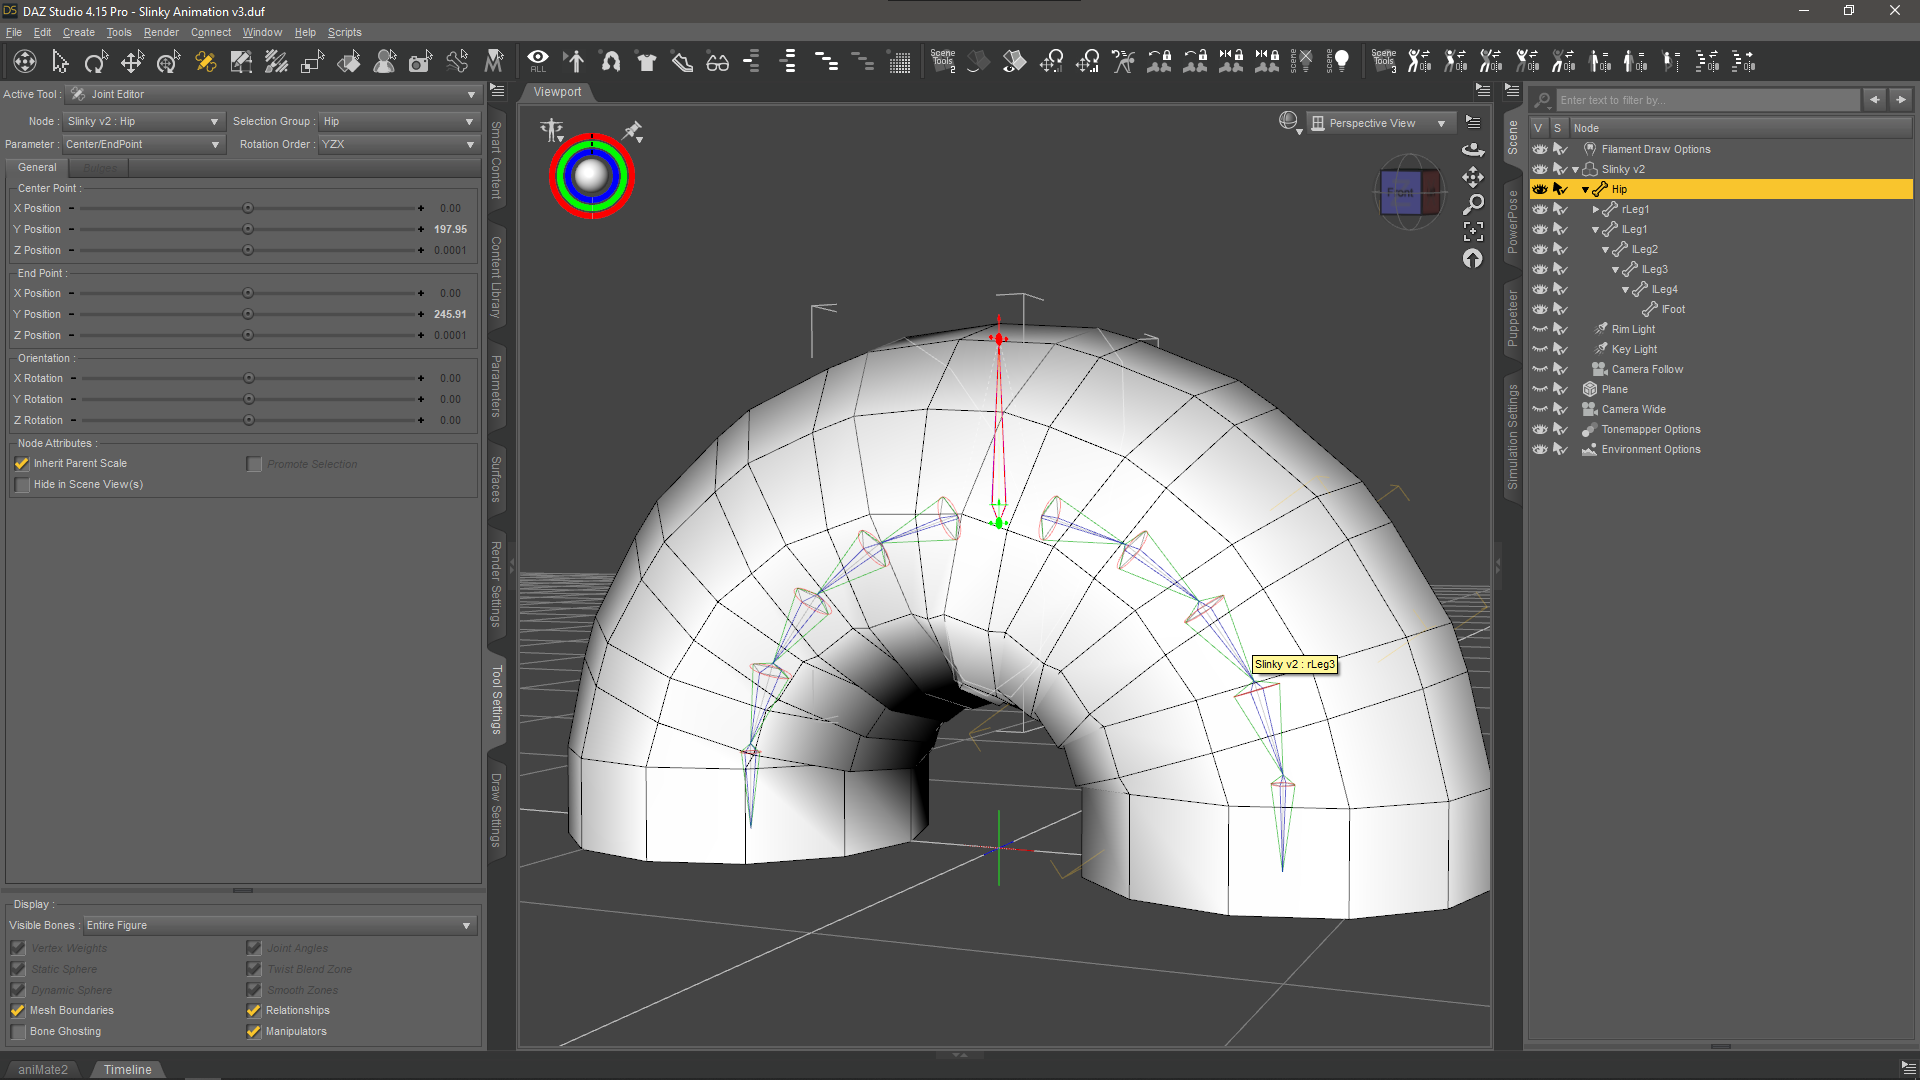
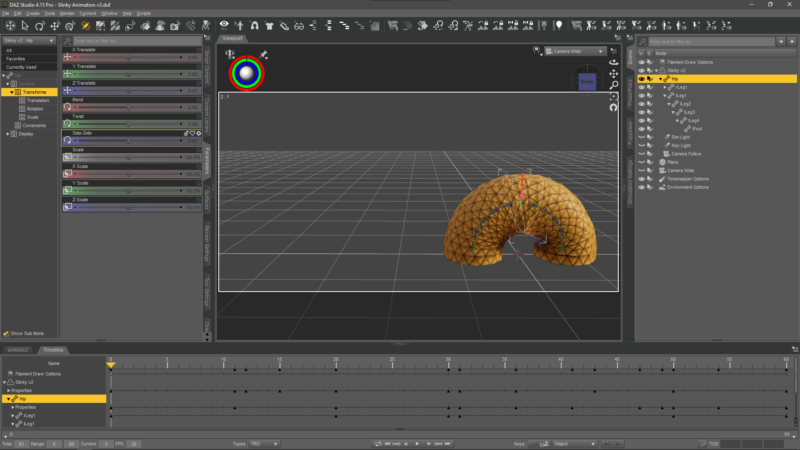
Here’s what he looks like with bones. The hip bone rotation is YZX, while all other bones are XYZ. To calculate the bending angle for each bone, I divided 90 by 5 (angle vs bones), which means that in his resting state, Slinky’s bones need to bend 18 degrees each, with the hip bone pointing up. I didn’t have to smooth the weight maps, which was a nice bonus.
I saved this setup as a pose so that I could bring it back as I bend him during animation.
Animating Slinky
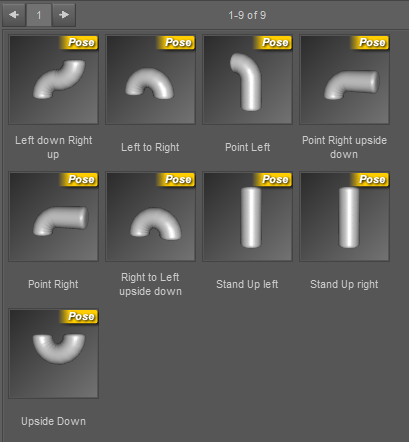
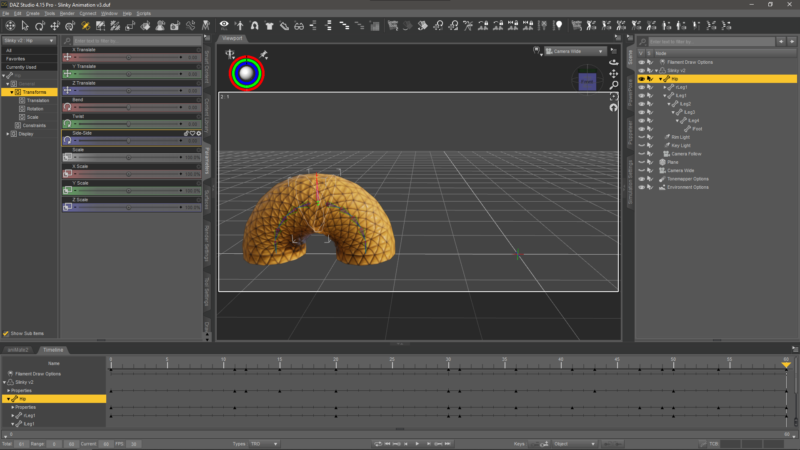
Although his walk cycle looks deceptively simple, it’s actually quite difficult to get right. Technically we need to turn him around once, while leaving his left foot in place so that all bends end up 18 degrees the other way, with the hip bone pointing down. I didn’t know how to approach it so I made several other poses that I thought could come in handy.
Turns out all I needed was the one I described above, with the hip bone pointing down and all bending angles going the other direction. Animating between these two poses means he walks one step forward. That’s a good start!
The tricky bit came with walking the second step. Slinky’s hip bone had rotated from 0 to -180 and I wanted to bring this back to 0. Animating it backwards would have him move the opposite way, back to the start. With a parameter tweak I could have gone to -360 (further forward), but I thought a better way would be to use my upside down pose, then turn slinky around by 180. Here’s what this means:
- Frame 30: hip -180 (last frame of first step)
- Frame 31: hip 180 (first frame of next step, same position as above)
Now I could apply the second step in the walk cycle to make him end up facing the right way up again.
I wanted Slinky to walk a few paces through the screen, so my original idea was to setup a regular 16:9 camera and have him walk at the bottom repeatedly. I created an aniblock in the hopes of looping the animation several times, but there were two issues with that approach: aniblocks being what they are, none of the interpolated keyframe motion that makes Slinky wobble so nicely was taken across. It was a shame, but I was prepared to live with it and perhaps re-create the wobble with Spring Dynamics later.
The bigger trouble was with getting aniMate to recognise the forward motion. It’s made for bipeds and can infer where the next foot needs to go, but in Slinky’s case it never got it right – no matter how hard I tried. Sadly I don’t know enough about setting this up manually, so I decided to apply the forward motion in Premiere instead.
Assembling the animation in Premiere
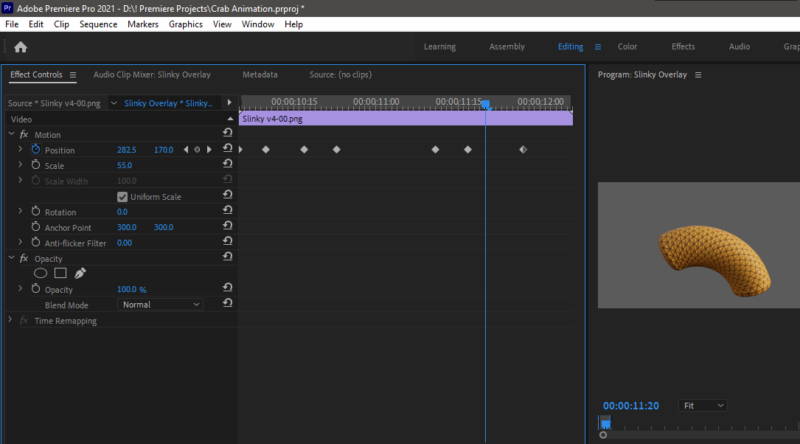
I’ve rendered out two passes of the animation: one with a parented camera showing Slinky closeup, so he walks in place, and another camera showing him walk from left to right. Ideally the latter could have been looped, but if you observe closely, there’s an issue with this approach:
If I match up the first and the last frame, you’ll see that the camera perspective is slightly different. Look closely at the shadows underneath Slinky’s bend to see what I’m talking about. It’s not obvious unless you see the loop assembled, and while not “that bad” I didn’t like it.
This is where the other walking-in-place animation comes in handy. While it has all of Slinky’s movements, it does not move him across the screen. This is easy to do when it’s linear, but in Slinky’s case, he moves while pushing himself forward erratically with each step. Thankfully I could use the same keyframe positions in each clip and match the forward motion with positional keyframes in Premiere, then add an offset manually for every keyframe in every block. It’s a time consuming task, like everything in animation.
Making Slinky look handsome
The last step before I rendered the final animations was to apply a Substance material on him. I’ve also added a subdivision surface modifier to make his edges a little smoother, this works really well with organic shapes like this. I experimented with lights and Iray, but then decided that the Filament version looks better (and renders much faster too). I may add a shadow later, but for now I’m very happy with him.
It took me three days in total. I’ve learnt a lot in the process and I’m looking forward to the next animation project already.