 Marvelous Designer comes with 7 default avatars, but it’s very easy to use your own 3D figure and create custom clothing for it.
Simply export your desired character as OBJ, including full body morphs, then import it into Marvellous Designer.
Here’s how to do with with the Genesis 2 Male character from the free essentials pack.
Exporting from DAZ Studio
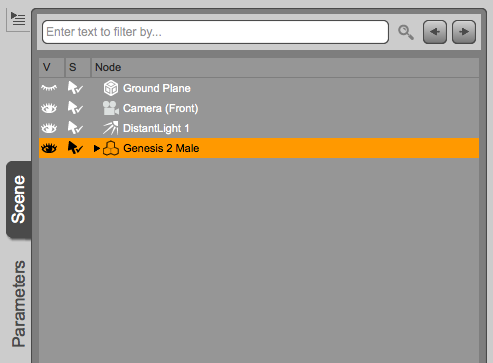
Load your character into an empty scene and select it in the scene tab. It’s typically located on the right hand side in DAZ Studio.
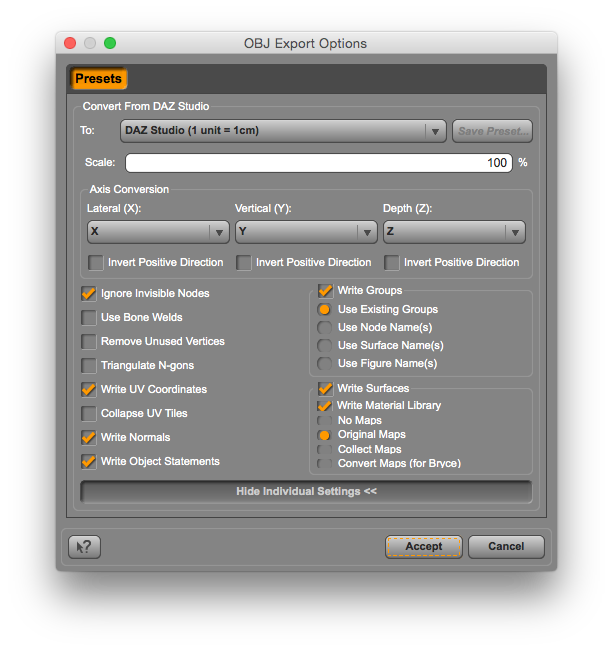
Head over to File – Export and pick a location for your files: DAZ Studio will create a .OBJ and a .MTL file. It will also bring up an export dialogue in which you can specify the scale and size for your export. Those need to match the import dialogue of your other app.
By default DAZ Studio’s scale is 1cm per unit. Leave it all as is and click Accept to save your files.
Importing into Marvellous Designer
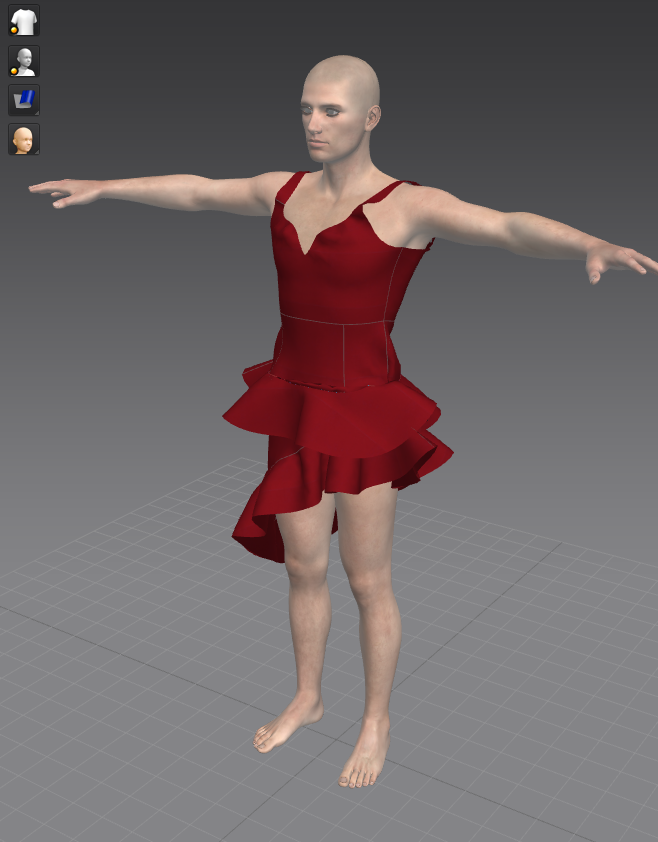
Marvelous Designer 4 opens with a default scene, featuring a lady in a red dress:
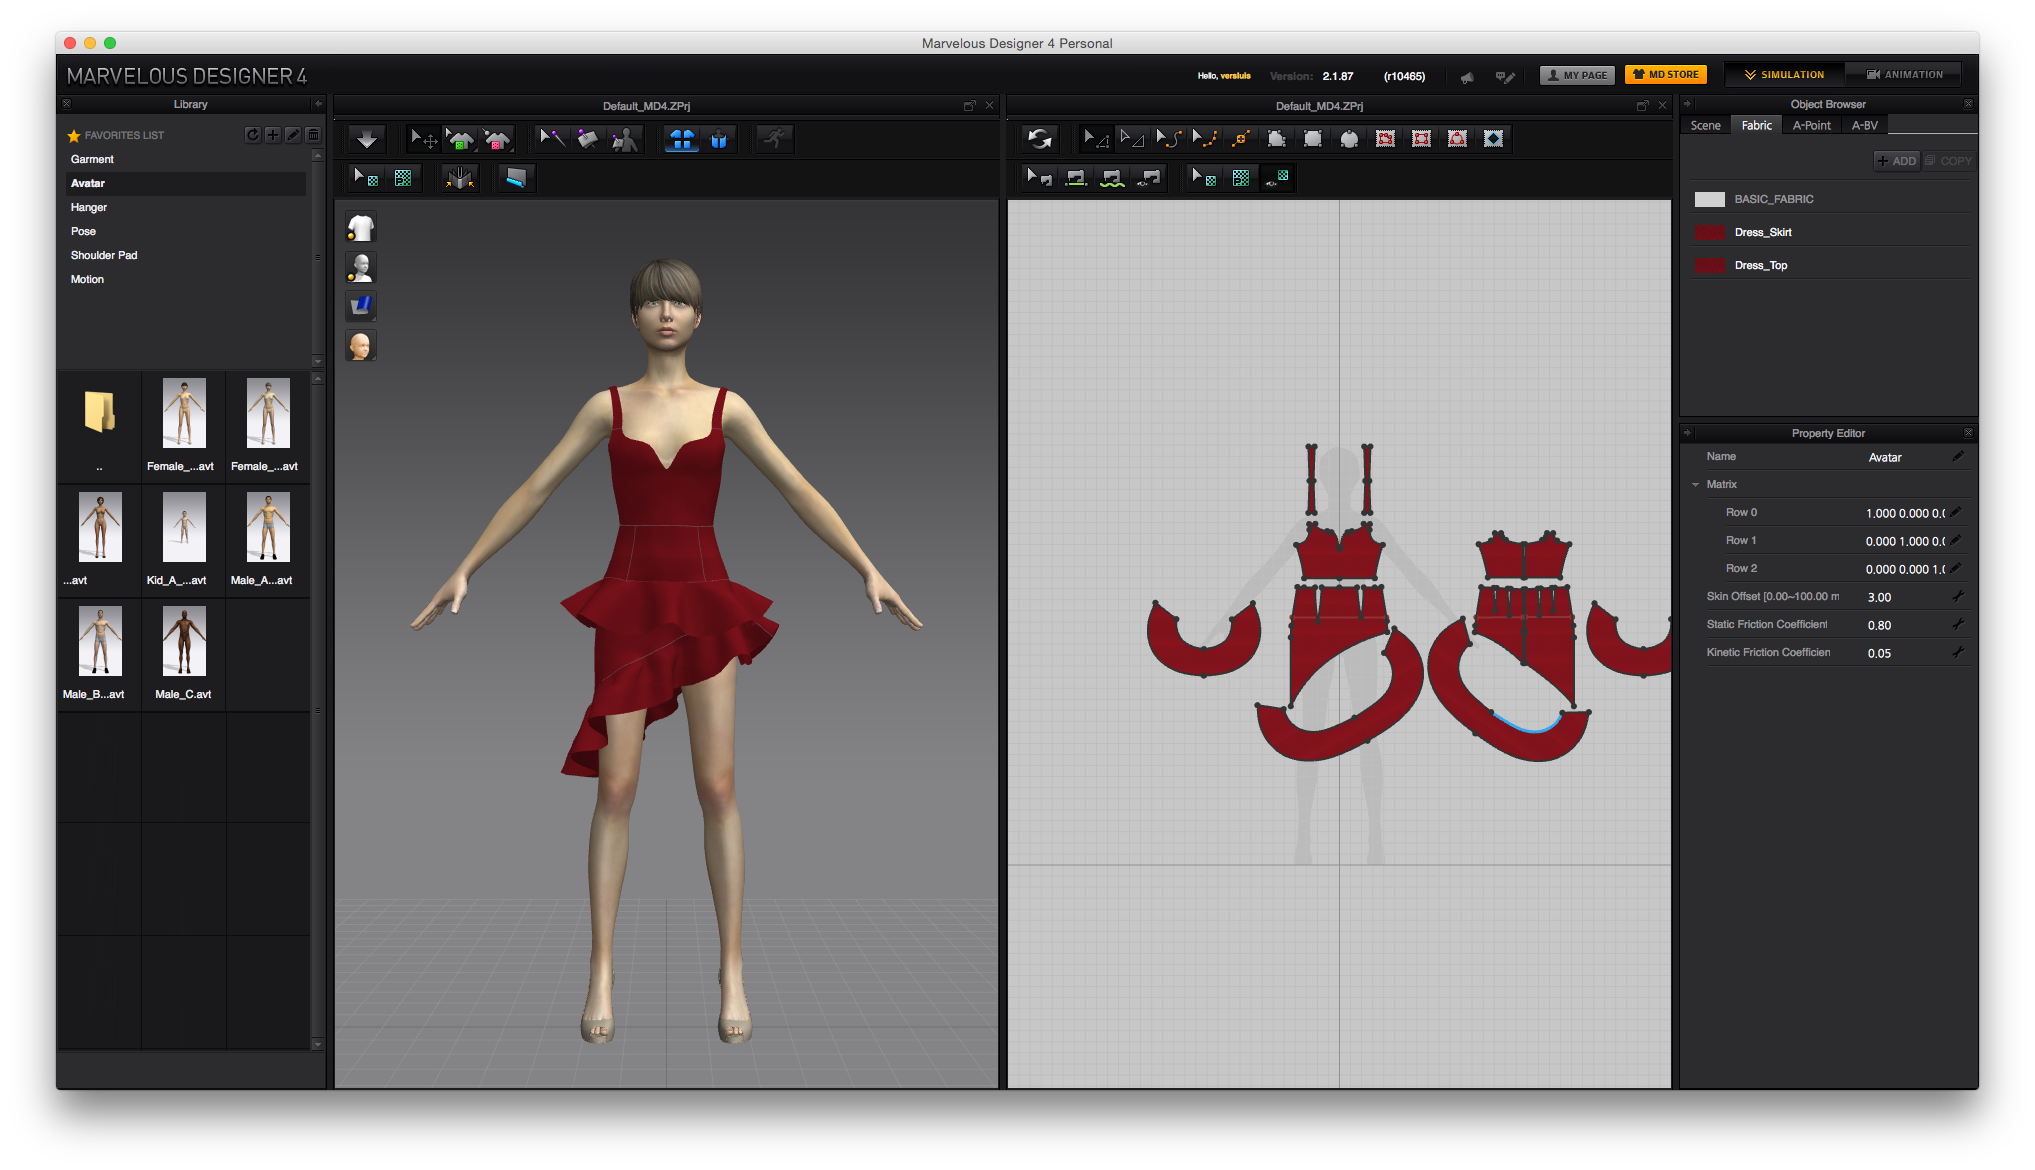
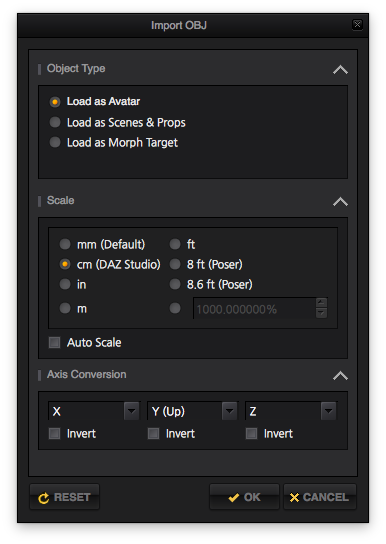
To replace her with Genesis 2 Male, head over to File – Import – OBJ. Navigate to the files you’ve saved earlier and select the OBJ file that DAZ Studio has created. This will trigger an import dialogue which is set to 100% by default. Don’t use that: it will make your Genesis character a 10th of the size that it should be.
Instead pick the DAZ Studio option in the scale section, which will make sure the avatar will have the correct size when imported (1 unit = 1cm).
Now the lady in the red dress has been replaced by Genesis 2 Male. After some quick adjustments, the red dress looks stunning on him too 😉
You can now go ahead start a new garment with File – New. This will leave your avatar in place and remove the red dress.
Arrangement Points and Bounding Volumes
The default Marvelous Designer avatars come with bounding volumes and arrangement points. They make it easy to place pieces of your garments onto your avatar with one click. You can work without them, or you can create your own from the properties menu on the right (under A-Points and A-BV).
Vintorix (THANK YOU!!) has already created a set of those over on ShareCG:
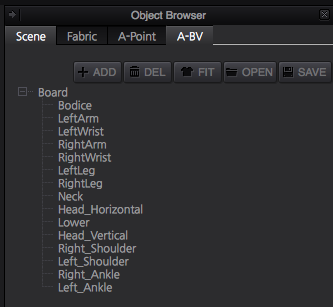
To use them, simply unpack the ZIP file and head over to the Object Browser on the right. Under A-Point and A-BV, select Open and load both the arrangement points and bounding volumes – one won’t work without the other.
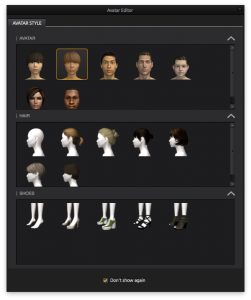
To display these in the 3D view, you can either use the menu and navigate to Display – Avatar – Show Arrangement Points (and Show Bounding Volumes respectively), or us the little avatar icon in the 3D view: it’s the second from the top, the one with the little orange dot in the screenshot below:

Happy tailoring!
Oh God bless the Arrangement Points!
Happy days and thank you!
Hello there!
I’m using a Marvelous Designer 6 Personal so I just wanted to use all the informations as you said to import GENESIS 3 MALE from DAZ STUDIO 4.9 to MD 6… but there’s no
A-Point and A-BV option in this version of software (it must be hidden somewhere into Object Browser). Do you know where I should look after them?? Any sugestions??
Hi Patrick,very good question indeed… truth is, I have no idea where they’ve hidden that menu in MD 6 🙁 All I can tell you is that under Display – Avatar – Show Arrangement Points you can at least see the arrangement points for a default character. But how you import them or create them for your custom characters? Pass.
Here’s the current (2017) manual section for arrangement points: http://manual.marvelousdesigner.com/display/MD4M/Arrange+Pattern+with+Arrangement+Points
Your best bet is to ask in the MD Forum, I’m sure Mr. Vintorix has figured out how to do it in MD6. Good luck!
After some searching i`ve found this.
You can adjust that things (mostly scales) in Avatar -> Avatar Editor menu.
But you must enable Display -> Avatar -> Show Bounding Volumes first to be able to move and rotate volumes around by gizmo.
Hello again,
a problem with Arrangement Points that’s a piece of cake (thank’s God for youtoube!), but I’ve got small another… I’m using Marvelous Designer 5 Personal and I just created a simple shirt for my avatar. The problem that I have is with Export option – when I want to export all my patterns, buttons, etc (only clothe without avatar)I can only get one OBJ file, 2 MTL AND 2 PNG files(only for buttonholes), so my question is: how can I export all textures (materials/colours)and then applay them to a final model in DAZ STUDIO 4.9?
Hi Patrick, glad you’ve solved the Arrangement Points problem. Importing your materials into DAZ Studio is a tad complex. The reason for your two material files is that Marvelous Designer 5 does not create a unified texture (version 6 and above apparently do that). It’s no problem though: in DAZ Studio, after importing your OBJ, head over to the Surfaces tab and see that your object has more than one material zone (or surface, as DS calls it). Simply add each PNG file to the relevant surface and you’re good to go.
Hope this helps!