Controllers are great little helper dials that can perform a number of functions and make our posing/animation life a little easier. They’re akin to Blender’s Drivers, yet implemented very differently in DAZ Studio. The idea is the same though: make one slider do multiple things, and let DAZ Studio calculate interpolated values. Let’s take a look at what they are and how they can help us.
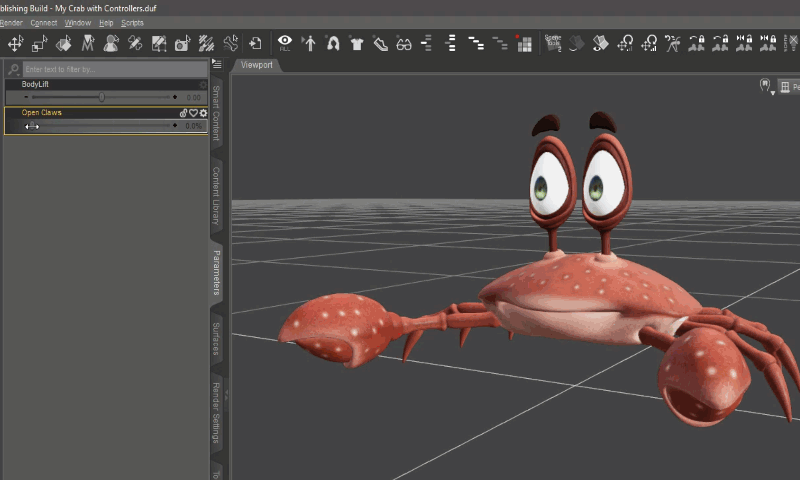
In my recent Crab Animation project I’ve used controllers to create a single dial in the top node of the figure, with which I could open and close each of his claws. Although an “open claw” dial was already implemented, it didn’t work the way I wanted it, and it wasn’t in the top node of my figure. Creating a controller saved me a few mouse clicks during animation. Here’s what the process entails:
- create an empty slider
- dial up the properties you’d like it to drive
- ERC Freeze the Controller
Here’s what the result looked like in my project.
Creating an empty slider
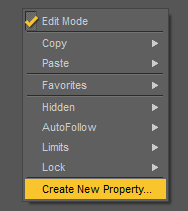
The first thing we need is to create a control property (make a slider) that will drive the changes we’d like to control. To do that, head over to the Parameters Tab and put it into Edit Mode (right-click anywhere in the empty list, or use the Hamburger Icon). Now right-click again and choose Create New Property.
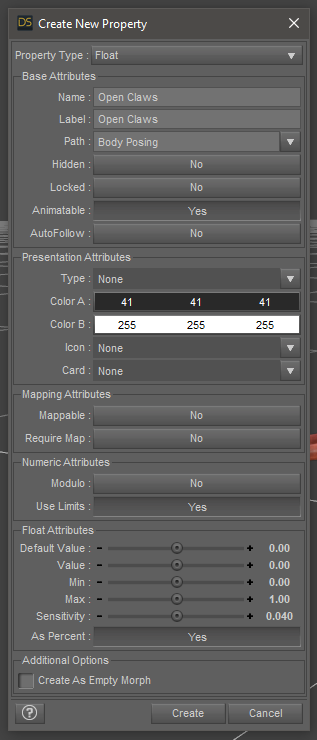
Give it a meaningful name and location with the Path dropdown. I’ll call mine Open Claws and put it under the existing Body Posing section. I will use this slider to open both of his claws at the same time. The only thing I’ll change in this dialogue is at the very bottom, under minimum default value, I’ll set it to 0 rather than -1. I don’t want this slider to go negative. Hit Create when you’re done.
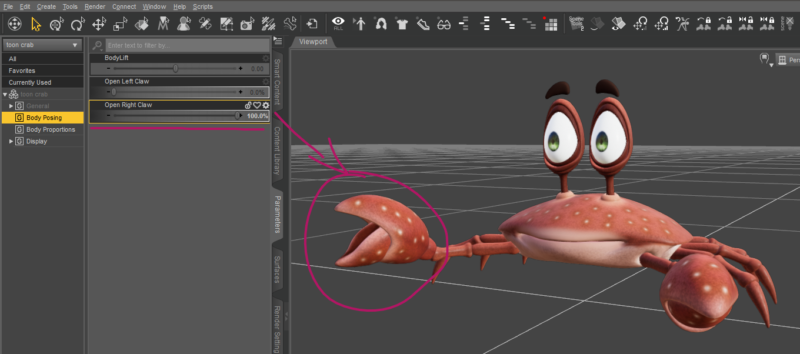
Now I have a new slider, still in Edit Mode. Crank it up to 100%, then make the changes on the figure you’d like to drive. In my case, I’ll select the thumbs of my crab and open them both, but I’ll also have him lift both hands too. Those are all rotation adjustments, but in four different places. It’ll create the effect of him snapping at something. Adjust any other values you’d like to change for your own project.
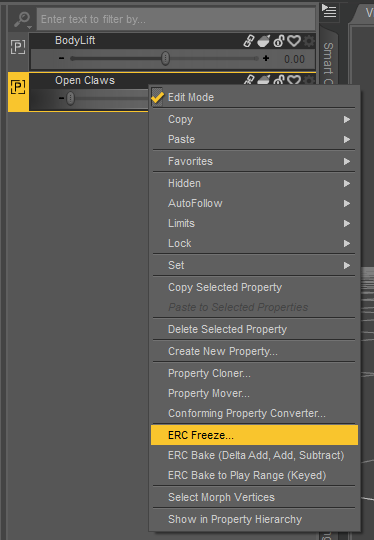
Now return to our custom slider and right-click on it, then choose ERC Freeze.
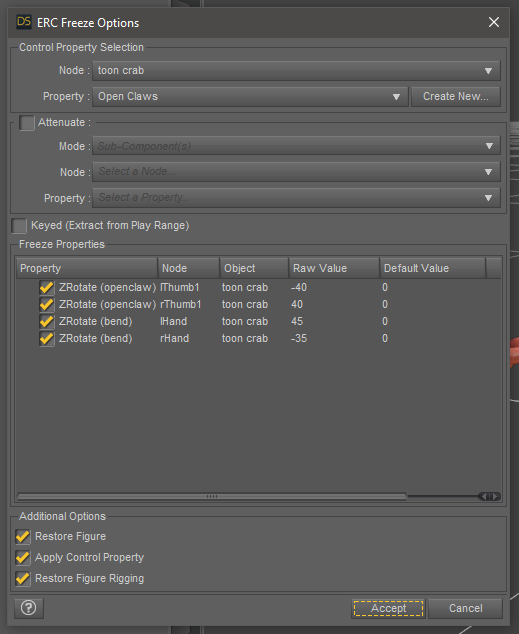
This will lock in all our adjusted values and calculate their changes as we move our slider. Think of it as creating a mini-timeline that interpolates all values over time. There’s nothing else we need to do in this dialogue, just hit Accept and we’re done.
Our slider will now work, but to make it more user friendly we need to right-click on it and disable Edit Mode again. That’s it! Now our crab can open and close both claws driven by a single slider. Saving your scene will also save the slider. If you wanted to add it permanently to a figure, save it like you would save a morph (Save As – Support Asset – Morph Asset, preferably to a dedicated library NOT the main DAZ 3D Library).
Here’s the video in which I’m setting up the controller part. It’s part of series, worth checking out if you’re into animations.
Unfortunately, moving the slider back to zero undoes every transformation I ever made to the character, including arm and leg length, not just the few morph edits I did after making the slider. I’ll have to find another way.
The trick is to unselect the properties you don’t want to the controller to drive. It’s best to save these things in the A-Pose with a base character, not a dressed/posed/custom character.
Go to edit, figure, memorize, then memorize figure shape. Then do the tutorial 🙂