In a previous post I added a Normal Strength parameter to my master material so I could tone down (or invert) a normal map per material instance. That solved half of my problem: my director wanted a cloth material to look less pronounced, but even with the normals dialled all the way down to zero, the weave pattern was still visible. That’s because the pattern doesn’t just live in the normal map – it’s baked into the base colour texture too. Flatten the surface all you like, the colour variation still shows through.
The obvious fix is a trip back to Substance Painter, but the whole point of this exercise was to avoid that. It turns out we can soften texture detail directly in the material graph, using data the engine has already generated for us: mip maps.
The naive approach: blend toward a flat colour
A first instinct is a Lerp (Linear Interpolate) between the texture and a flat colour parameter – mid grey, or a colour picked from the fabric itself. It works, but you have to choose that colour by hand, and if it’s slightly off, the whole garment shifts hue as you fade the detail out. There’s a better way.
The better approach: blend the texture with a blurred version of itself
Every texture in Unreal automatically gets a mip map chain – progressively smaller, progressively blurrier versions used for rendering at a distance. Those blurred versions are already sitting in memory. We can simply reach into that pyramid and sample one directly:
- Duplicate your Base Colour Texture Sample (keep the same texture parameter so material instances stay in sync).
- On the duplicate, set MipValueMode to MipLevel (absolute) in the Details panel. This exposes a new Level input on the node.
- Add a Scalar Parameter (I called mine Mip Blend, default 0) and plug it into the Level input. Higher values select smaller, blurrier mips.
- Add a Lerp: the sharp sample goes into A, the blurred sample into B, and a second Scalar Parameter (Detail Blend Alpha, default 0) into Alpha.
- The Lerp output replaces the original texture sample in your chain – in my case, it feeds into the existing tint and brightness multiplies before reaching Base Color.
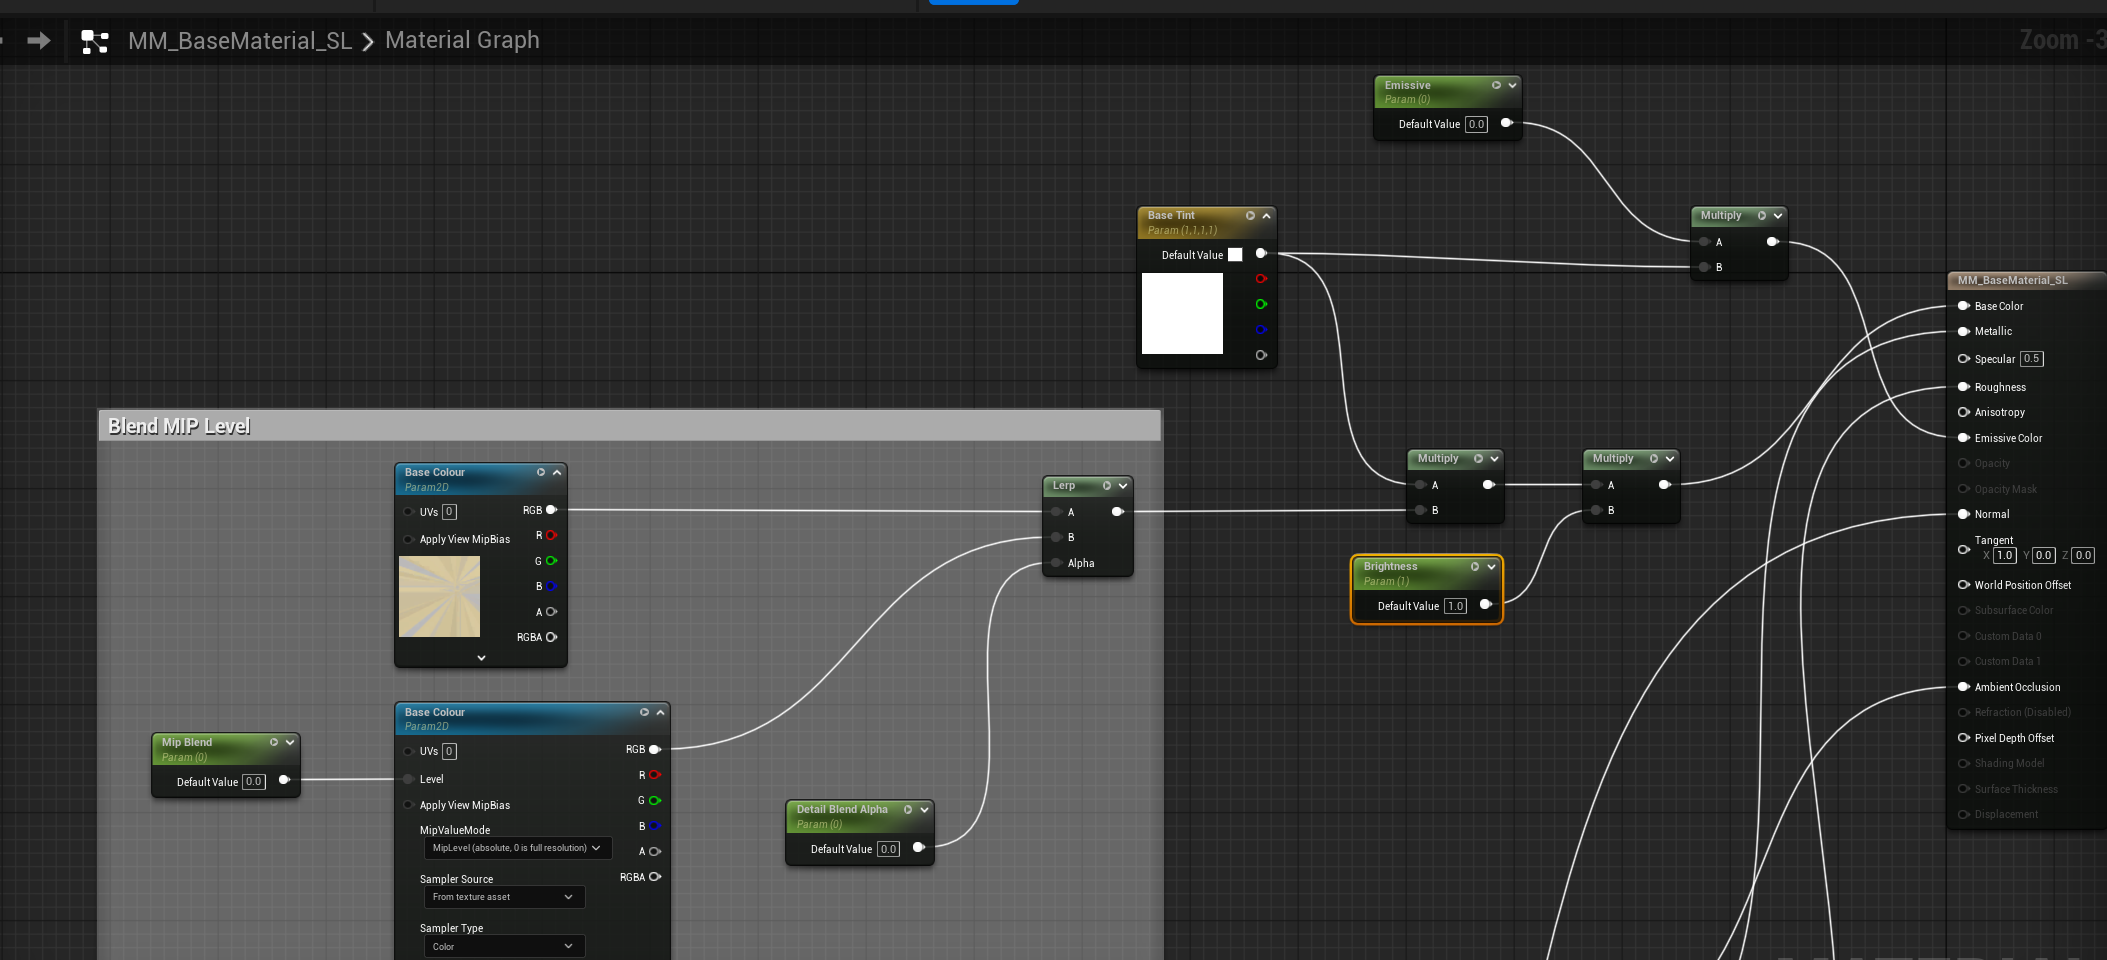
Because the “flat colour” is derived from the texture itself, the fabric keeps its exact overall colouring and large-scale tonal variation – only the fine pattern washes out. No colour matching, and it works automatically for any texture a material instance swaps in.
Two knobs, lots of range
The mip level being a parameter is what makes this properly flexible. Mip 3 softens the pattern slightly; mip 5 gets washy; mip 8 and beyond is essentially the texture’s average colour. Combined with the alpha deciding how much of the blurred version blends in, you have a tiny two-knob texture-softening rig.
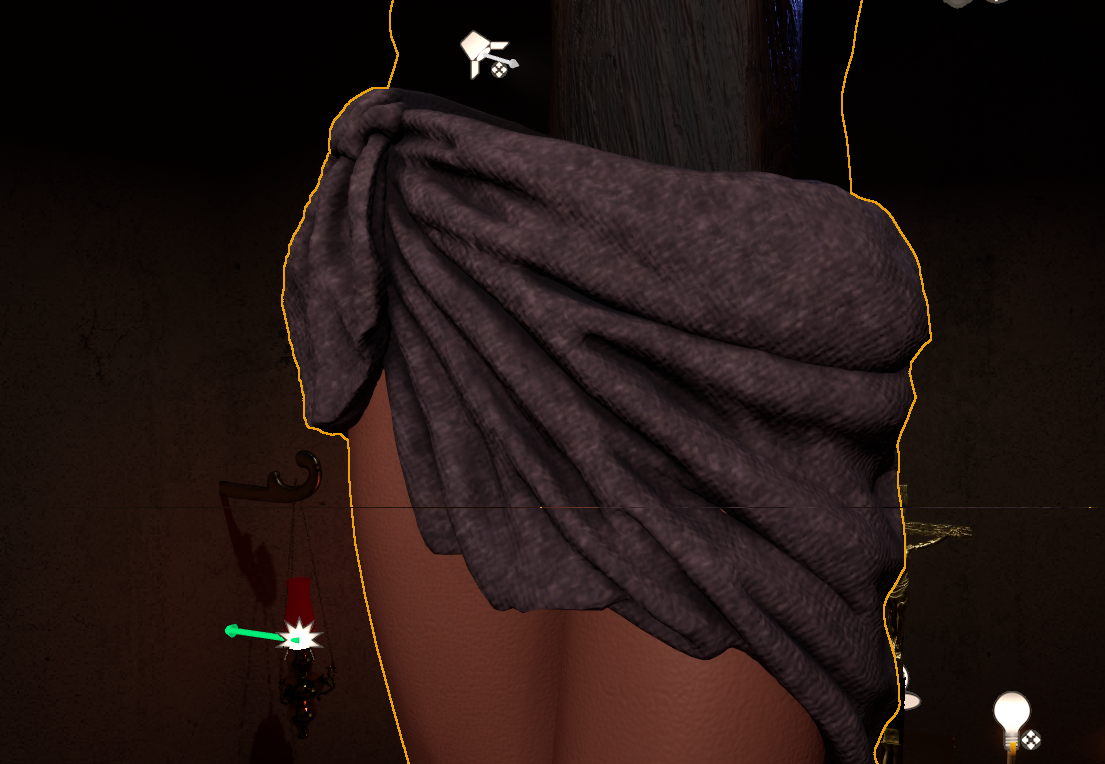
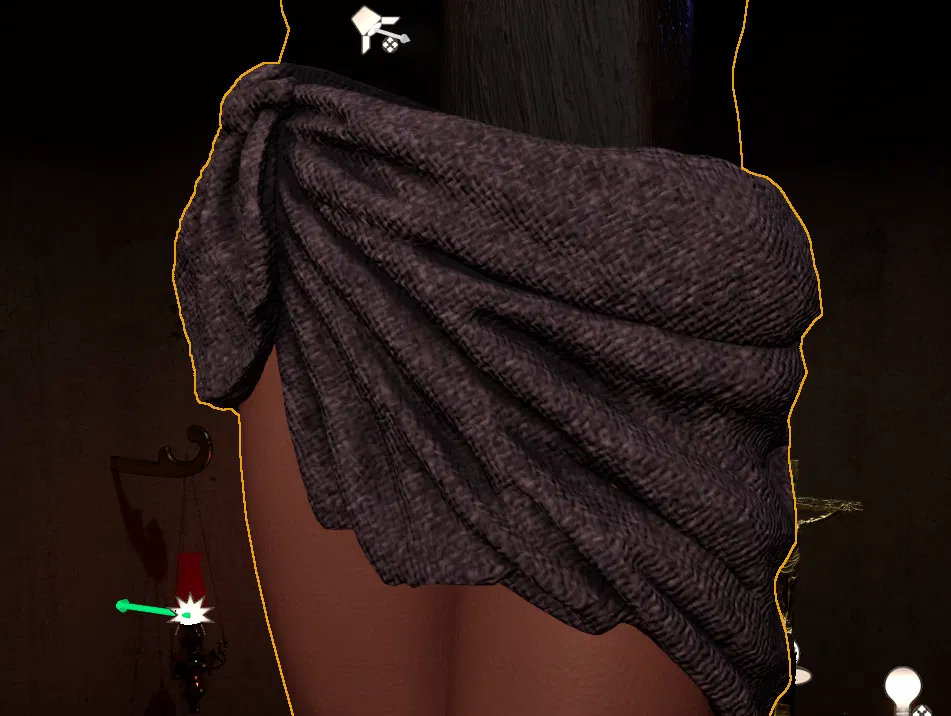
For the skirt in my scene, the combination that looked right was mip level 3, blended at about 0.57, together with a Normal Strength of -0.3 from the previous post (yes, negative – the threads sink into the weave rather than standing proud). Nobody would arrive at those numbers in Substance Painter ahead of time. They emerge from dragging sliders while looking at the actual scene, in the actual lighting, with the director standing behind you. And if the note comes back “can it be a bit brighter, or pink?”, the tint and brightness parameters handle that too – all inside the engine, all in seconds.
Small caveat worth knowing about
It’s a texture-space blur. This is not a screen-space Gaussian blur – it happens per-sample, in the texture’s own space. That’s exactly what you want for fading out a weave or grain pattern, but you can’t use it to blur an object’s silhouette.
Sharp graphics smudge rather than vanish. High mips average the texture, so a printed logo or hard-edged graphic fades toward a smudge instead of disappearing cleanly. On organic patterns like herringbone it looks great; on graphic prints, results vary.
It costs one extra texture sample. Sampling the same texture twice uses an additional sampler slot in the material. There’s no extra memory cost – the mips exist regardless, and small mips are cheap to fetch – but if you’re ever bumping against the sampler limit, switching the samples’ Sampler Source to Shared: Wrap makes them draw from a shared pool instead of consuming individual slots.
Master material hygiene
As with the normal strength setup, this lives in a master material that many instances derive from – most of which should look exactly as they did before. Both new parameters therefore default to 0: zero mip offset, zero blend. Every existing instance renders untouched, and only the materials that need softening opt in via overrides. I don’t even have to remember which objects use this master material – anything I haven’t explicitly changed simply stays as it was.