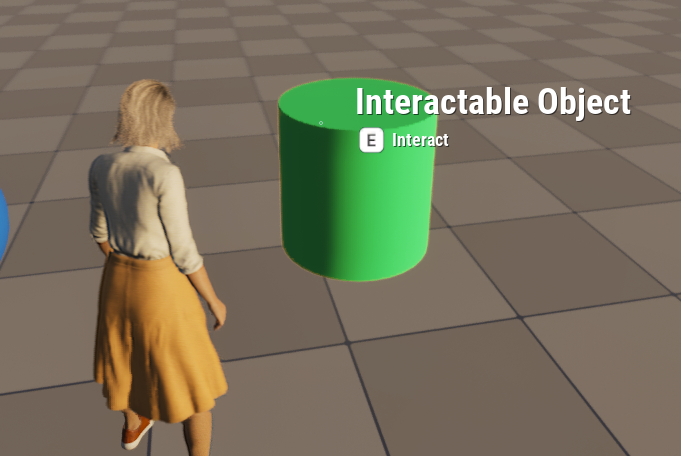
Narrative has a component we can add to a blueprint that will turn it into an interactable object. It’s aptly called NarrativeInteractible. Once added to the class, we can select it and override the OnInteracted event. This will let us implement custom code that executes on interaction.
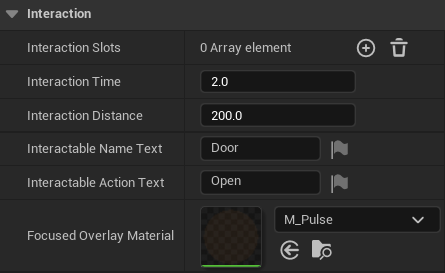
The Interaction section on the component lets us override the default text, overlay material, distance from where we can interact and how long the player needs to hold down the button for the interaction to complete.
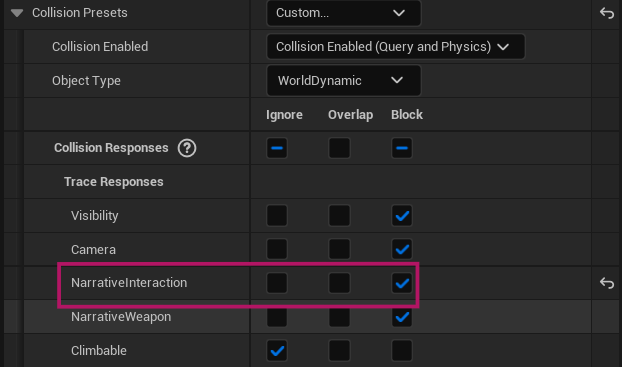
The component works by checking the collision of an object, so pick the mesh you want it to use, then block the NarrativeInteraction channel.
Creating a Pickup Item
Pickups are objects that take interaction a step further by removing the object from the level and adding a representation of it to the player’s inventory. Although Narrative has a custom component for this (Narrative Interactable Item Pickup), it’s easy enough to implement this manually like so:
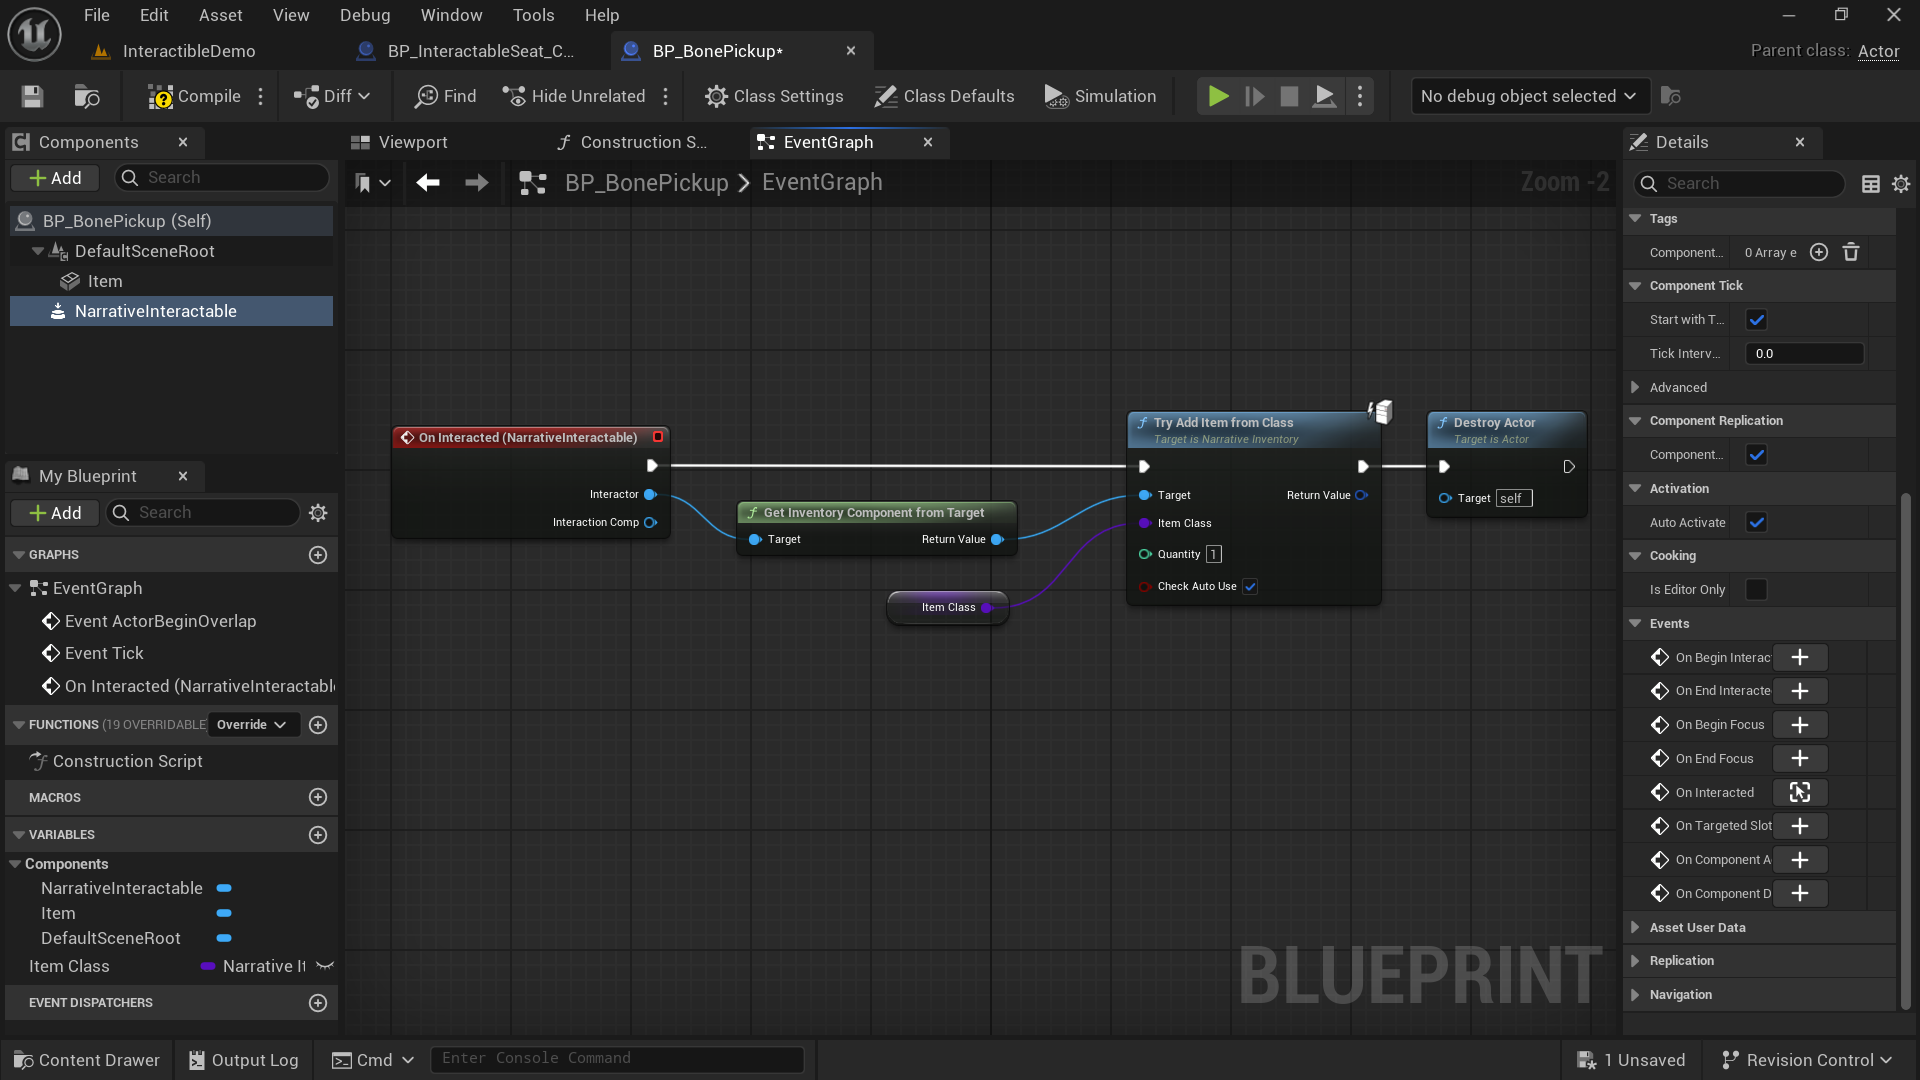
Here we react to the OnInteracted event, grabbing a reference to the player’s inventory, then adding the item class of our pickup (i.e. inventory representation). Finally we destroy the current actor, removing it from the scene.
The Item Class is a subclass of a Narrative Item, a generic representation of an object defining its name, mesh, icon and other attributes. It needs to be created alongside the blueprint that’s used as the pickup item.
Subclassing a Pickup Preset
There’s also a BP_Interactable_Item_Pickup in the project that we can subclass and use. The advantage of it is that it already includes adding the item to the player’s inventory and making it disappear after pickup. I’ve discussed details in another article.